I heard that Nancy Zieman was having a Christmas Stocking Challenge and I just had to enter! It was finally the reason I needed to purchase a pattern I had been eyeing.
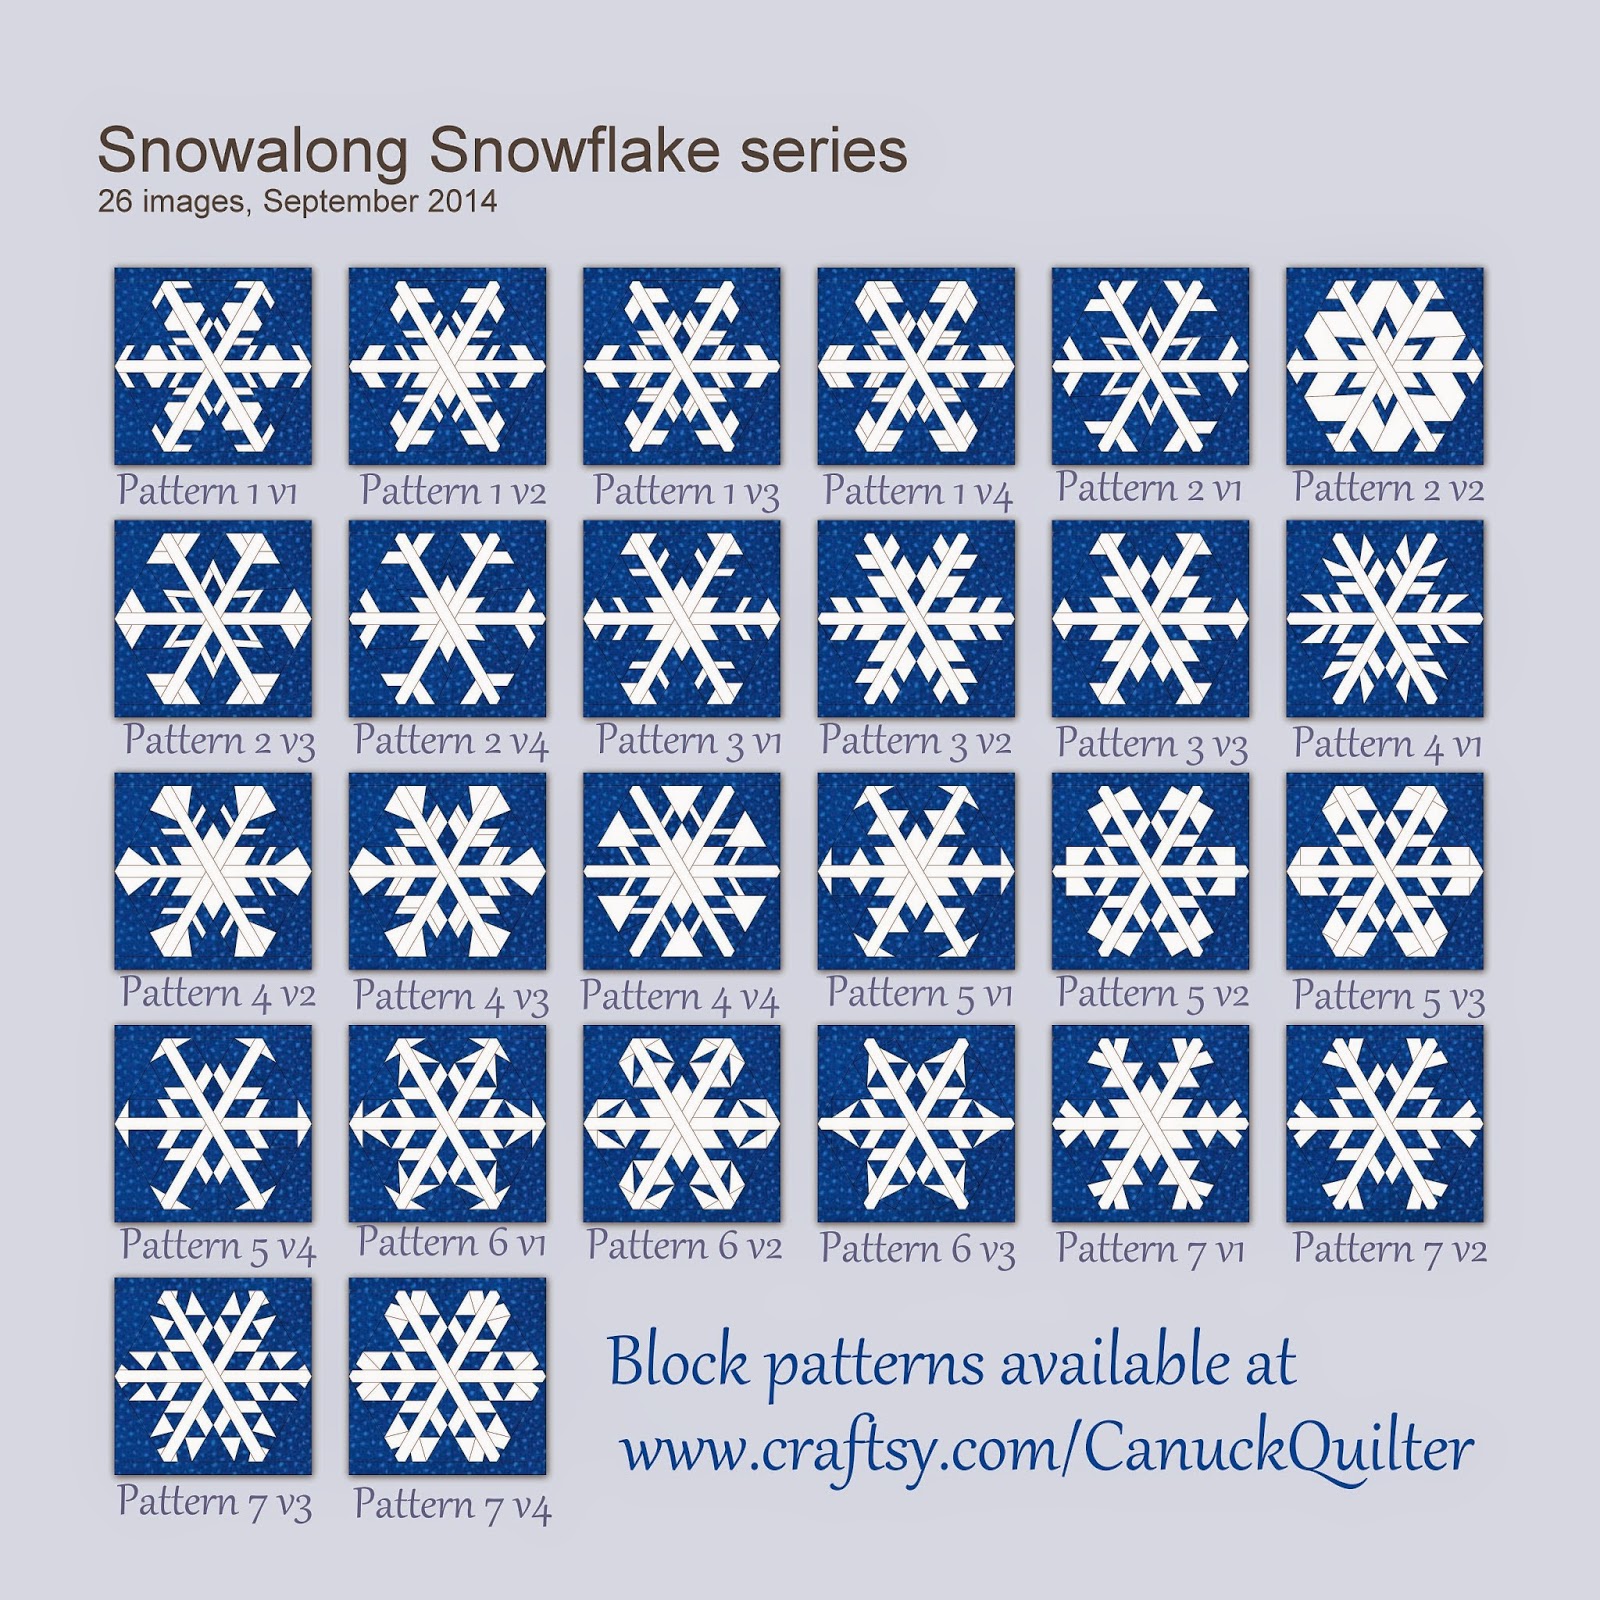
These gorgeous snowflakes by Joanne Kerton of CanuckQuilter.com. I first learned of this pattern when I met Joanne at SewPro. I have a heard time recognizing faces as I get to know people and Joanne had made a tote bag using one of her snowflakes on it. I knew when I saw that tote bag that it was Joanne.
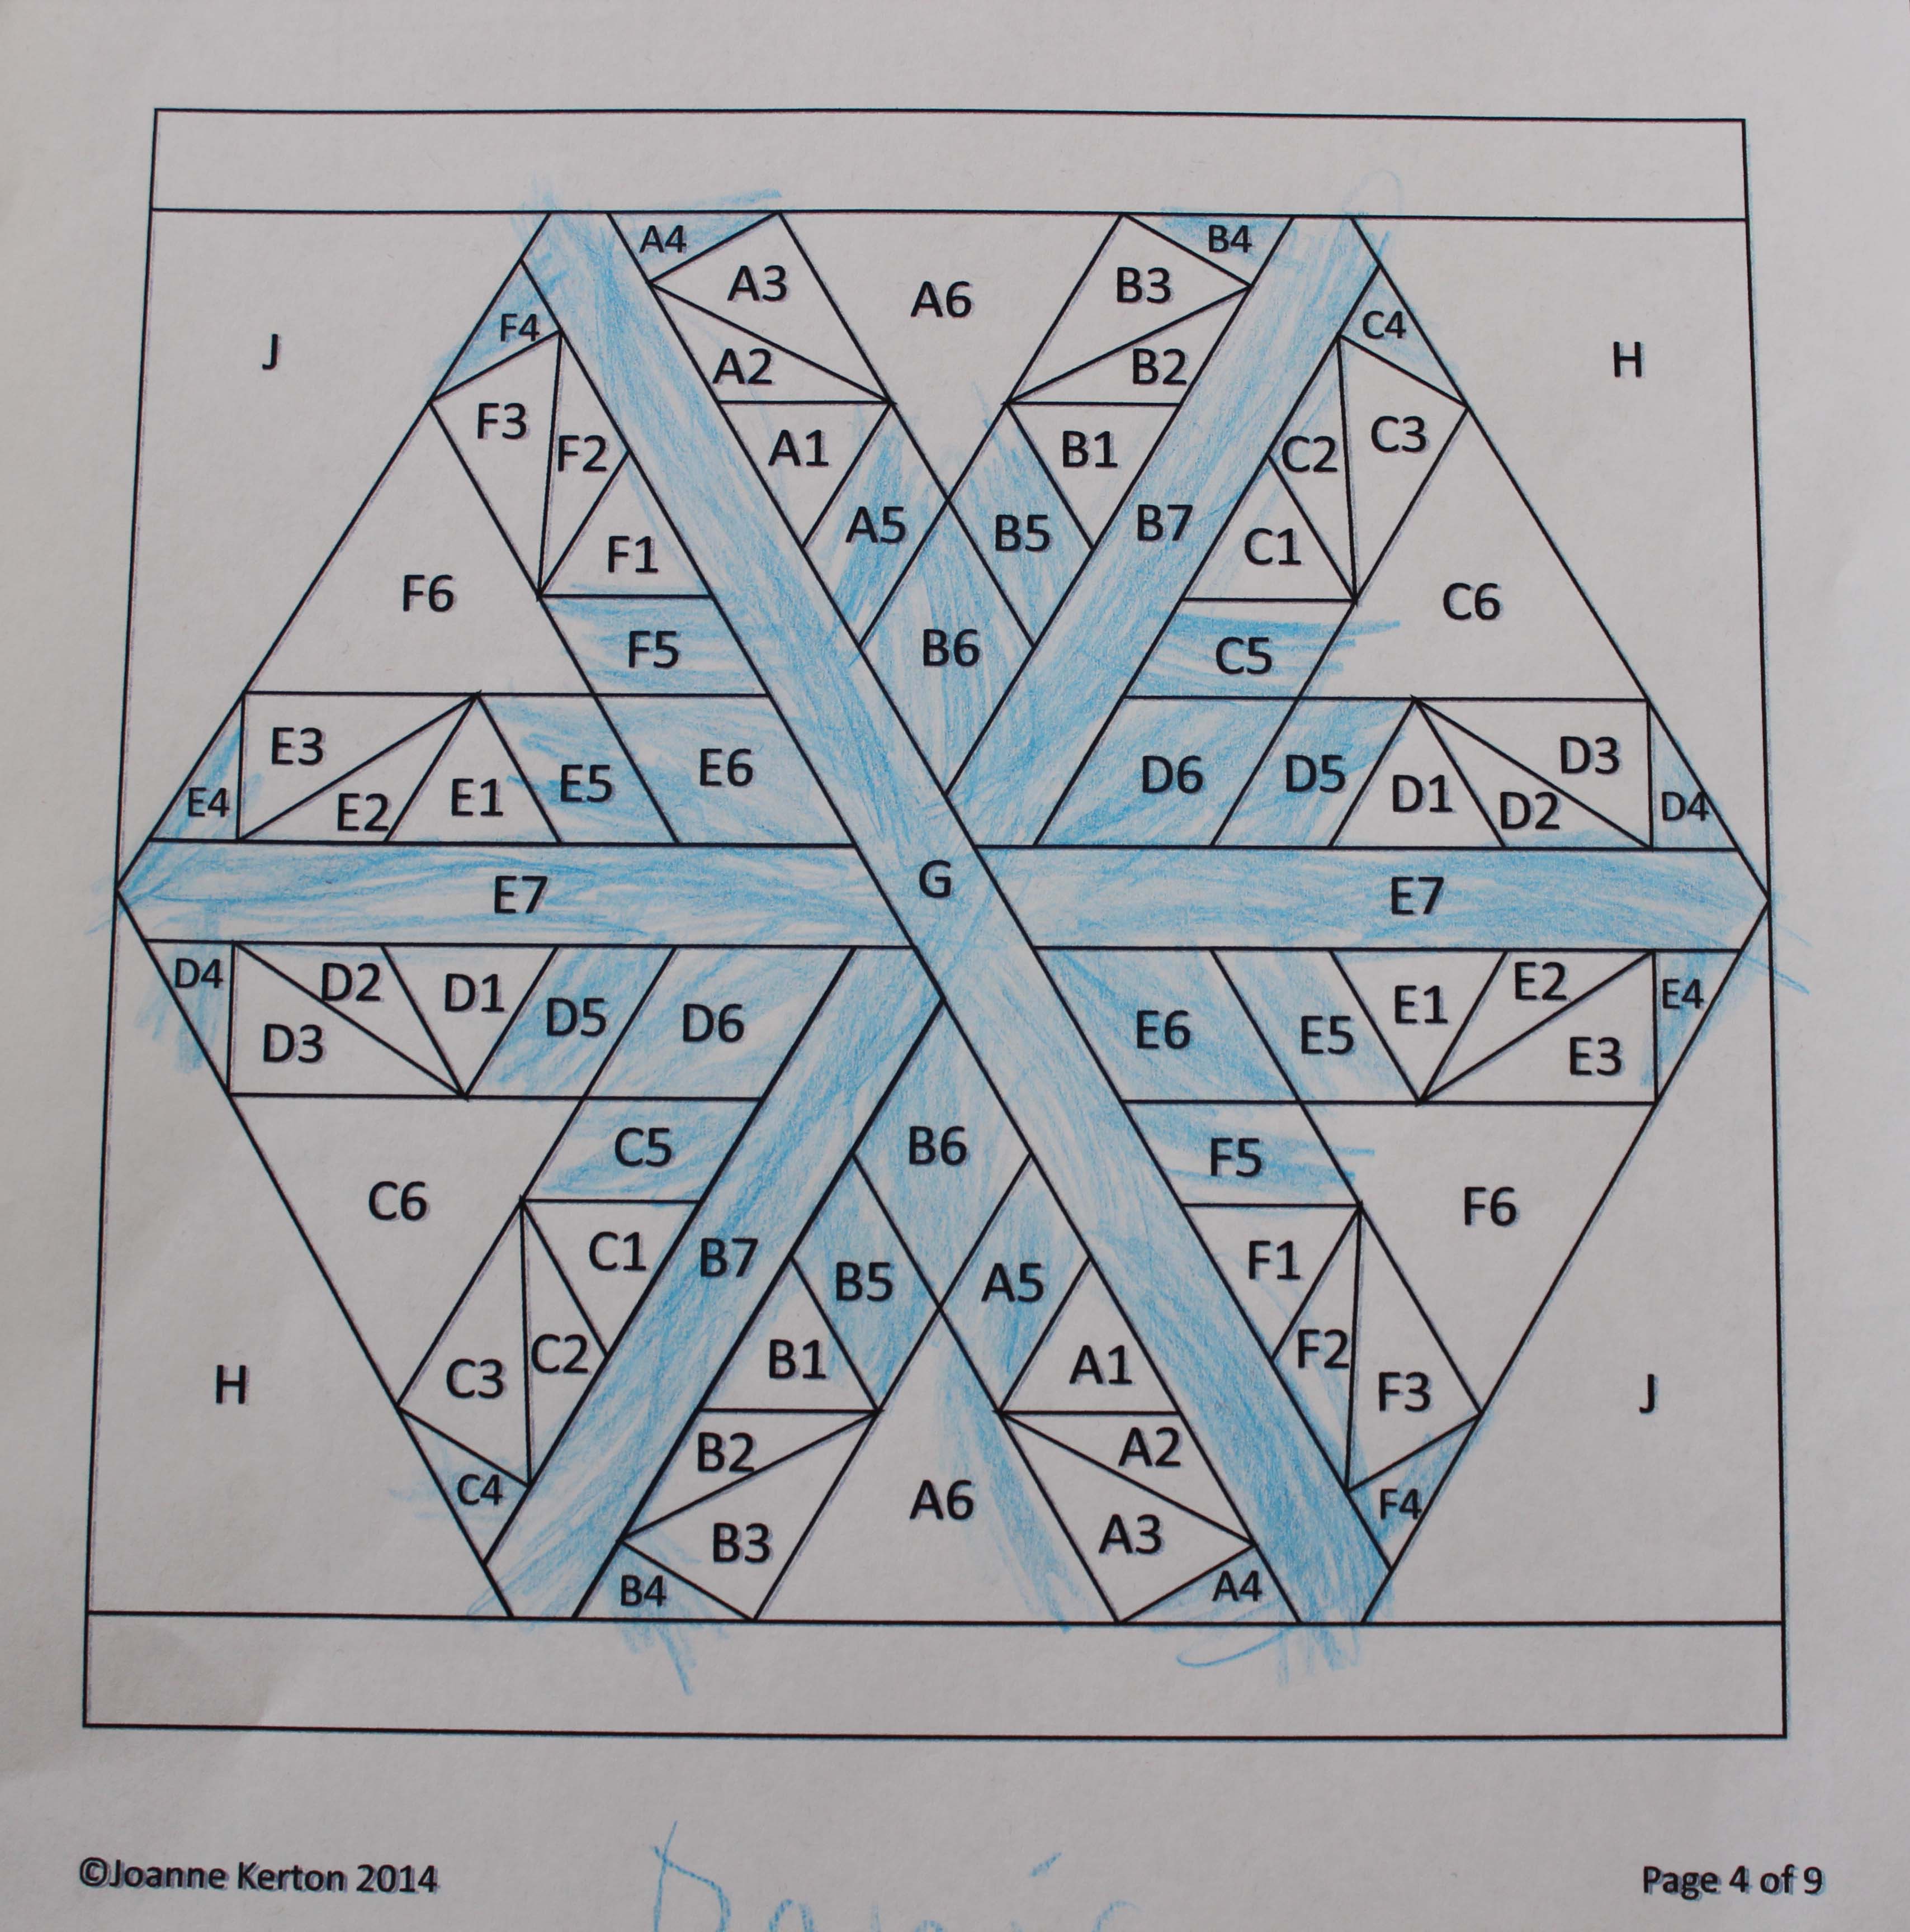
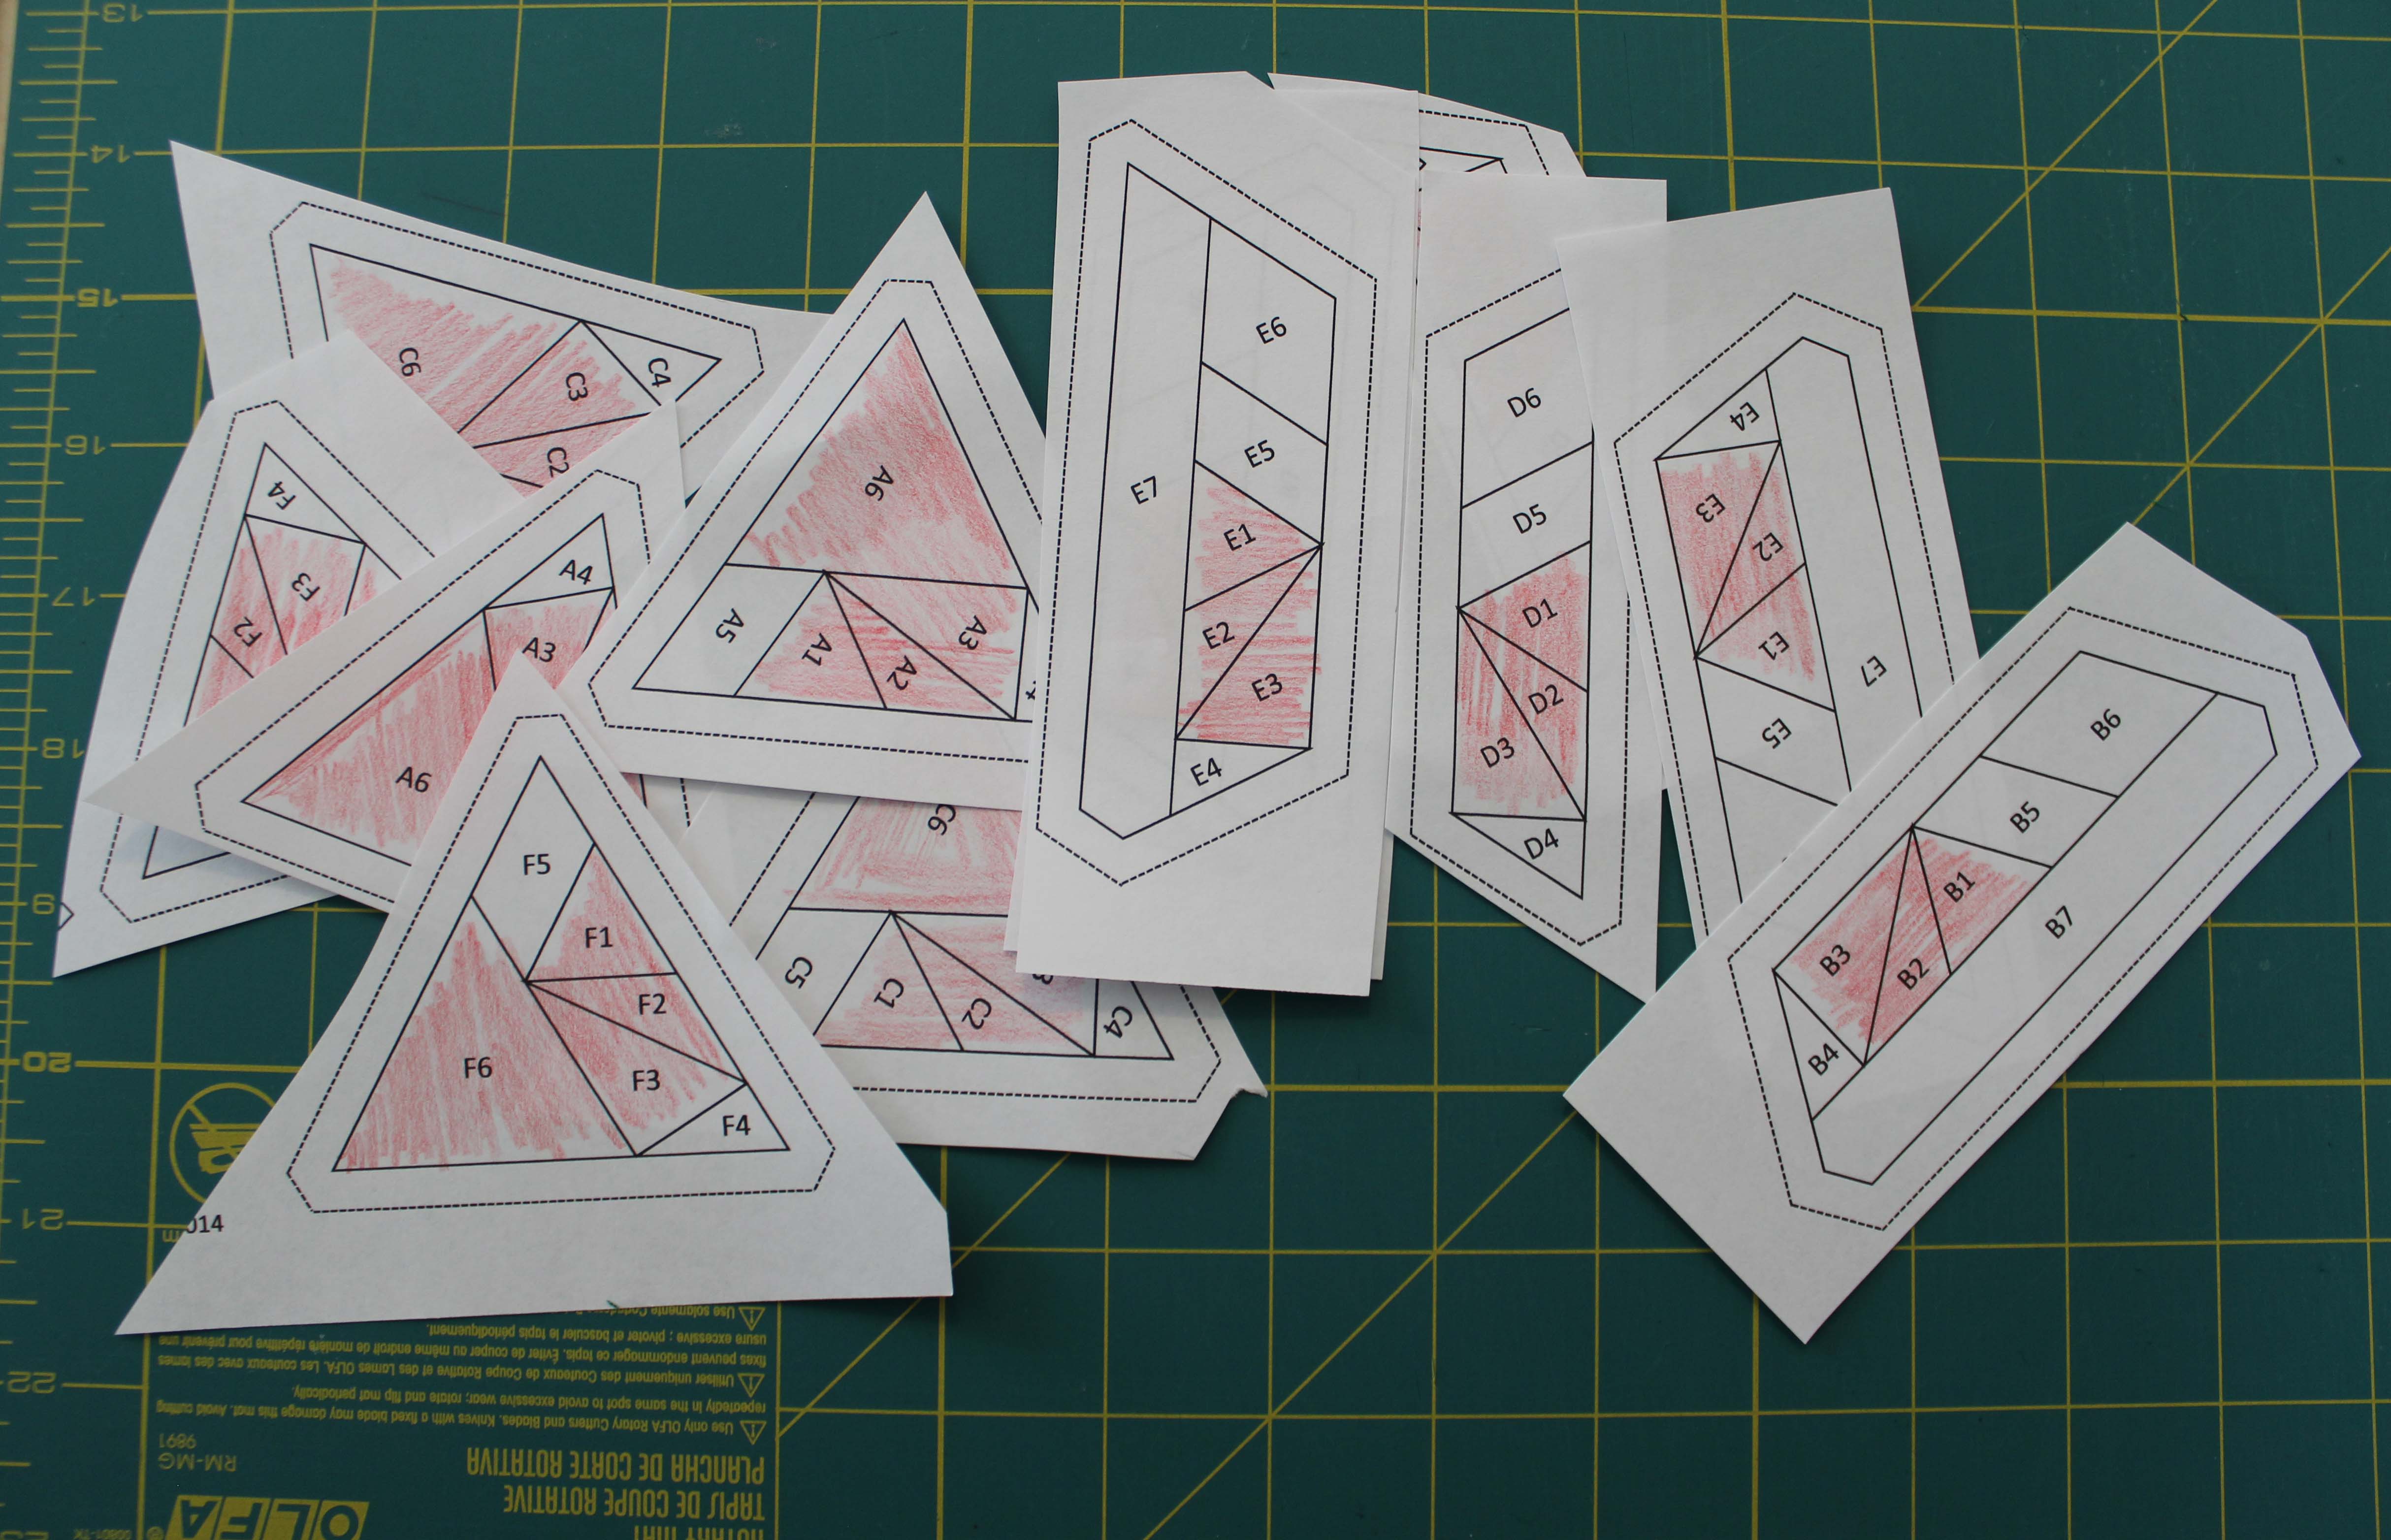
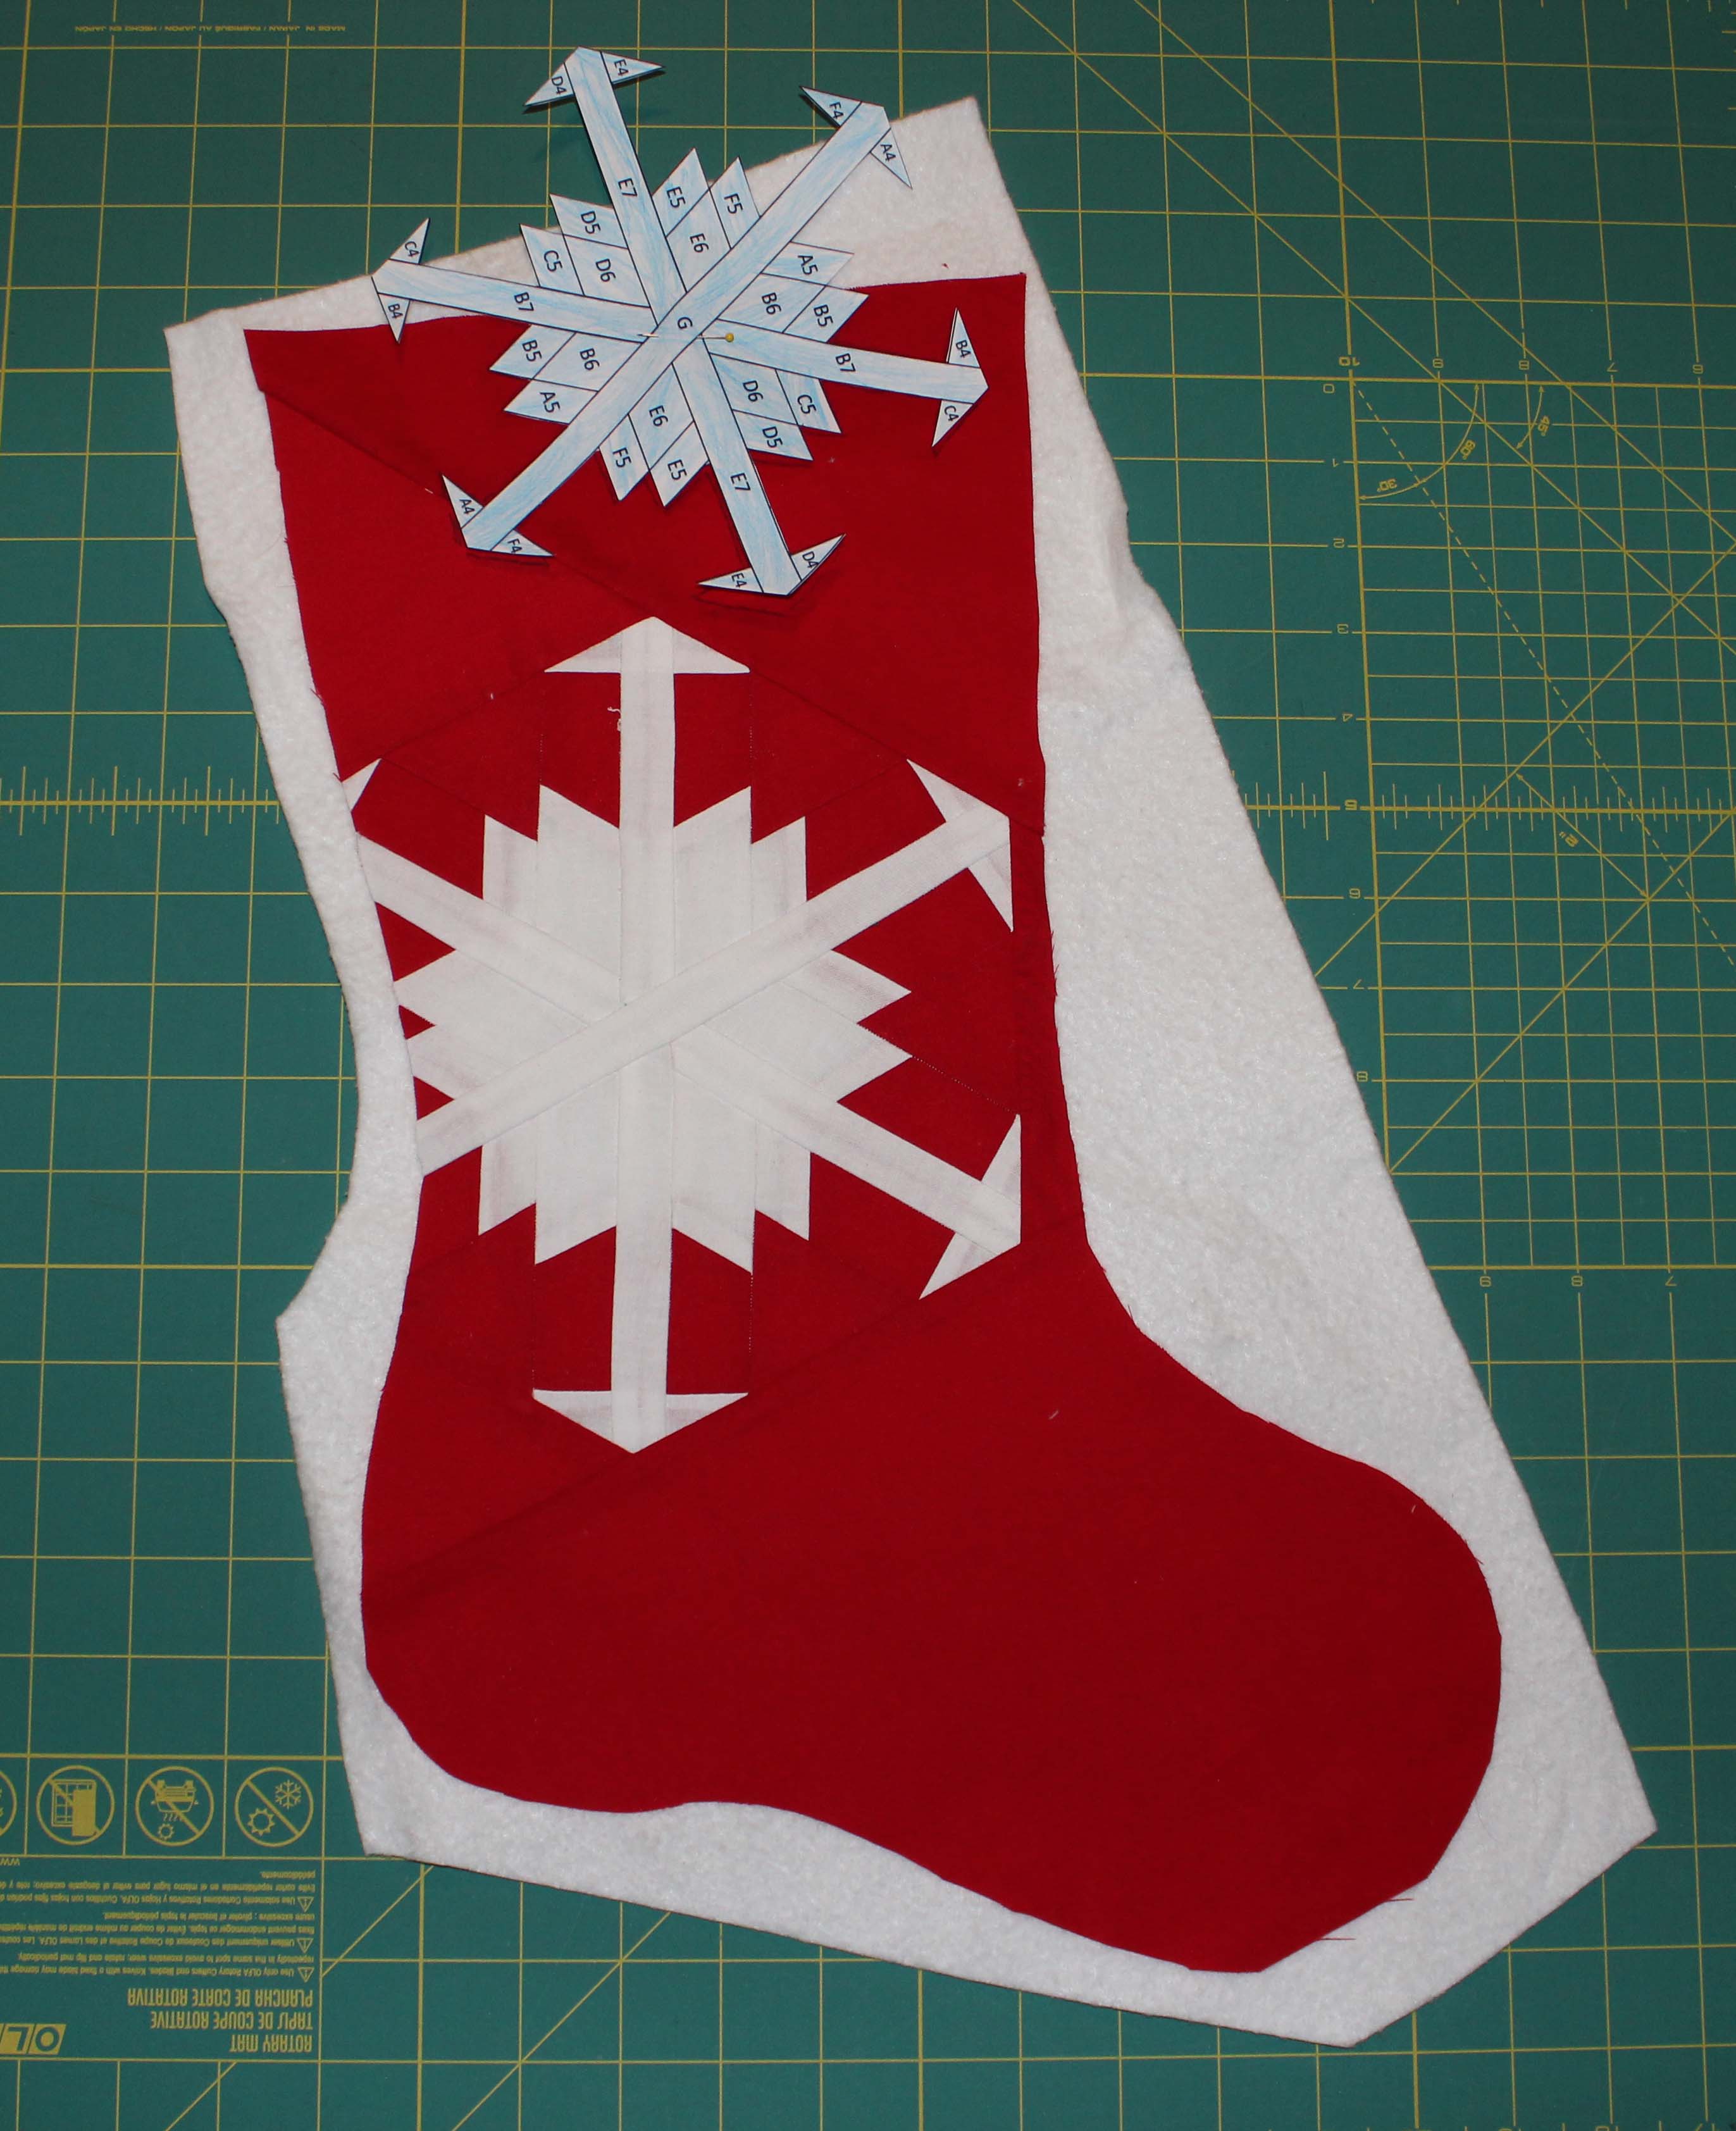
Each pattern makes 2 or 3 snowflakes and comes with a coloring sheet so you can design your snowflake. This is really helpful when paper piecing. I used the coloring sheet first, then I used a colored pencil that matched my fabric to color in the paper piecing pattern.
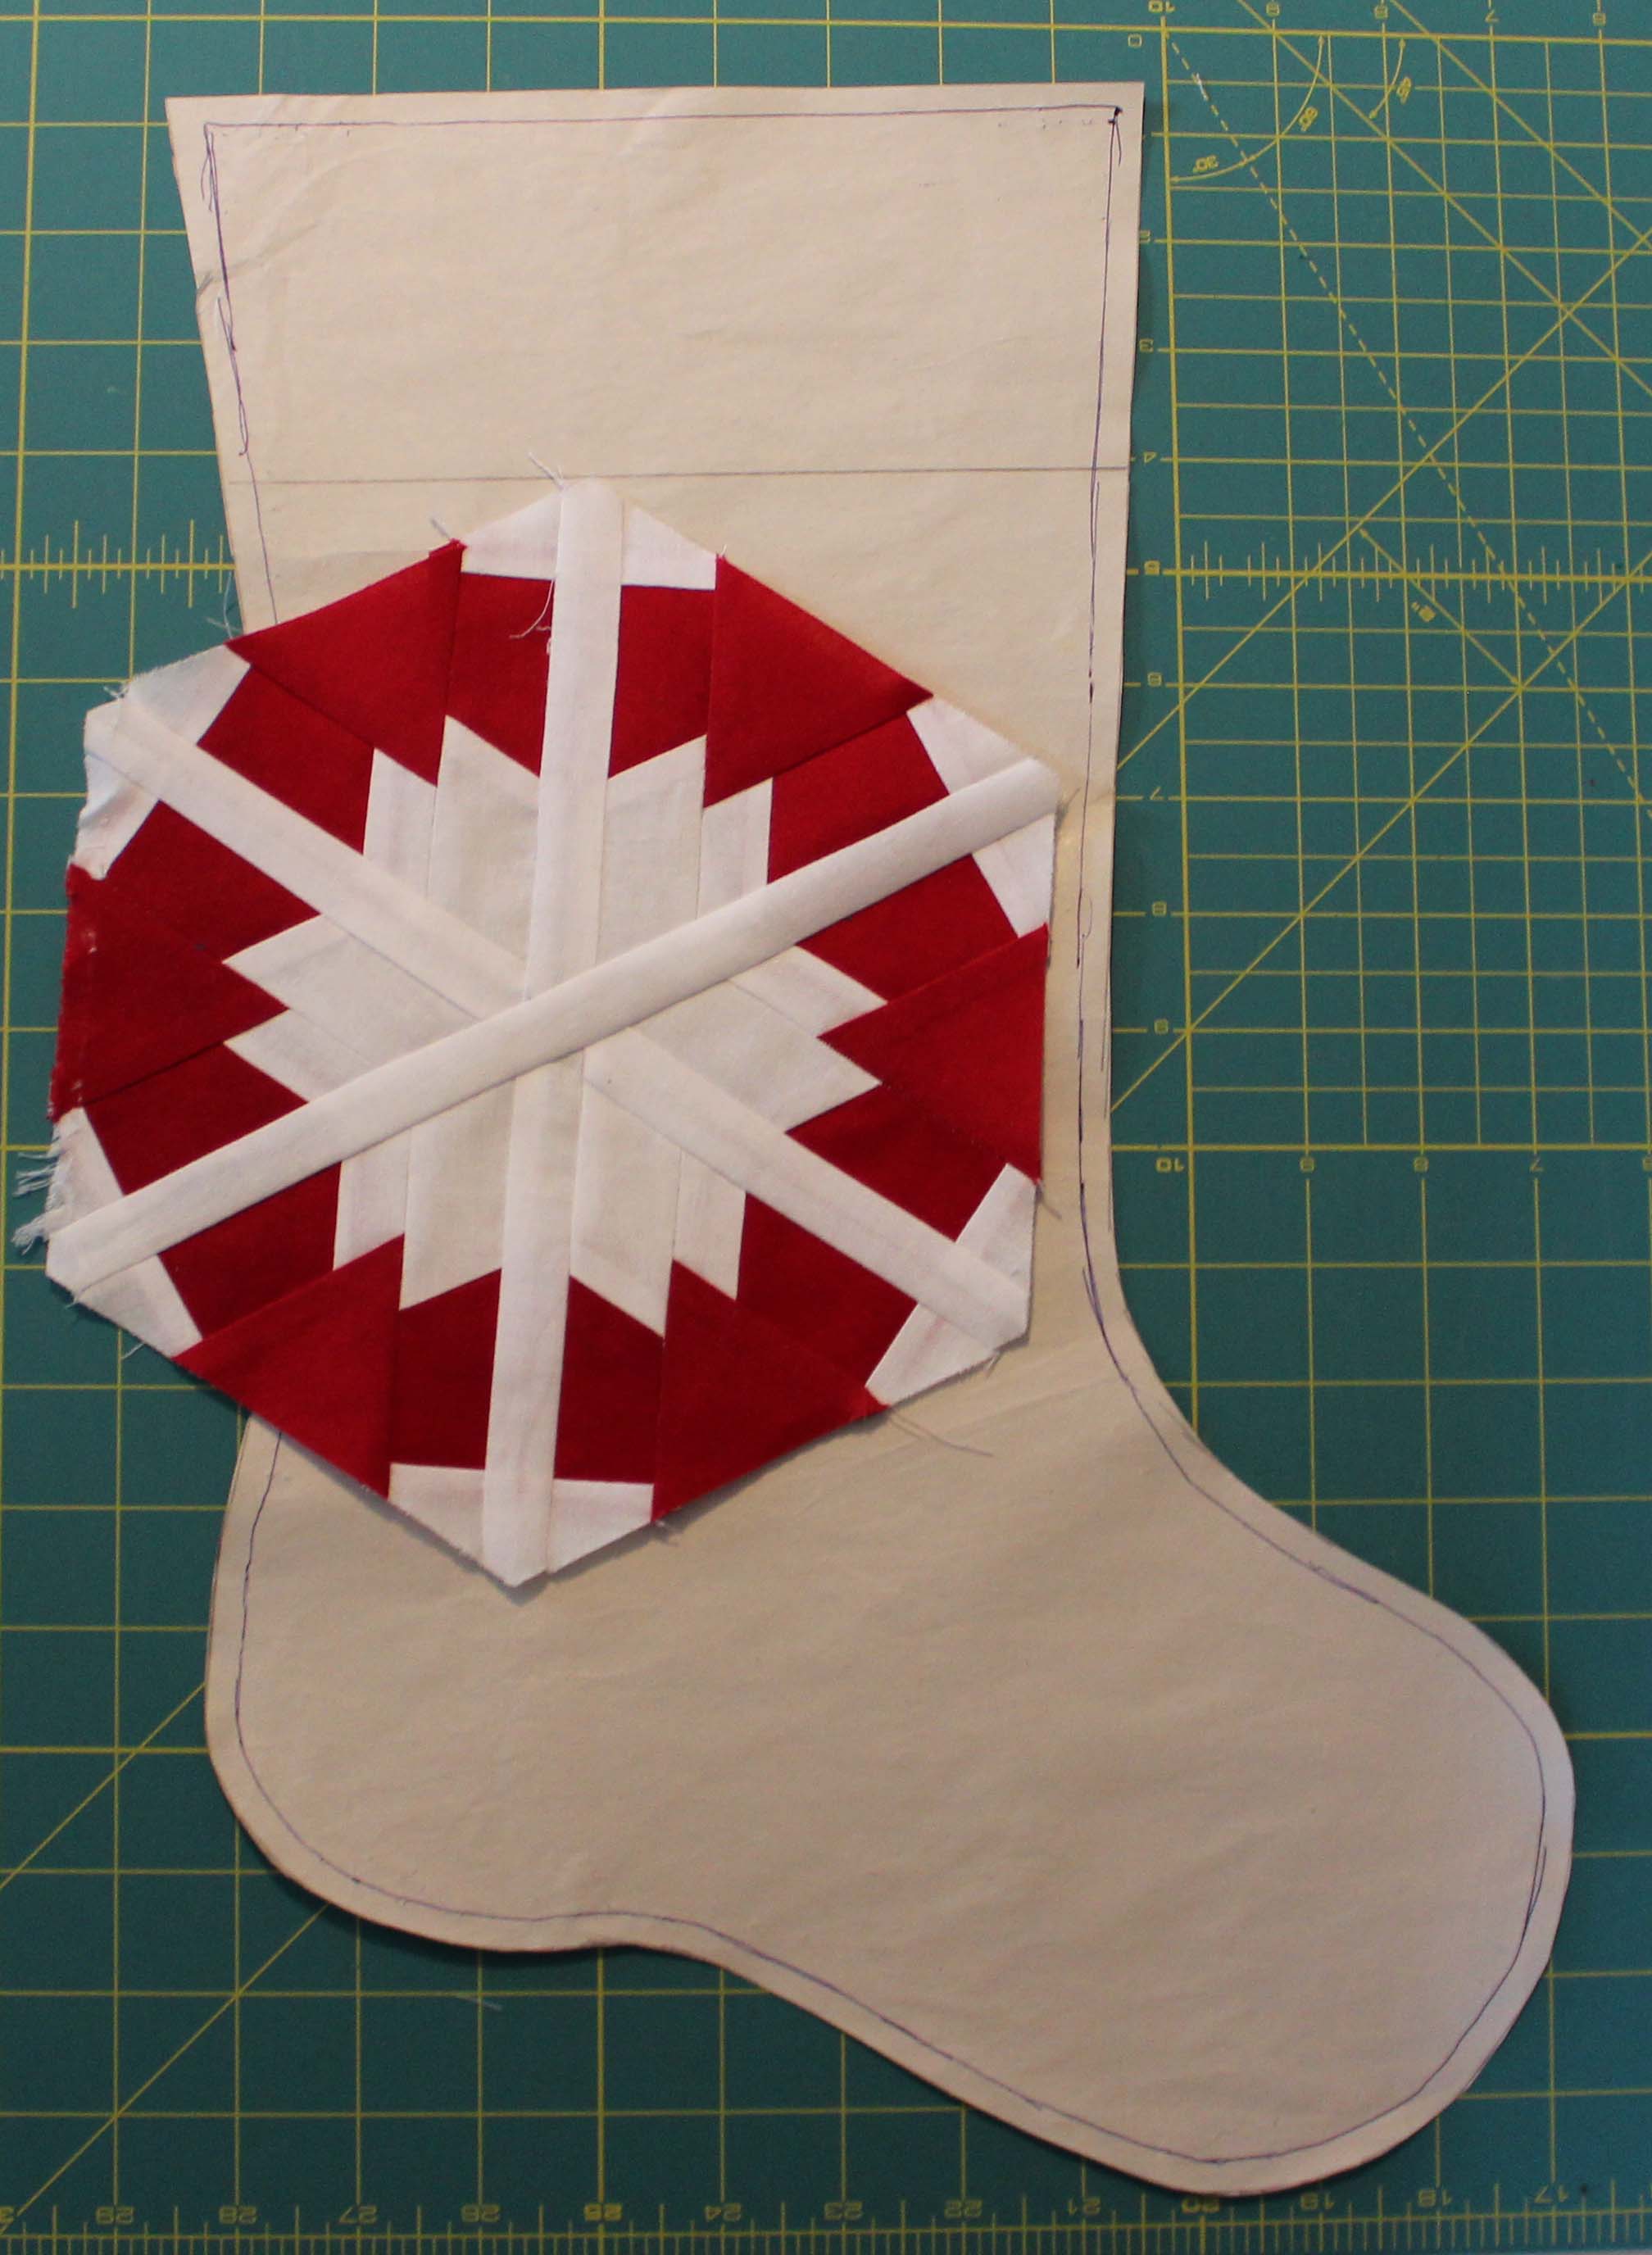
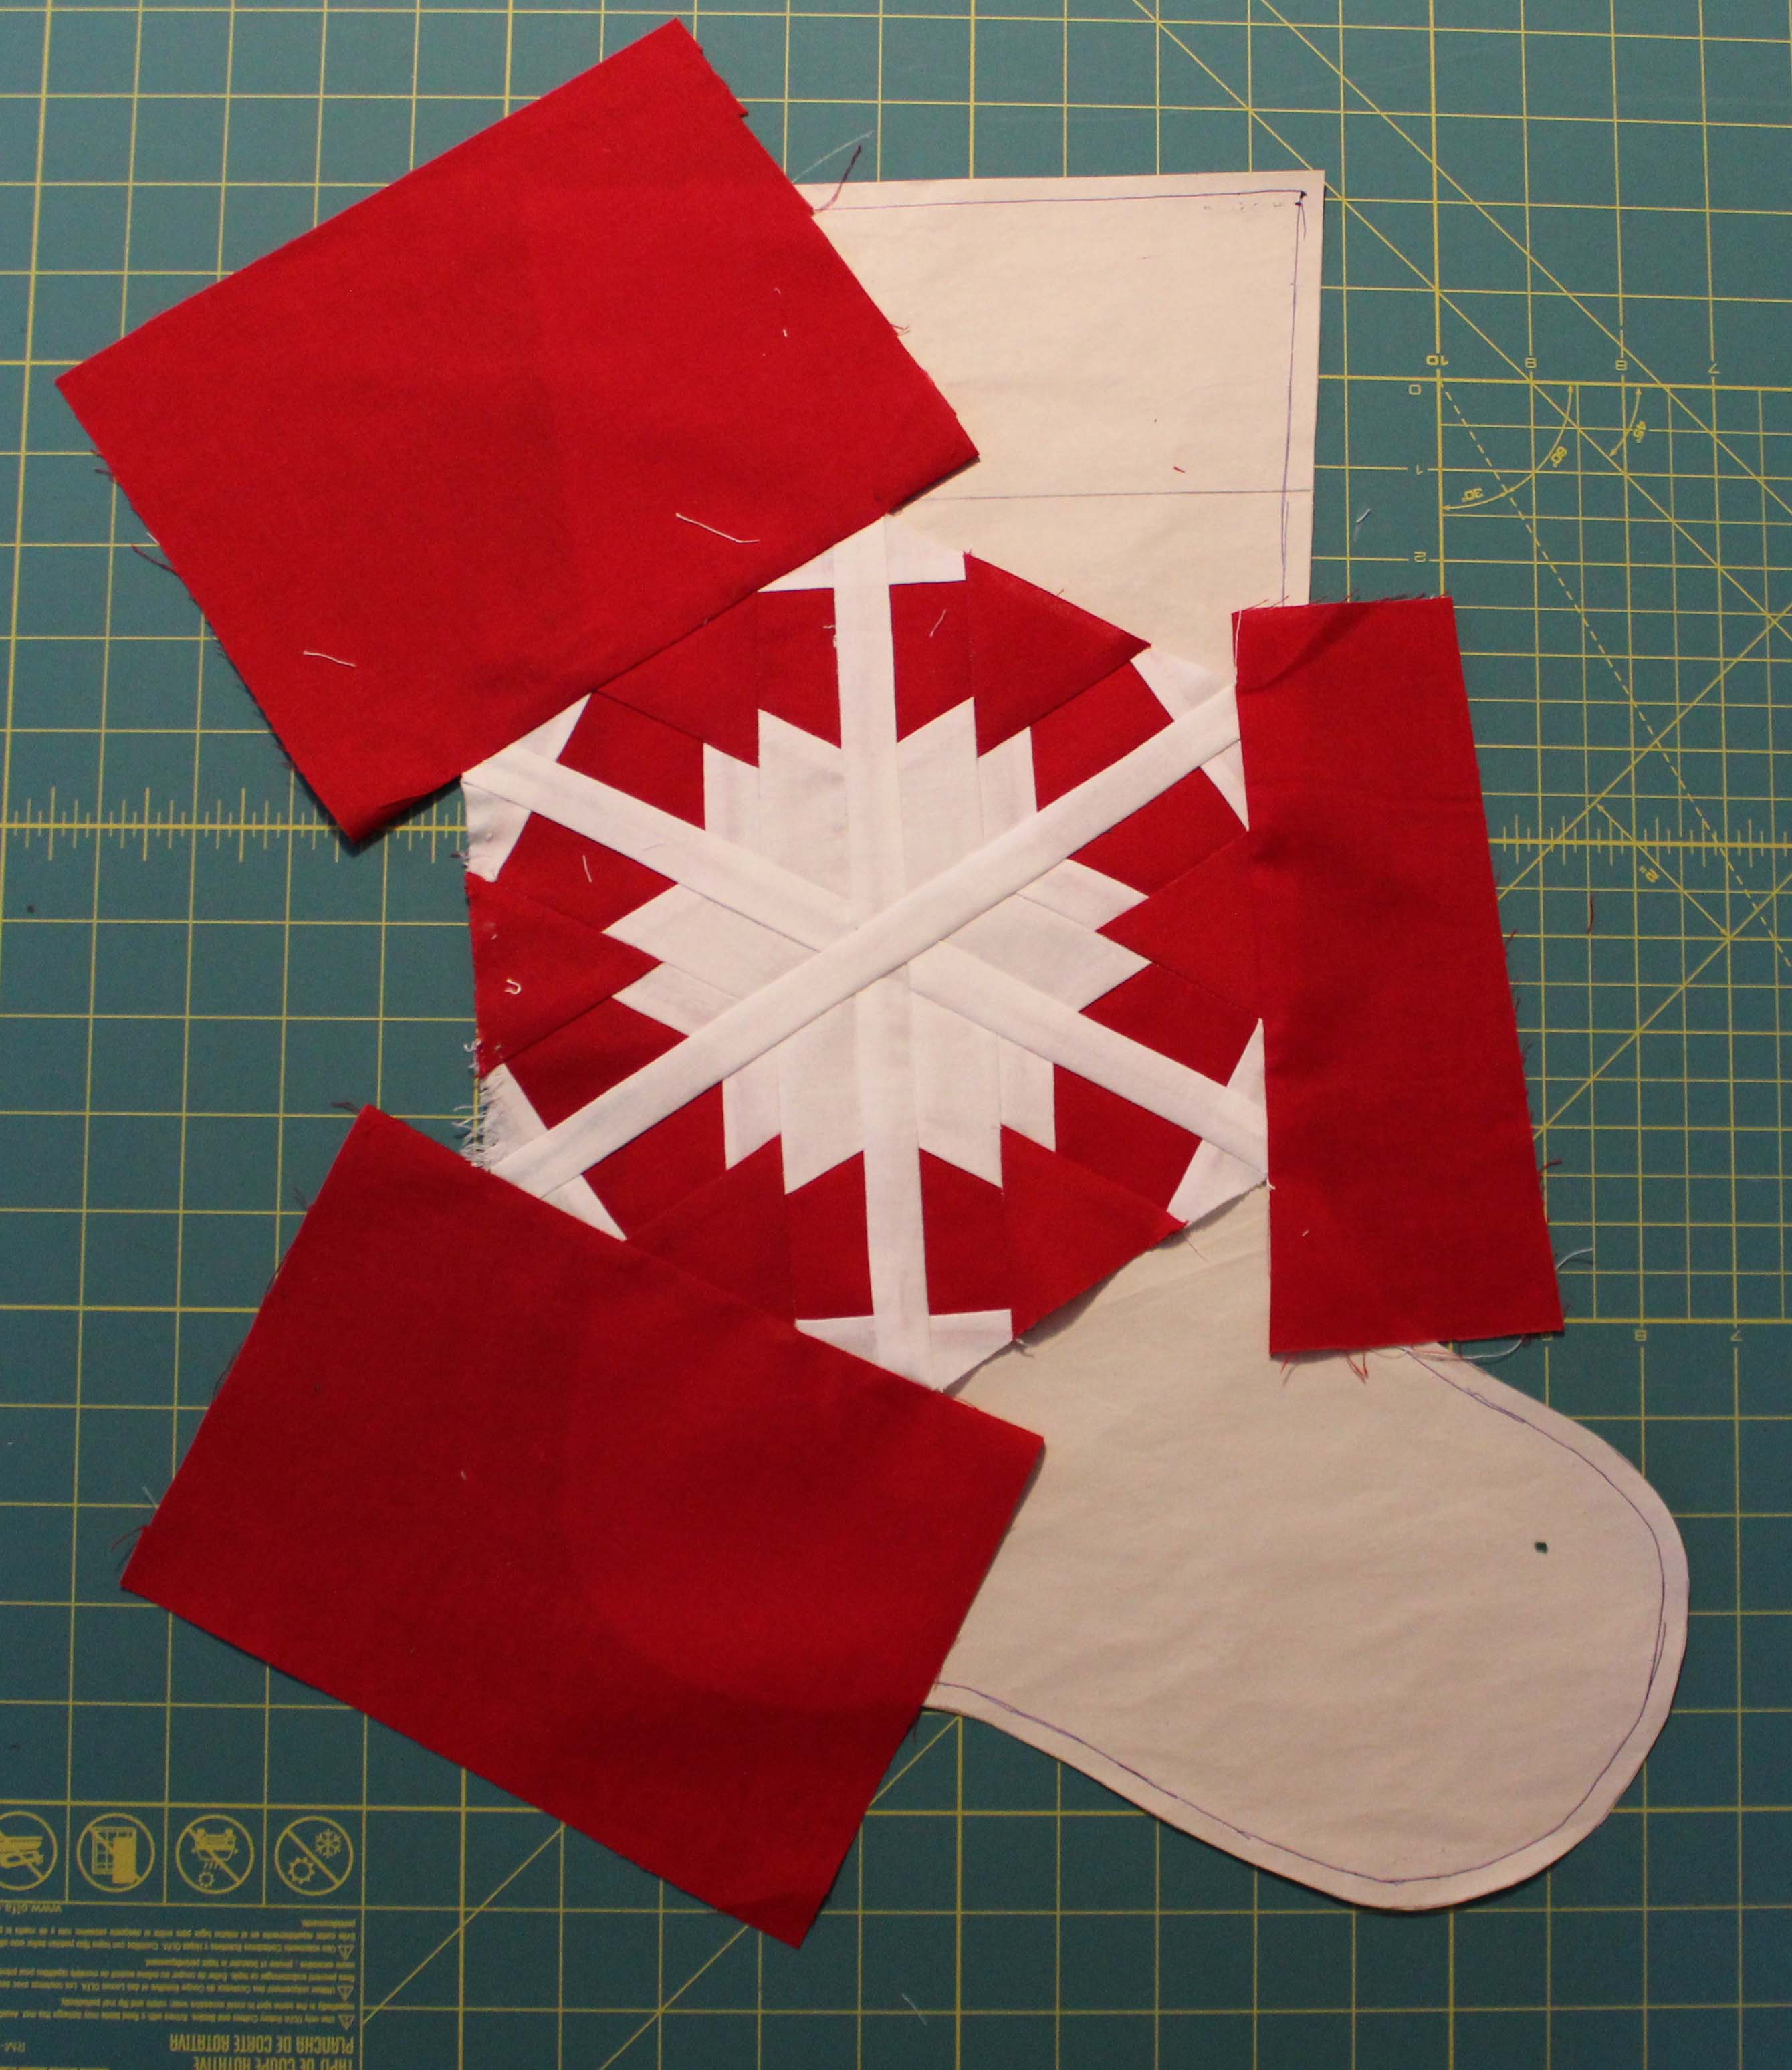
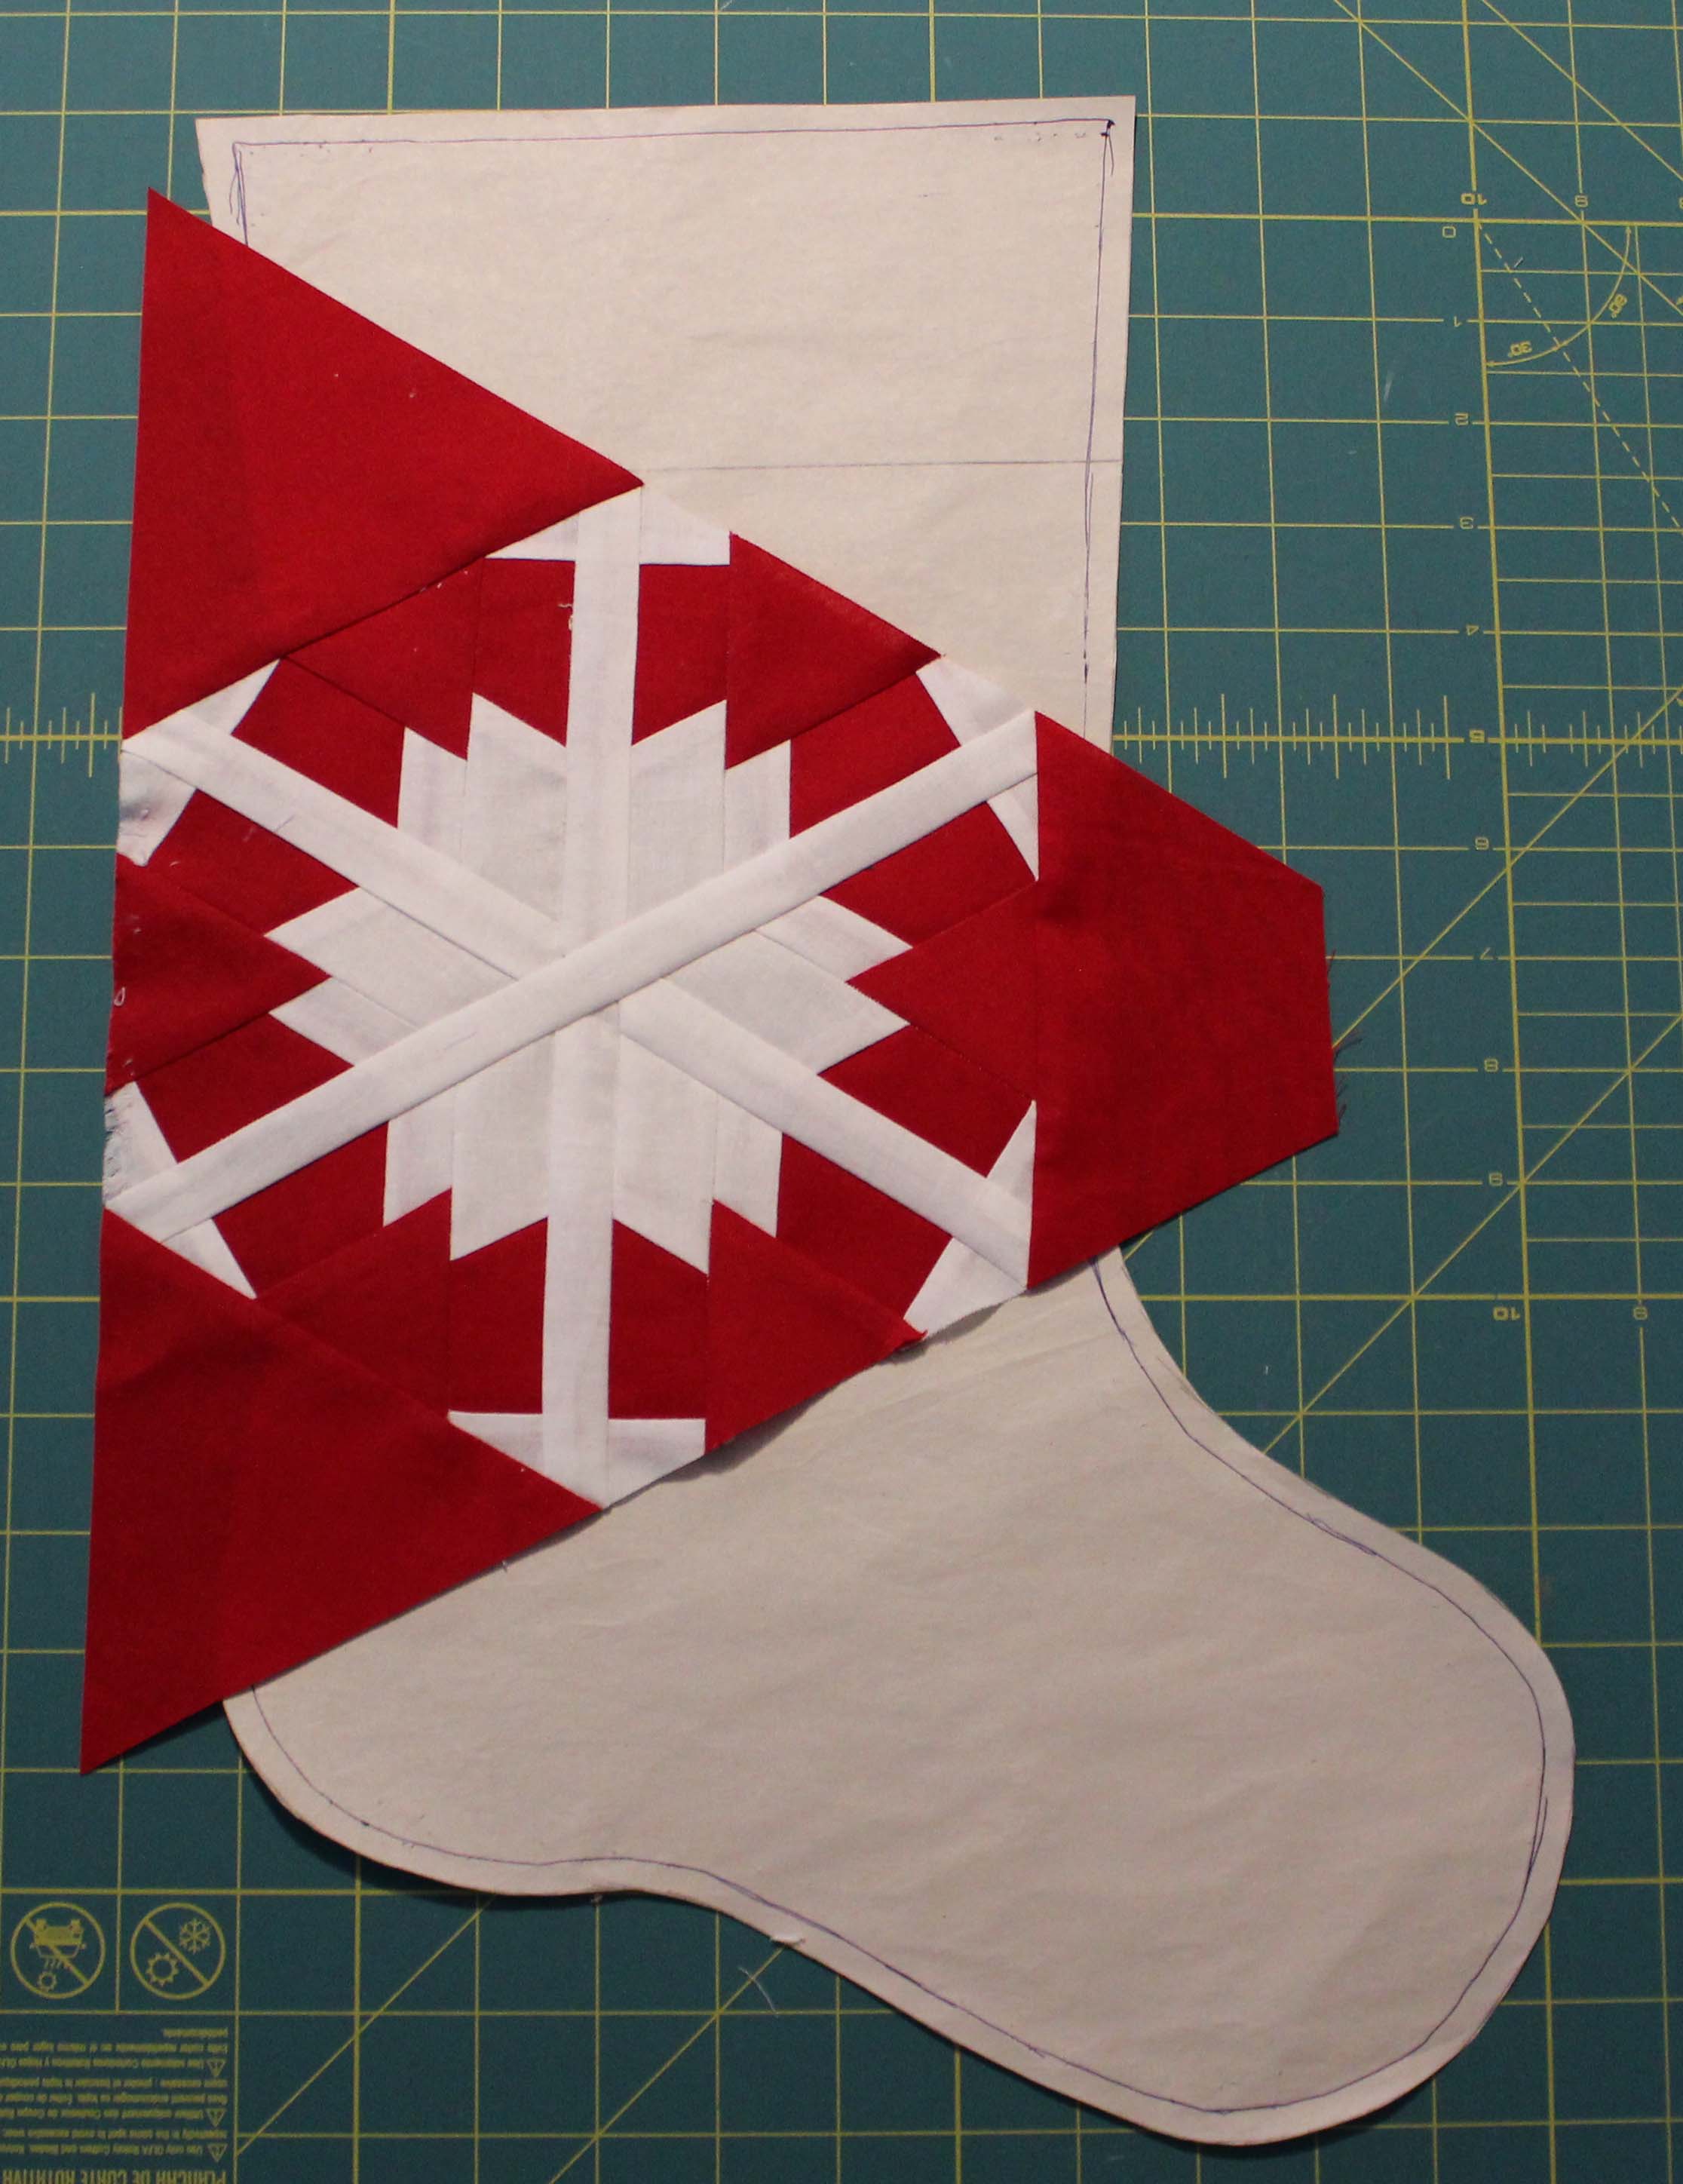
I drew out a stocking pattern and cut three stockings from it, two for the lining and one for the backing. I used the pattern to place the finished snowflake on and sewed more fabric around the edges until the stocking pattern was covered.
I laid the stocking pattern on top of my snowflake fabric and cut the front stocking out.
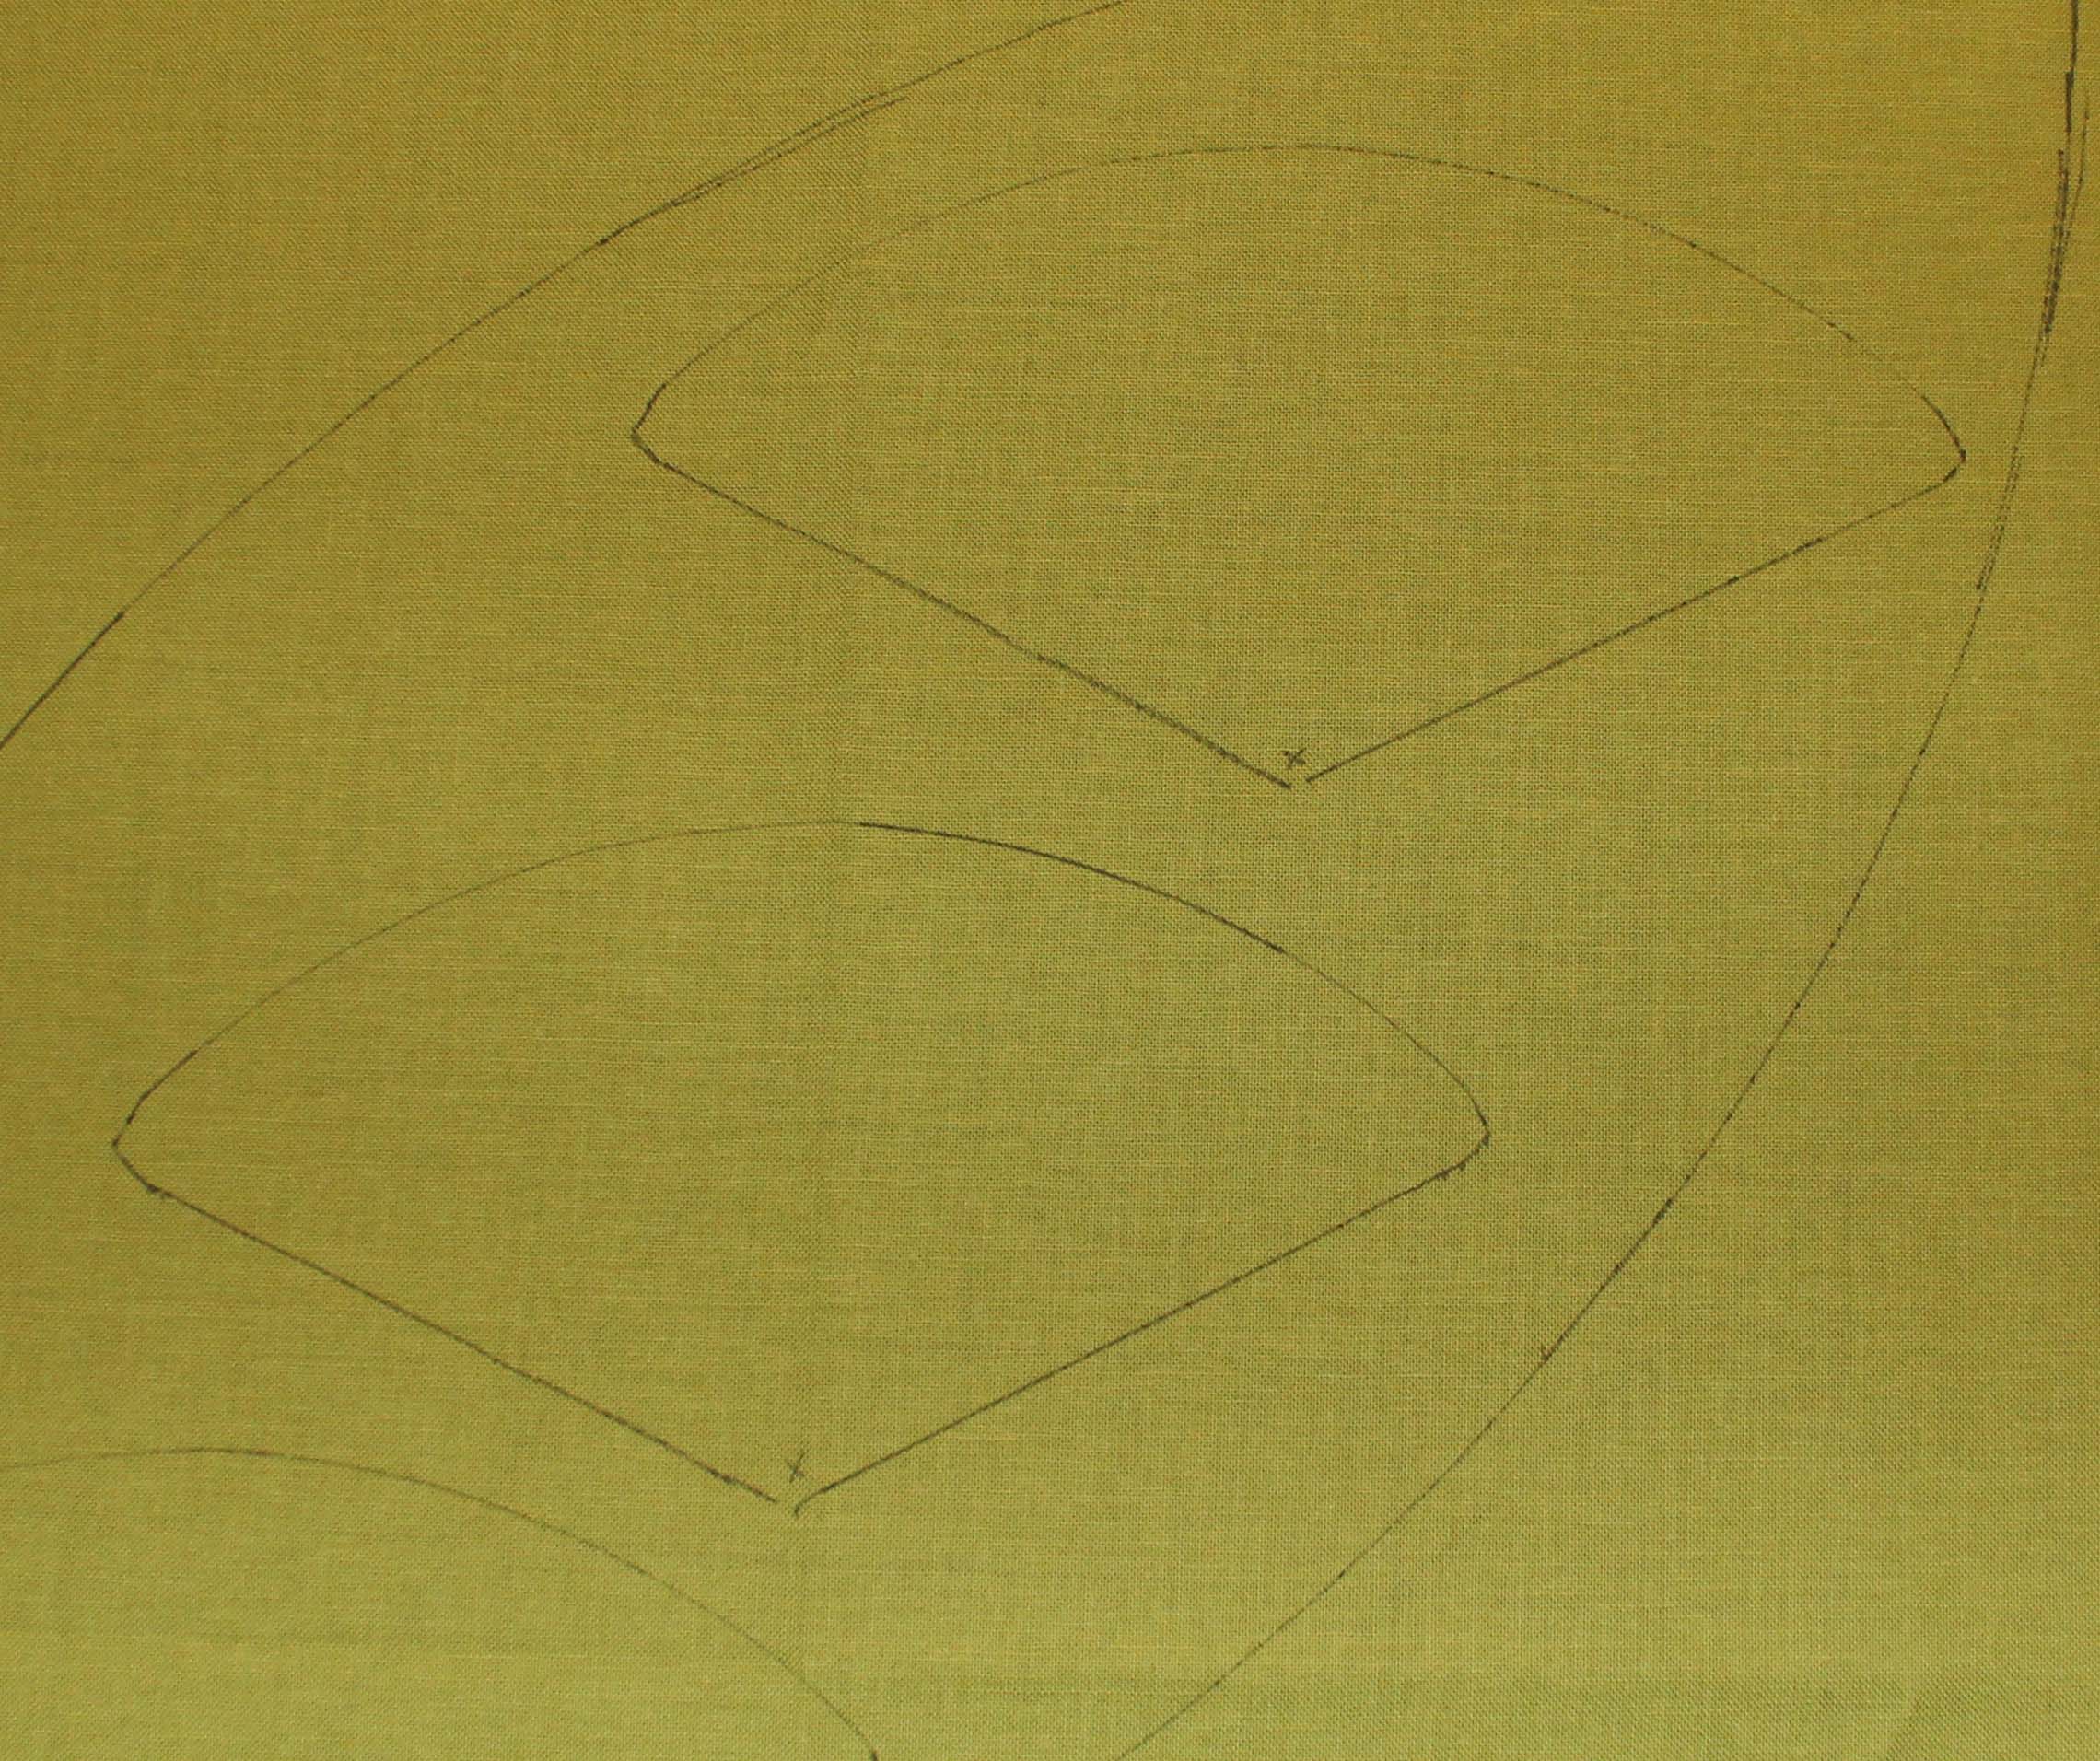
Remember the coloring sheet that comes with the pattern? I cut that out and used it to draw my quilting designs on the stocking.
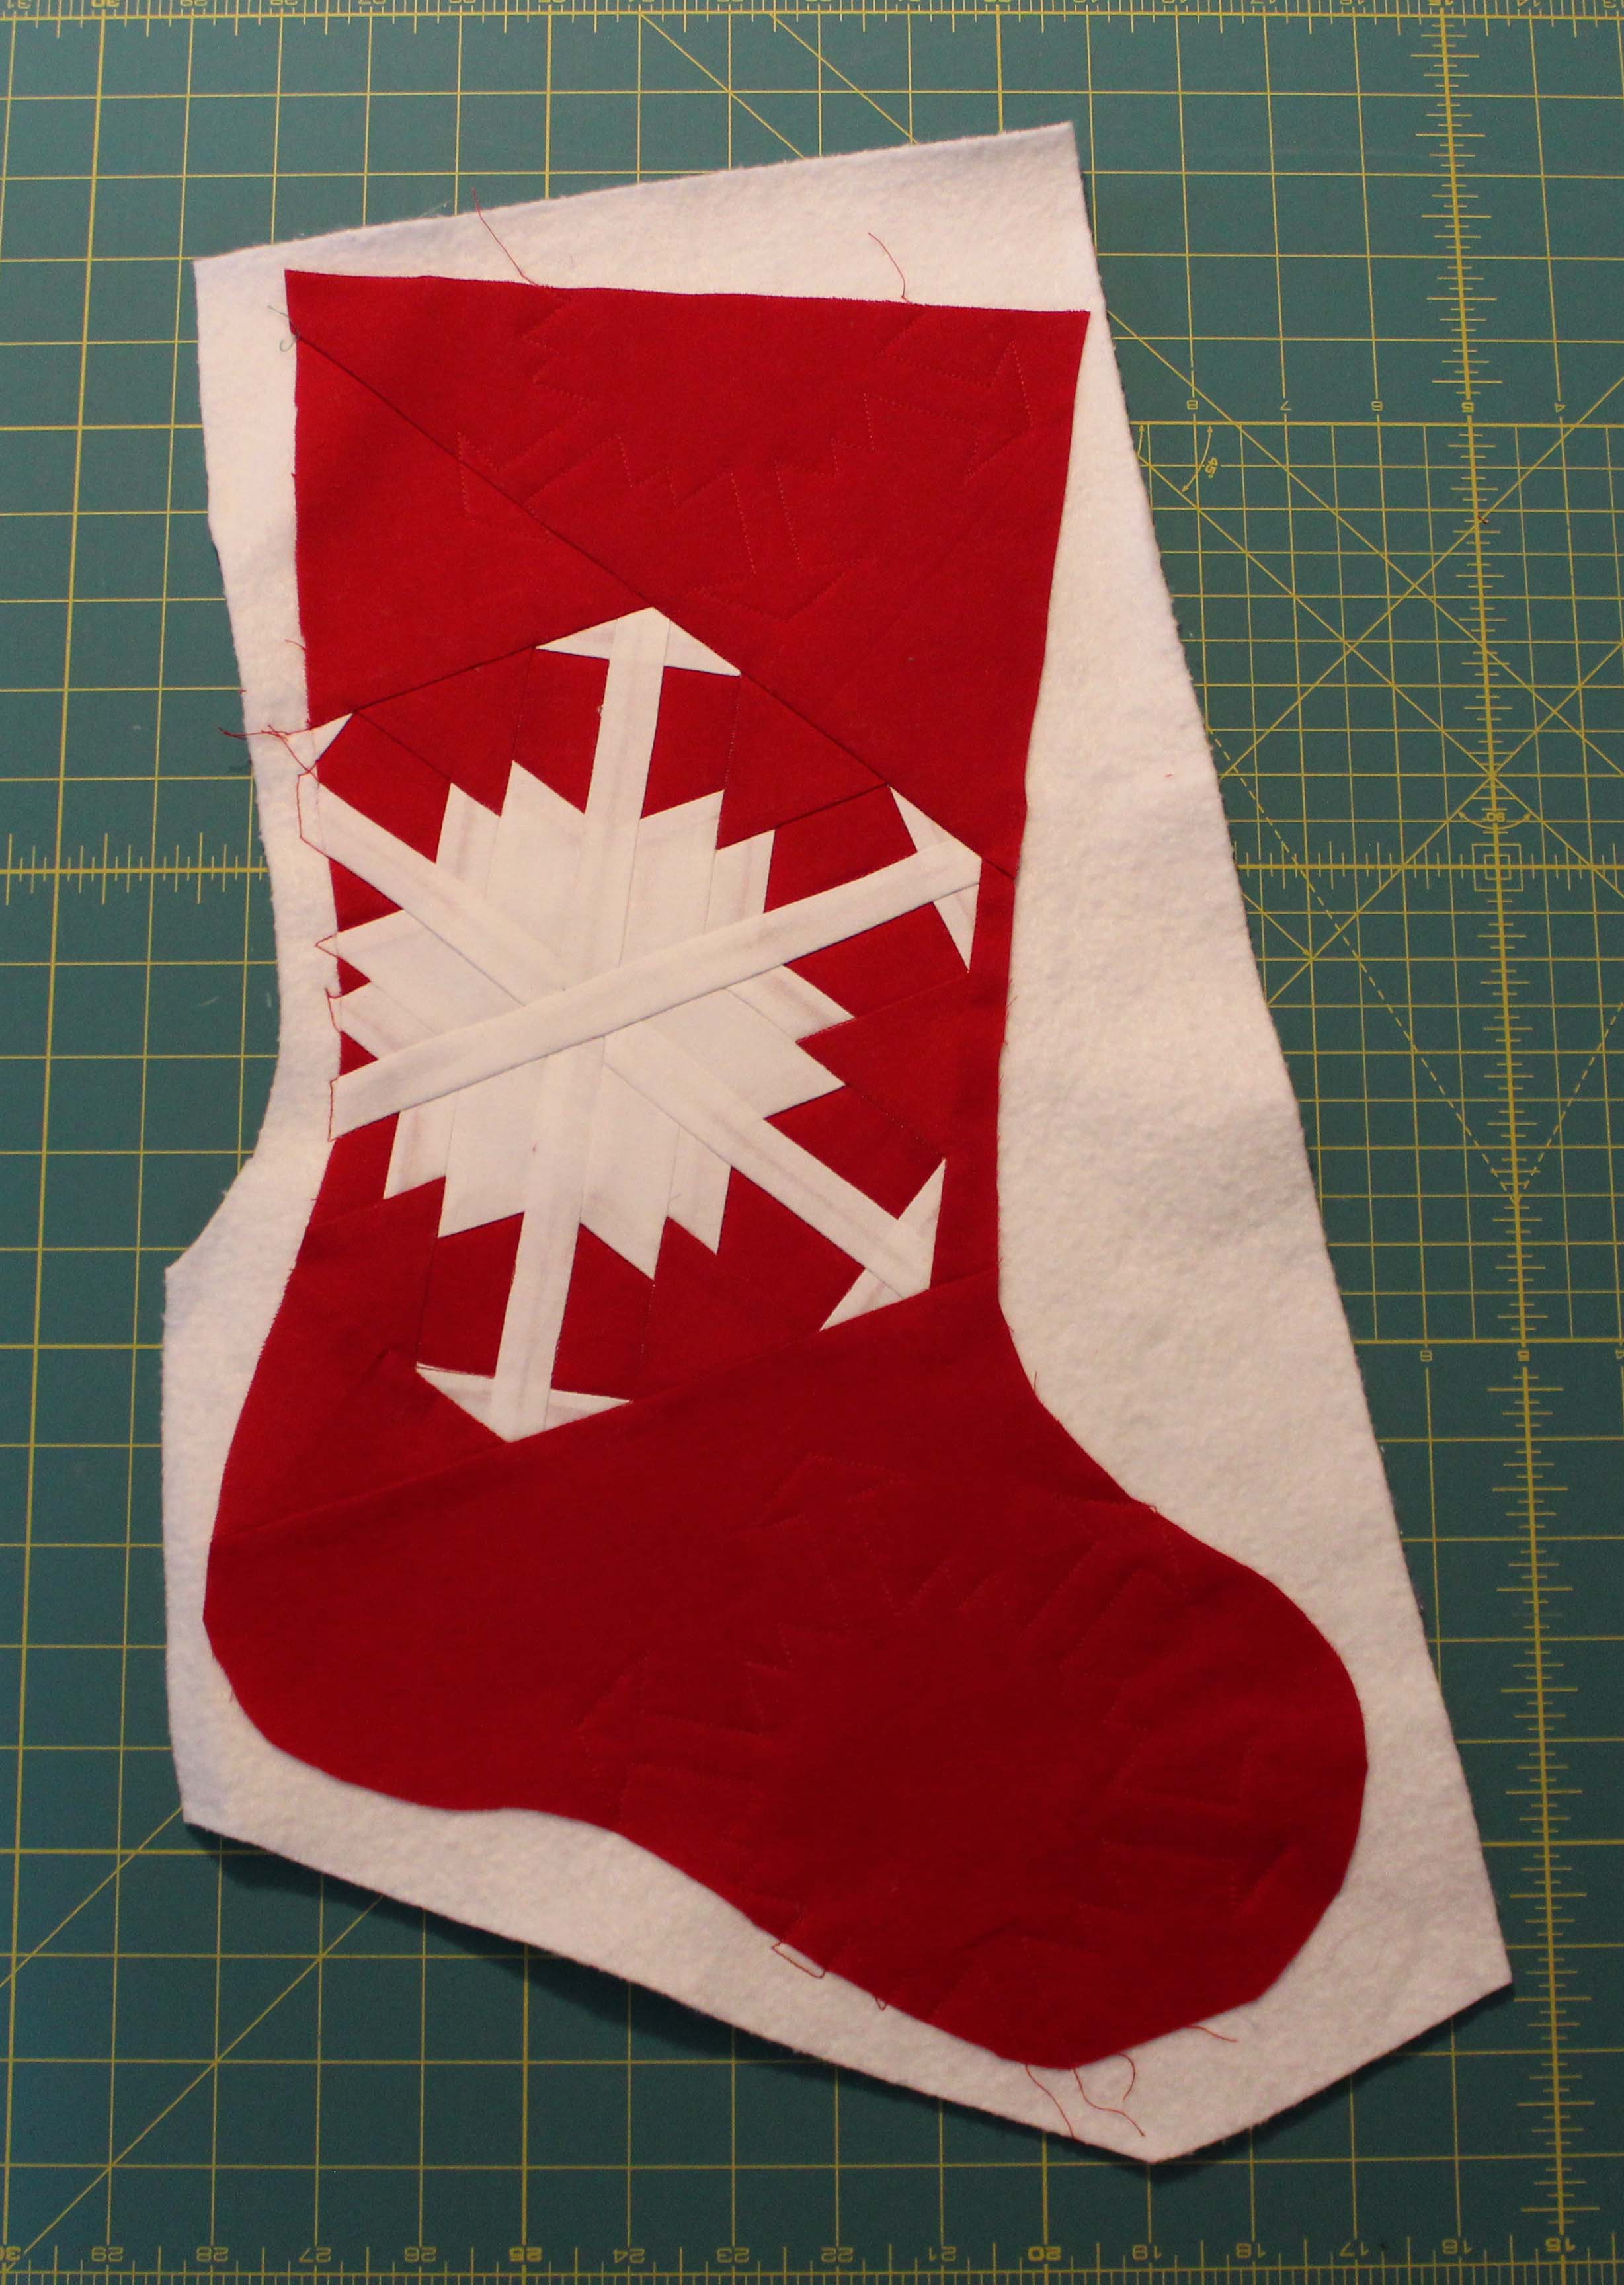
I used a matching red thread, so the quilting is a bit hard to see.
I then assembled the stocking using a basic DIY lined stocking like this one. There are many tutorials on the net, you can find one that works for you if you don’t like that one.
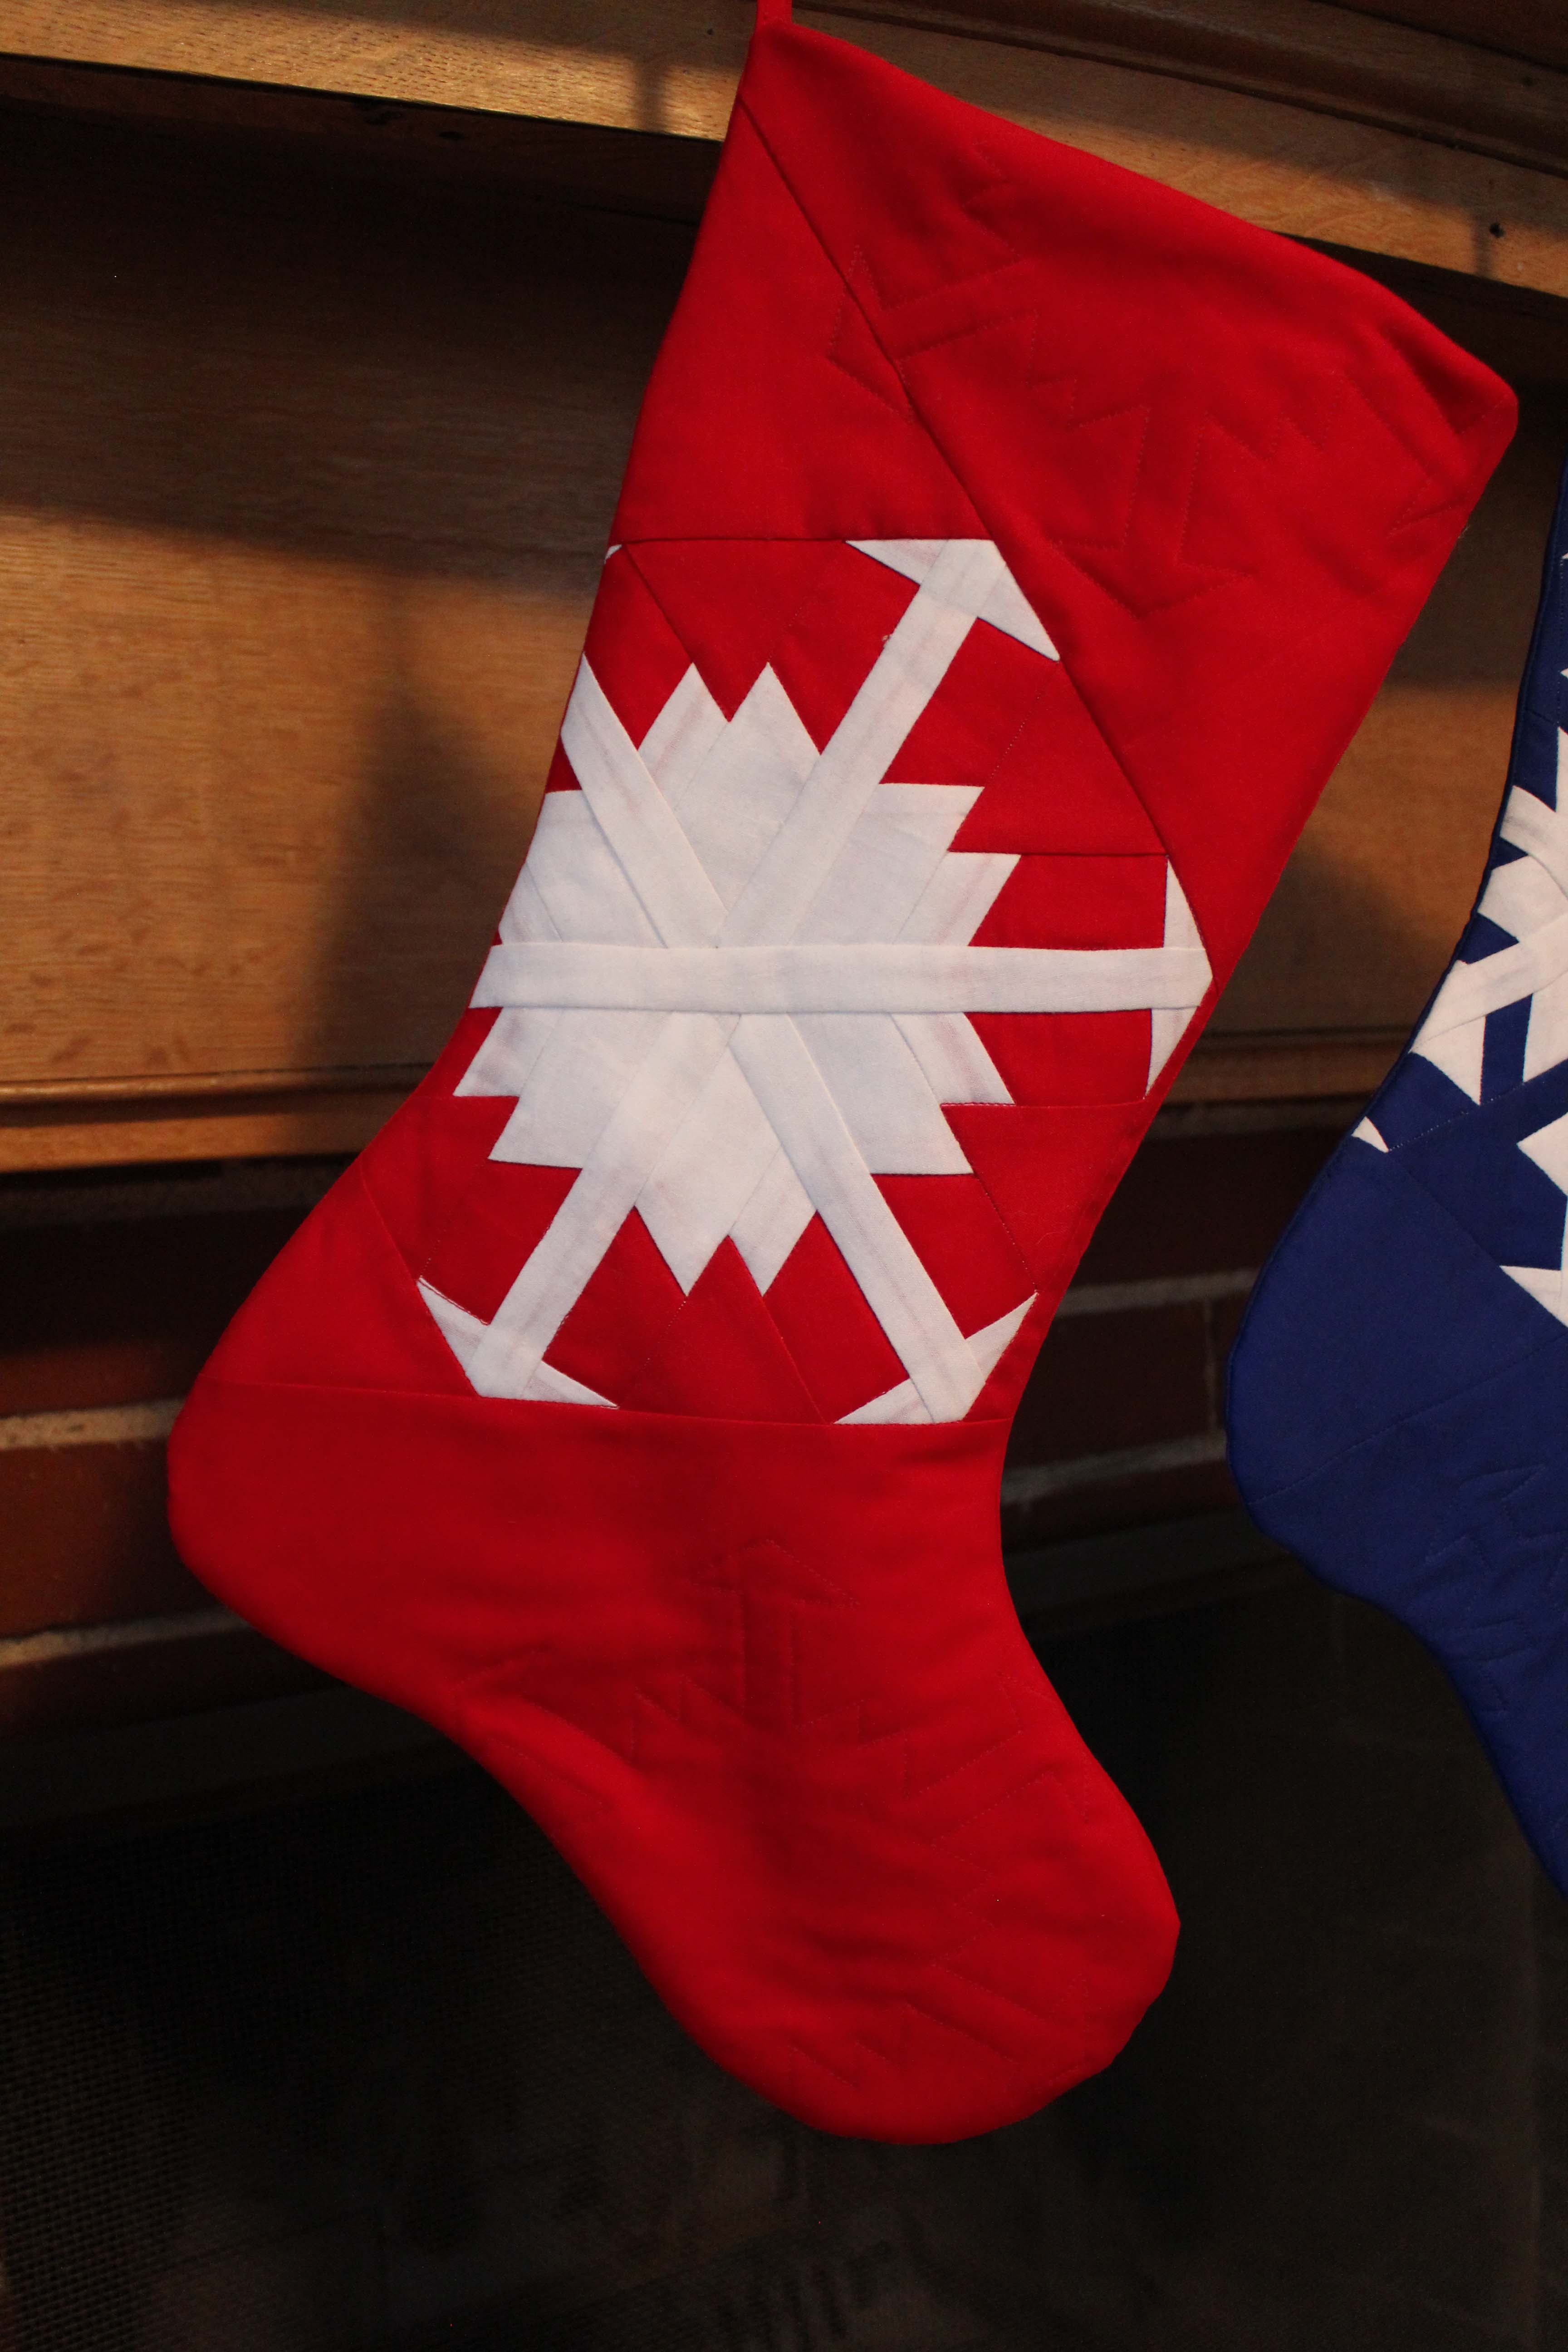
Here is the red stocking hung up.
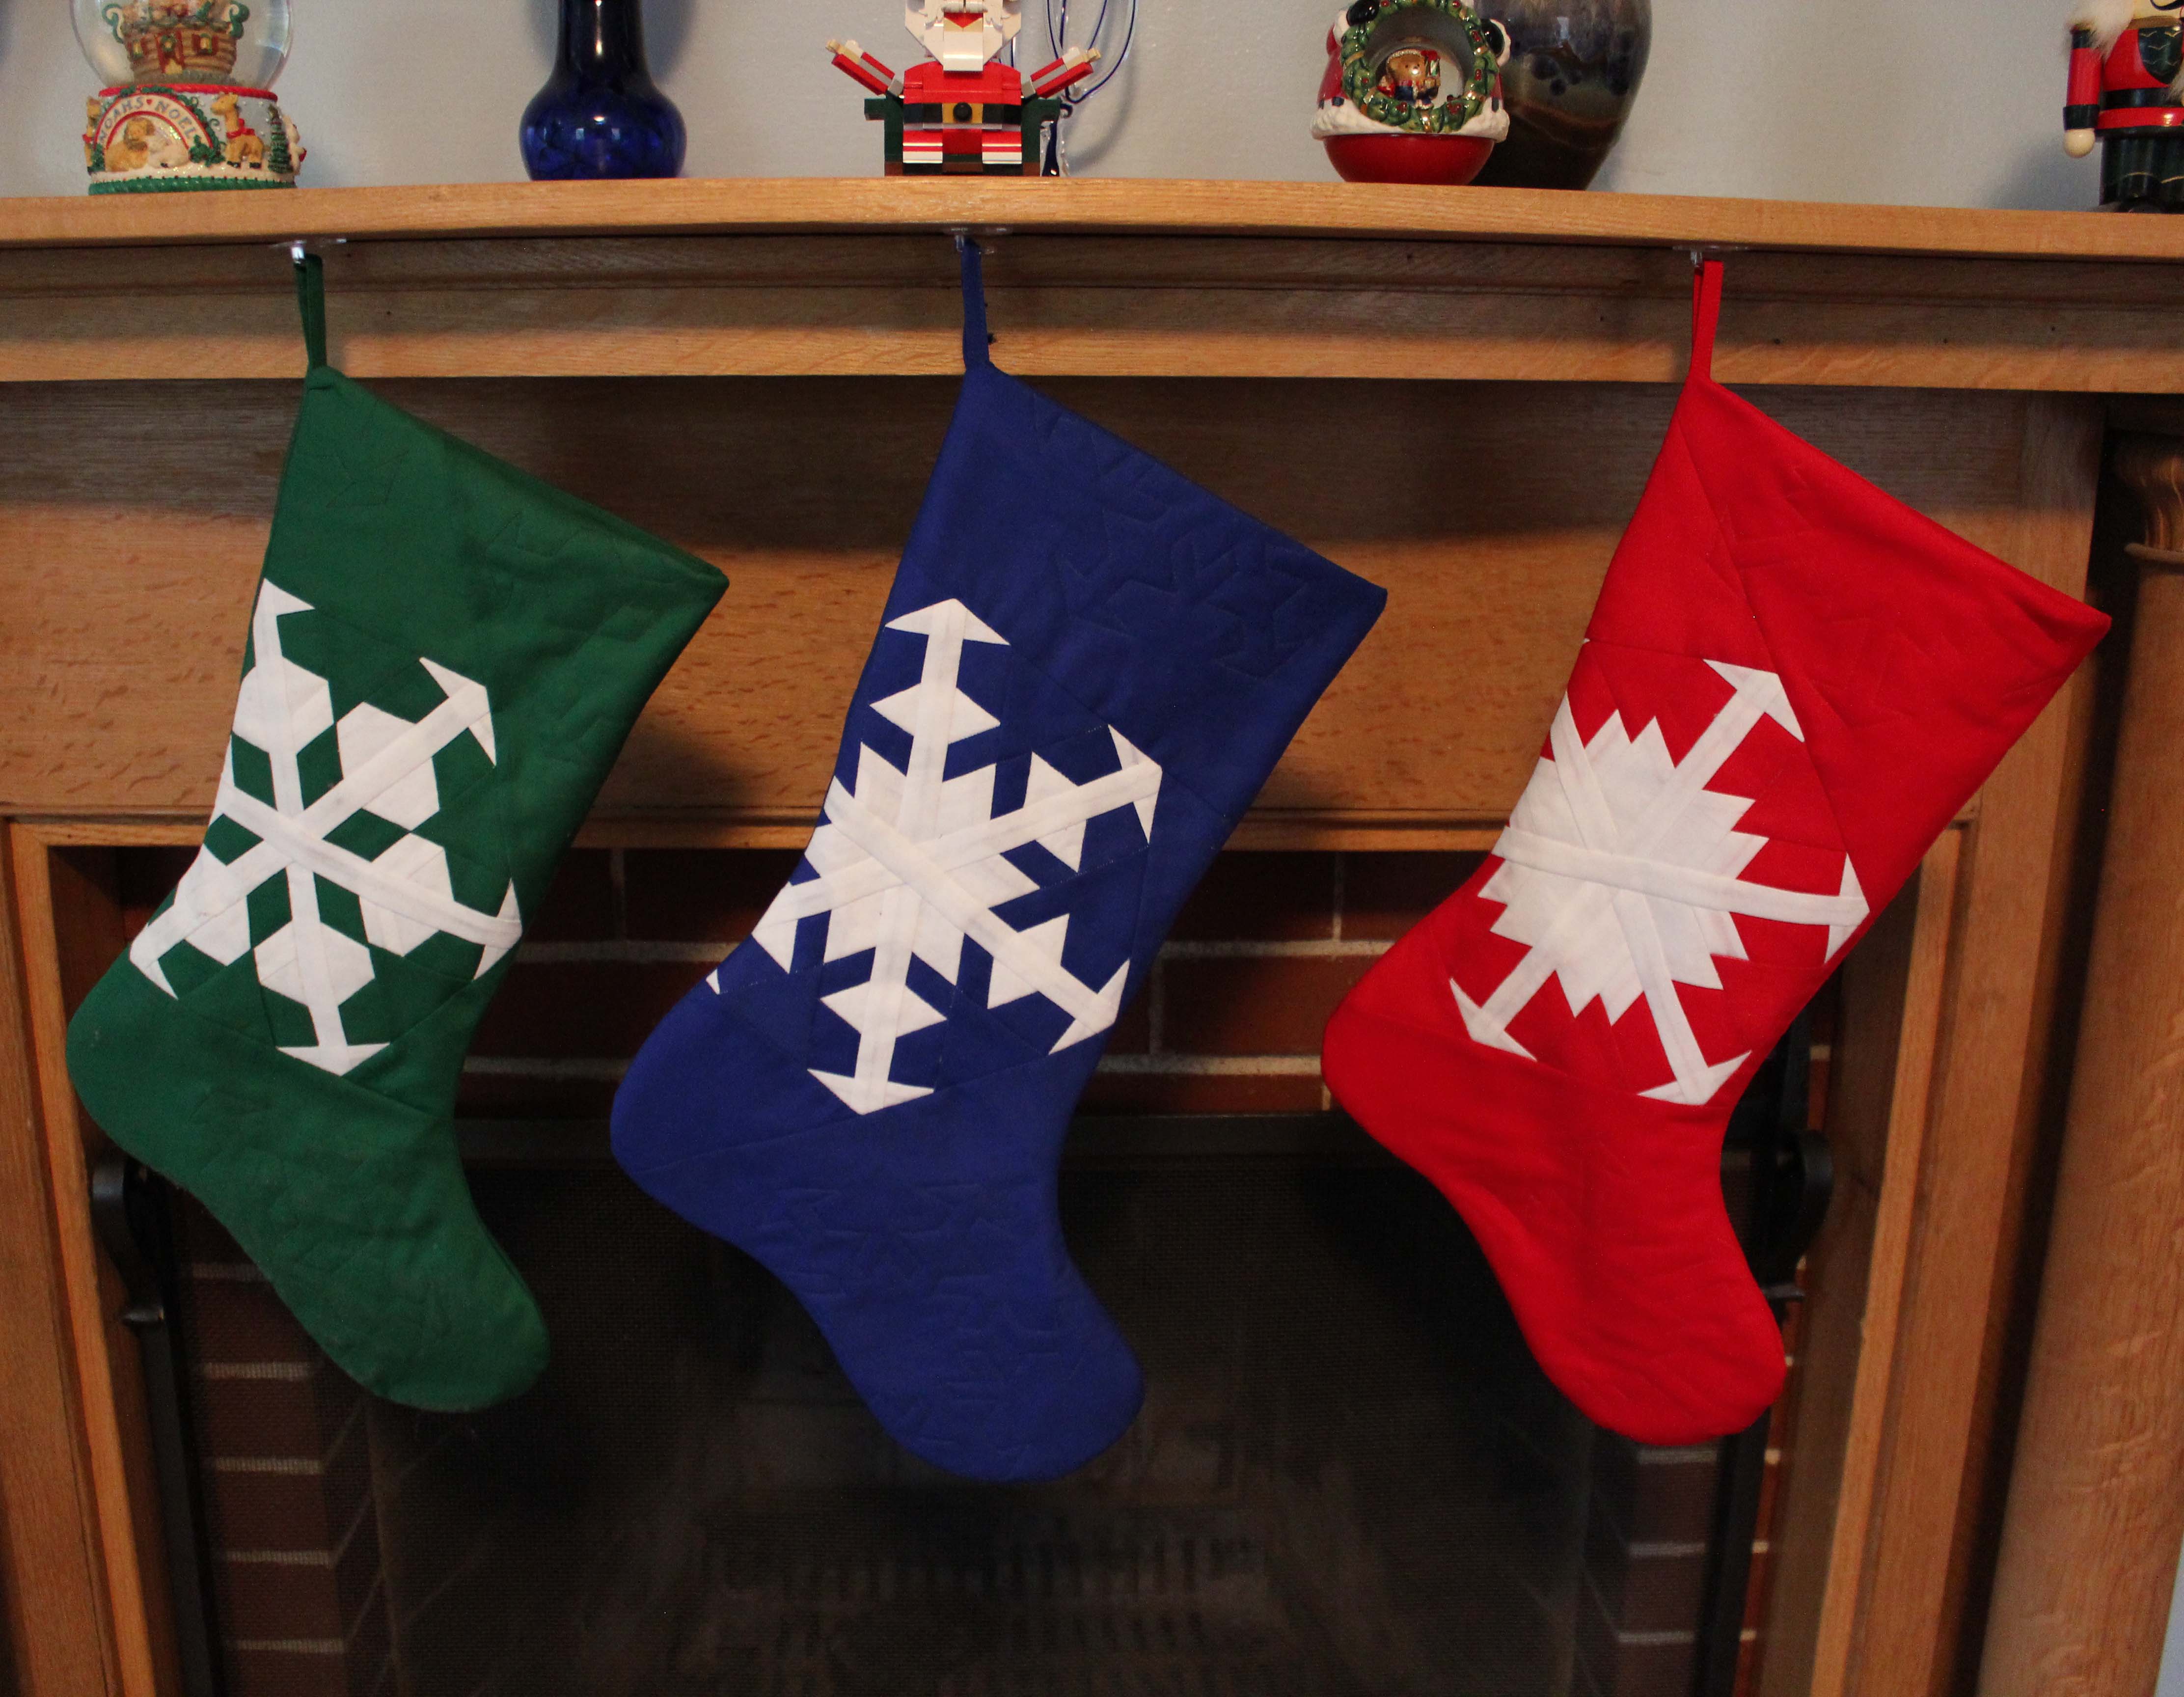
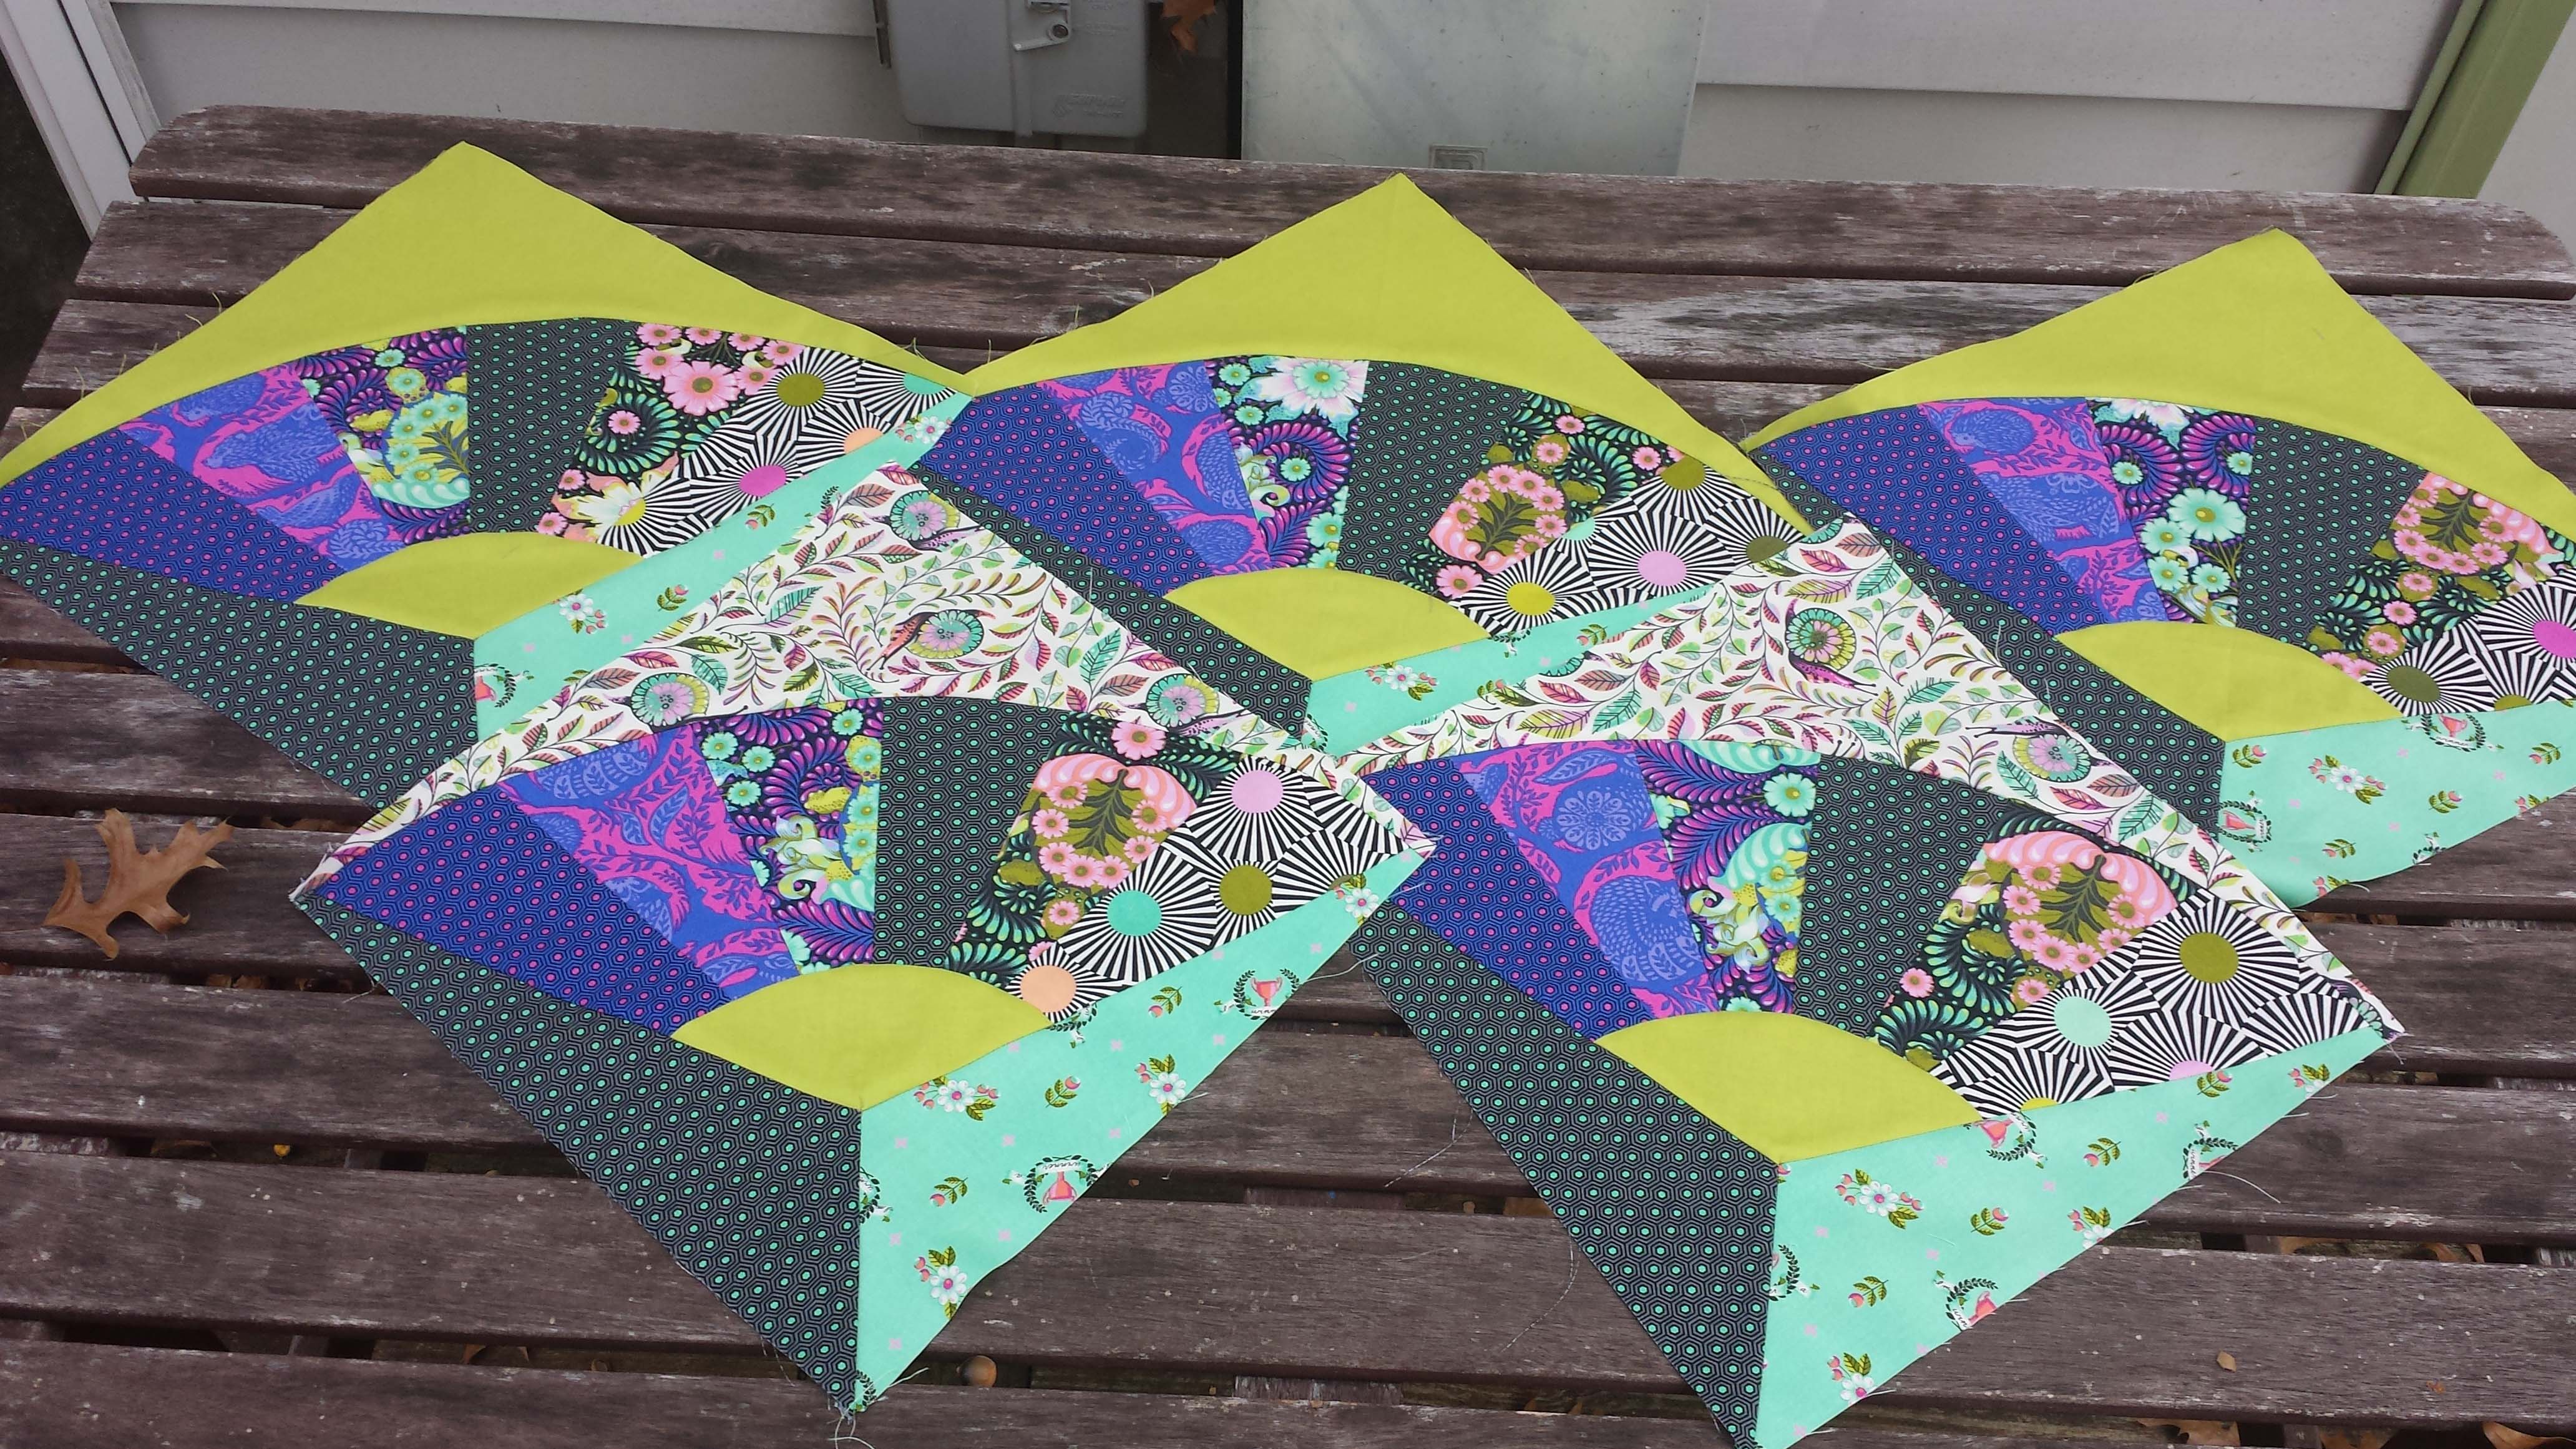
And here is the picture of the three I finished in time to submit to Nancy’s Challenge
There are five hanging there now. It’s rather hard to get a decent picture of them, there’s always one turning the wrong way!
Tomorrow is the announcement of the winners of the challenge. There looks to be about 103 entries and just under 20 prizes, so I think I have a decent chance.
I have a been a Stay at Home Mom since my eldest was 5 months old. She’s almost 14 now. My youngest is in first grade. When he started kindergarten friends would ask me what my plans are now. I replied that I just wanted to spend time in my sewing room. “Will you make that into a career?” they asked. “No,” I replied, “I have no idea how to do any of that, I just want to sew and create.”
Over the course of the year I grew. I stopped being a ‘lone’ quilter and joined guilds and sew-ins. Do you know that quilters are the nicest people ever? Seriously, I was so welcomed everywhere I went. It is a brilliant community, a place where I feel comfortable to create and share. I started thinking about pattern making. I do follow patterns here and there, but many times I just grab fabric and start sewing, do a little doodling on graph paper, some math and BAM, I have a quilt. I’ve never written any of it out, just made what I wanted and moved on to the next thought in my head. So I thought to myself, why not put the patterns to paper and create a book? I gave myself five years to accomplish this goal.
One night at a guild meeting, members were discussing some retreats they have been on or were planning to go to and someone mentioned Sew Pro. I asked them what that is.
In a nutshell, Sew Pro is a convention for members of the sewing community to learn how to create a business doing what they love. I researched it, discussed it with my husband, and mulled it over for some time.
Next thing I knew, I was flying to Chicago for a weekend by myself, for myself!
Hello, Chicago, nice to meet you!
I focussed on the classes that pertained to publishing and pattern design. They were all fanstastic and I learned so much! I made new, wonderful friends and I received fabulous advice from people in the quilting industry.
Earlier in my post I mentioned the welcoming quilting community I experienced when I first ventured out of my house. Well, I cannot begin to describe how welcomed I felt at Sew Pro, and noone embodied that sense of inclusiveness more than Pat Sloan, one of the keynote speakers. Pat walked table to table introducing herself before she spoke (like no one already knew who she was, right?) and she has remained active on the Sew Pro Facebook page sharing words of wisdom and cheering members on as they meet their goals and celebrate accomplishments.
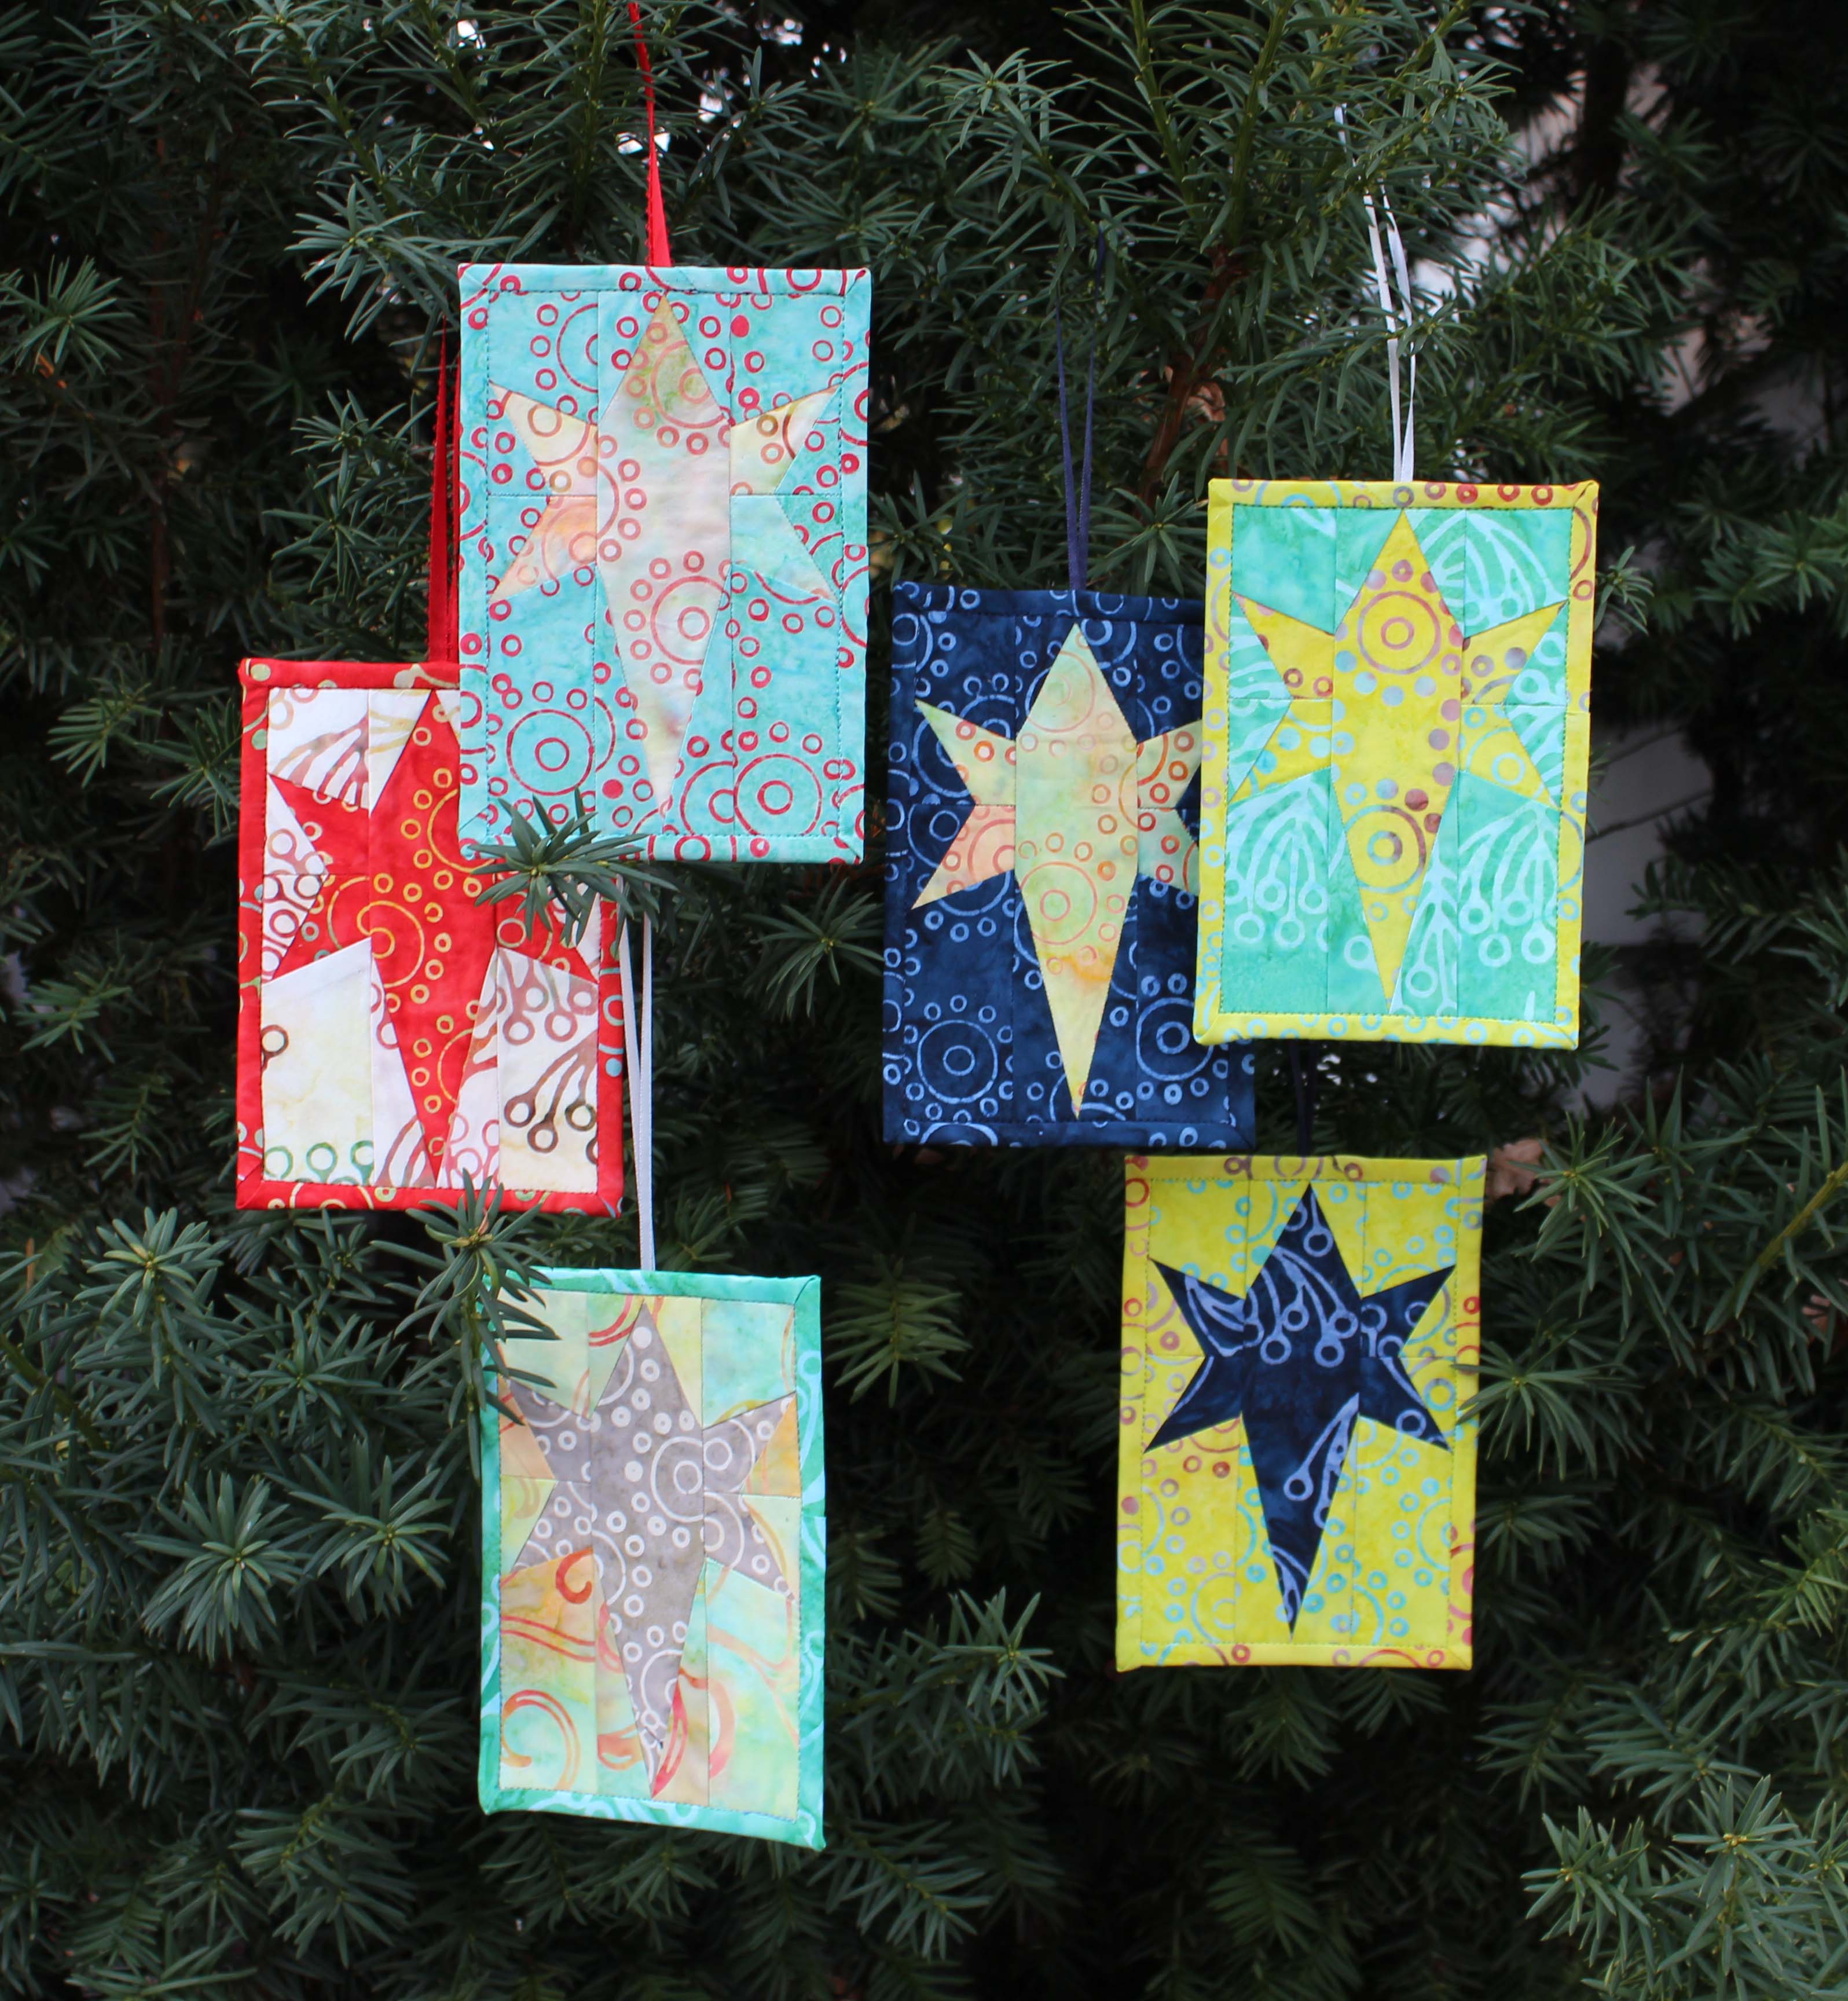
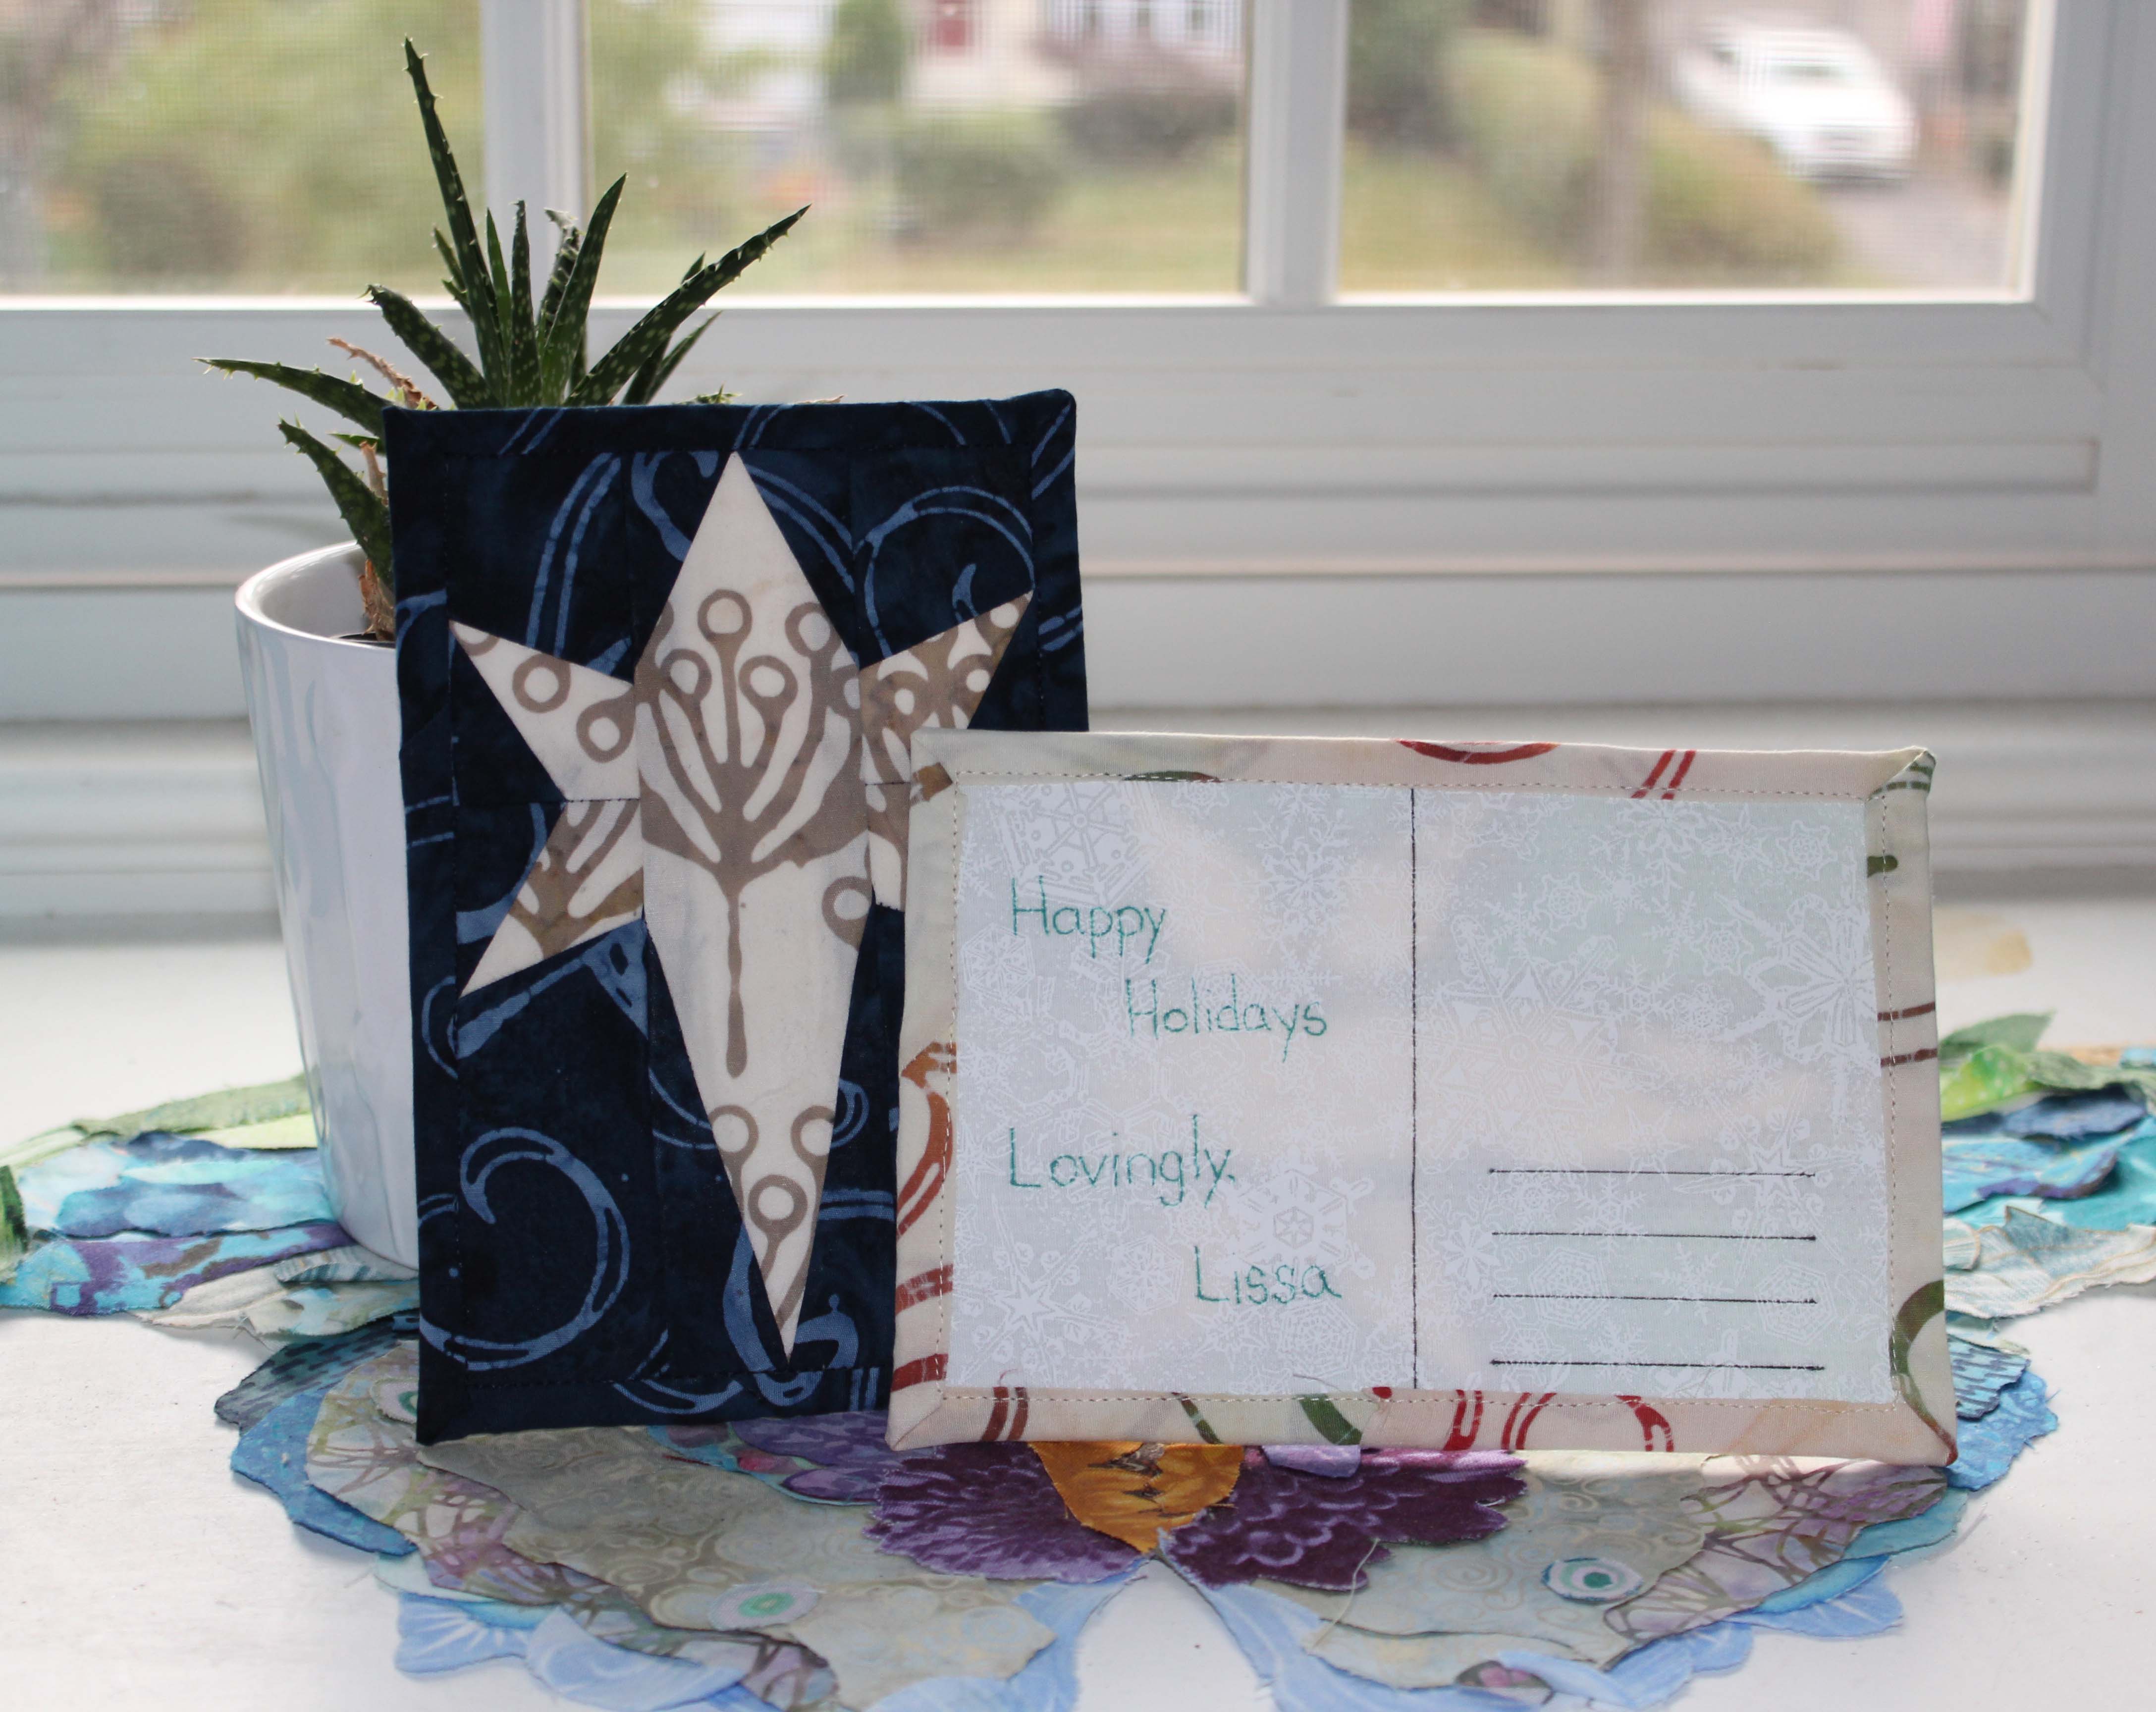
It is in her honor that I created this, my first pattern that I am sharing here;
The pattern is paper piecing, finished size is a miniature 4.5 x 6.5 inch quilt. I used Pat Sloan’s HomeTown Girl Batiks. Perfect for decorating.
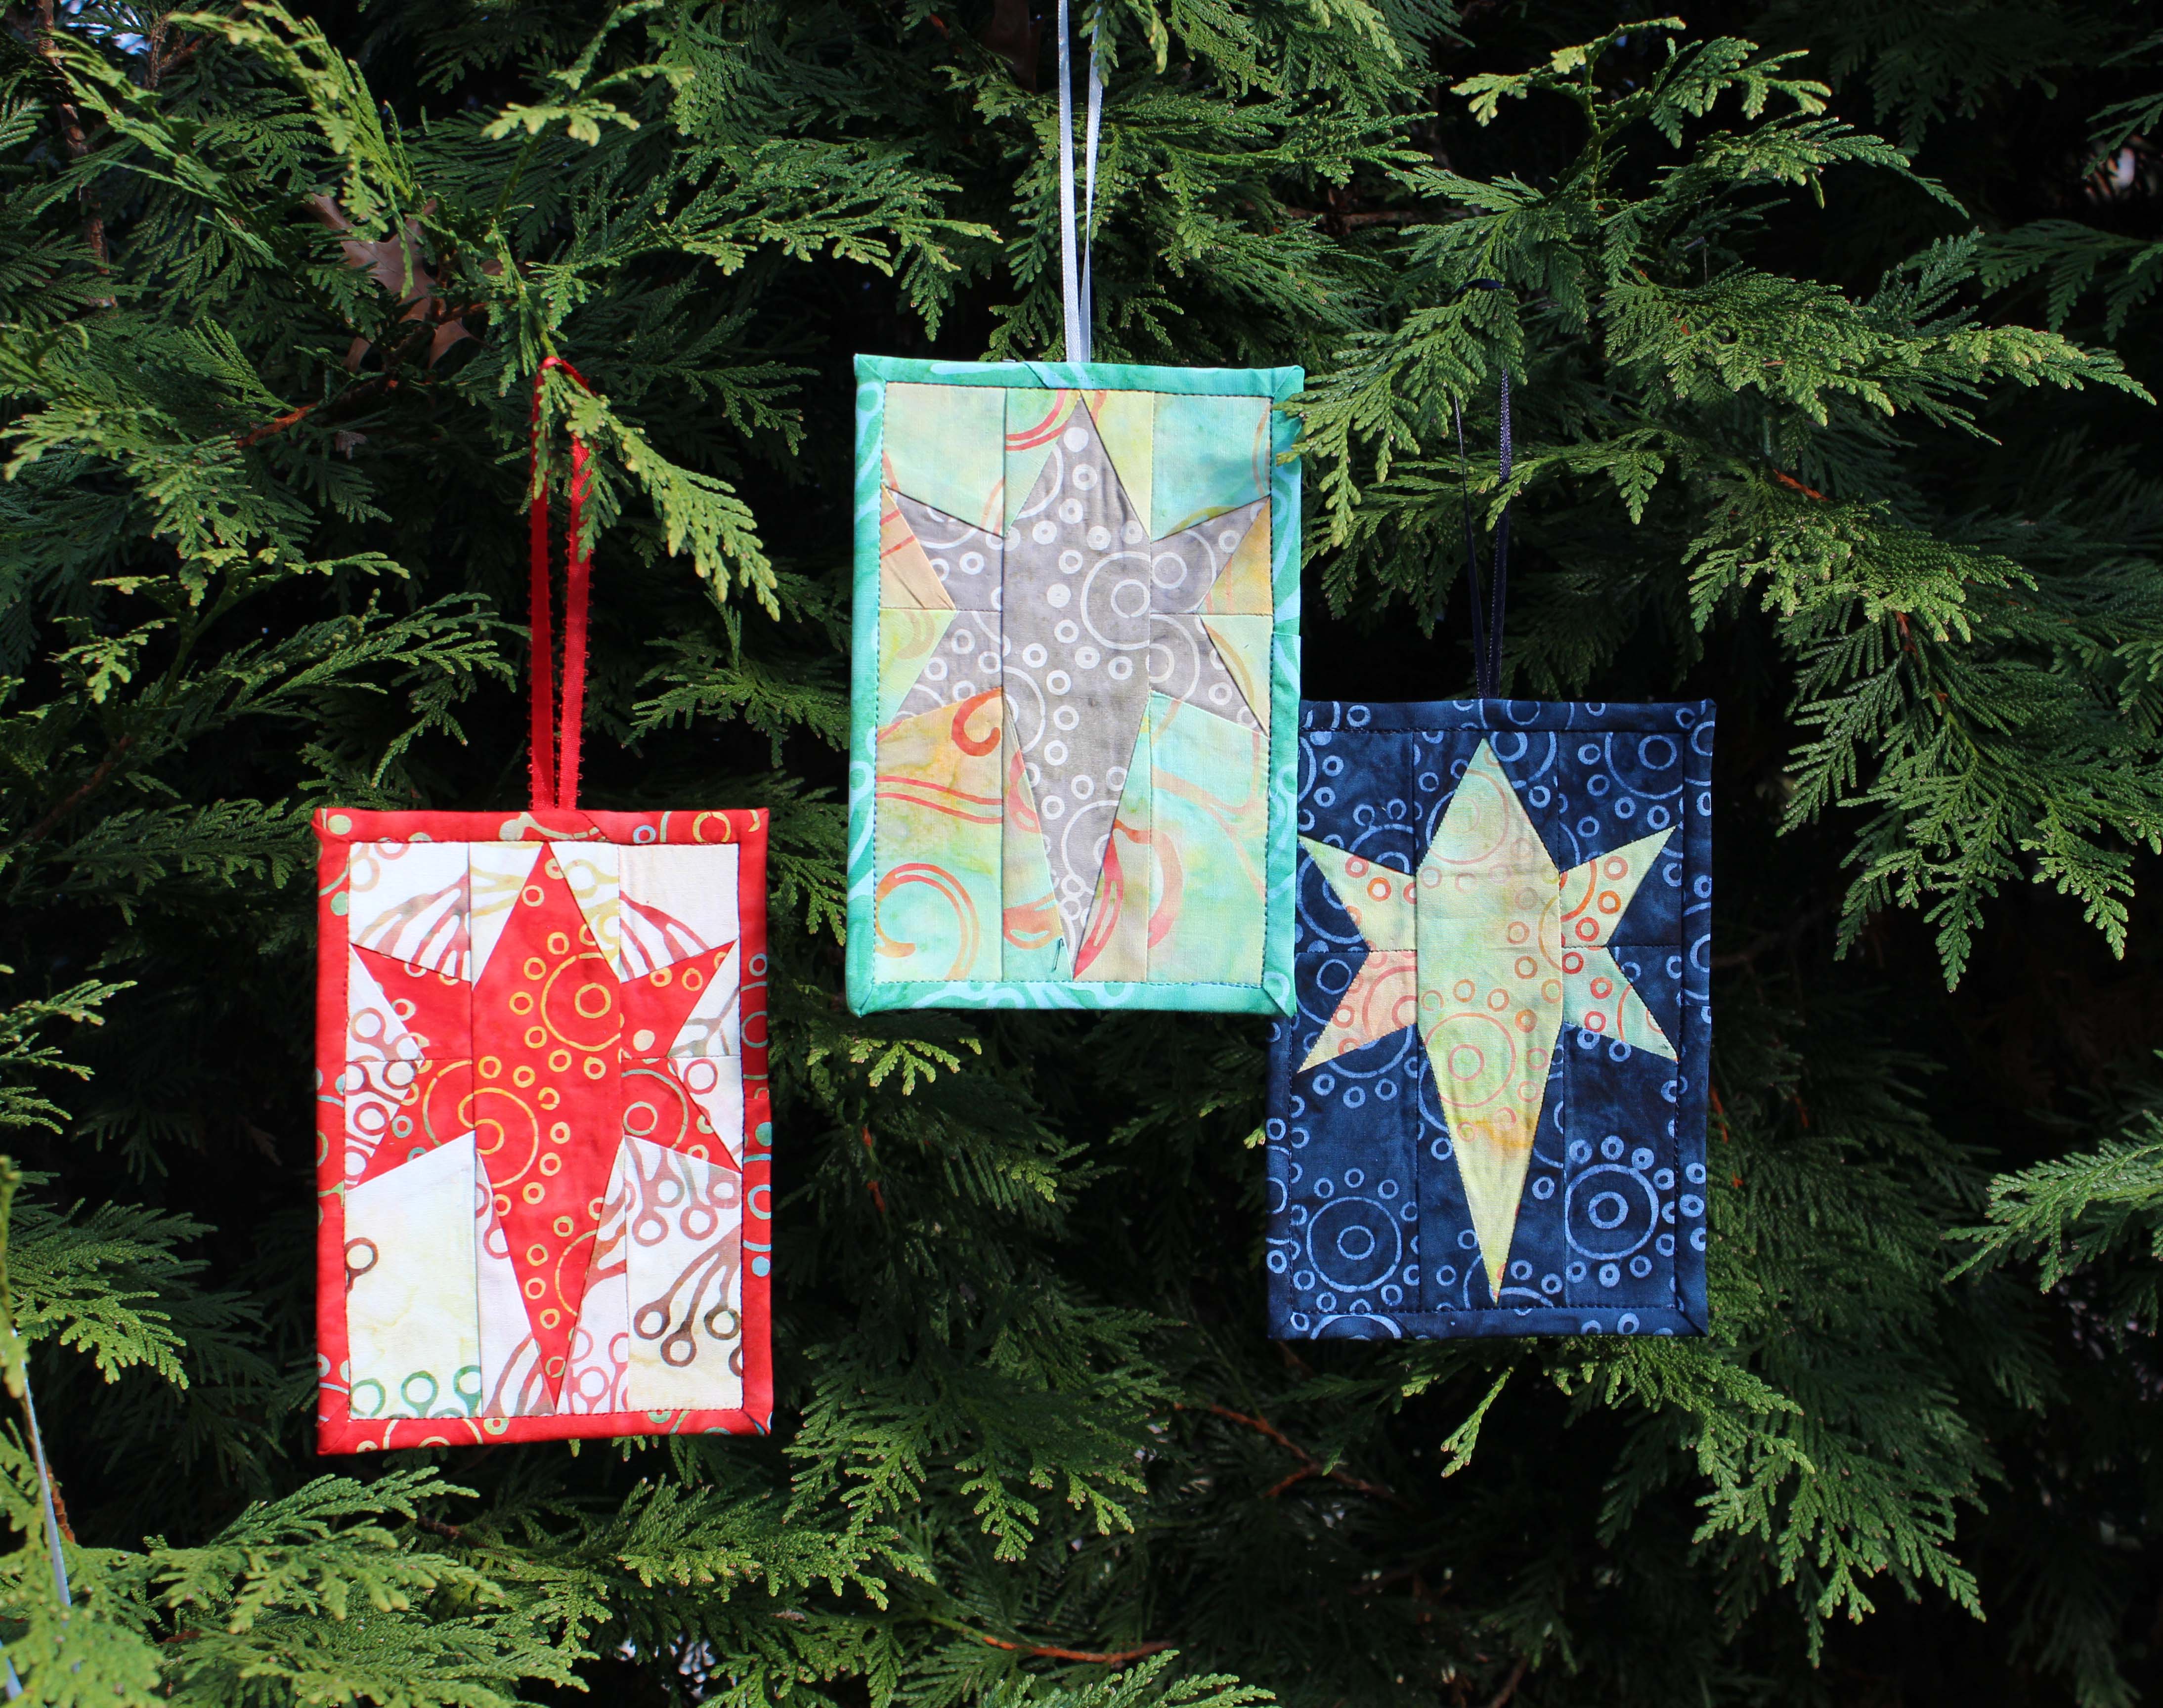
Or, you can send some holiday postcards.
(I very much want to mail these to someone! Leave a comment and I will pick two people to receive these)
The past few months have been a whirlwind. I’ve tried out some new things and some worked and some failed. I just tell myself that one day the ‘fails’ will be funny stories for me to tell as a keynote speaker at a future Sew Pro.
A bit of advice that I repeatedly heard at Sew Pro was “ASK.” Don’t be afraid to ask. Don’t be afraid to ask for exactly what you want.
Here I go, I am asking…
You’re about to see some of my quilt designs that I plan to create patterns for and put into an etsy shop in the new year. I’m asking all fabric designers reading here to look them over and think about showcasing one of your fabric lines with my pattern. I’m asking all pattern makers to think about being a tester for me. I’m asking distributors and publishers to consider my work. Contact me if you think we could work together.
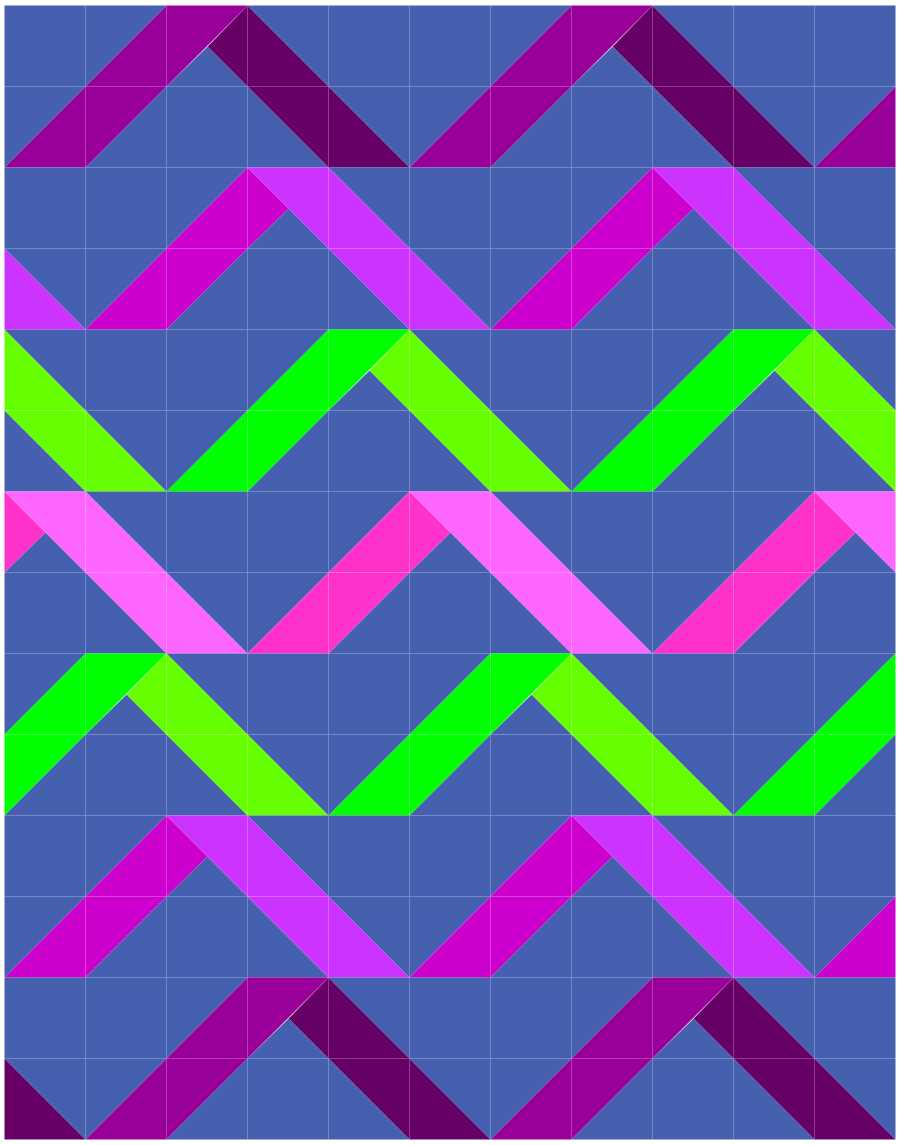
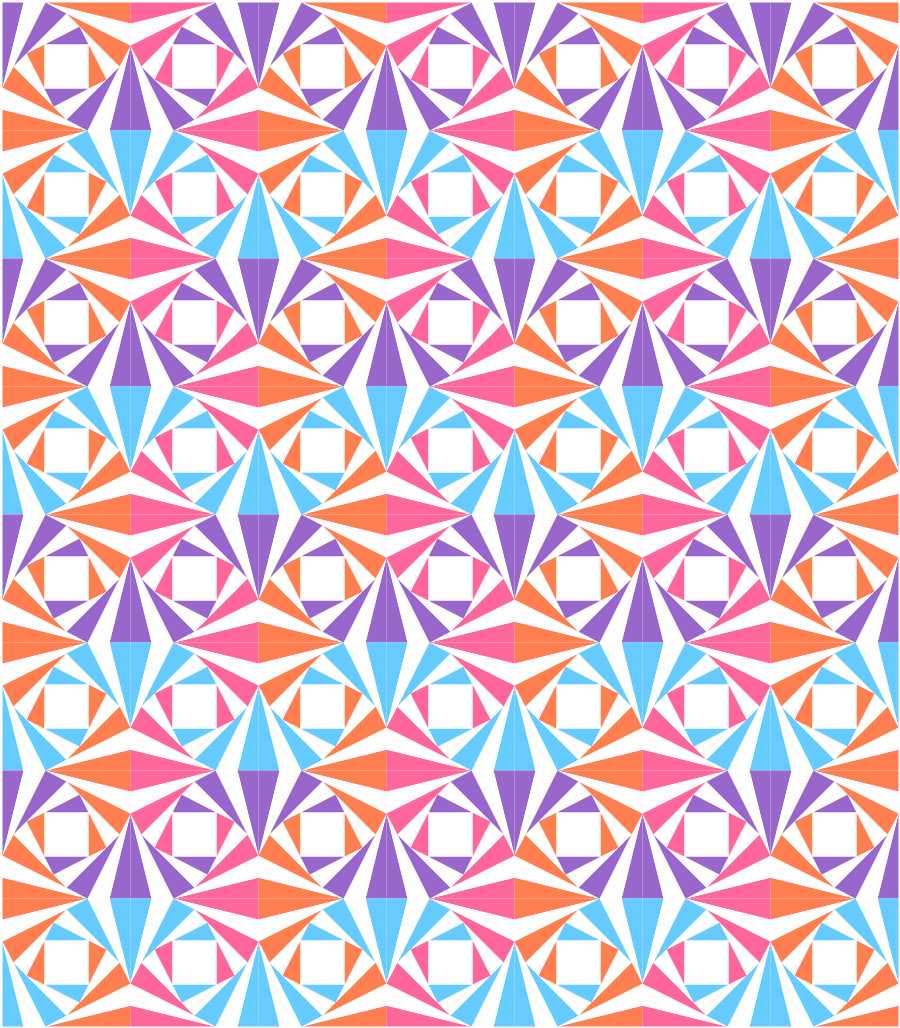
Rainbow Twirls and Aurora Borealis
Rainbow Twirls
Aurora Borealis
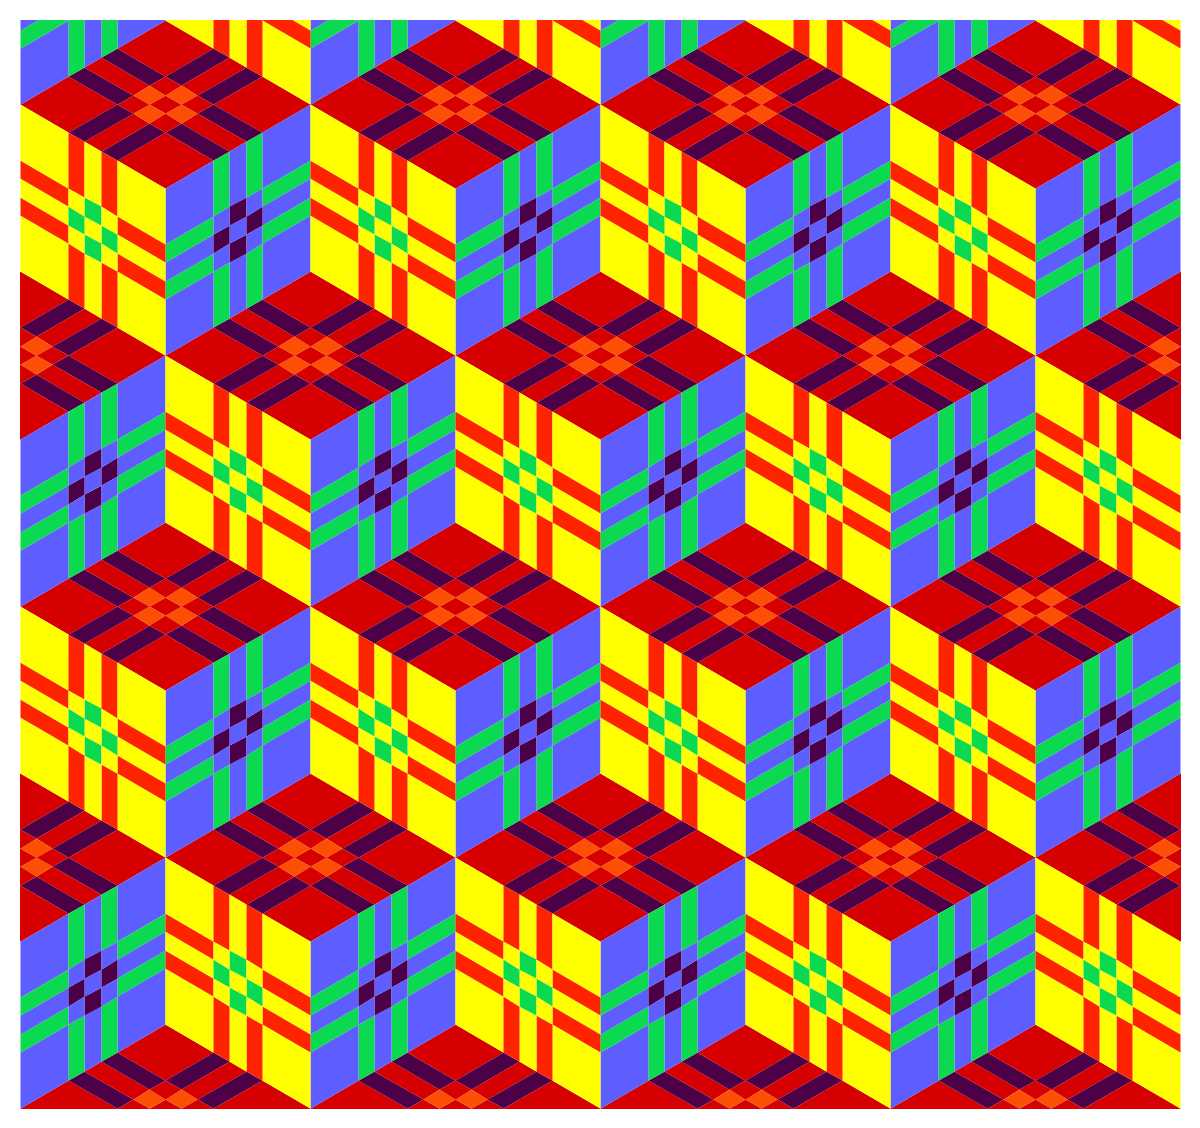
Star Flower and Patchwork Blocks
Star Flower
Patchwork Blocks
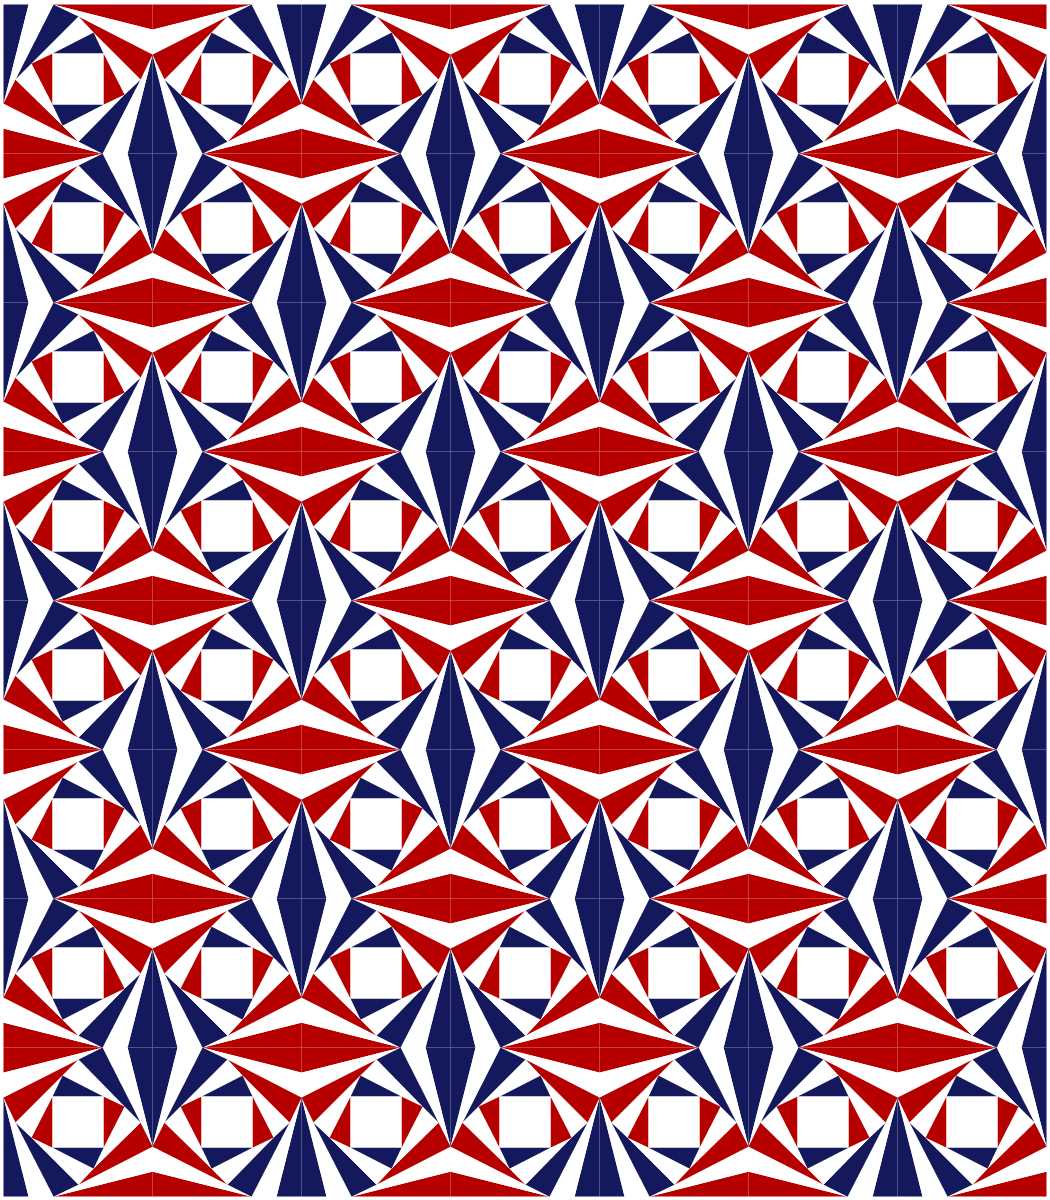
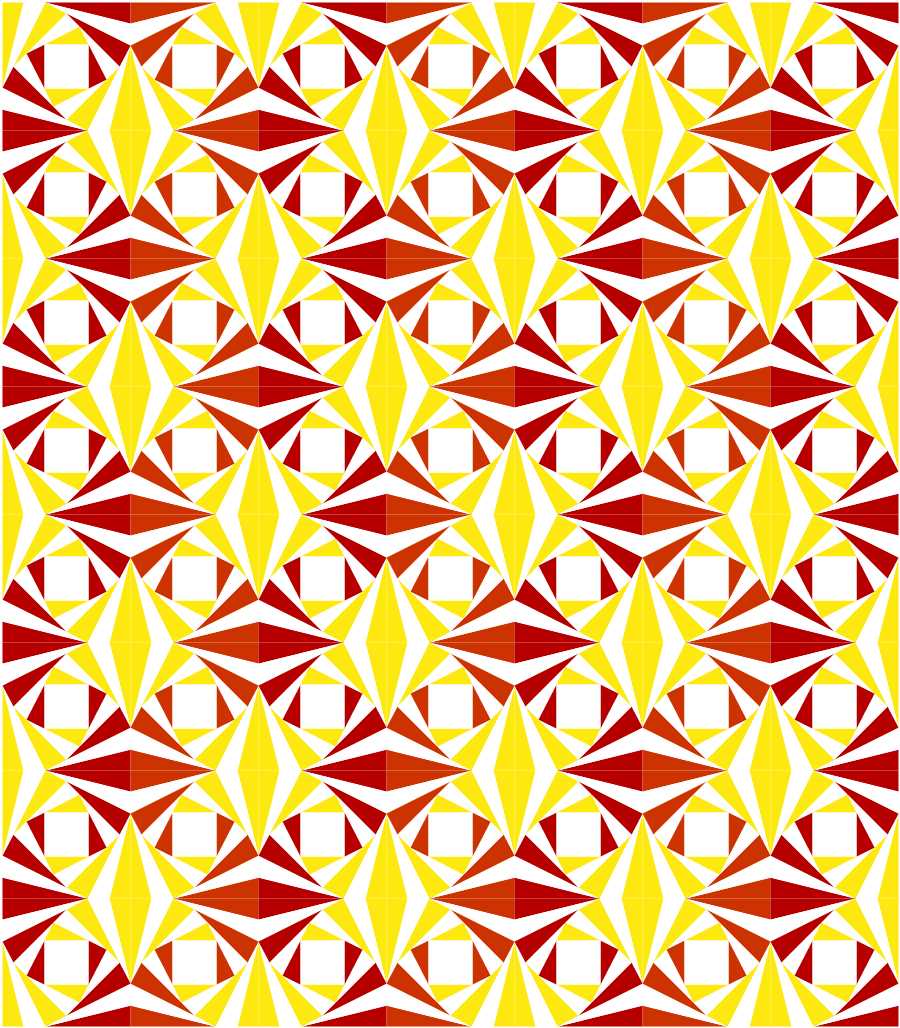
Valor, Jubilee, Ice, and Fall
Valor
Jubilee
Ice
Fall
I love how patterns can look so different just by playing with colors.
Wait…there’s more!!!
A couple of give-aways…
It would bring me so much joy to mail the two postcards I made. Leave me a comment here and I will randomly select two people on Saturday, November 19th.
As part of this blog hop, there is a Rafflecopter giveaway giving away three bundles of fabrics and patterns.
Please stop by all the other wonderful participants in the Sew Pro Blog hop. Everyone has so much to share.
Oh, I’m going to ask one more thing before I go. This is my first blog hop and I have had so much fun. If you are planning a blog hop, please think of me, I would love to participate. I would also love to participate in any sew alongs that may be starting in the new year.
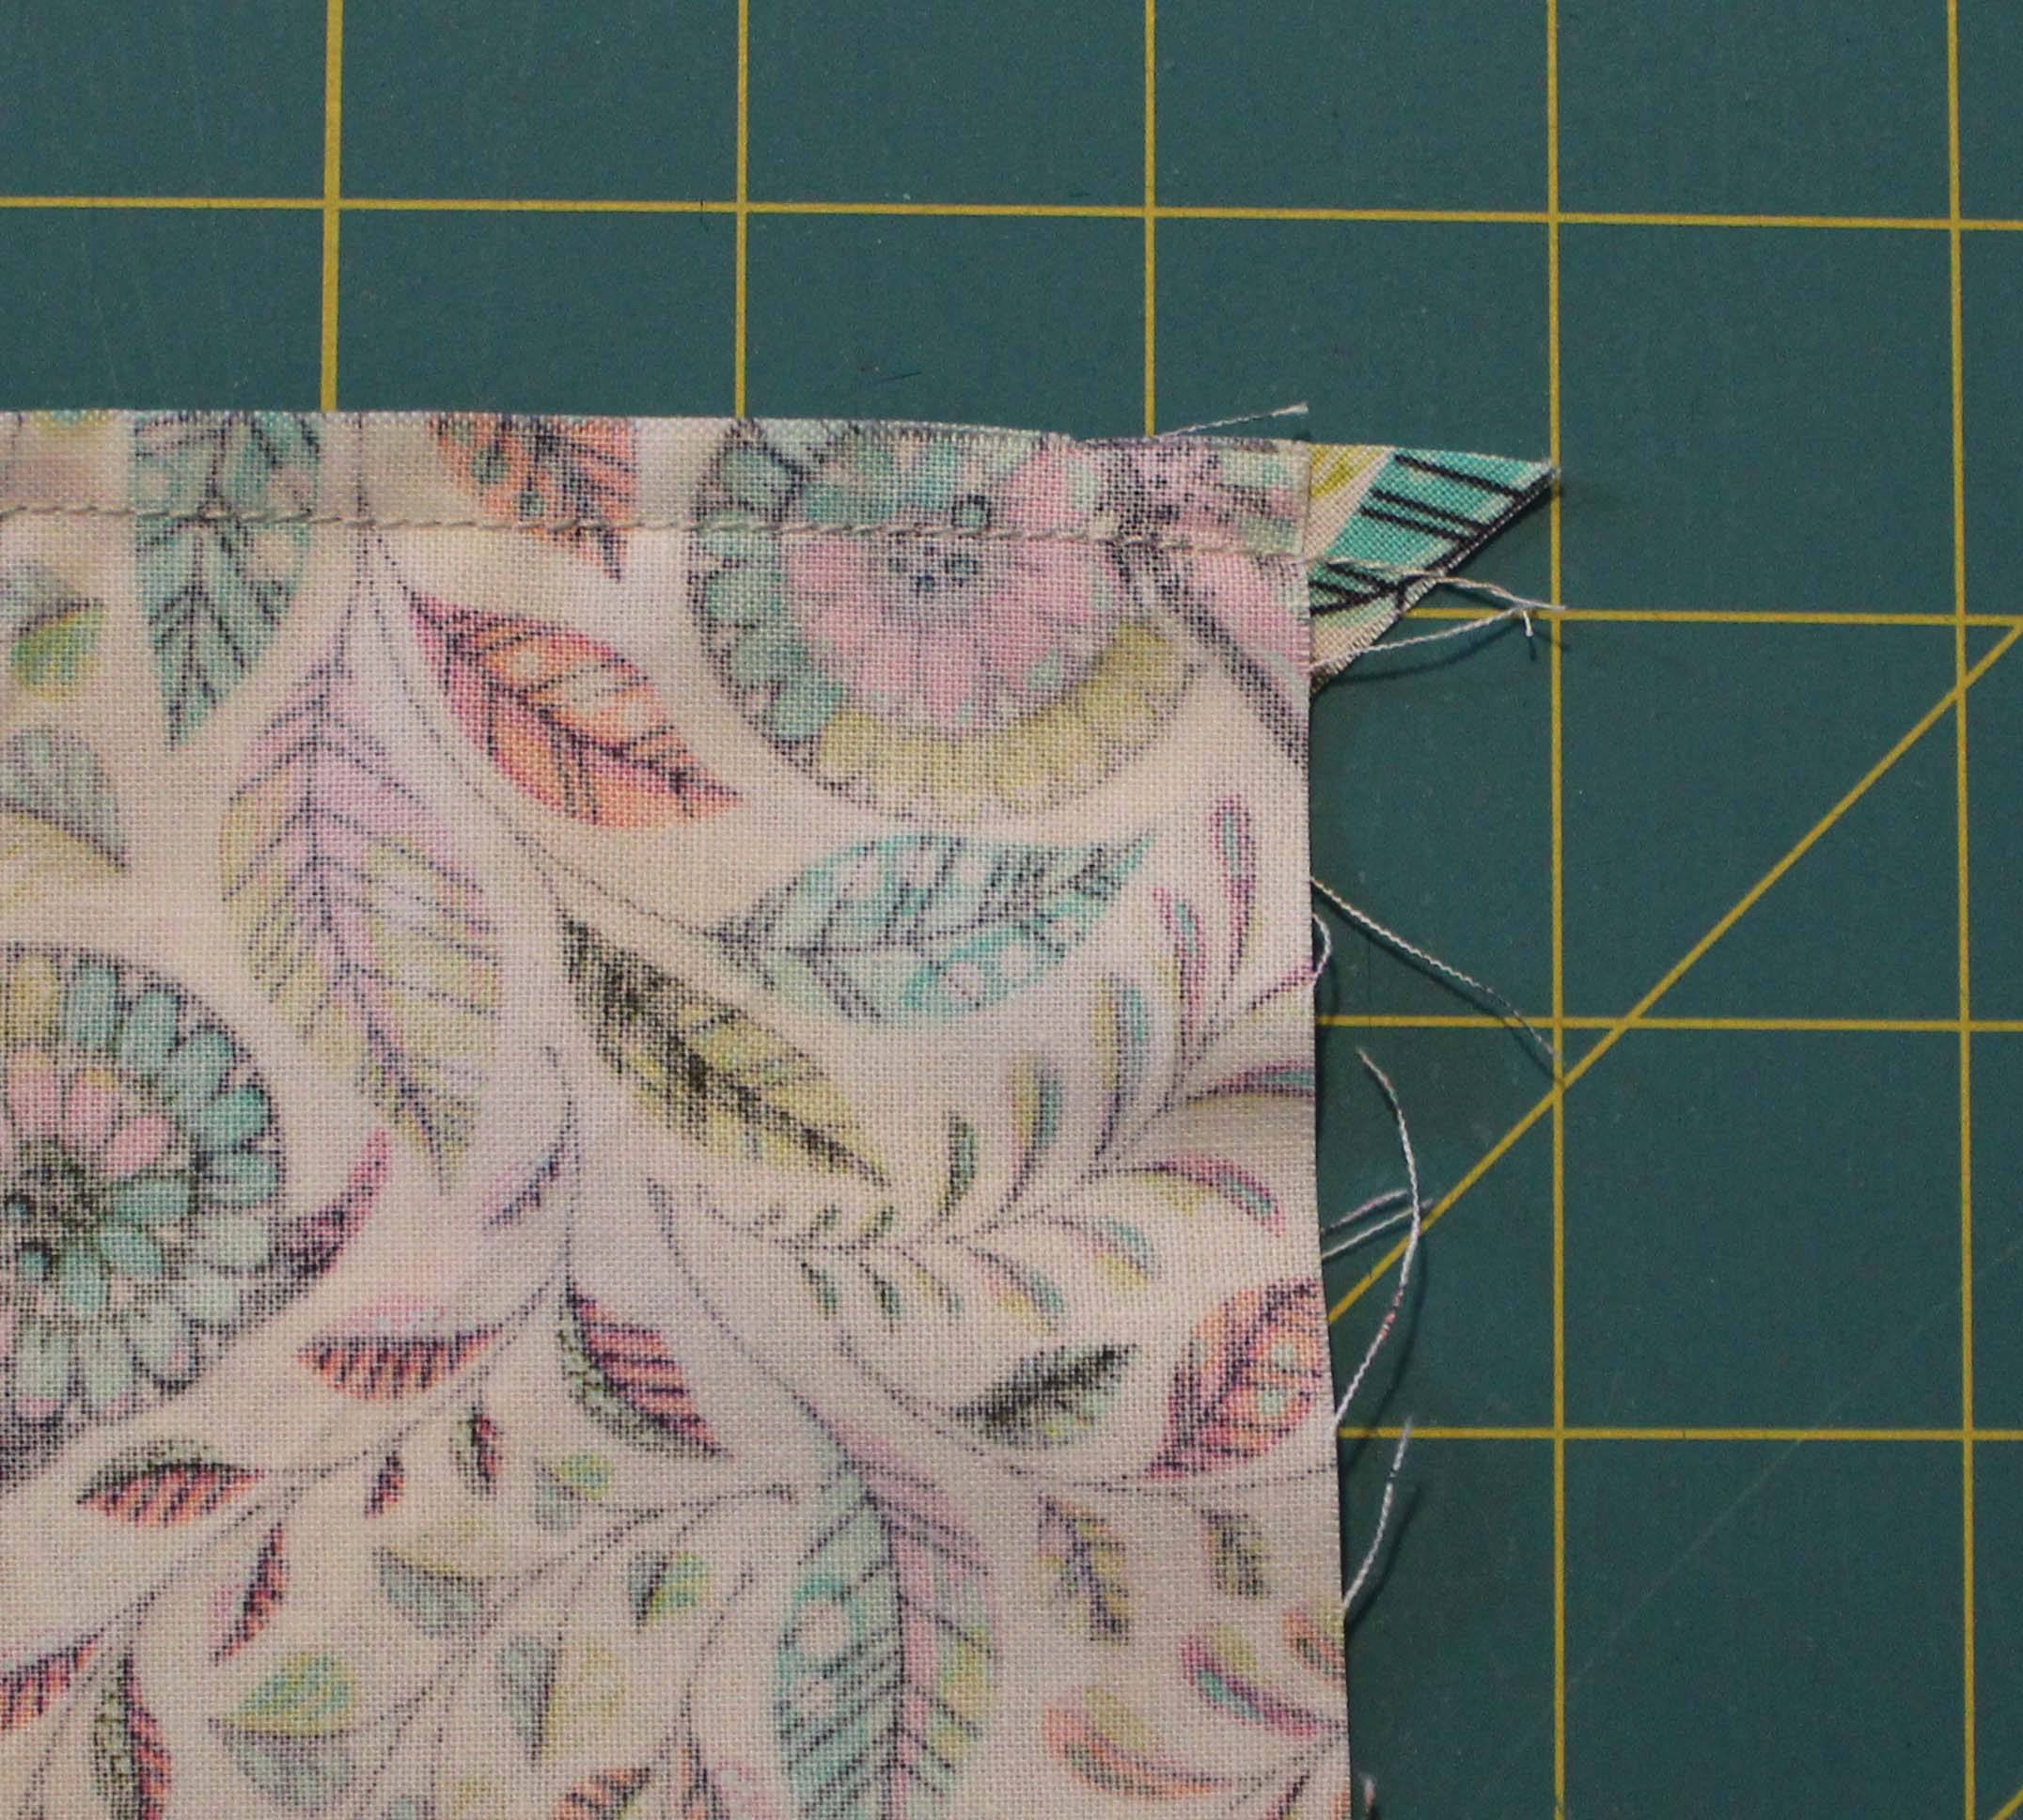
First, a little note. When you are adding the setting triangles and find you have some overhang, don’t worry. Leave the little dog ears and keep going. It will all work out in the end.
Do you get nervous putting the quilt top together? I do. After all that work making each block, I take a deep breath with each seam and hope that it matches up.
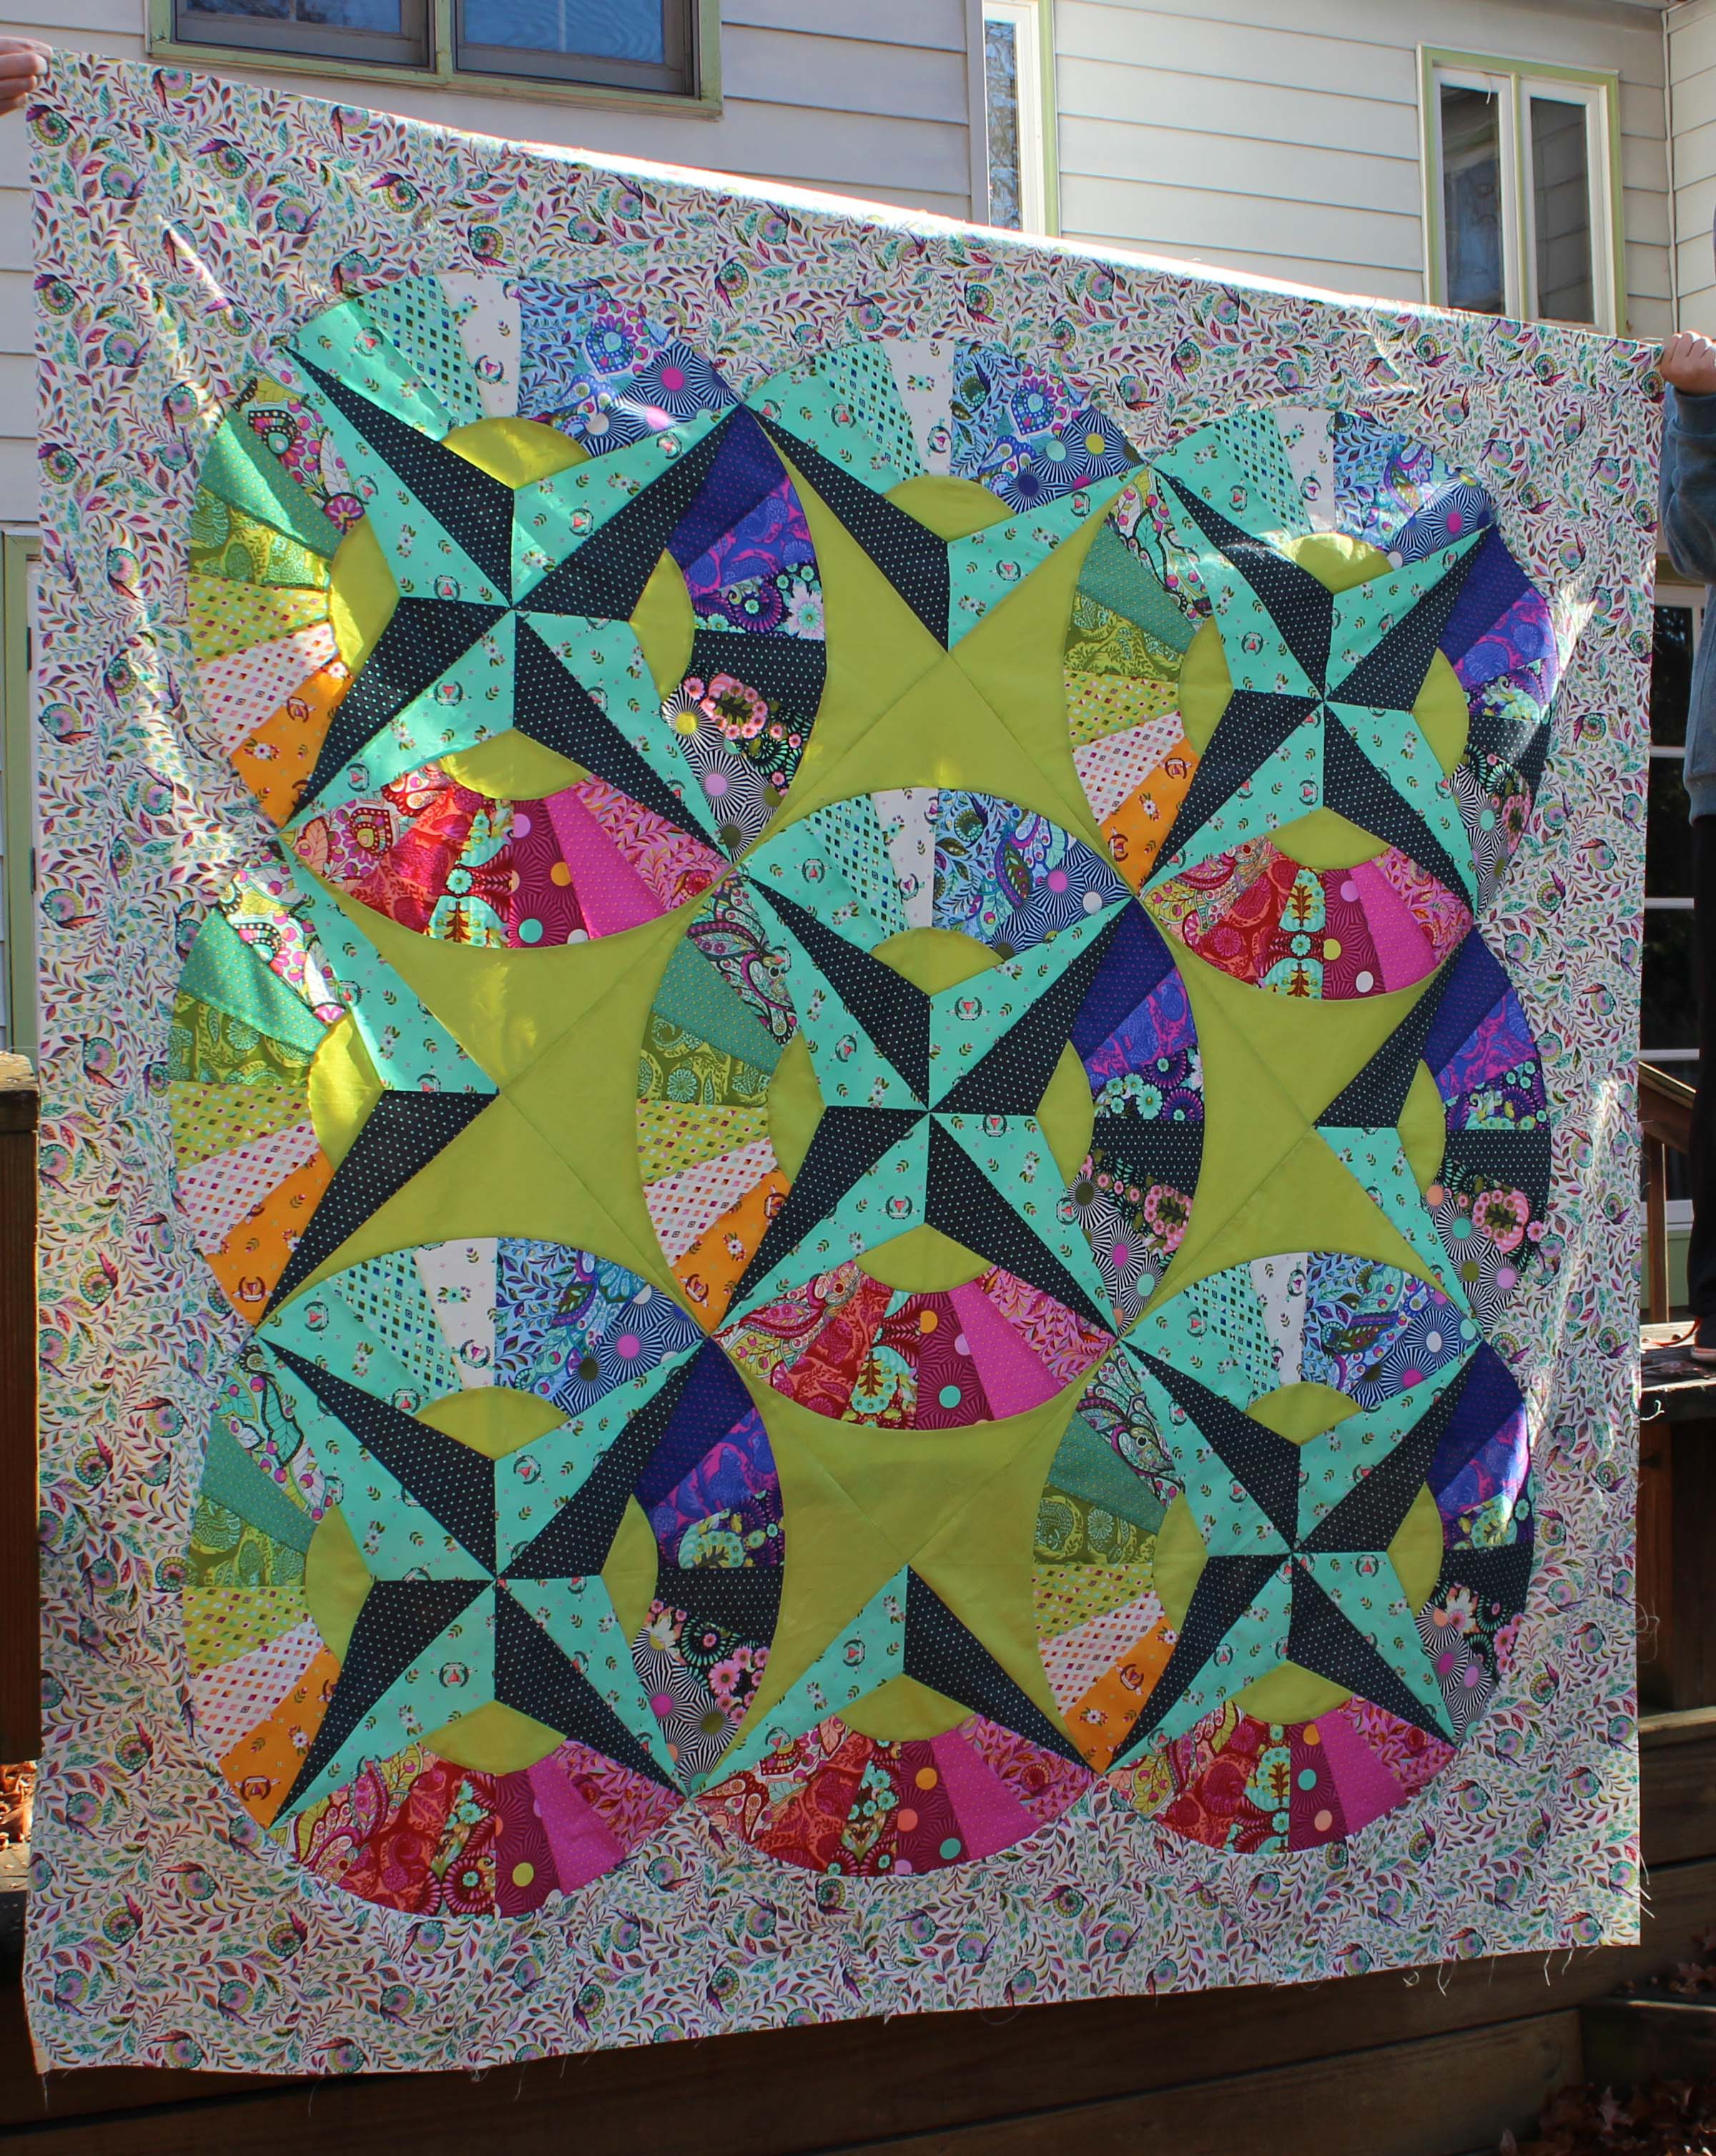
I’m happy to say that my Fandango Quilt Top matches up wonderfully!!
I am so thrilled! I hope you are just as happy with your tops as you finish them.
Thank you so much for following along with me on this quilt along, but we are not done yet! There is still quilting to do. I will not have this quilted by next Tuesday. It just isn’t going to happen. I will have an update and there are so many other posts planned.
For instance;
The SewPro Star Blog hop is this week. My post will be up on Thursday with my first ever pattern!
I am pattern testing the most adorable baby quilt and will be showcasing it here very soon
and, ofcourse,
Holiday Crafting!!!!
I hope you will continue to join me here and on instagram!! You can find me there as @lovinglylissa
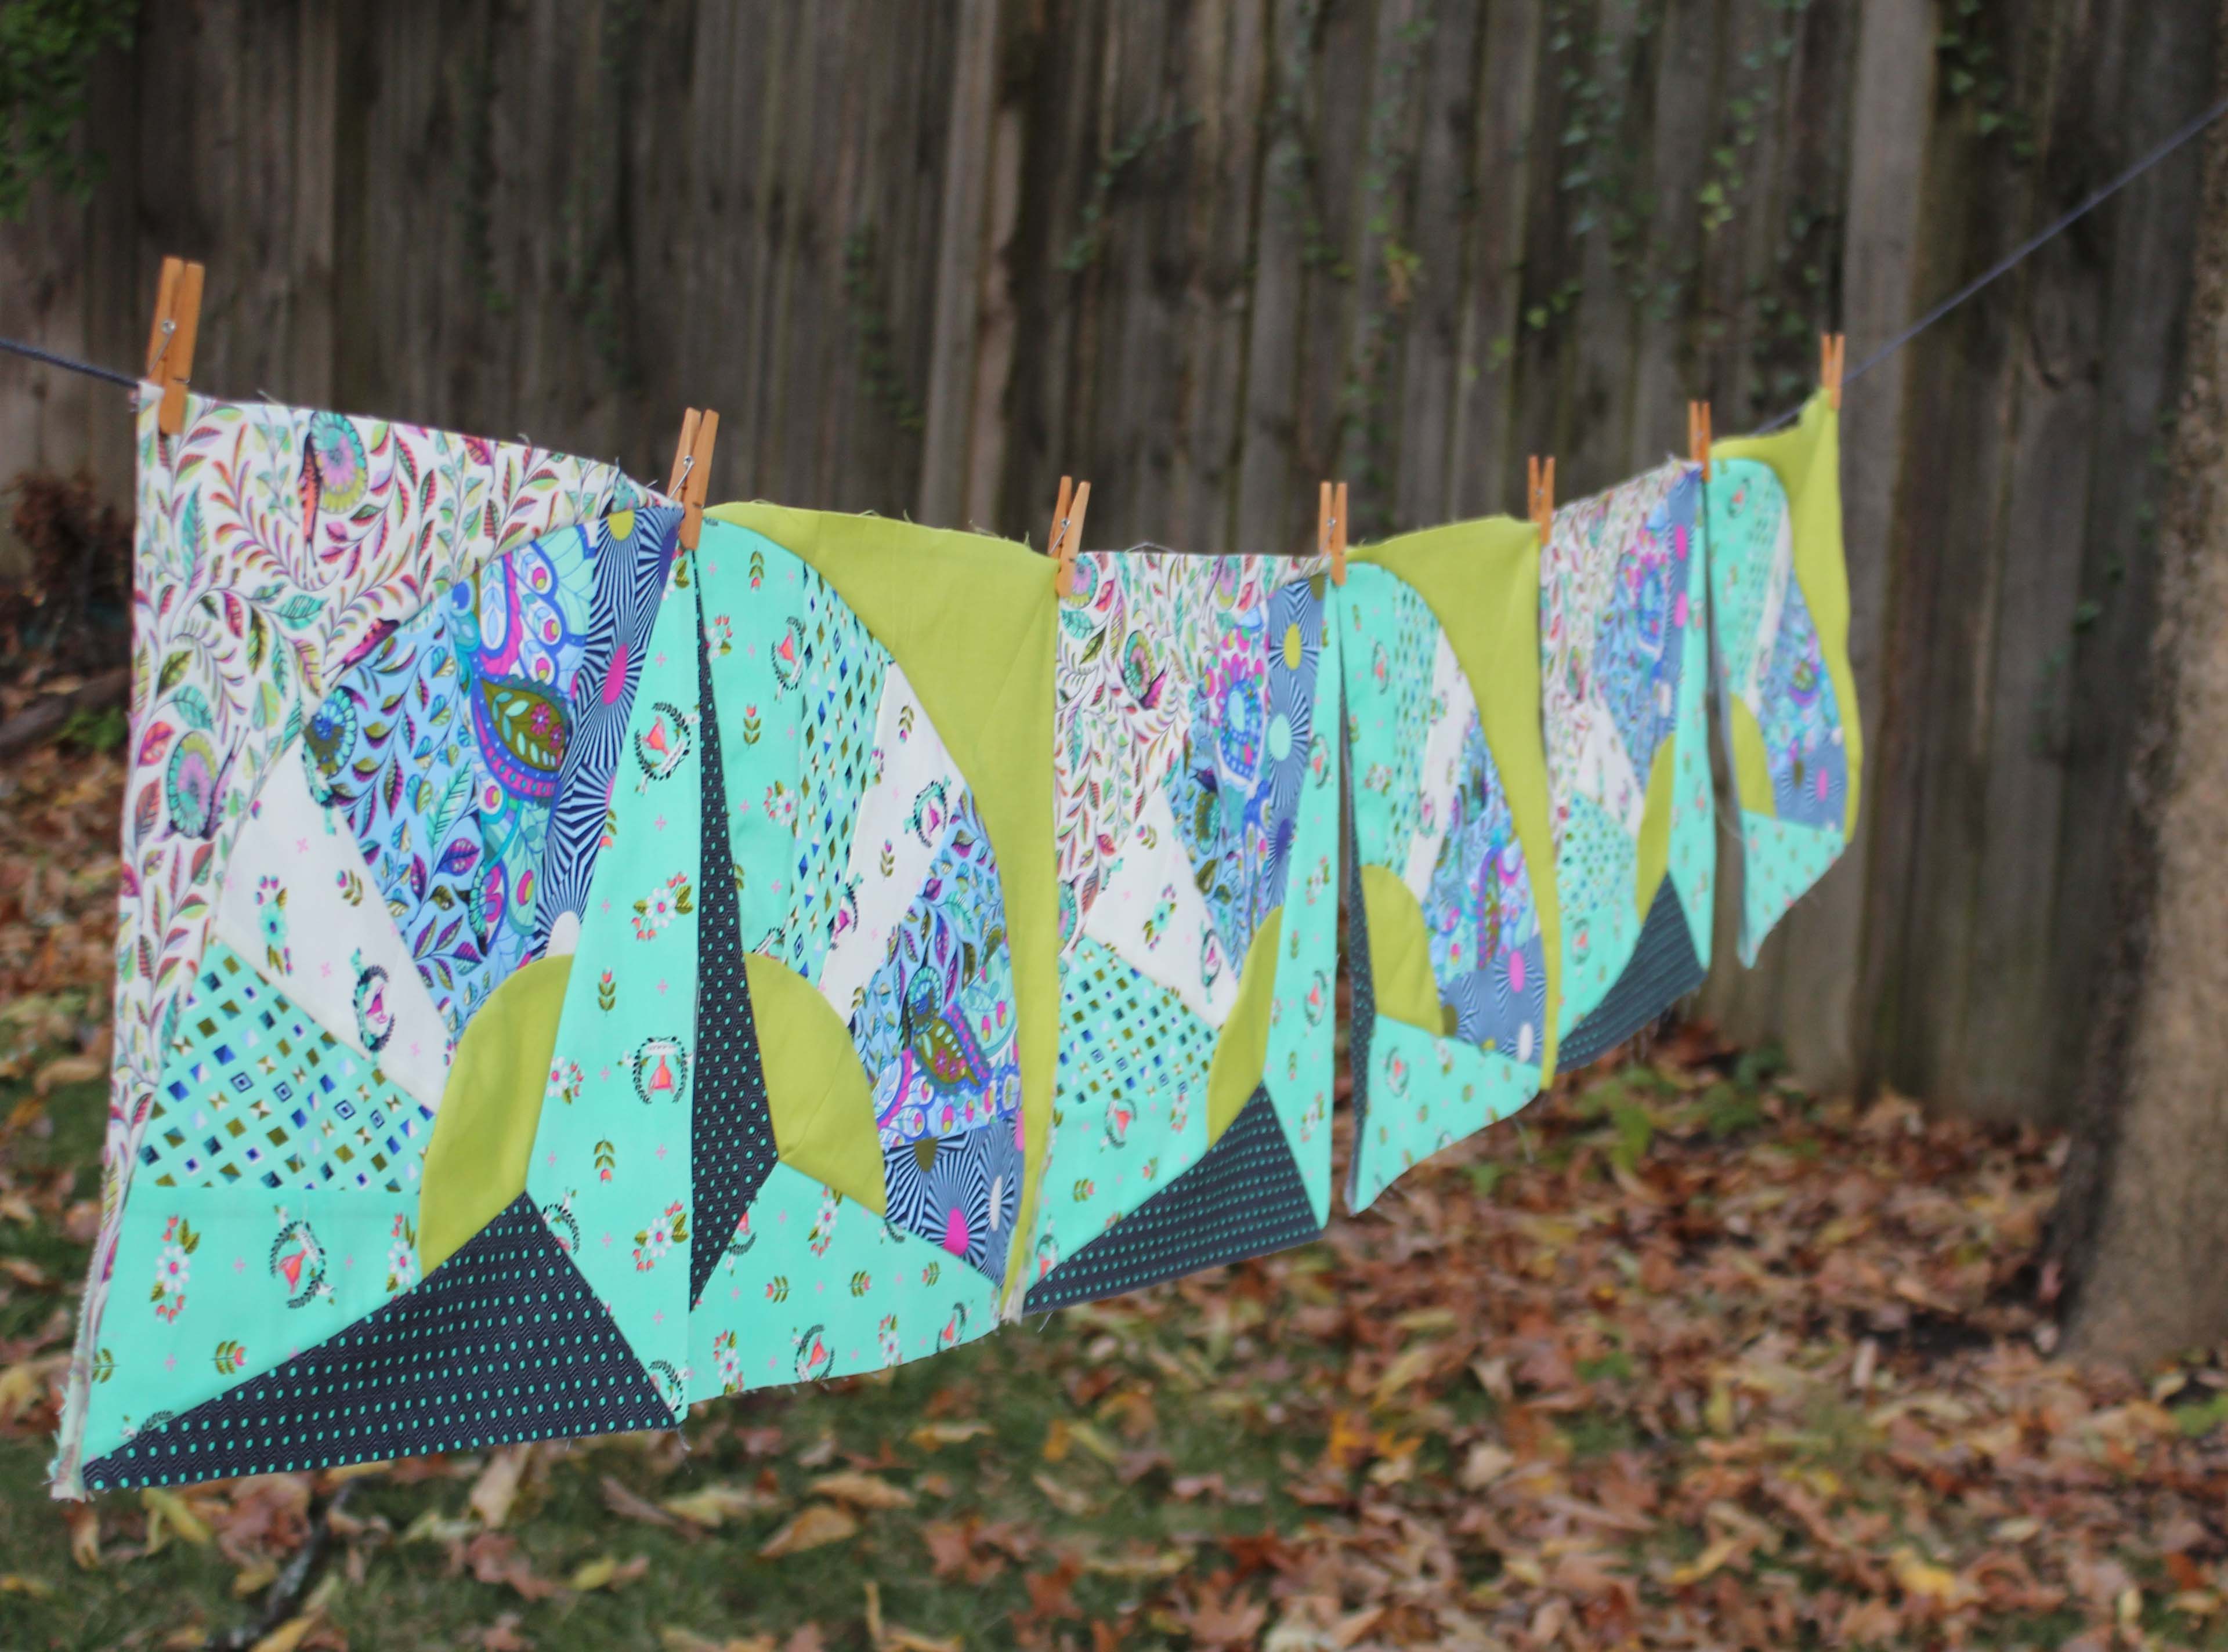
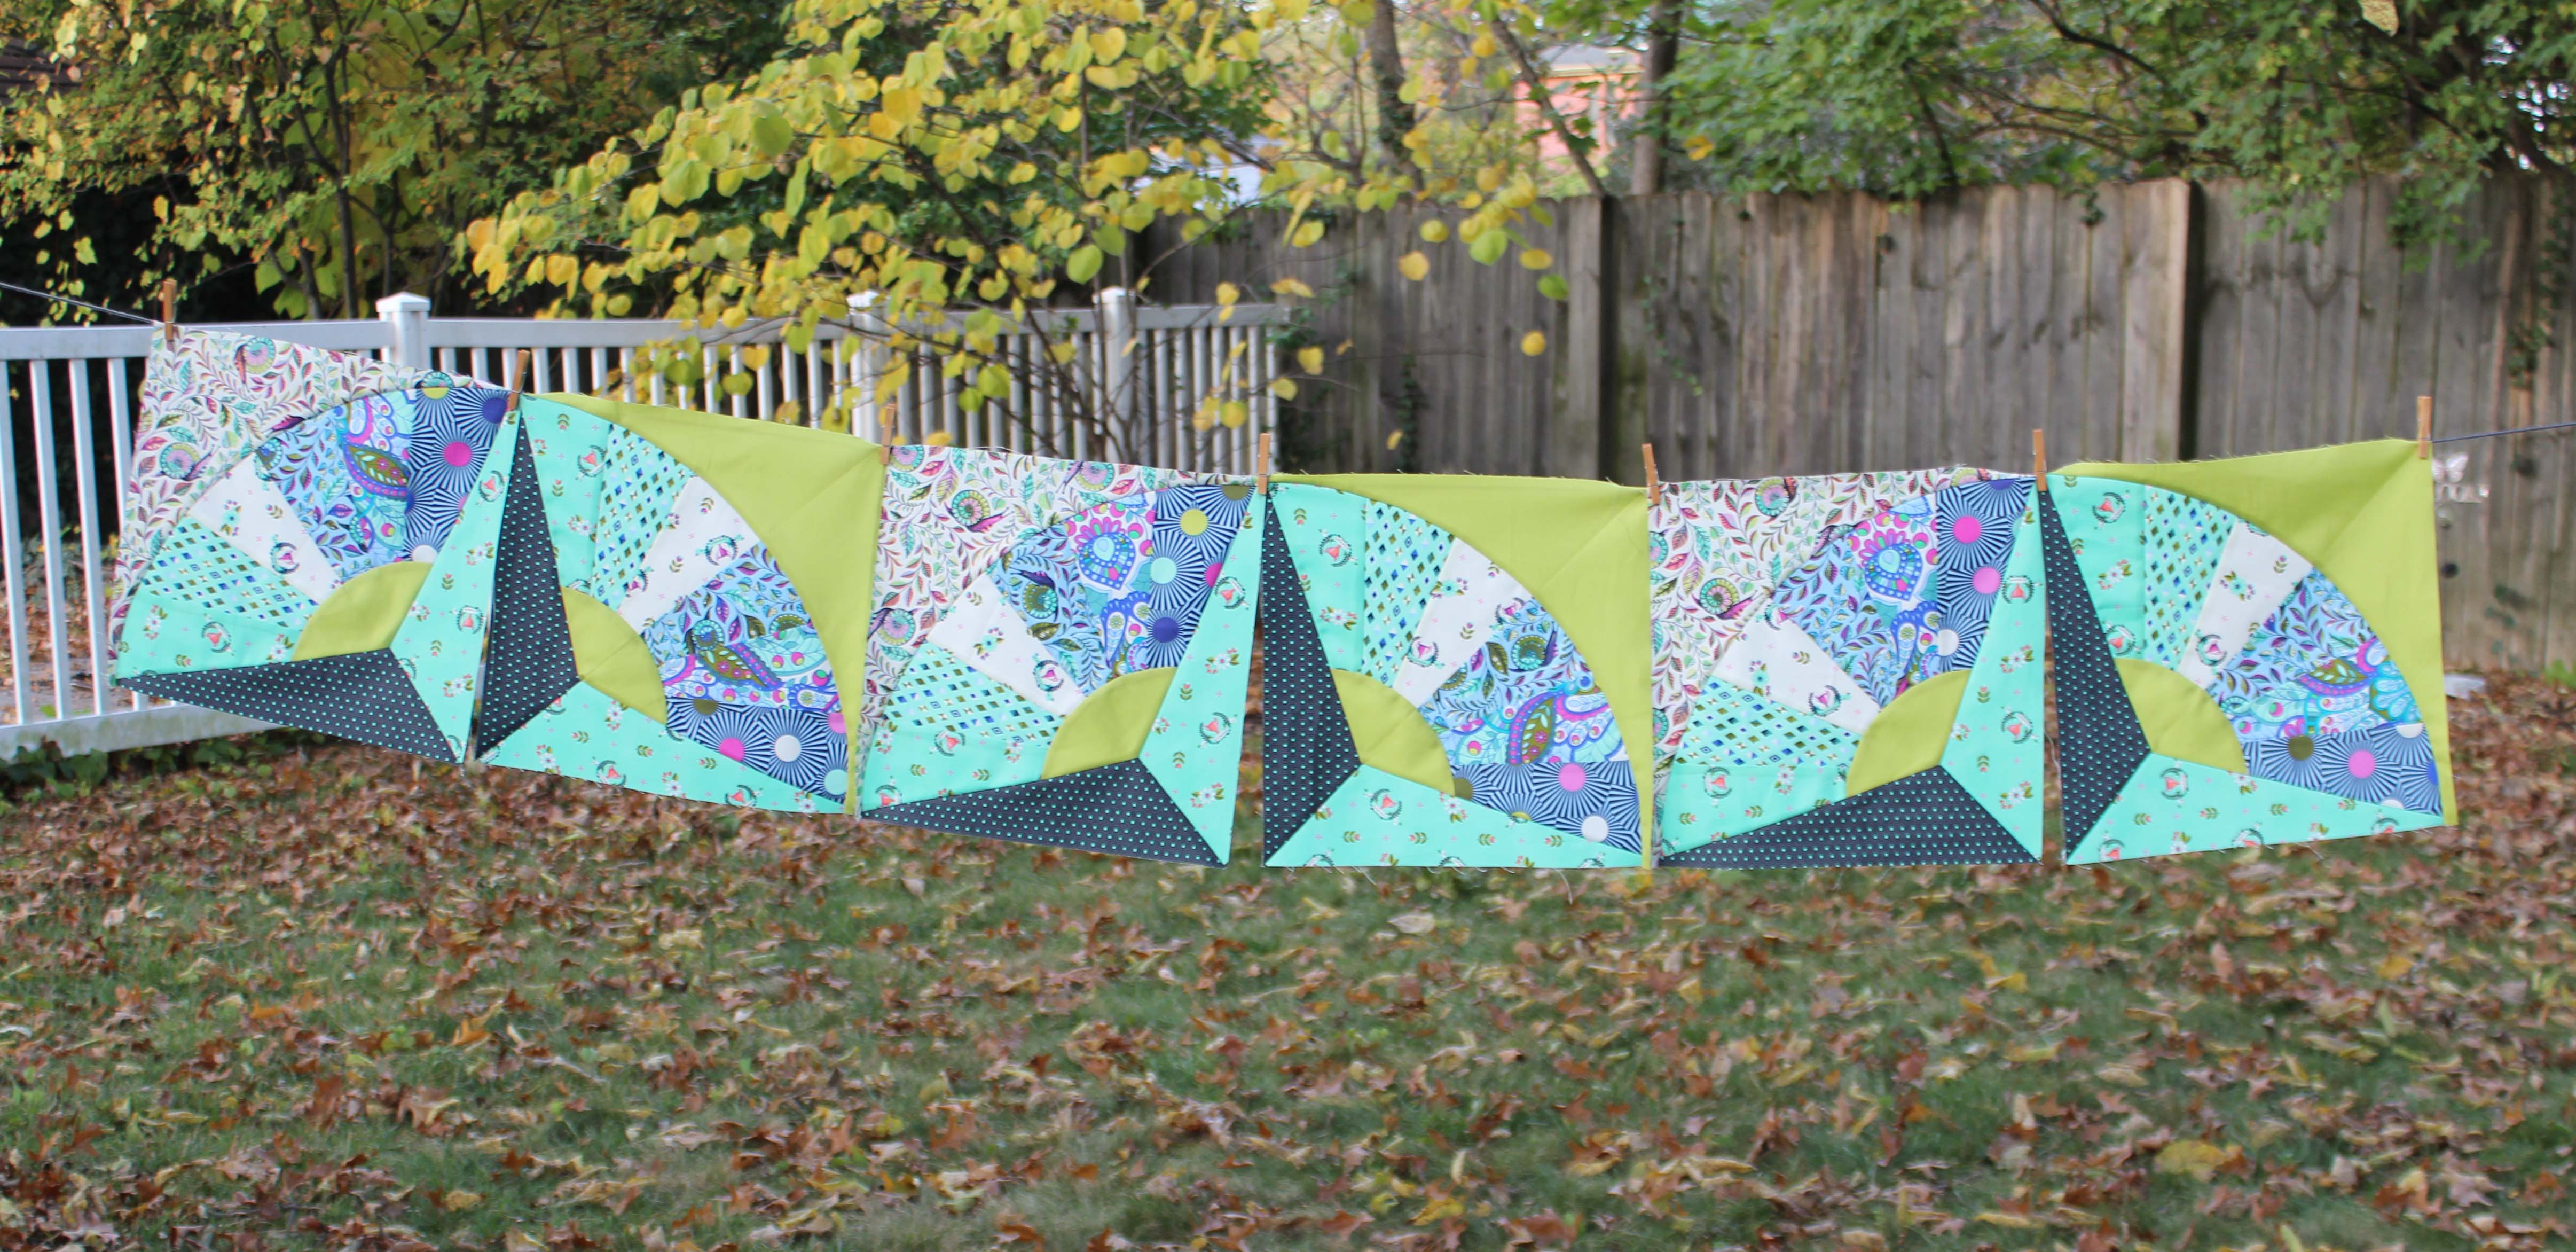
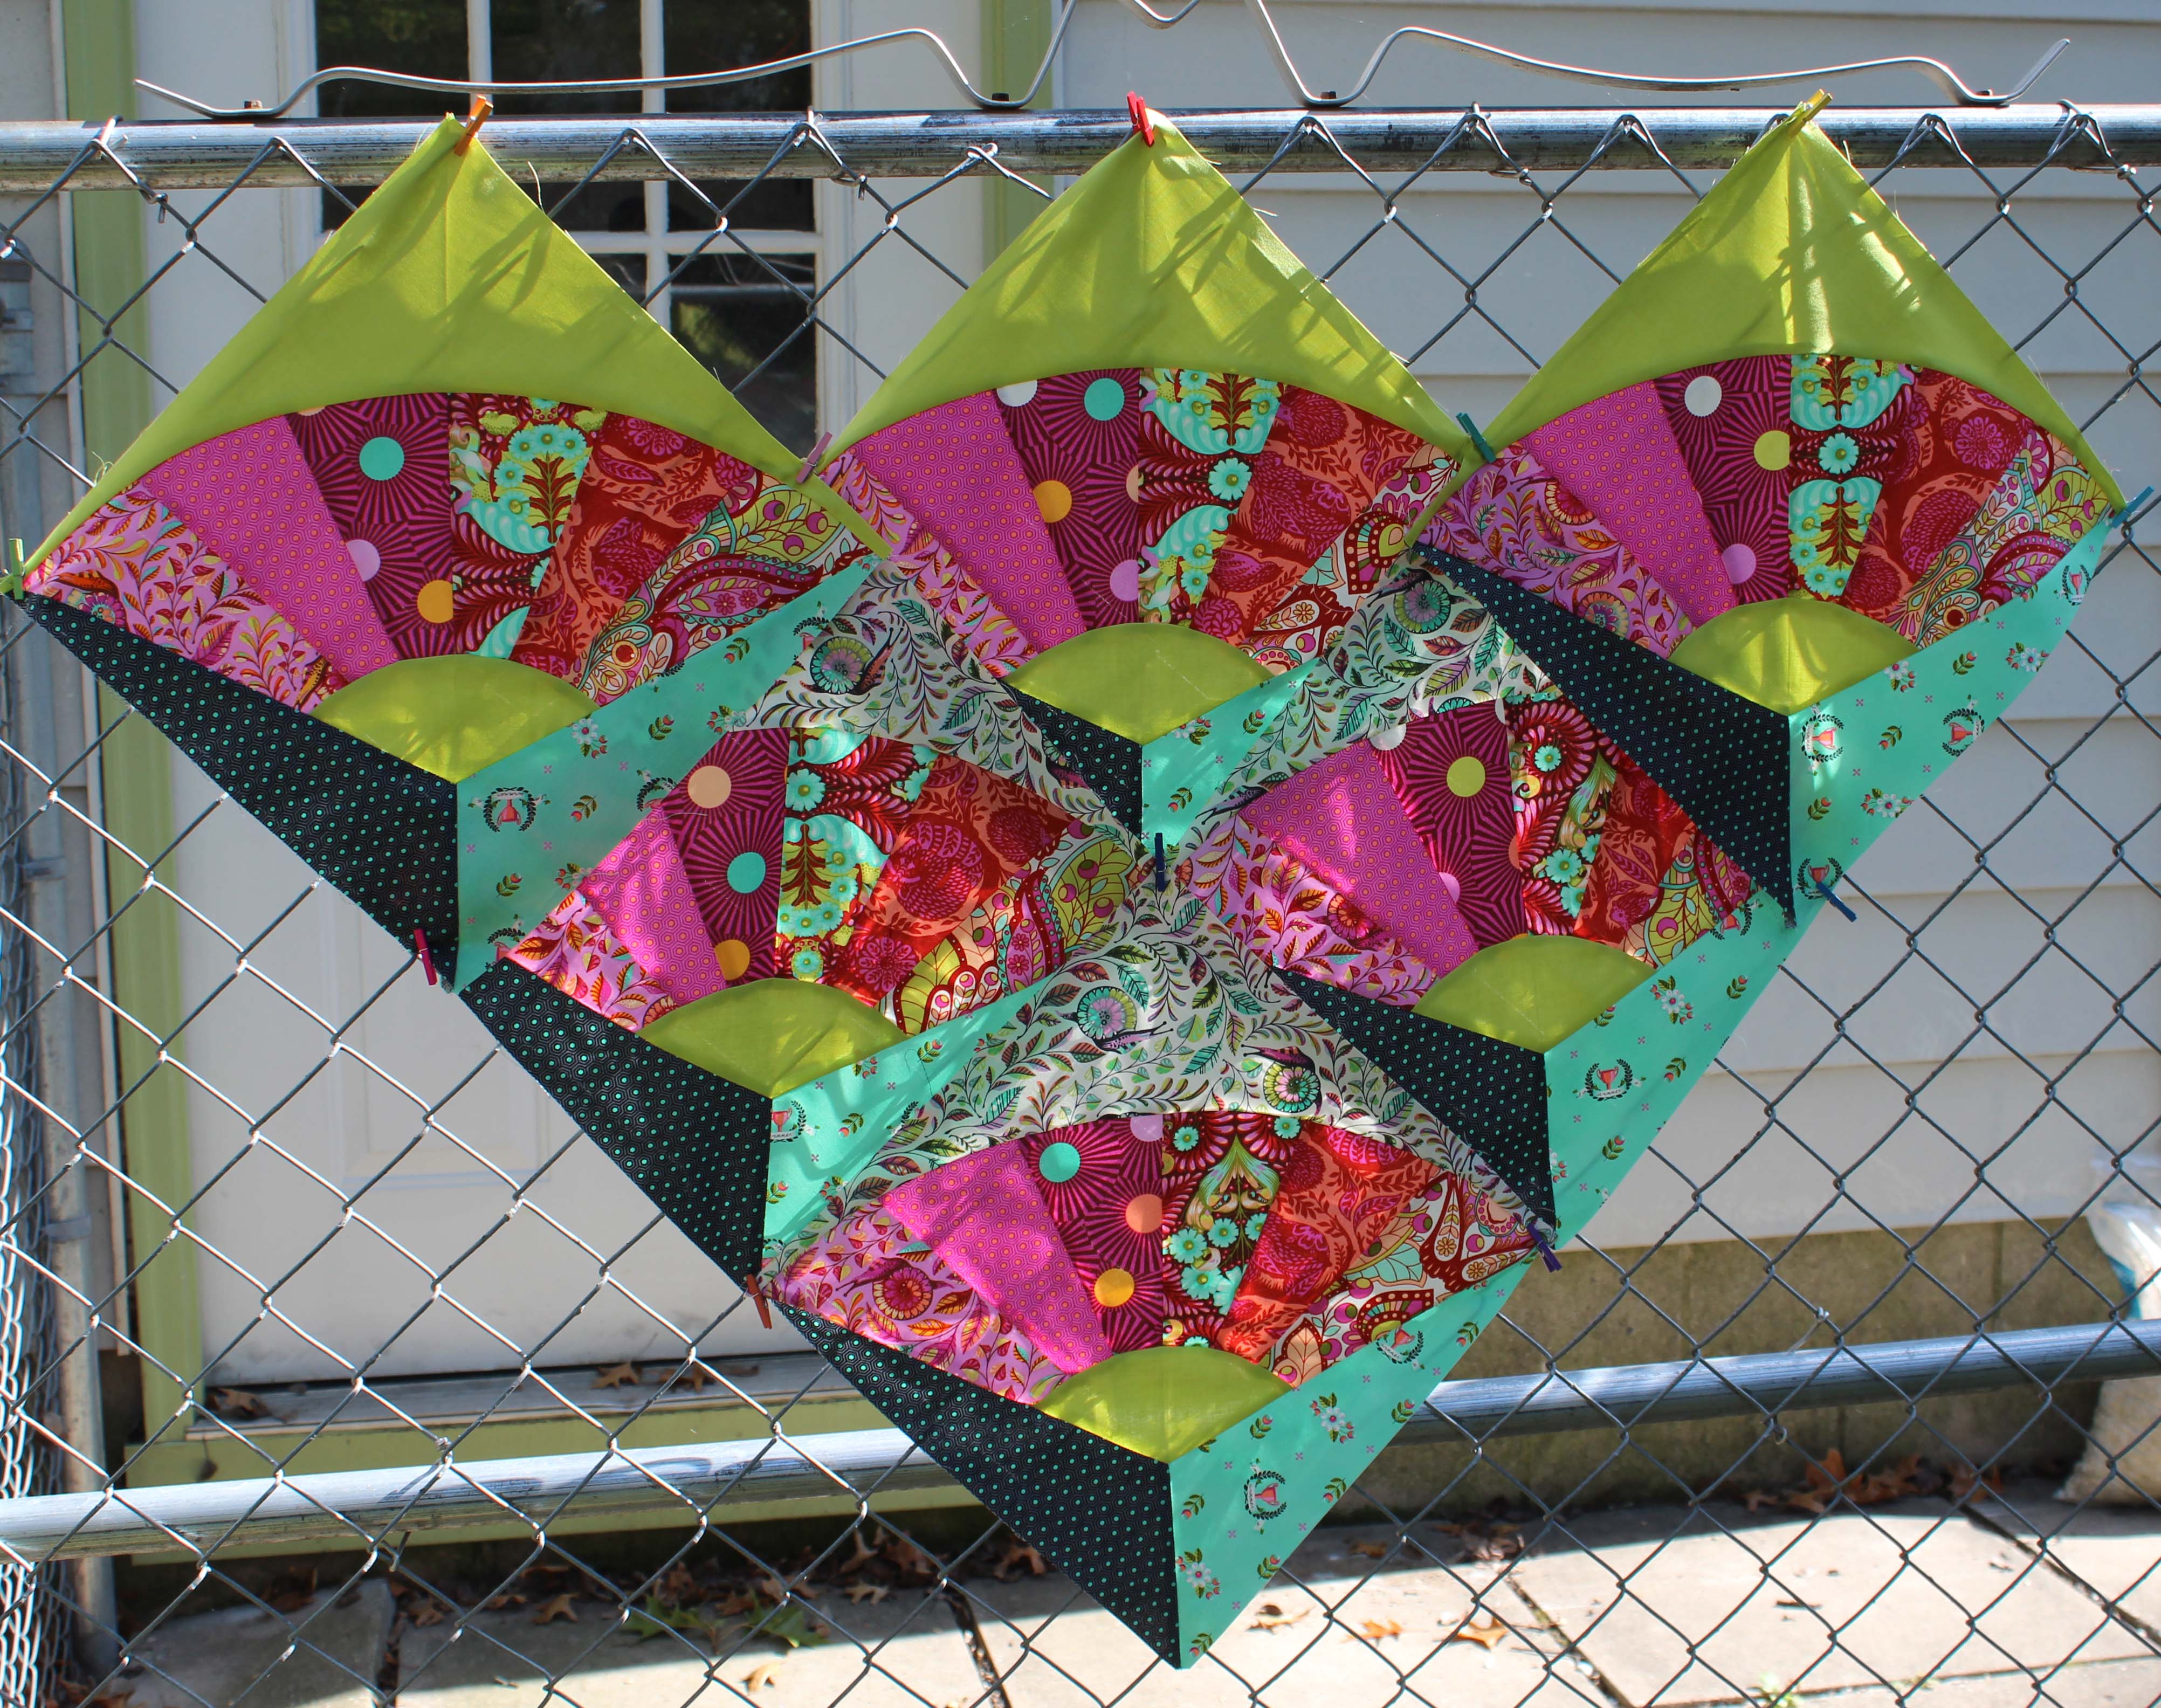
I want to send a special thank you out to my quilt top holders. Don’t they just look thrilled to be helping their Mom? LOL!
Well, I am actually very close. I have 5 of 6 blocks done this week. I mis-cut one of the templates and didn’t have enough left over fabric to make a new one. I called my local quilt shops and noone had this fabric so I ordered it online.
I ordered the wrong color!
So, I am waiting for another package to arrive. I ordered backing for the quilt as well while I was at it.
This up coming week is going to be a busy one. I will be putting this quilt top together and preparing a special blog.
Next week is the Sew Pro Star blog hop and I am participating along with many wonderful people. I will have my first pattern to share with you for free!
Not much new for me to report this week. The blocks went together very smoothly and I even was able to work on other things this week.
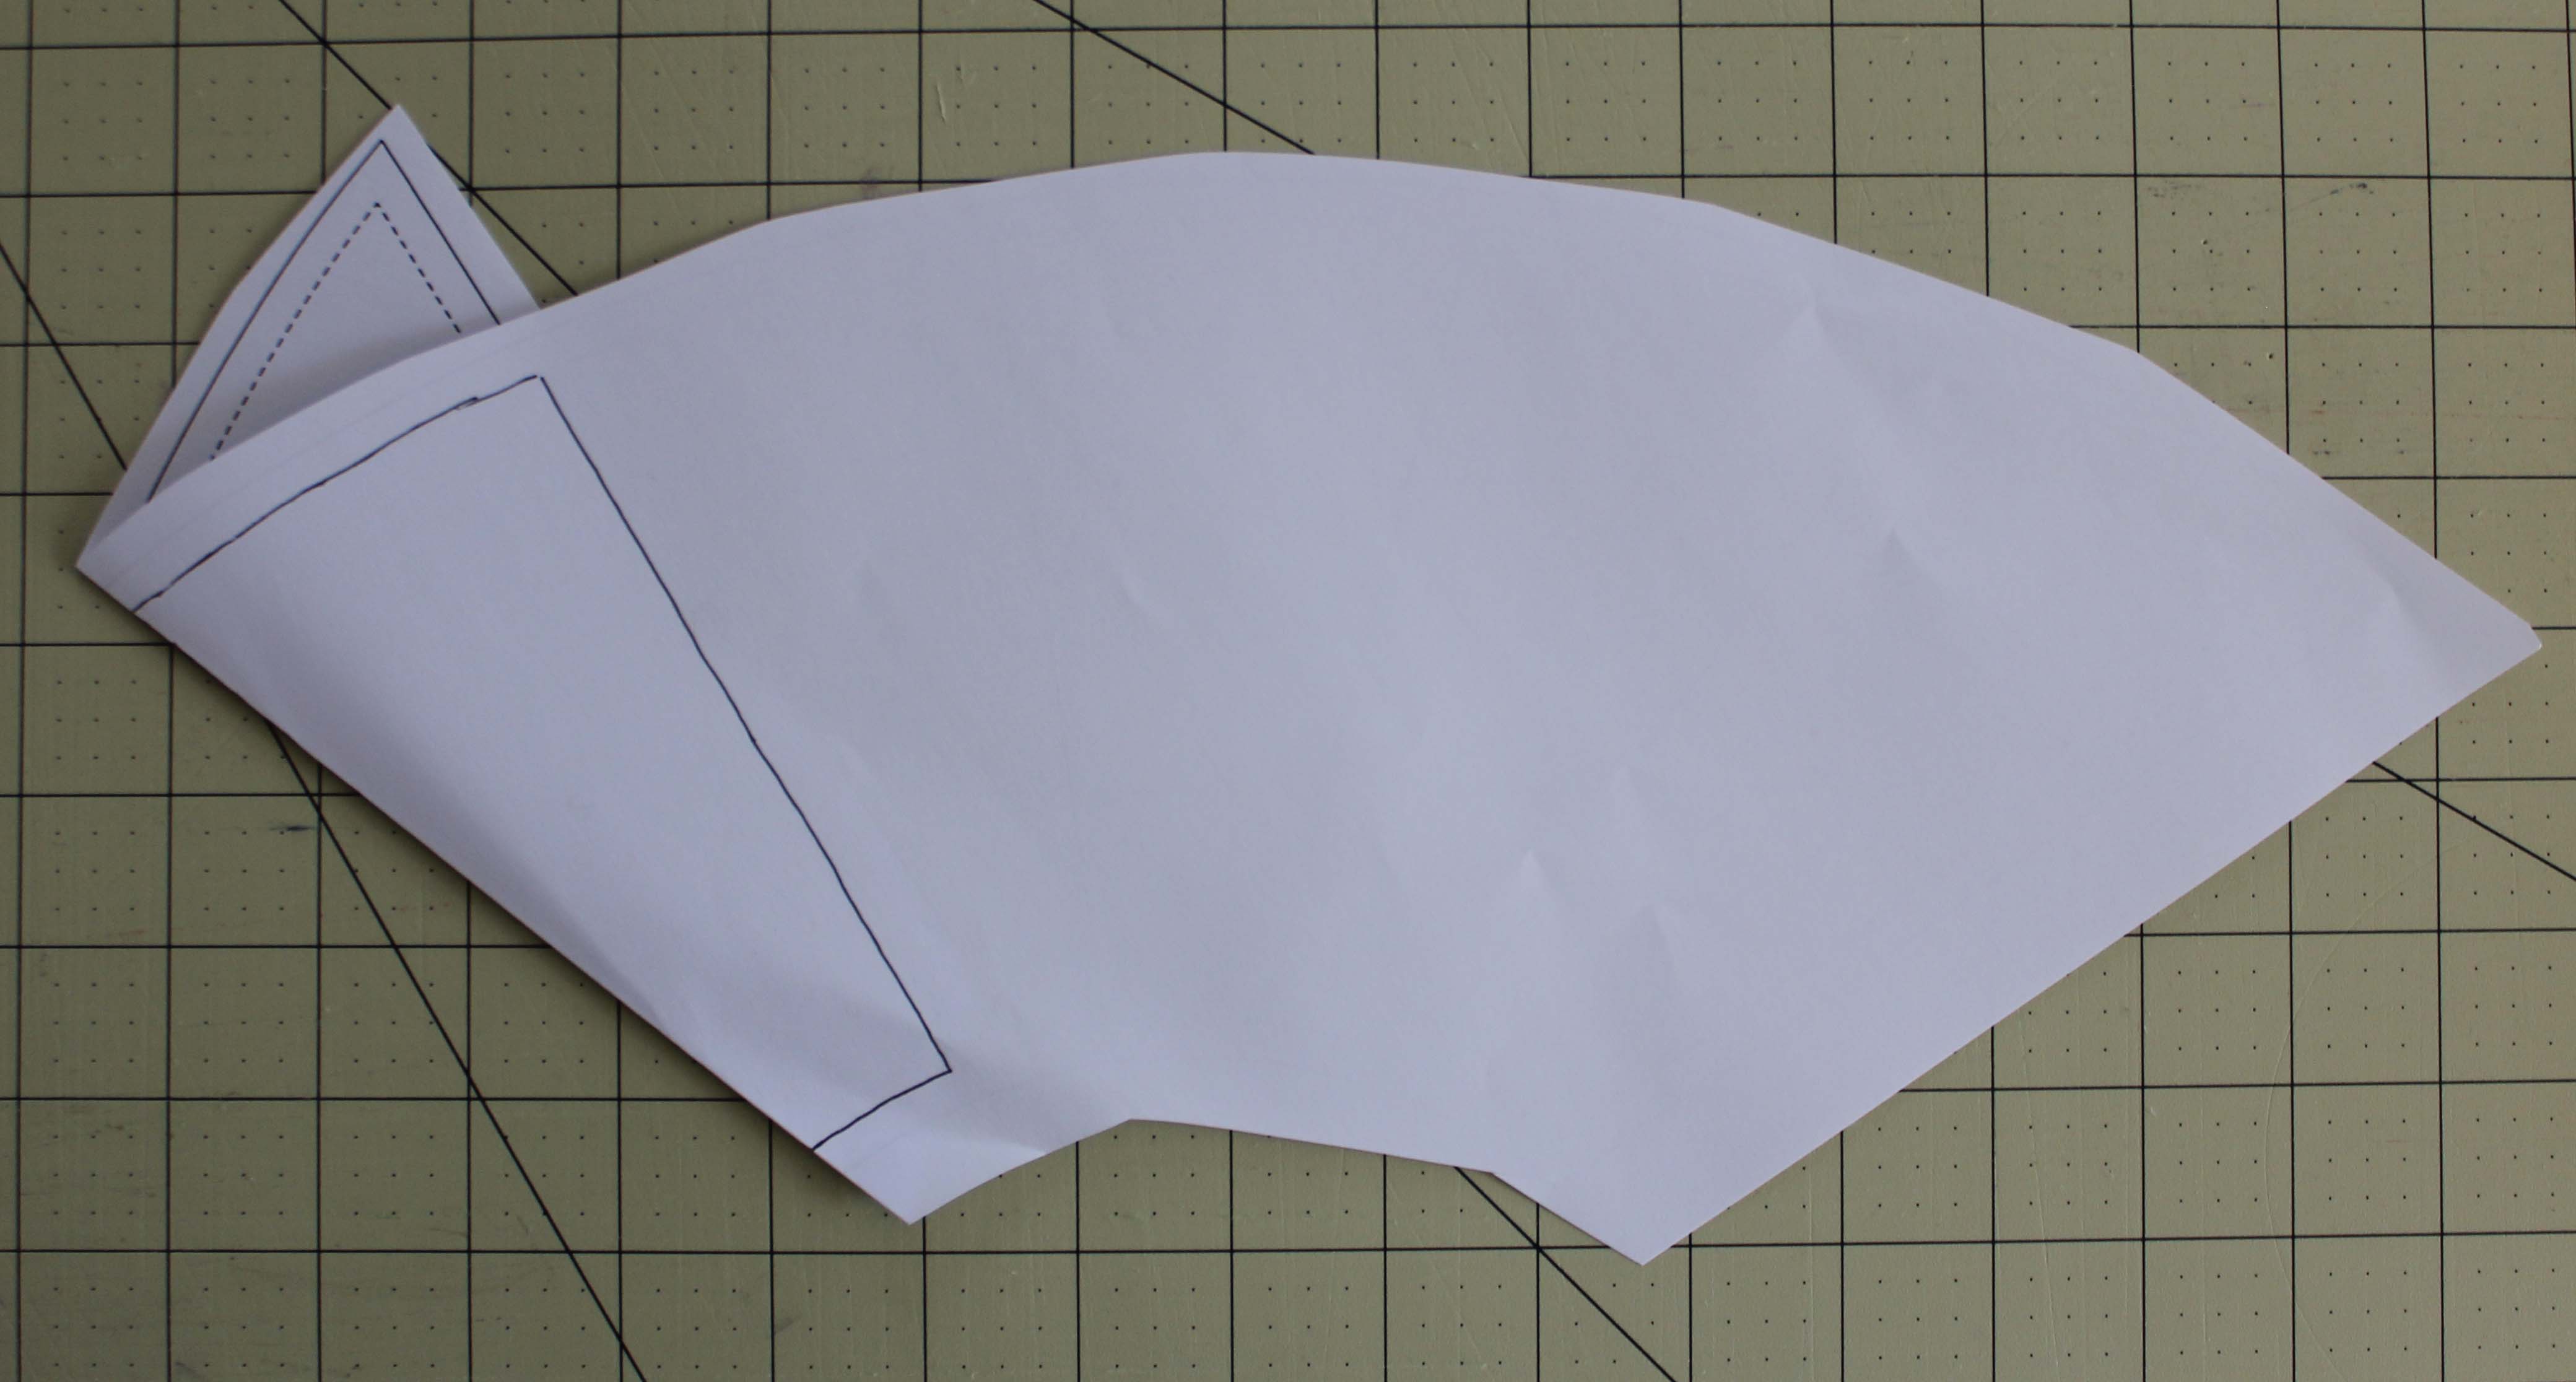
Linda asked me if there is enough fabric to cut the pieces for the fan bigger. The quick answer is yes.
Your fabric is 9 inches wide and you are cutting one strip, some are 7 1/4 inch and some are 6 1/2 inch. You can cut these widths up to the 9 inches.
You then cut 6 rectangles from each strip at 4 inches each. That is 24 inches all together. Let’s underestimate and say the width of fabric is only 40 inches, that leaves you 16 inches extra fabric, so you can add up to 2 inches on each rectangle and still have a little left over.
If in doubt, grab some graph paper and draw it out before you cut. That’s what I did to figure out this answer.
Next week is our last set of blocks. Wow! This is going by so fast. I did try to order a backing but the store didn’t have enough yardage. What are you thinking of for a backing? Will you be purchasing the suggested fabric or going with something different? I would love to hear about your choice!
Did you have an easier time this week? Now that we know what we’re doing the next few weeks should just breeze on by.
I used this week to work on ways on making that first seam between pieces one and two easier. I found this great tutorial by QuietPlay. @rachaelknitsandquilts reminded me of another tutorial from We All Sew. This is the tutorial I relied on for this week, with a few changes.
First, I traced section two to the back side of the paper.
Second, fold back the paper along the sewing line between sections one and two.
Now here is where I go a little off book. I place the fabric for section two right side up on the paper covering the section I drew. I get out that trusty washable glue stick and stick it in place.
I folded the paper back again and laid the fabric for section one right side down on top making sure to cover folded back piece of paper. I raised the whole thing to the light to make sure the fabric covered section one fully. Make sure there is fabric over the edge of the folded paper for seam allowance.
Unfold the paper without moving the fabrics and sew along the sewing line.
Then just finish sewing as you did last week. Not one seam was ripped by me. I was quite pleased with the outcome.
Here we are half way done with all the blocks. How exciting!
Welcome back to our Tula Tuesday Fandango Quilt Along. We are finally SEWING. This week is about getting all the bugs out since we are following the same directions for the next 5 weeks.
Slow and Steady is not only the name of the fabric line, but it is really really good advice on creating this piece. Keep it in your mind as you work along.
Honestly, it didn’t go too bad. I did rip out some seams and discover I cut one piece of fabric wrong (so far), but nothing that wasn’t fixable.
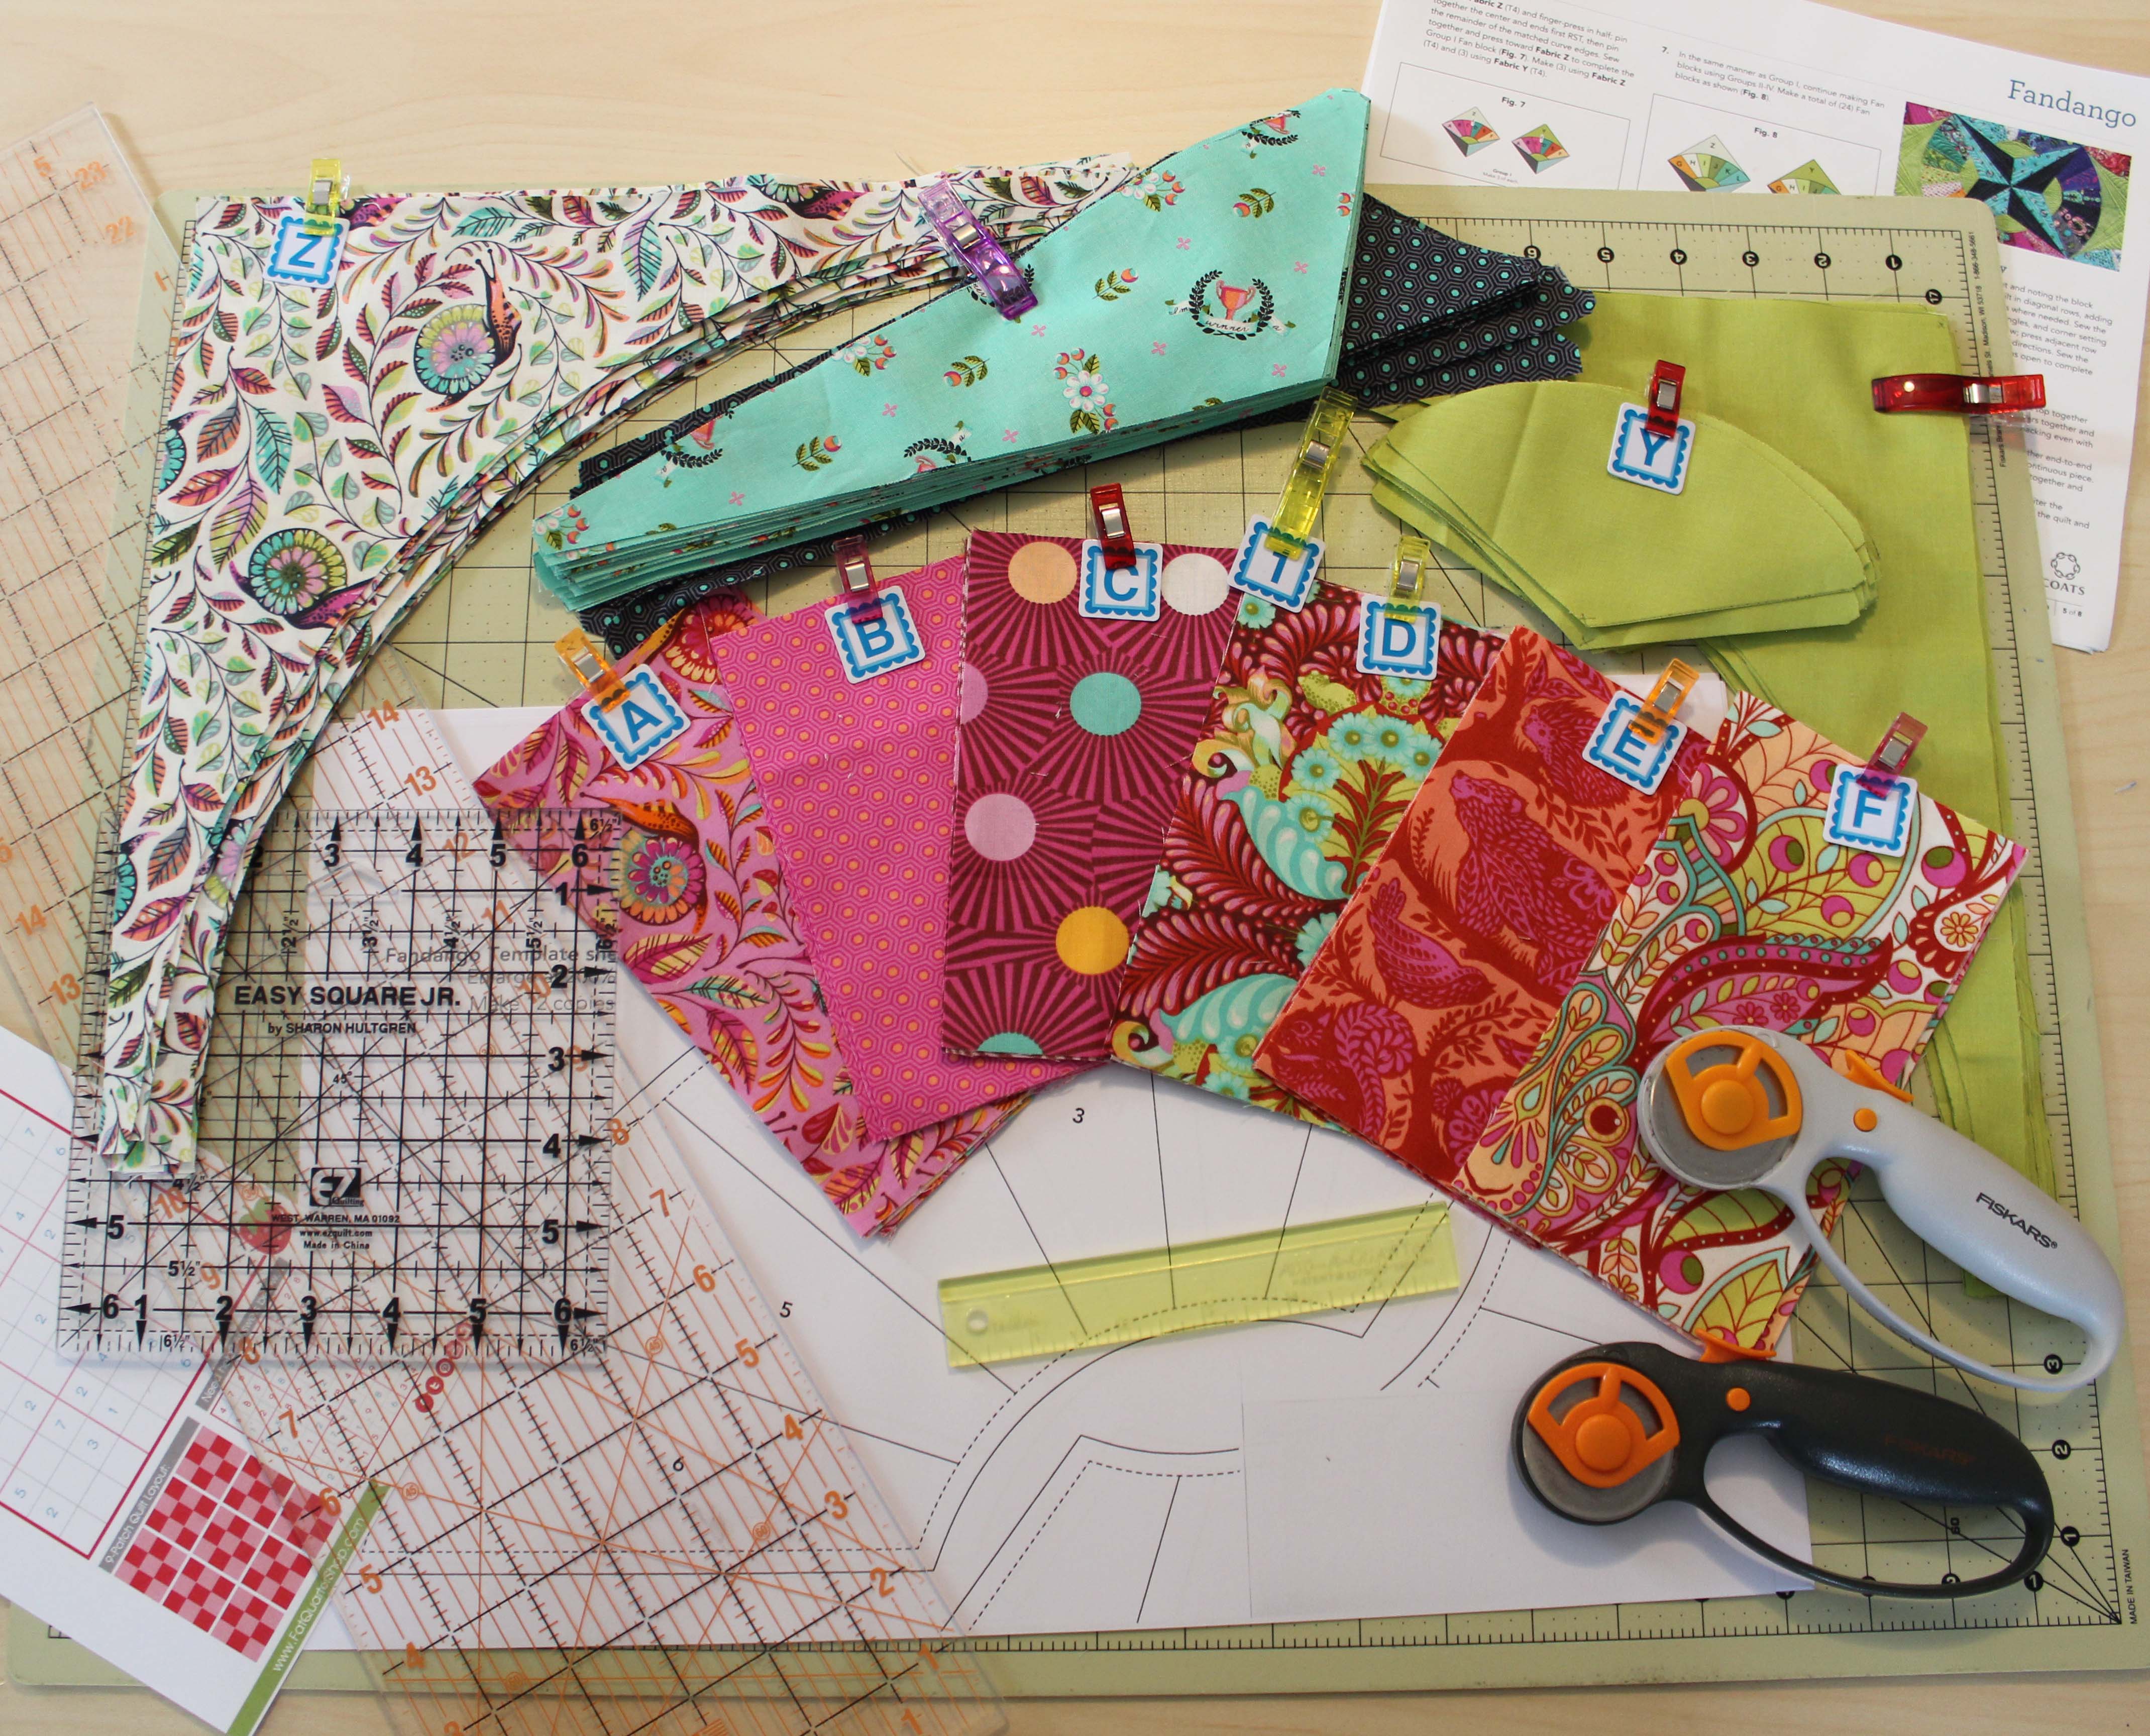
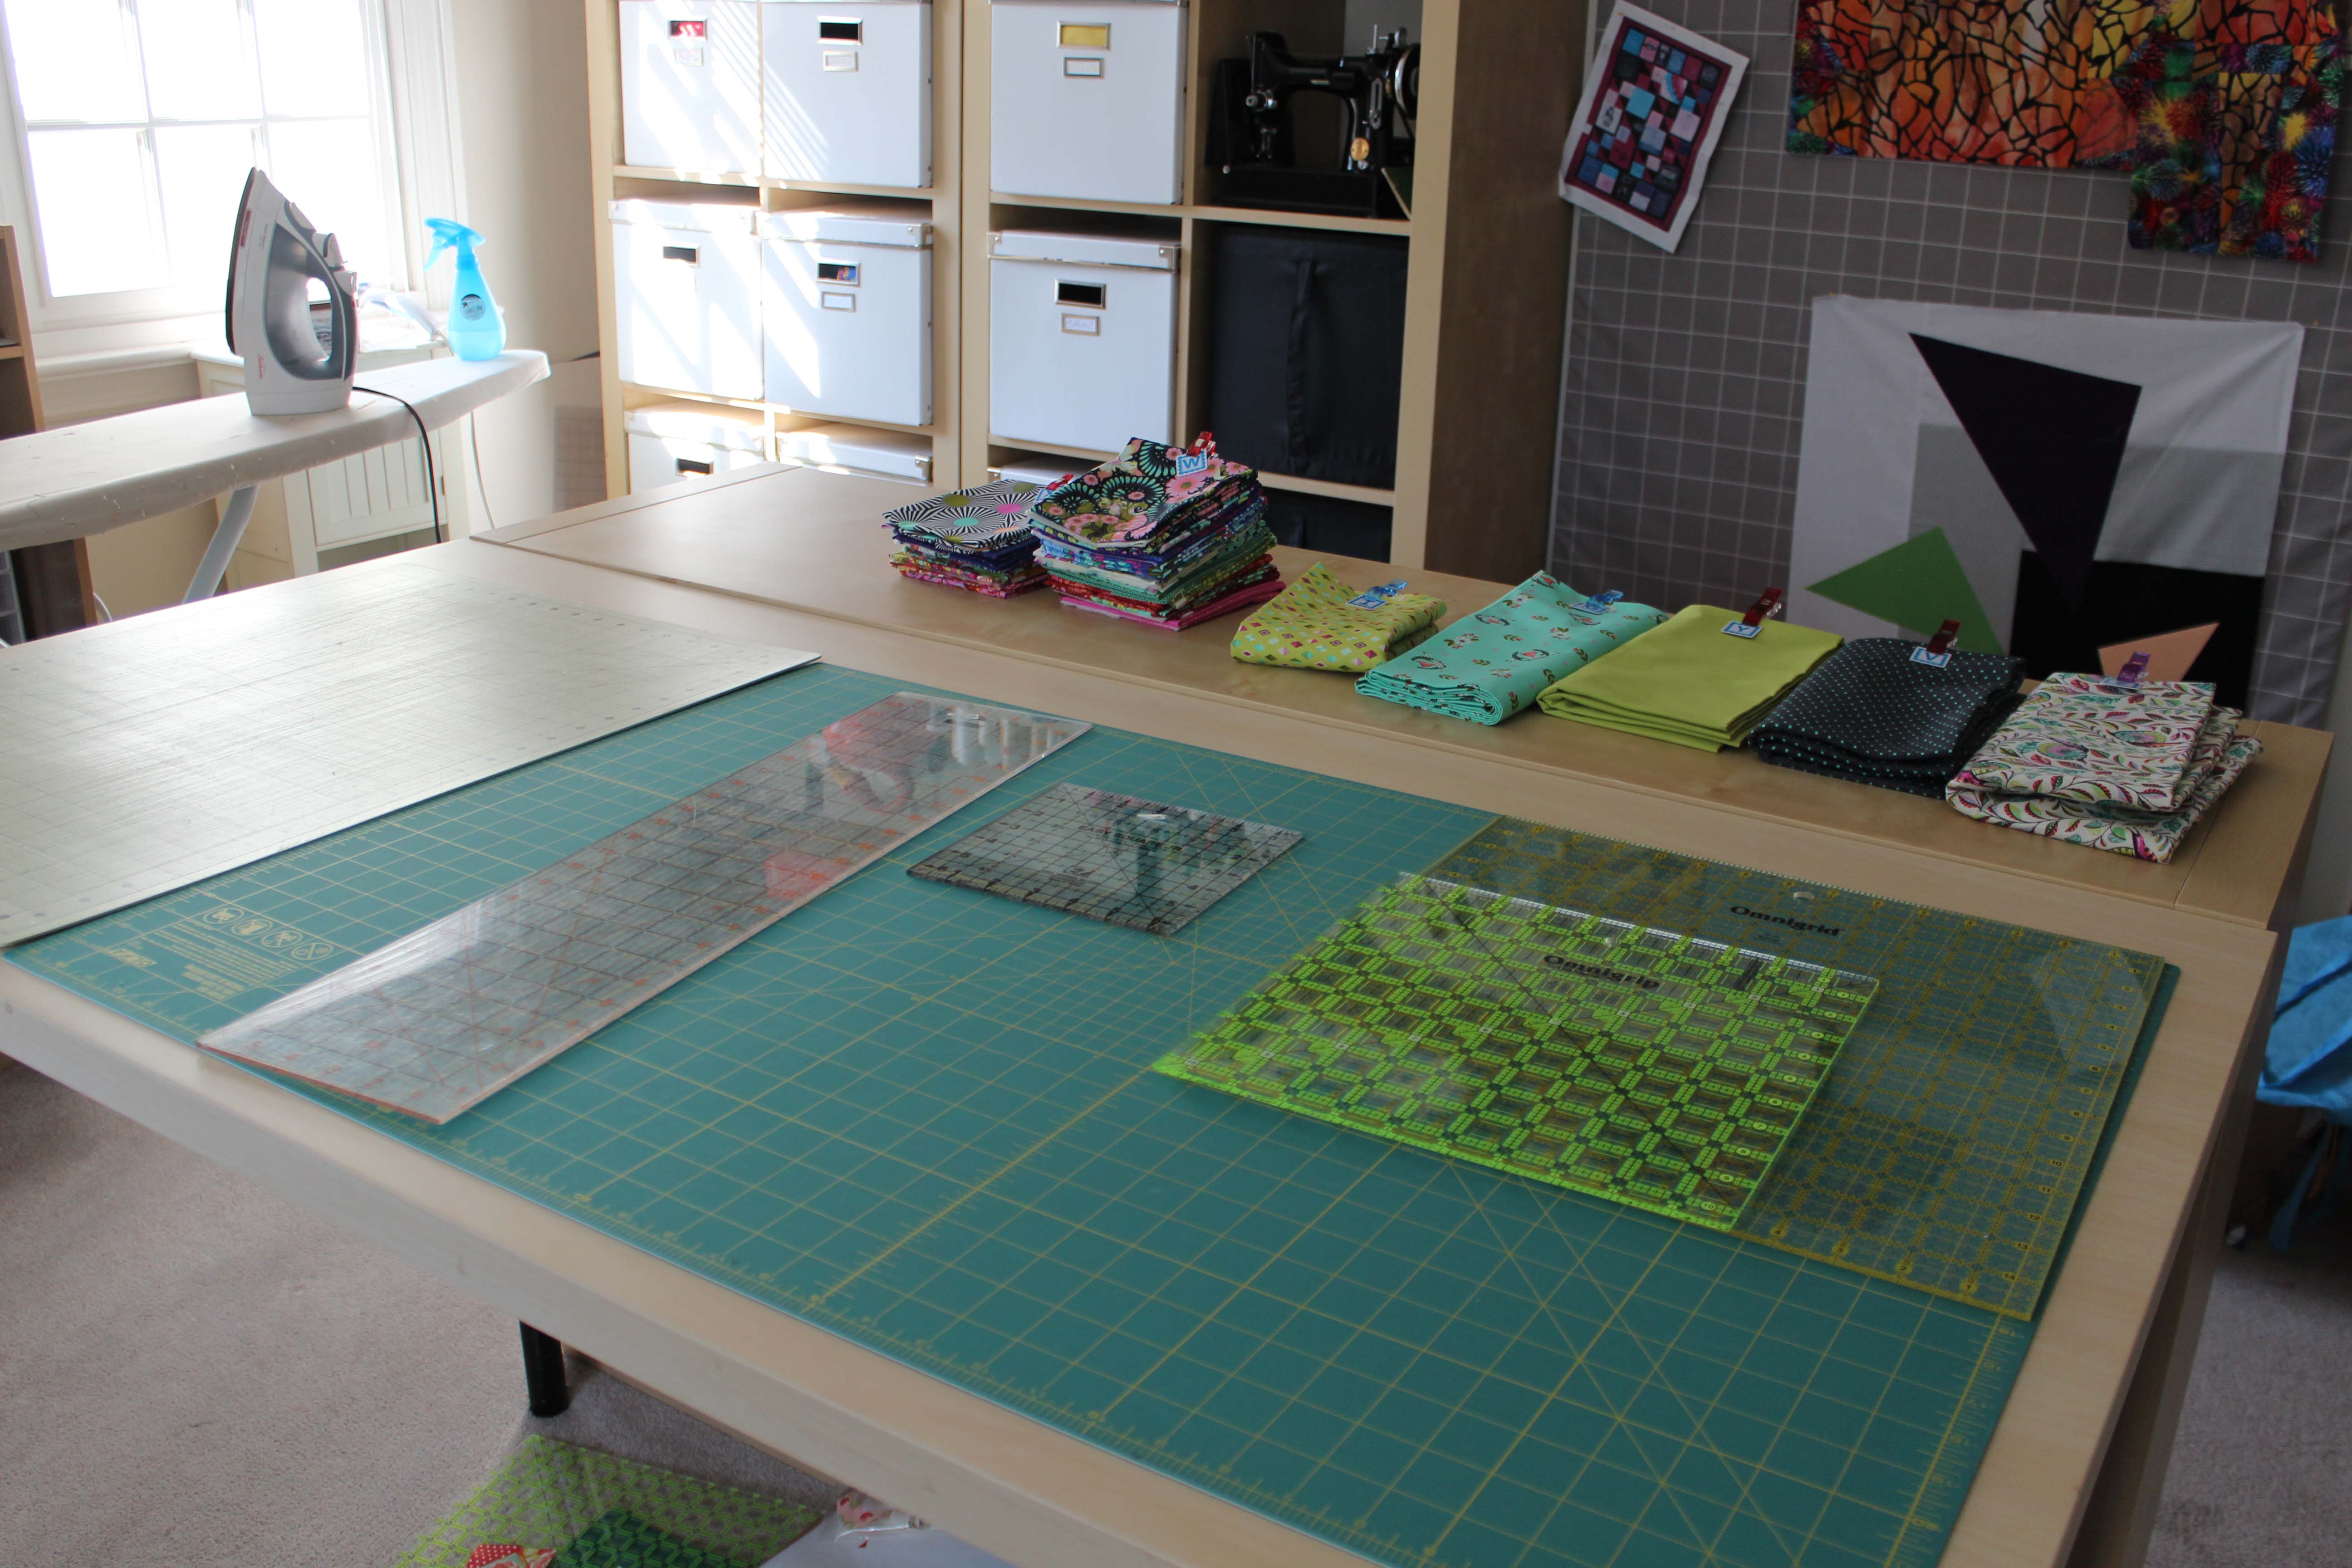
Here are the supplies I gathered.
Directions, fabrics, paper templates, rulers, add a quarter ruler, fabric rotary cutter, paper rotary cutter, and a mailer that is like a heavy index card to help with the cutting. Not pictured and used are clear tape, a washable glue stick, and PINS!
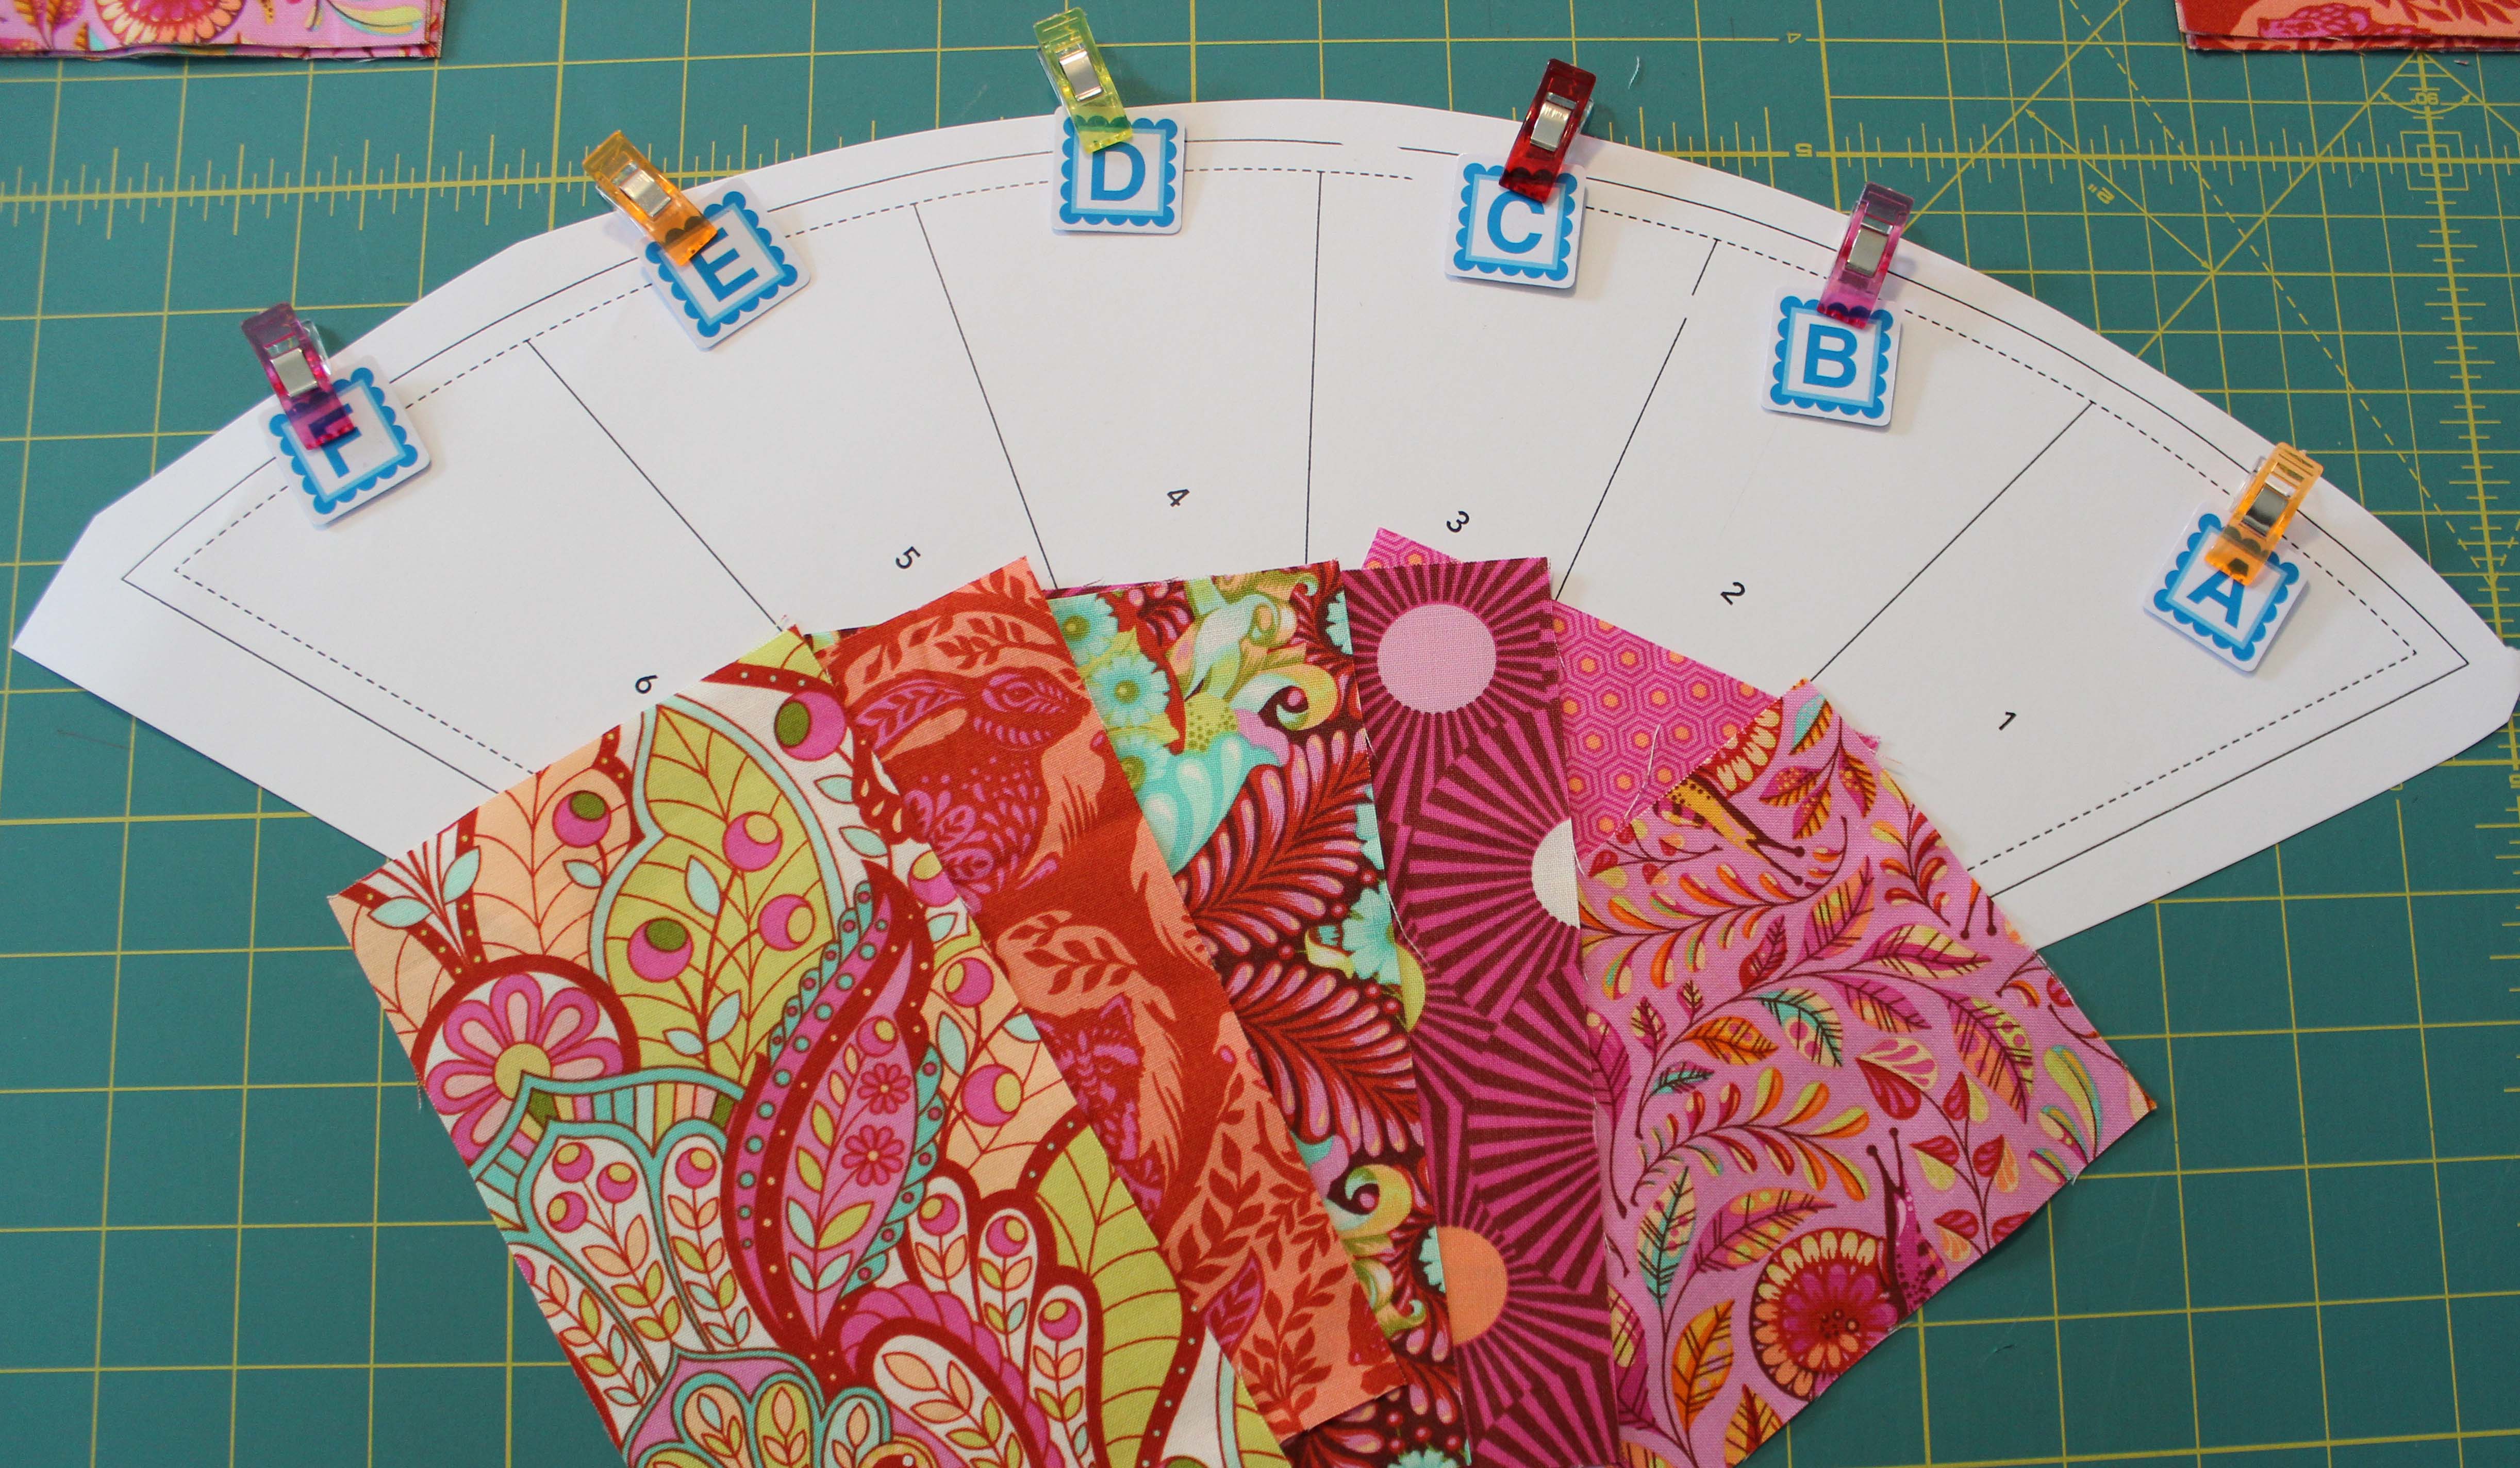
Let’s get started. The numbers on the paper template run right to left and I was a bit curfuddled since it didn’t seem the right way the fabrics should go. But never fear, it was totally correct. Fabric A goes to section 1 and so on. Trust the pattern.
I love paper piecing, but this pattern is much larger than the ones I usually do. I had trouble holding the fabrics to the paper to line them up. This is where the clear washable glue stick came in handy. Once a piece was cut and ironed I would give it a quick small dab with the glue stick and adhere it to the paper. Then while I lined up the next piece it wouldn’t flop all over the place when I held it up.
Section 2 gave me a hard time and that’s where all my seam ripping happened. When this occurred I would use a piece of clear tape over the line in the paper to hold it back together when I sewed it again. Don’t use this method more than once tho, get a new paper template after that. (I hope it doesn’t come to that)
before
after
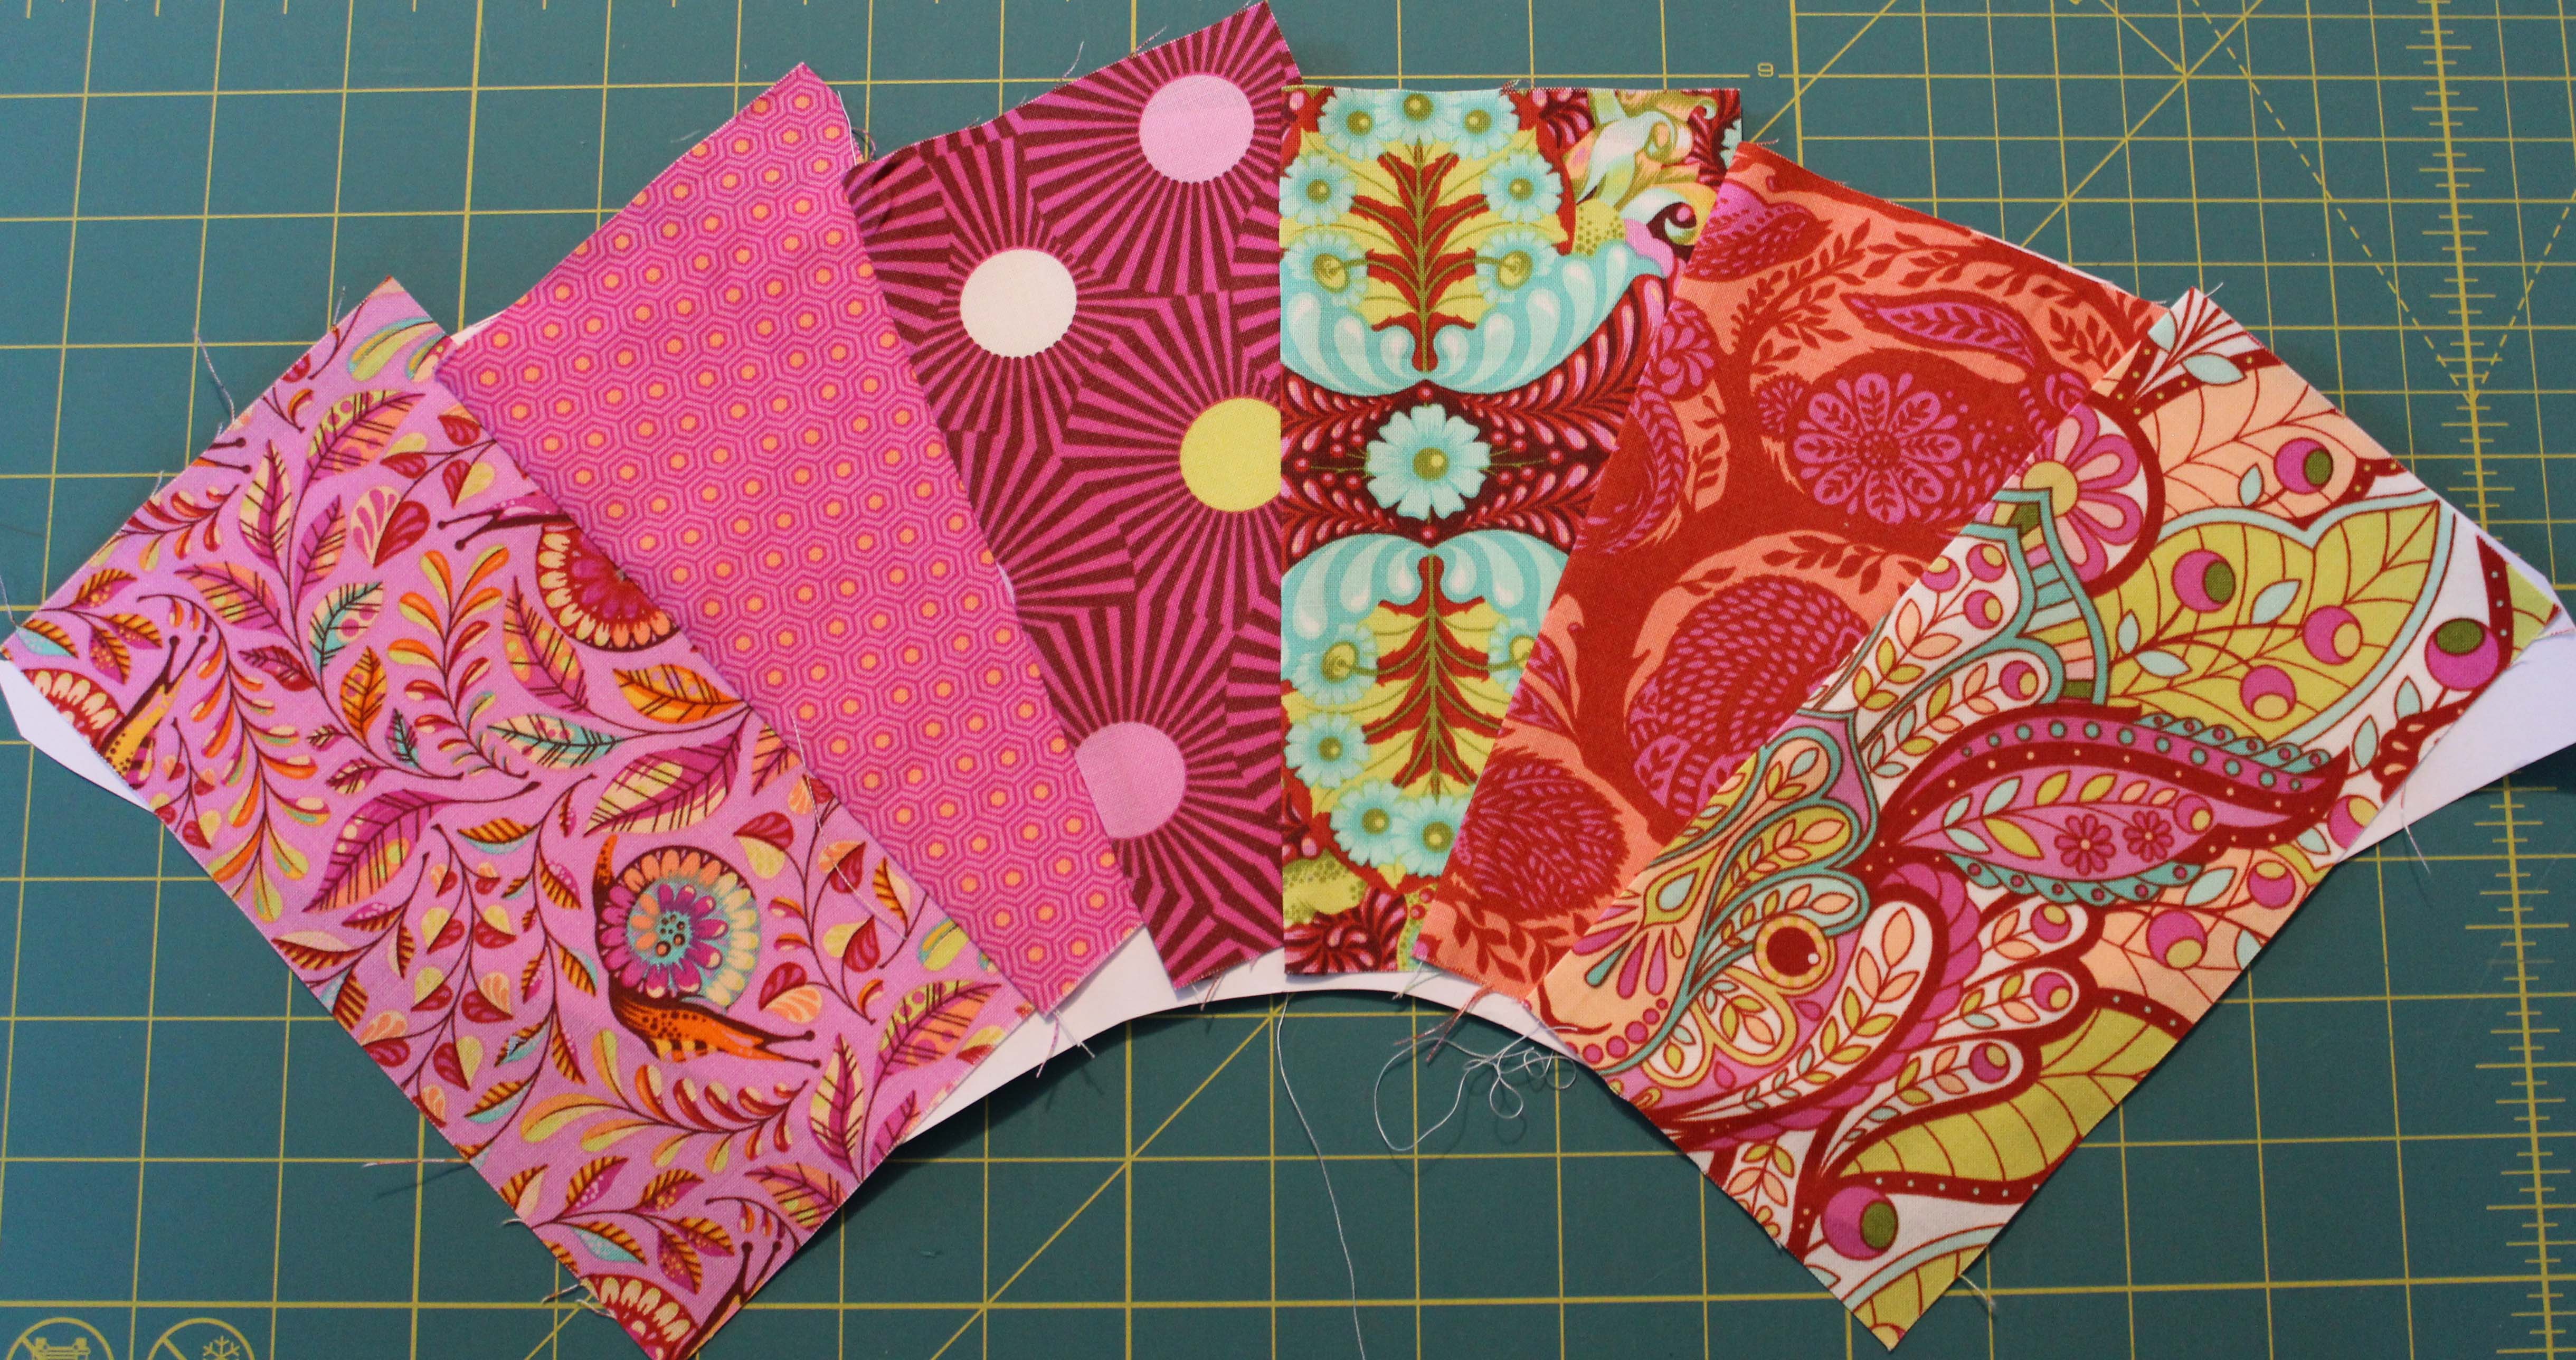
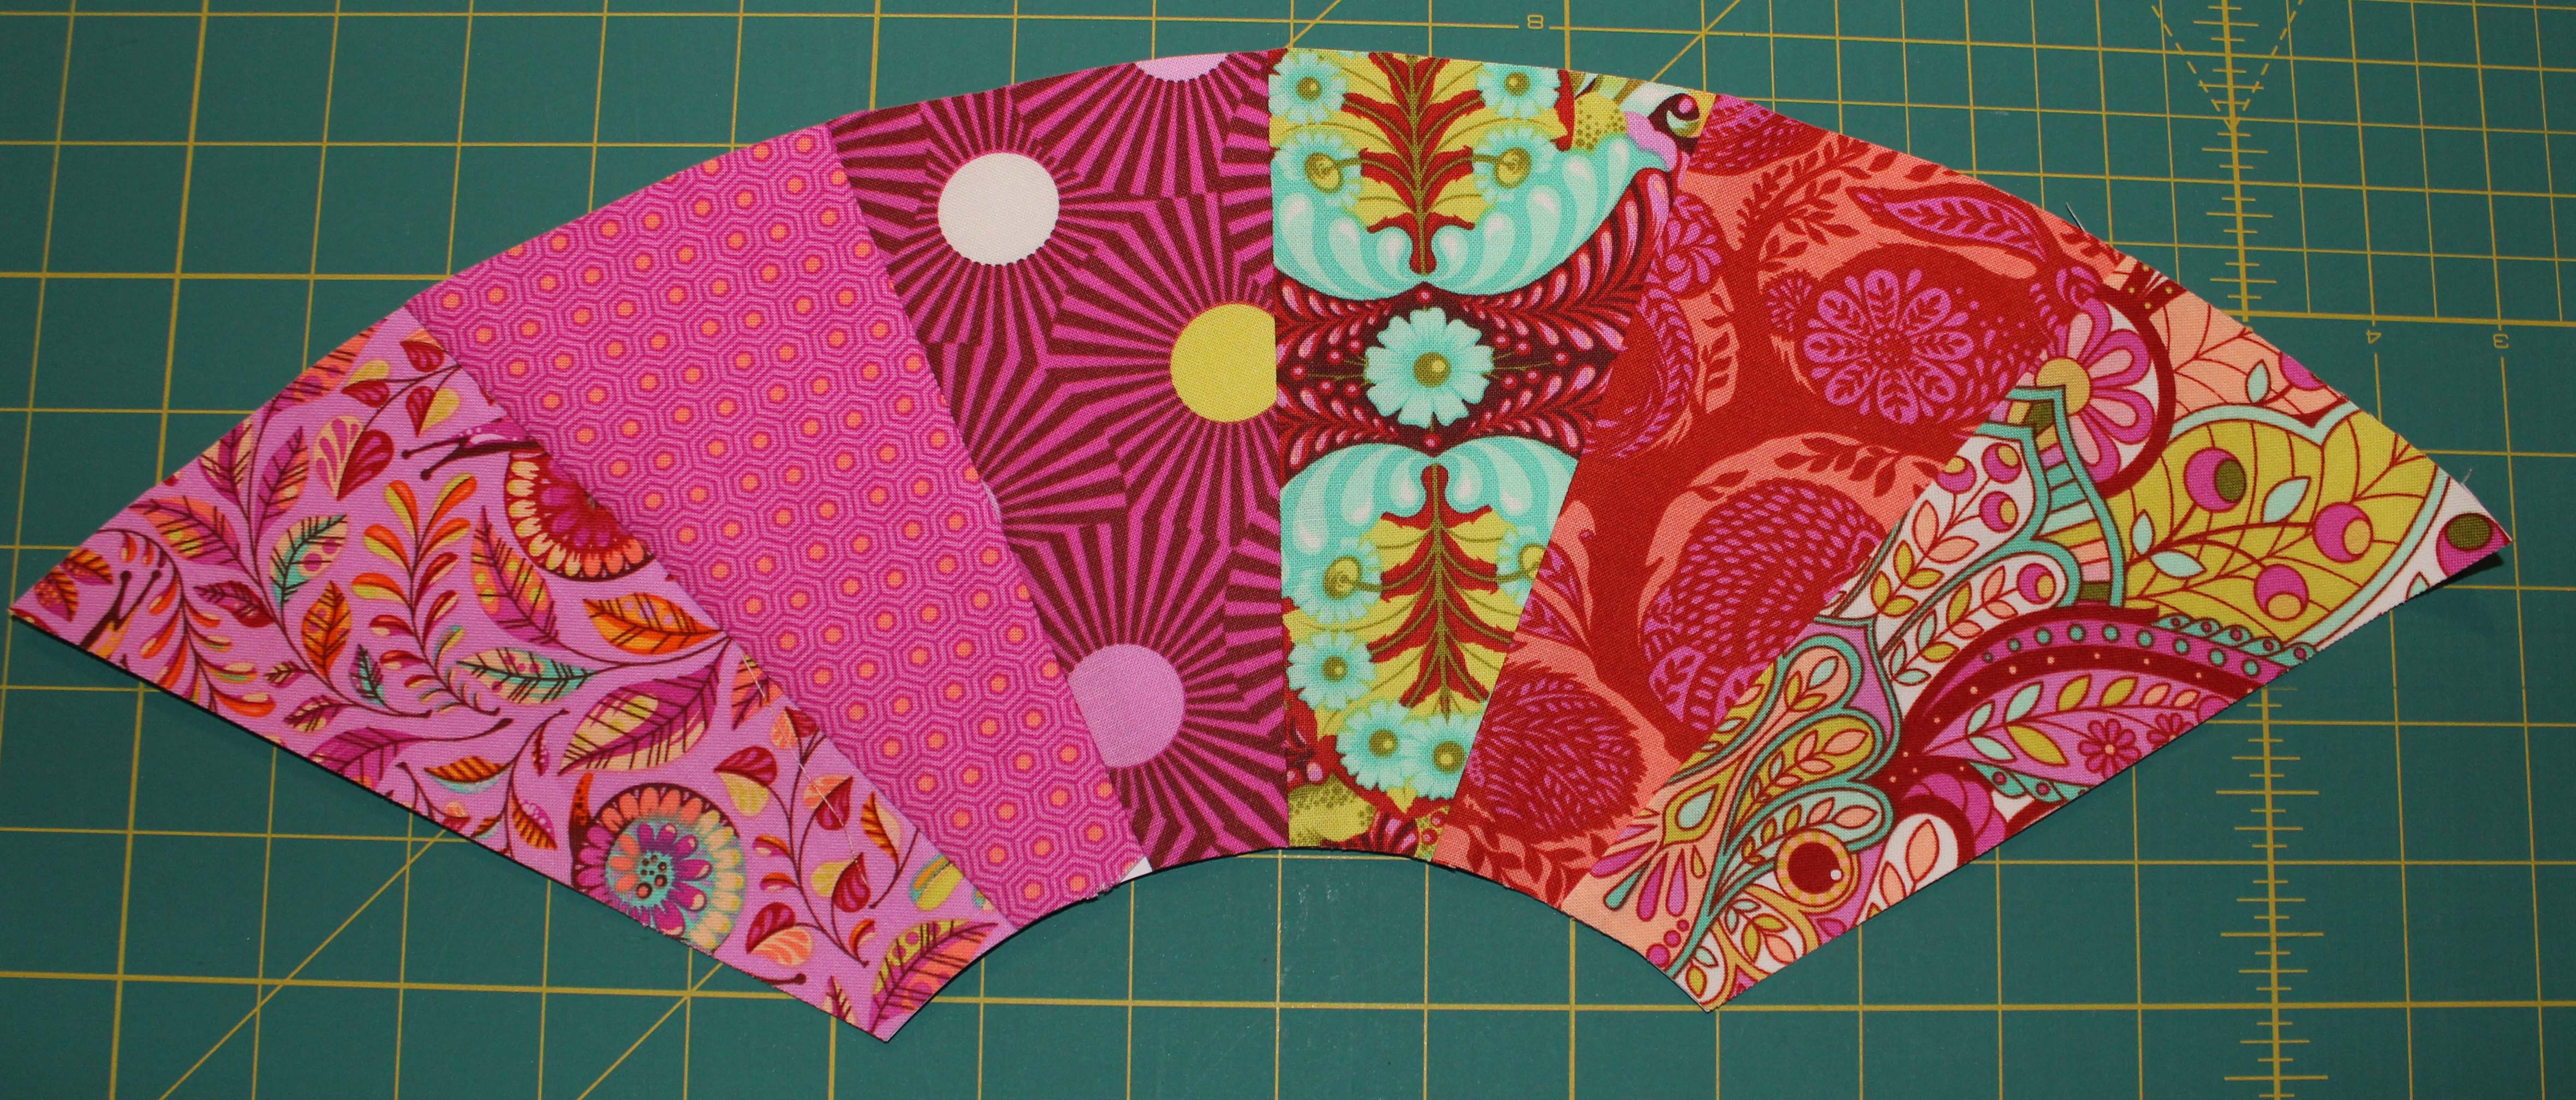
Isn’t it so pretty once it is cut out? Remember to leave a seam allowance when you cut!
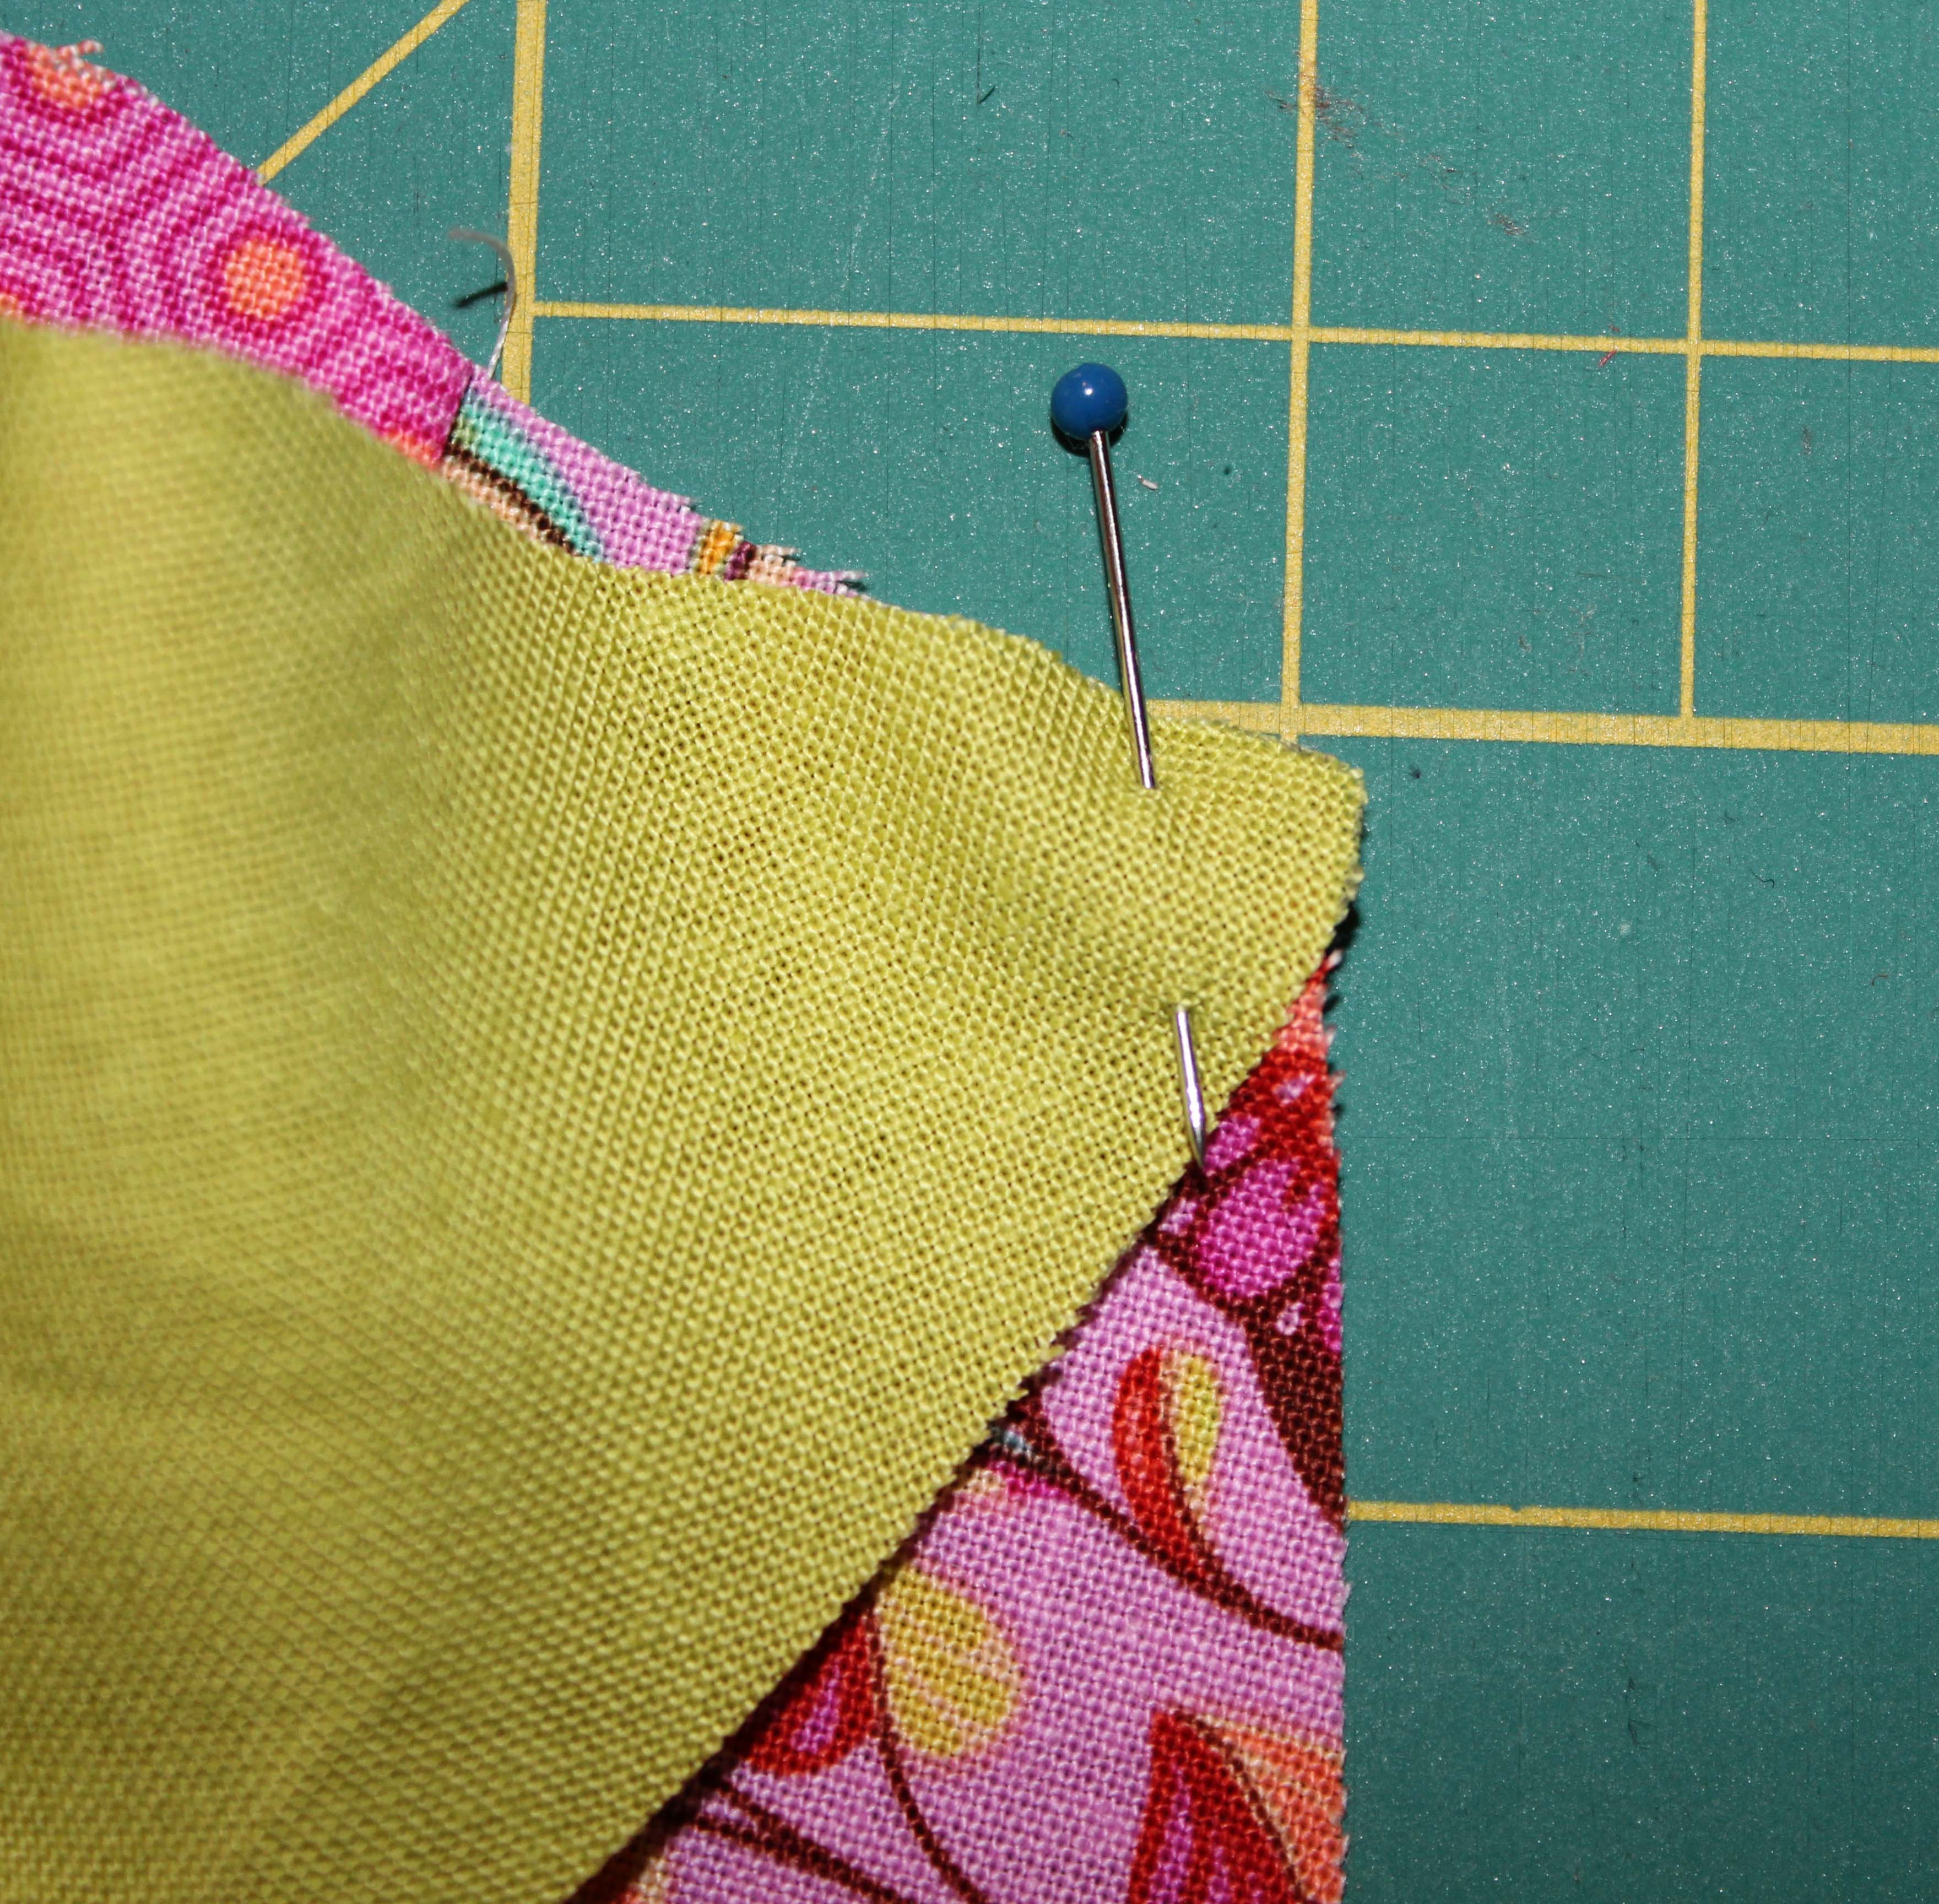
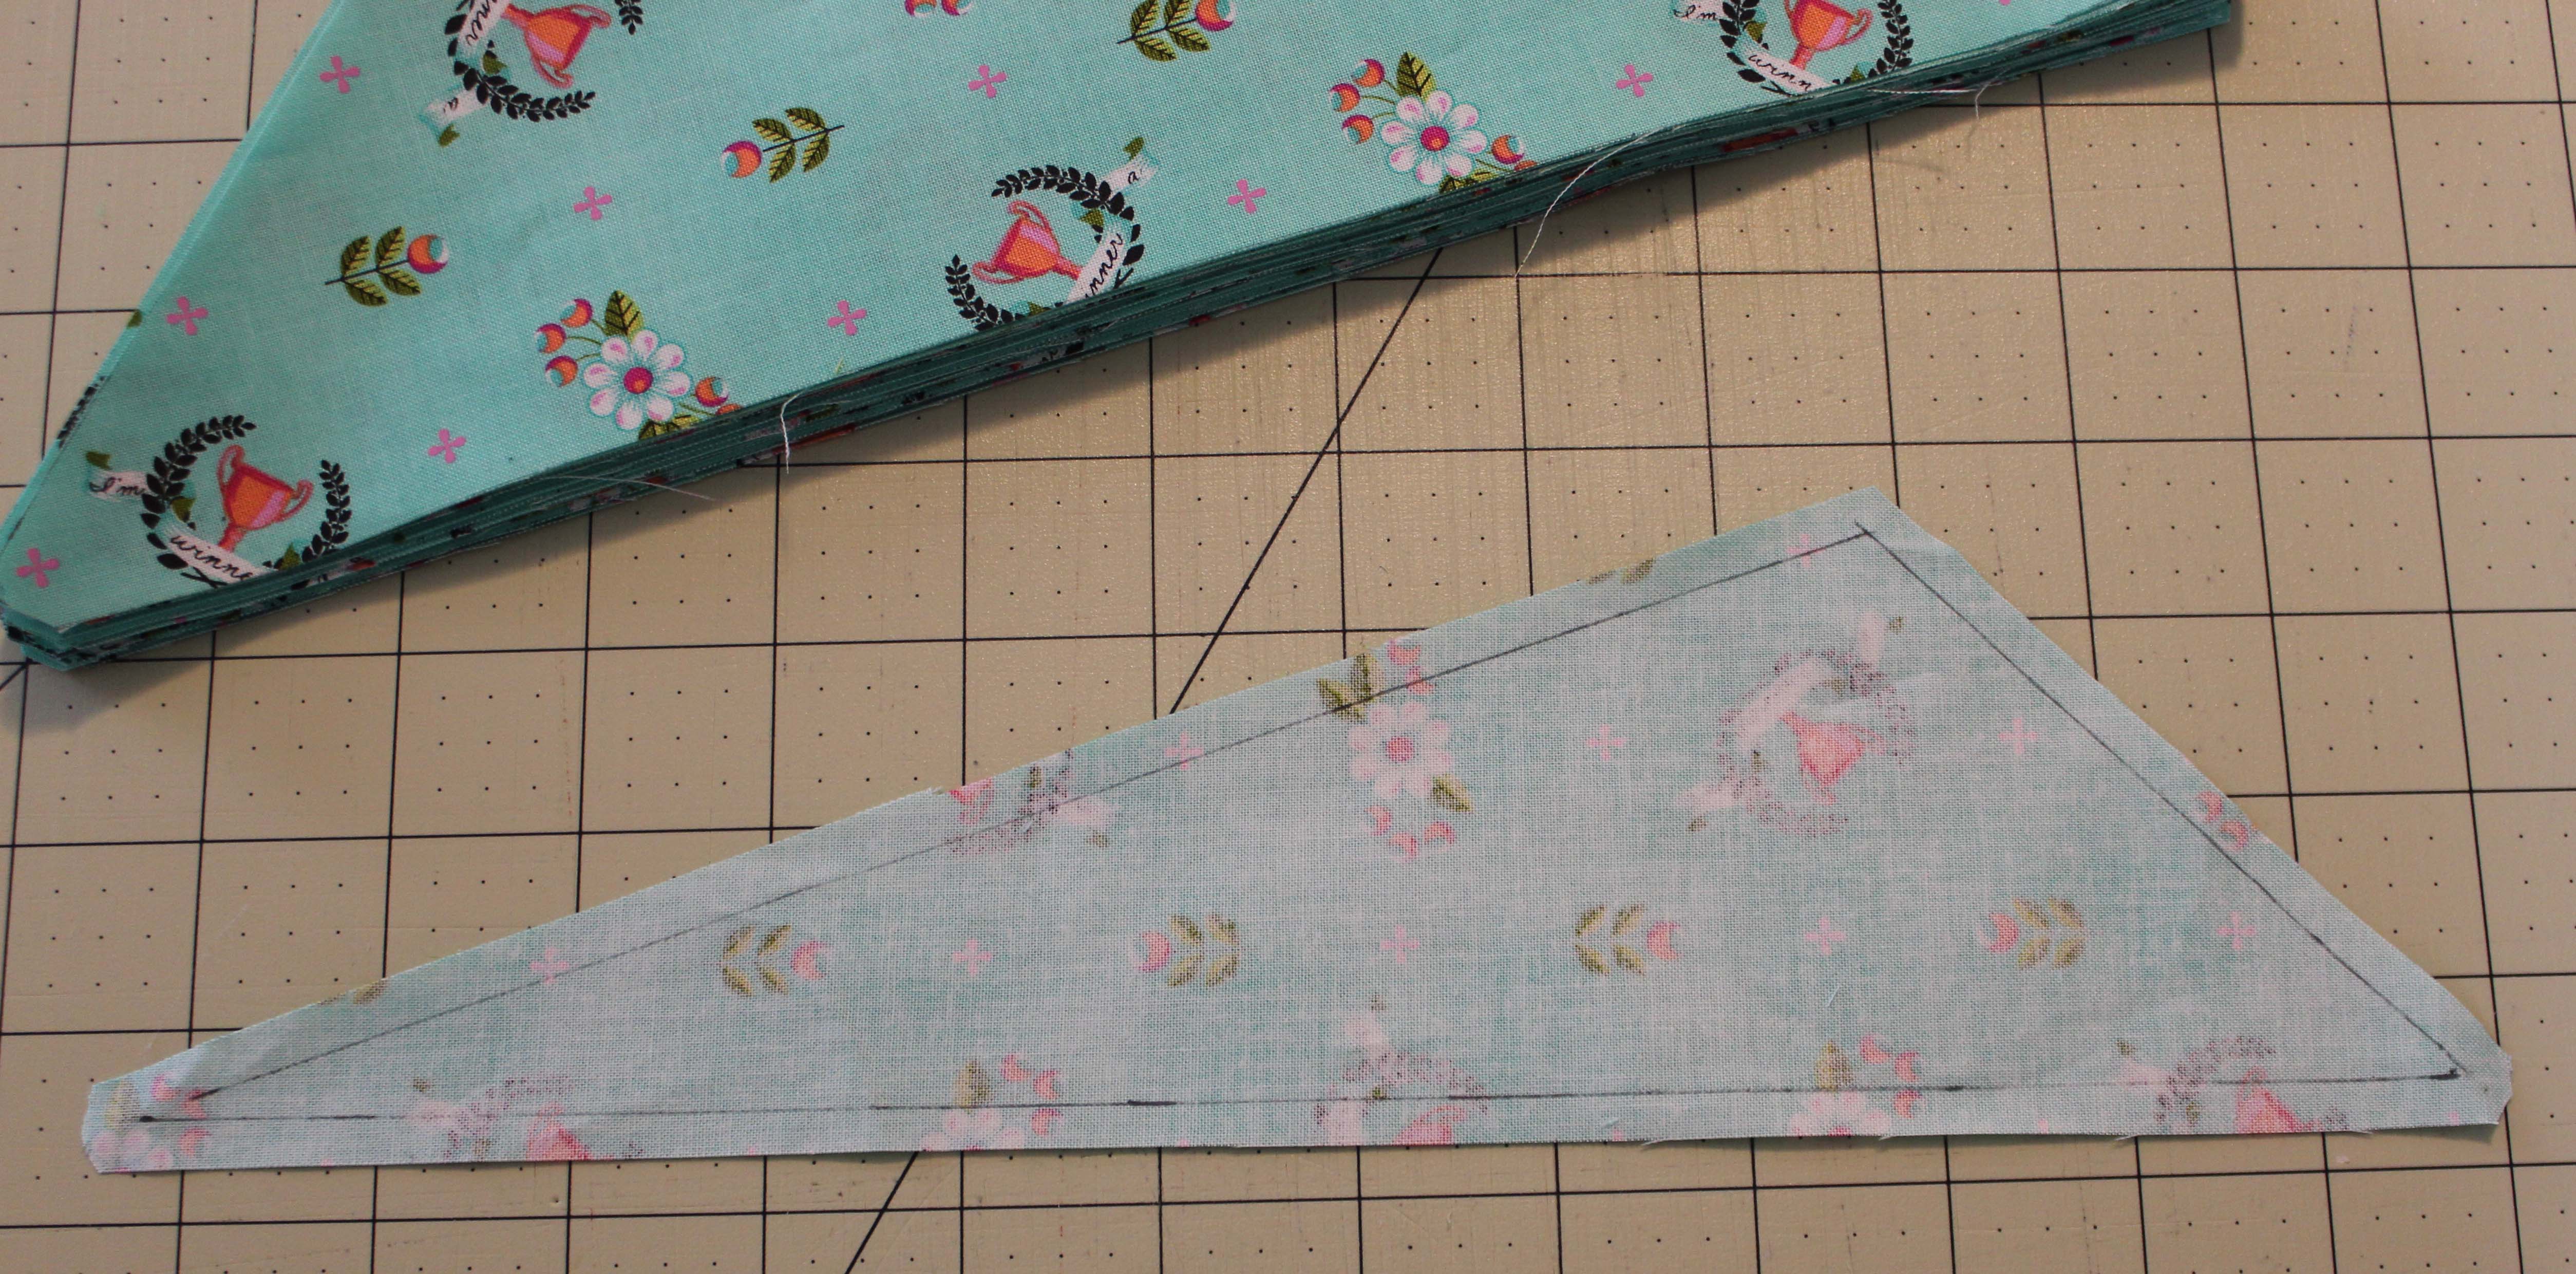
Next step was adding a template 1 piece. At the edge of the cut template it comes to a point. Make sure to line this point up with the corner of the fan on either end. It will match up the edges beautifully when you flip the piece over and iron.
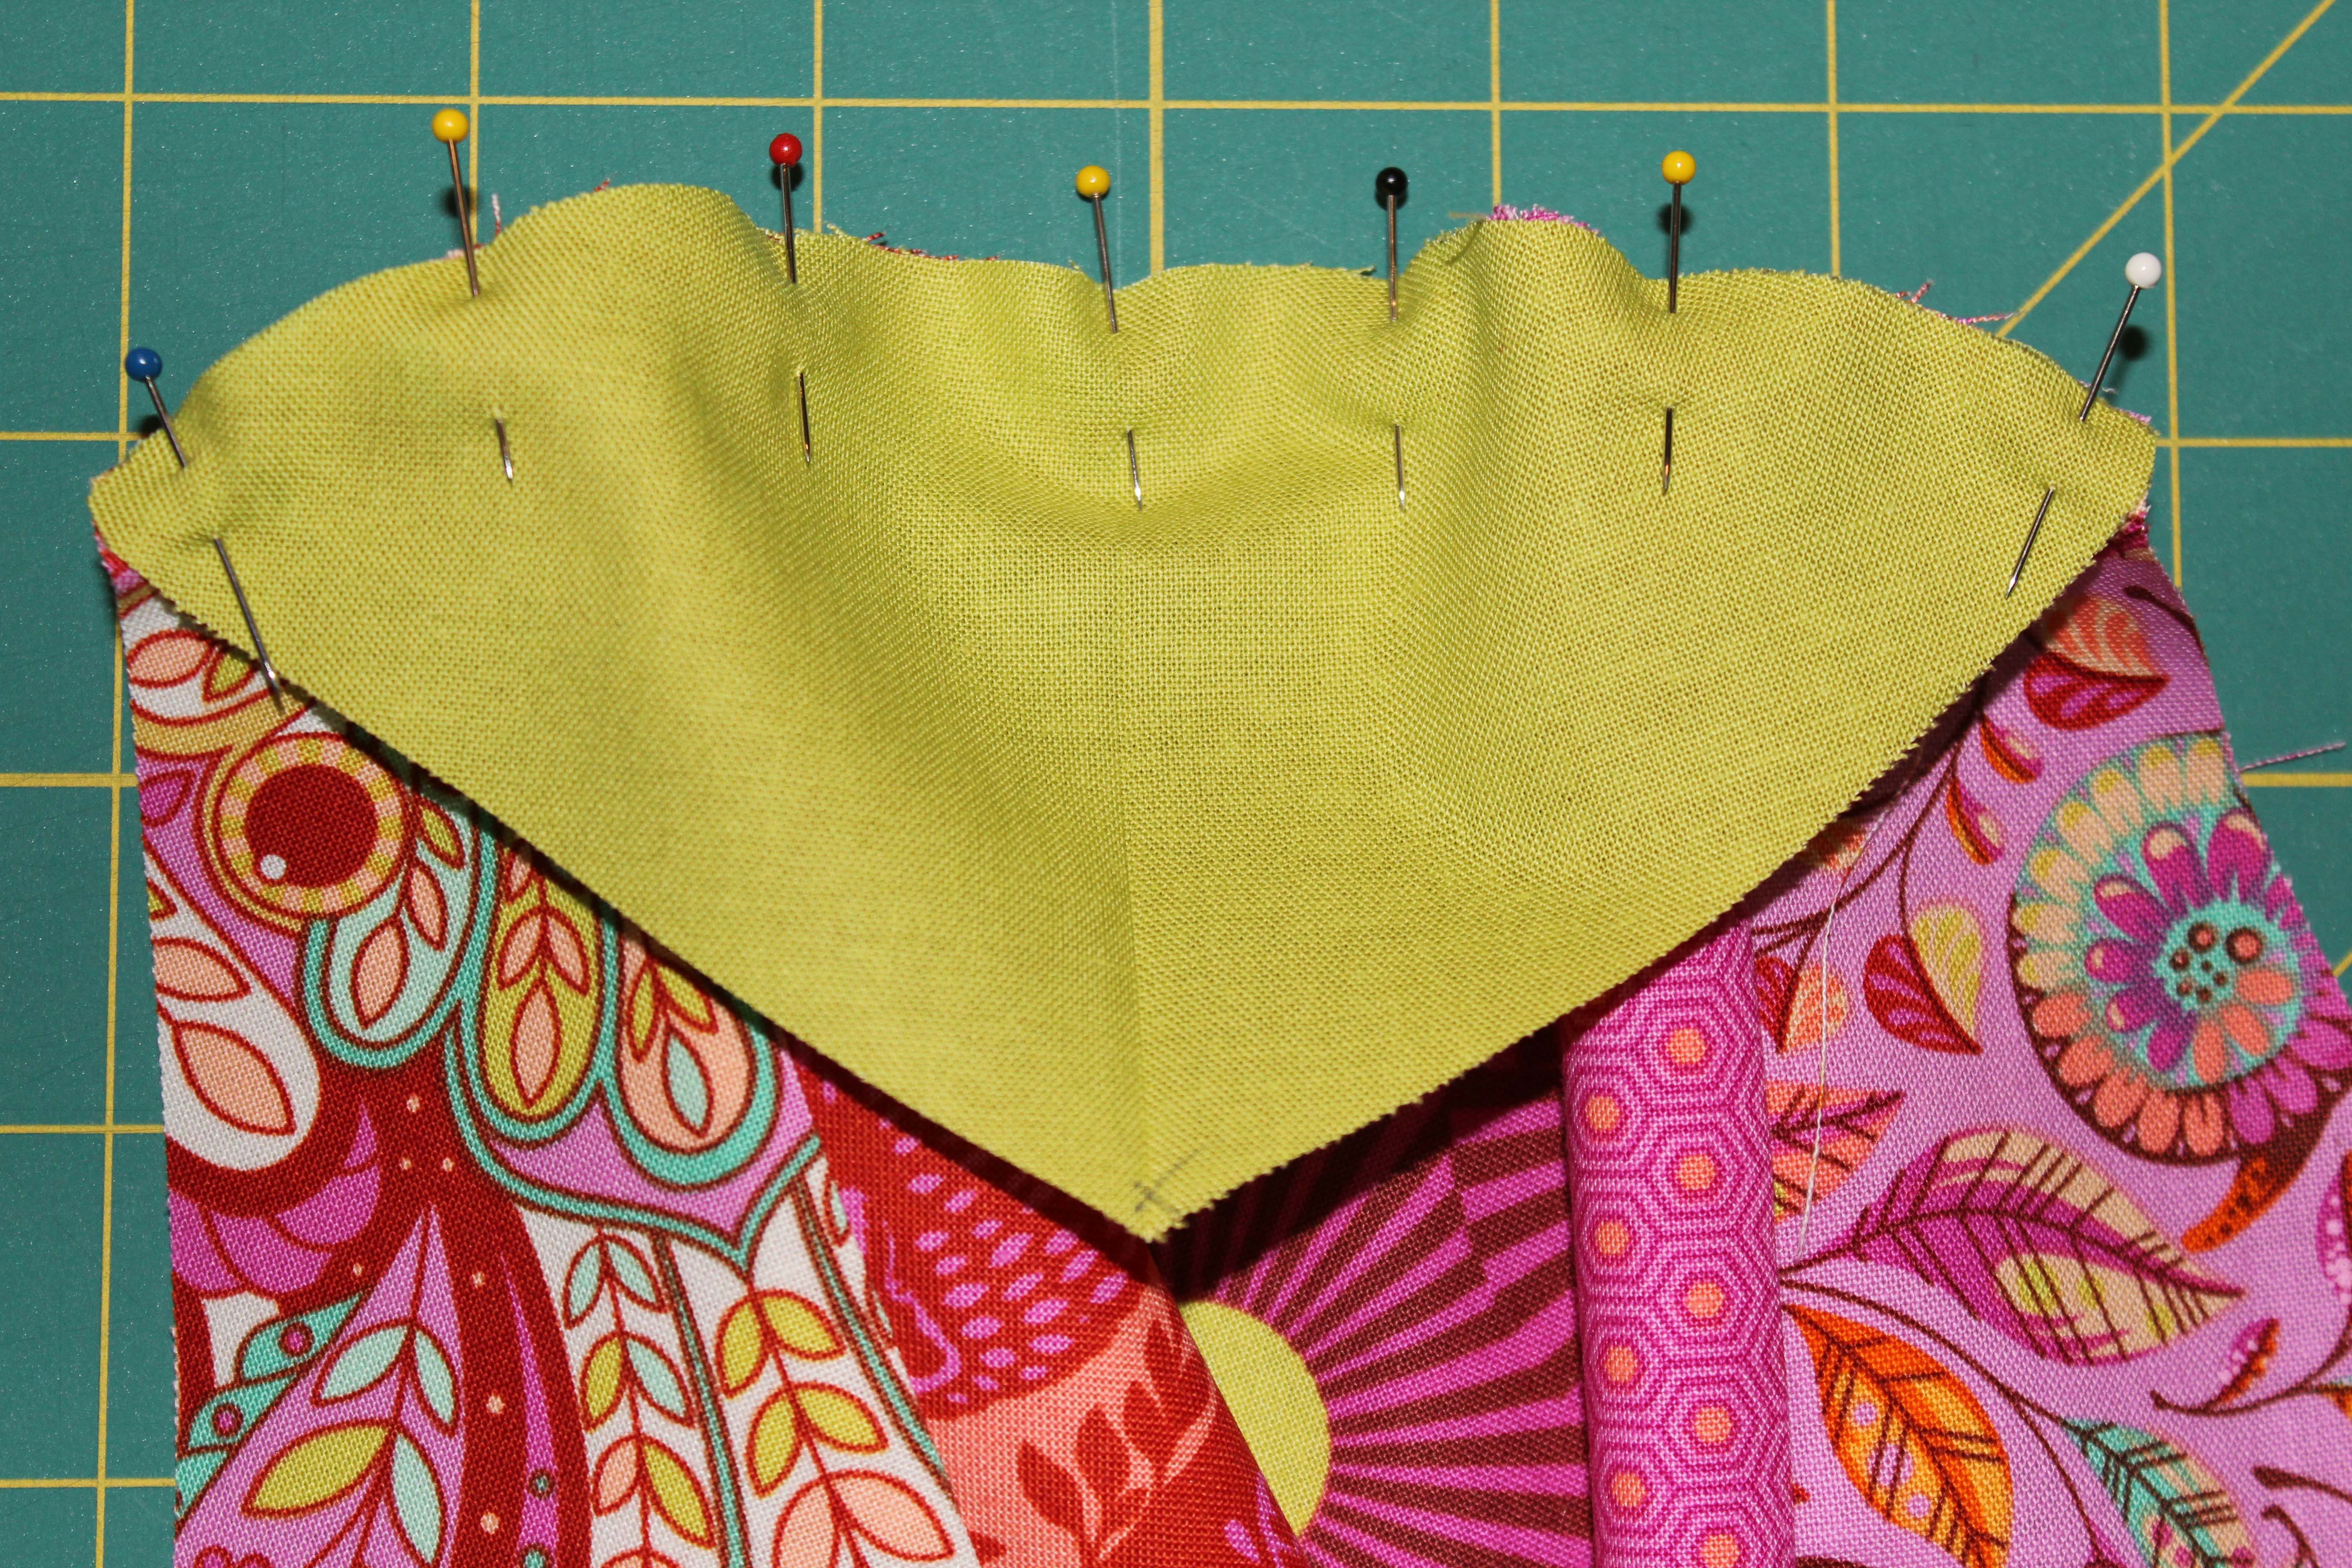
When attaching this curve and the template 4 curve use PINS!! I like to live dangerously and sew barefoot, so pins are usually not out in my sewing room. That isn’t the case for this piece. I pinned and pinned some more. Start in center, then do each end, and then just start pinning in between.
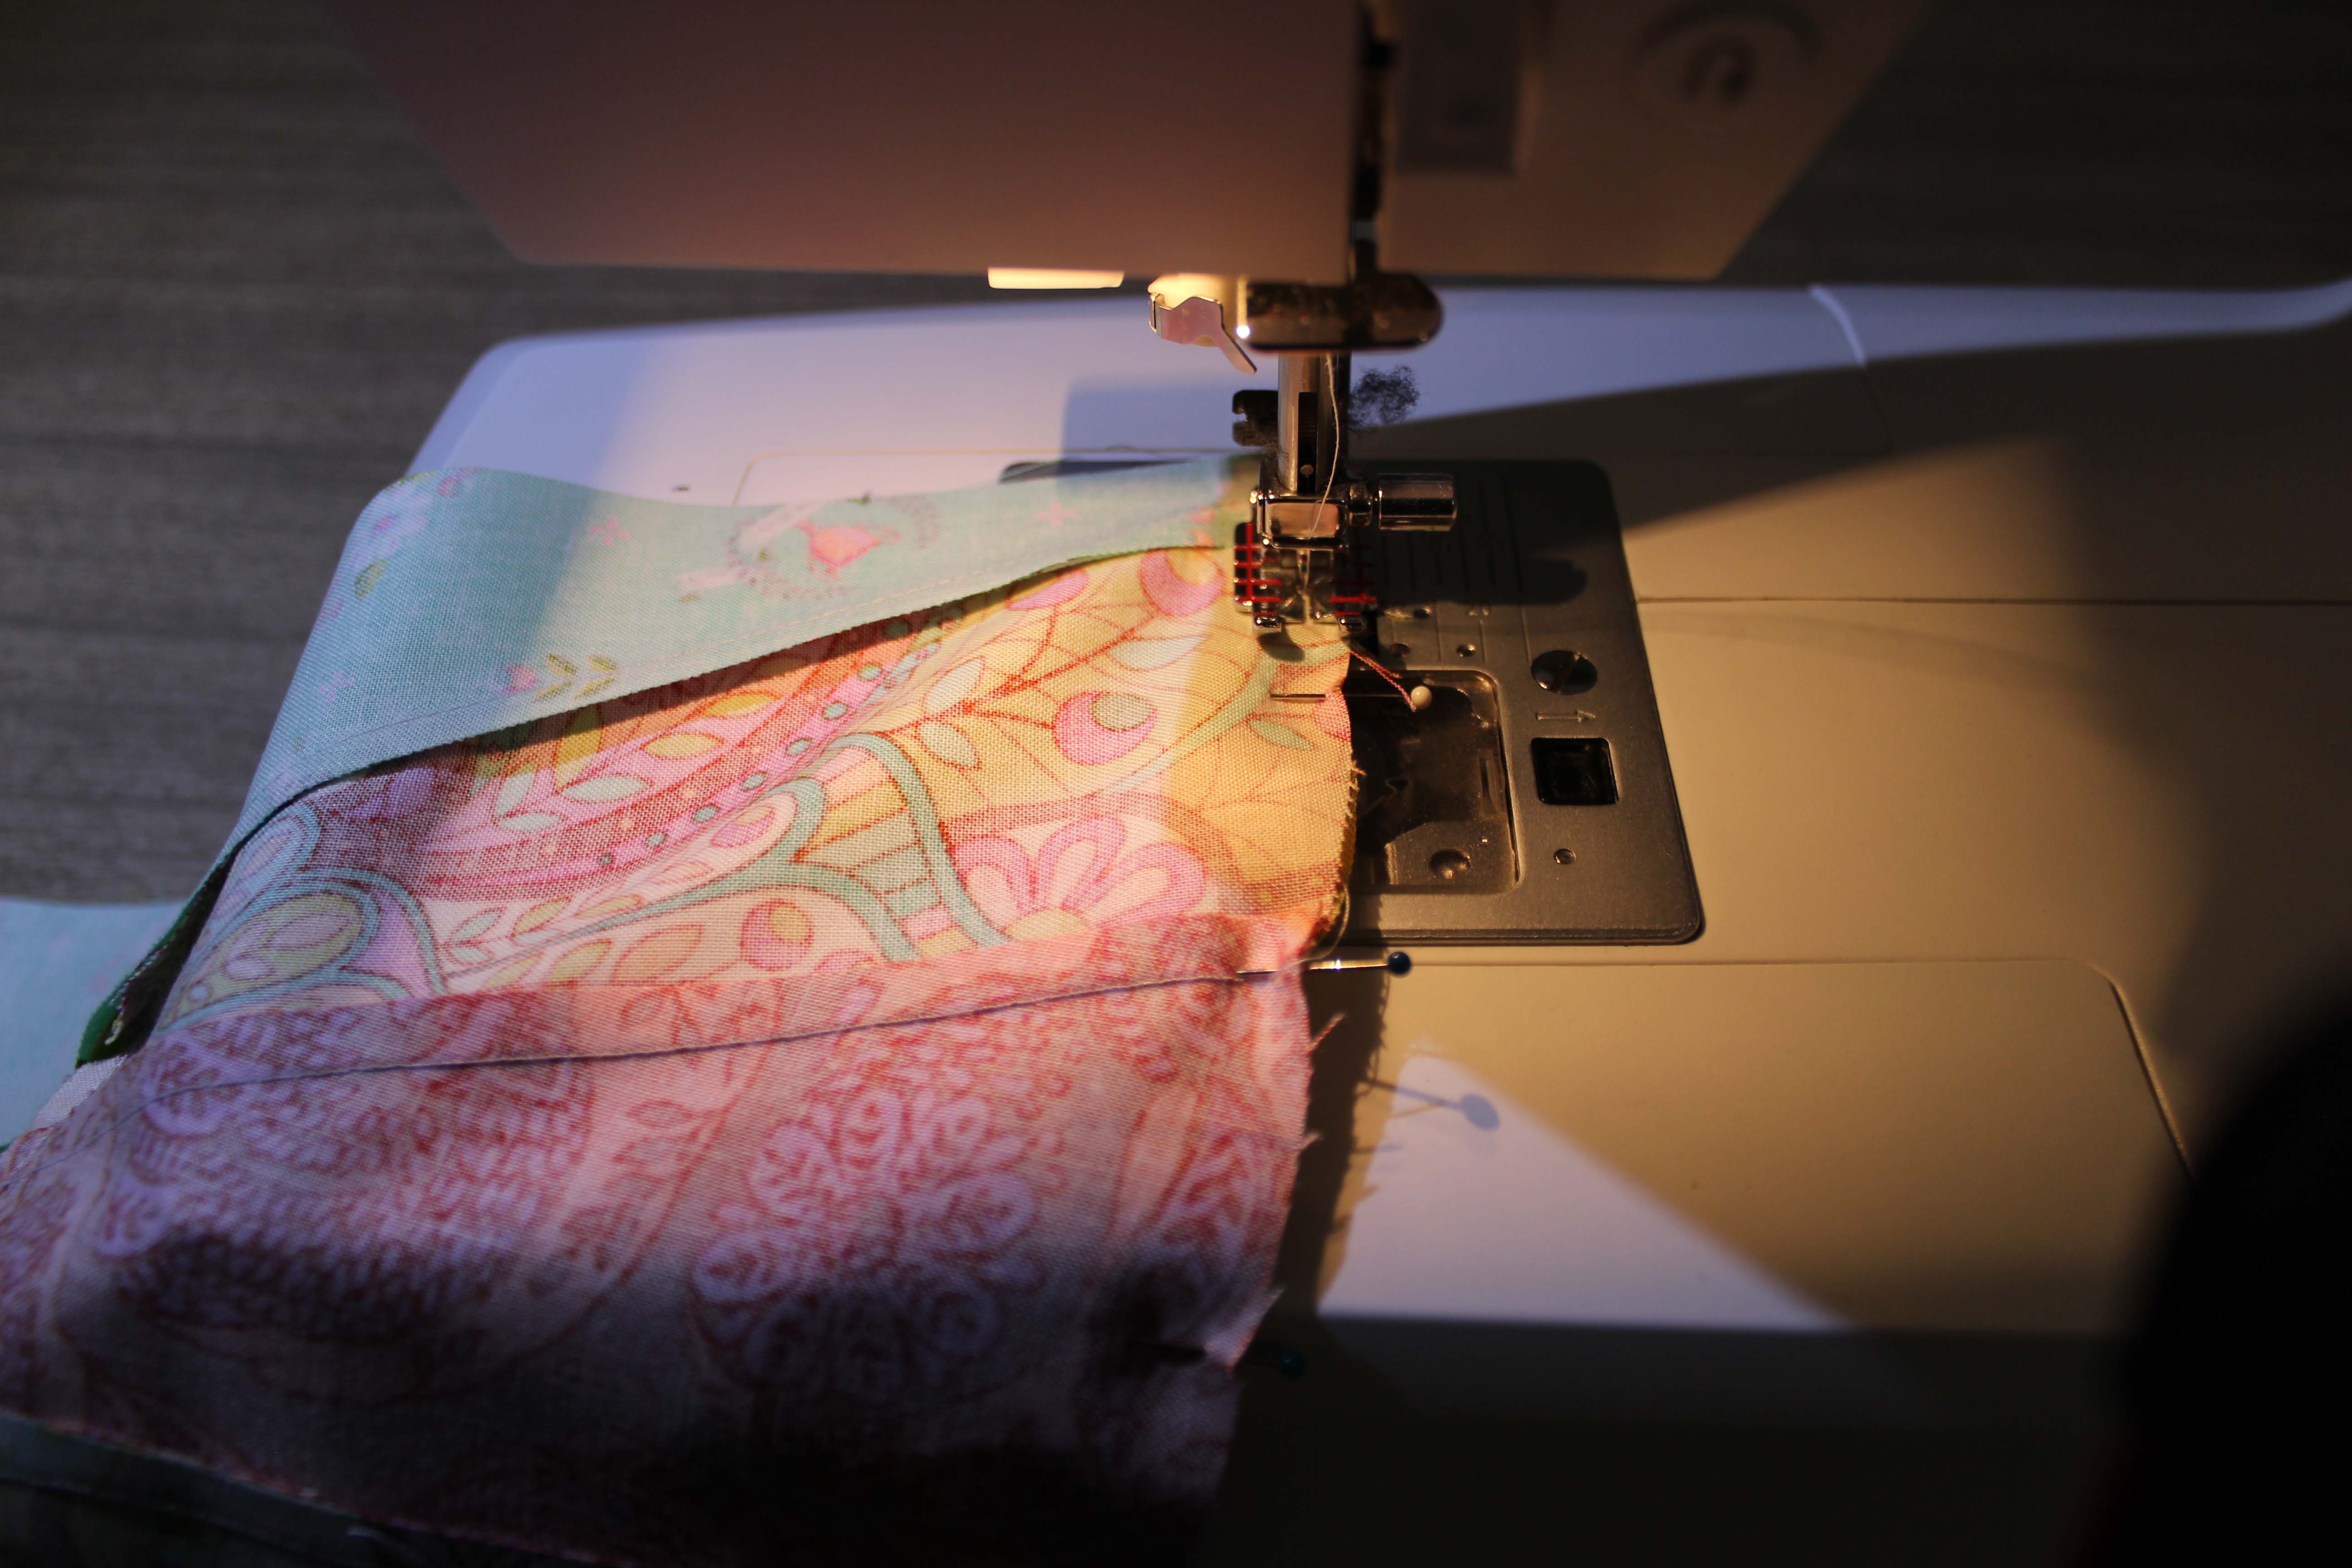
When I sewed this, I flipped it over so the side with all the seams was up. This way I could guide the seams under my needle and not get any scrunched up. Just trust the pins and go slow while you sew.
(it’s really hard to get a decent picture of something on the machine. I’ll have to practice this)
The directions for adding the side pieces with the Y seams are self explanatory so I don’t have any extra tips for that.
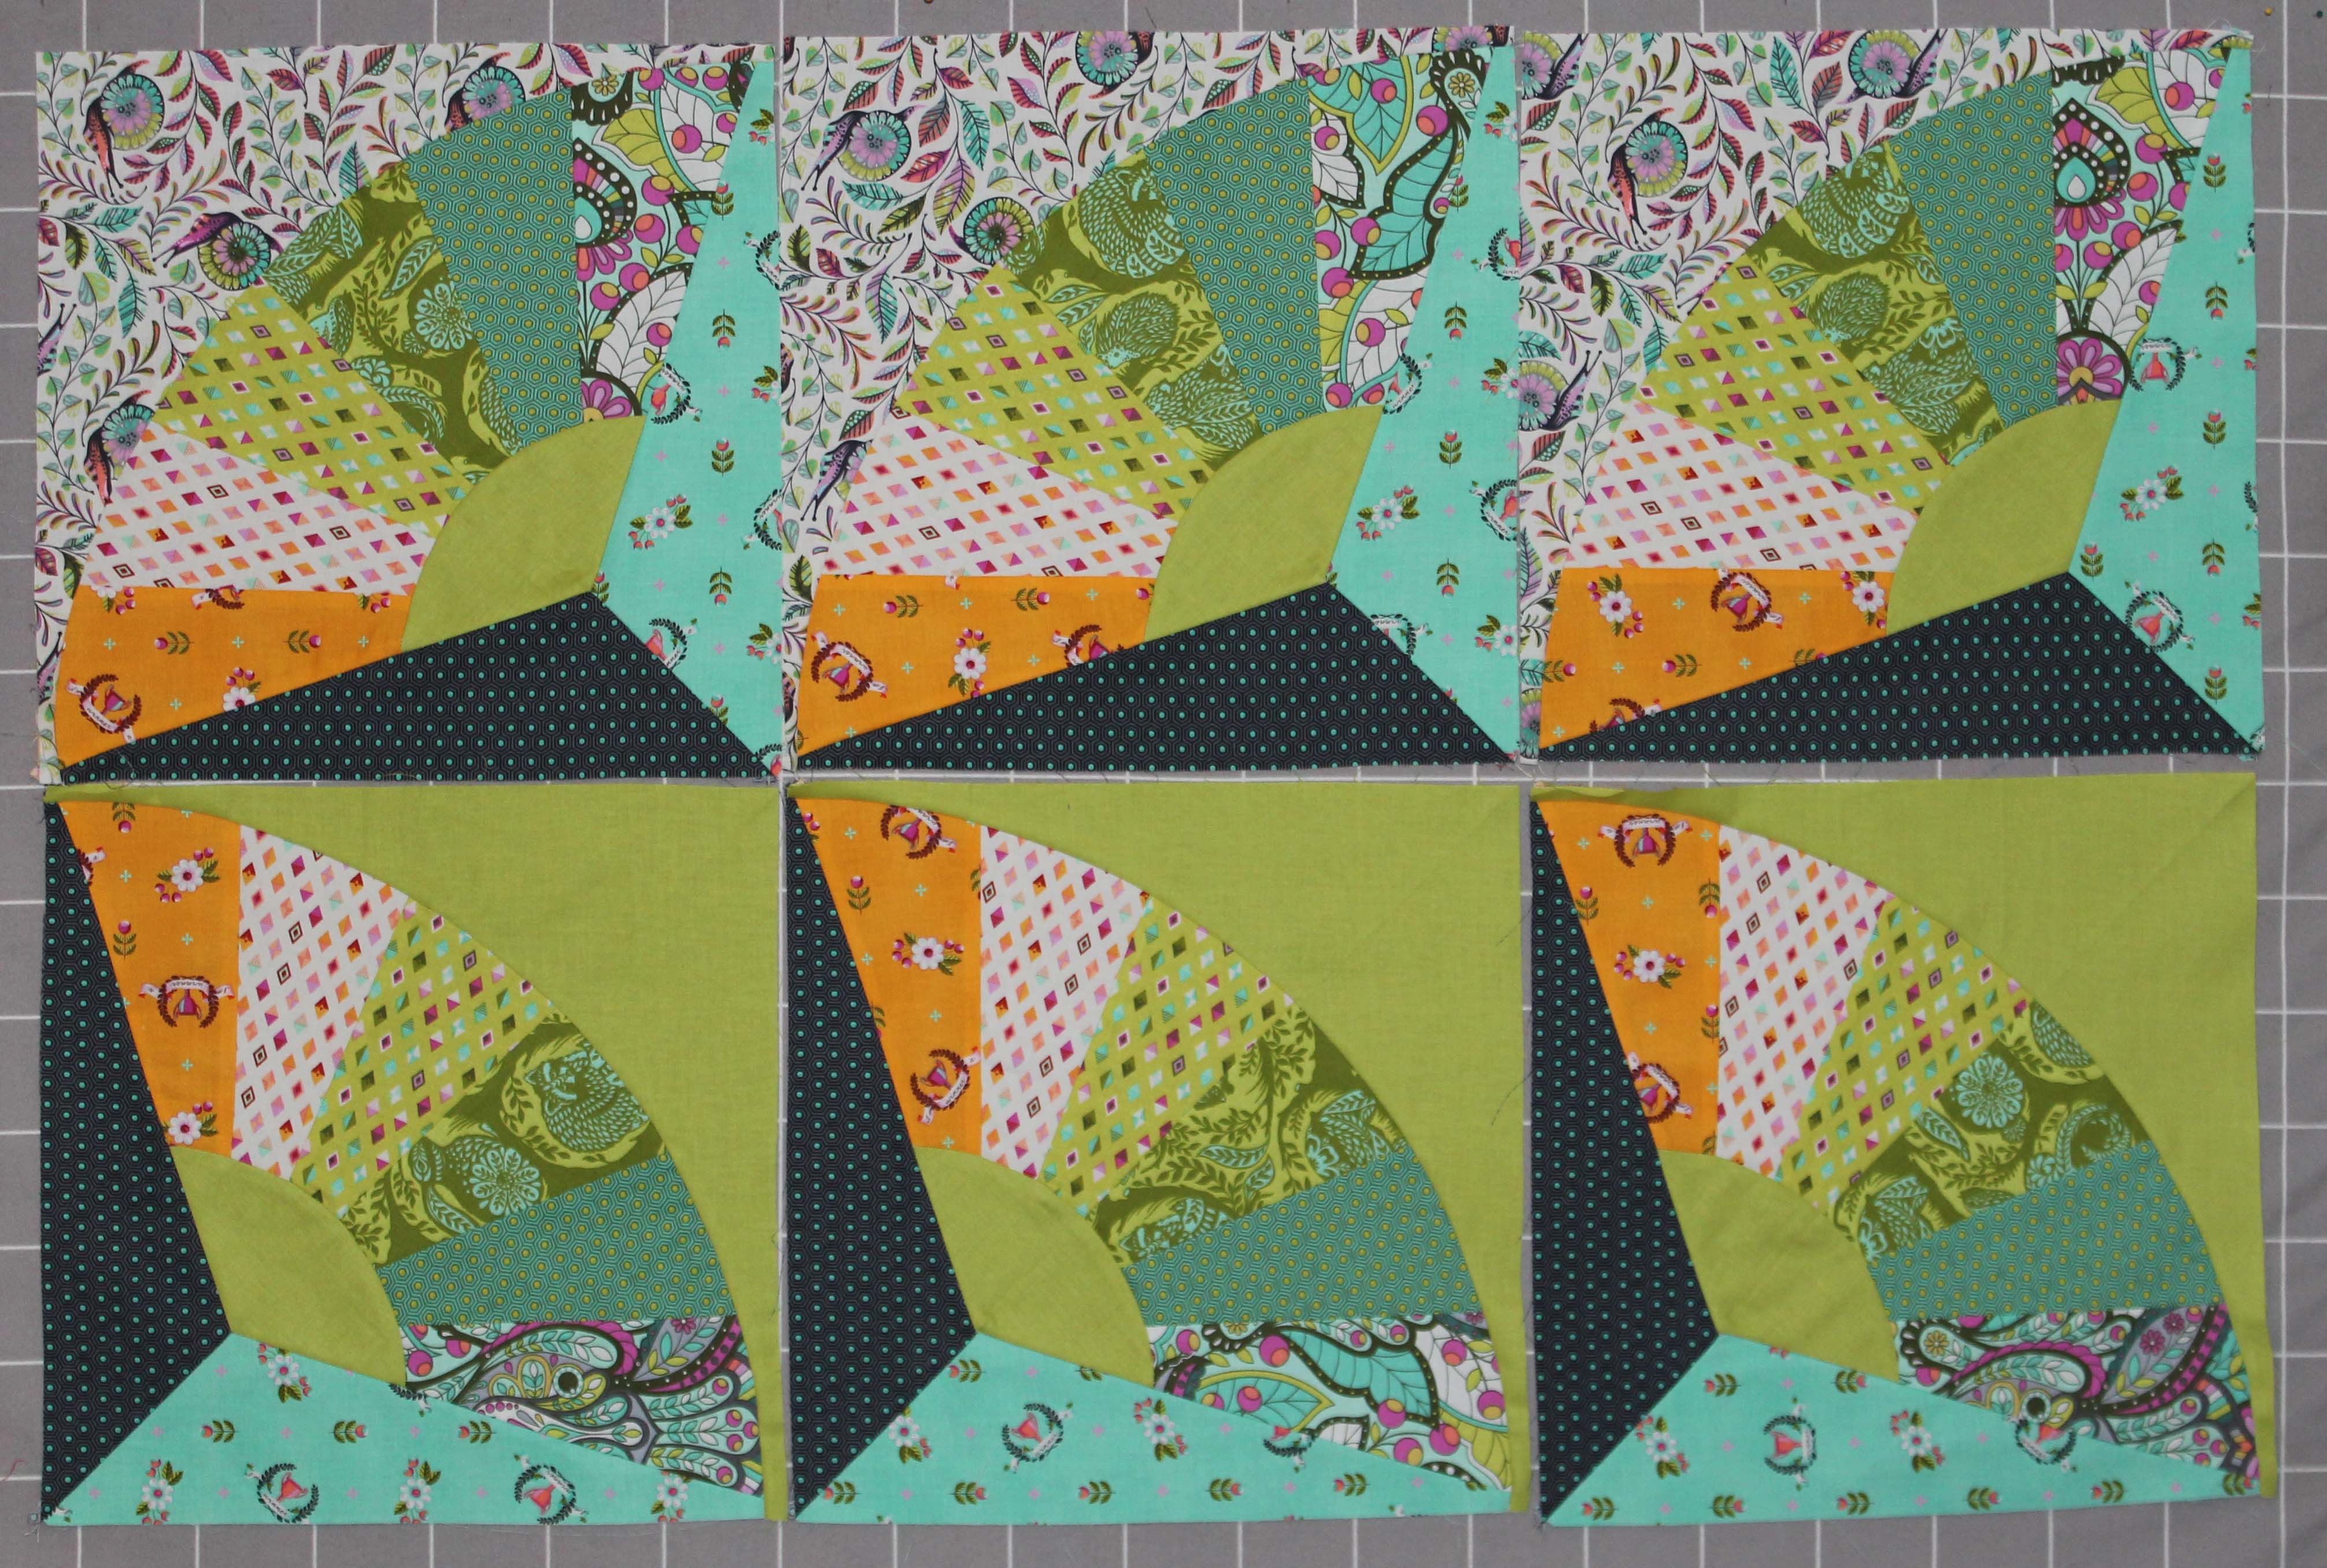
Here is group 1 all done!
The next few weeks we are repeating the same steps with different groups of fabrics. Next week is group 2.
Do you have any tricks or tips you have used?
Do you have any questions on these steps?
Share them in the comments and I will do my best to answer them!
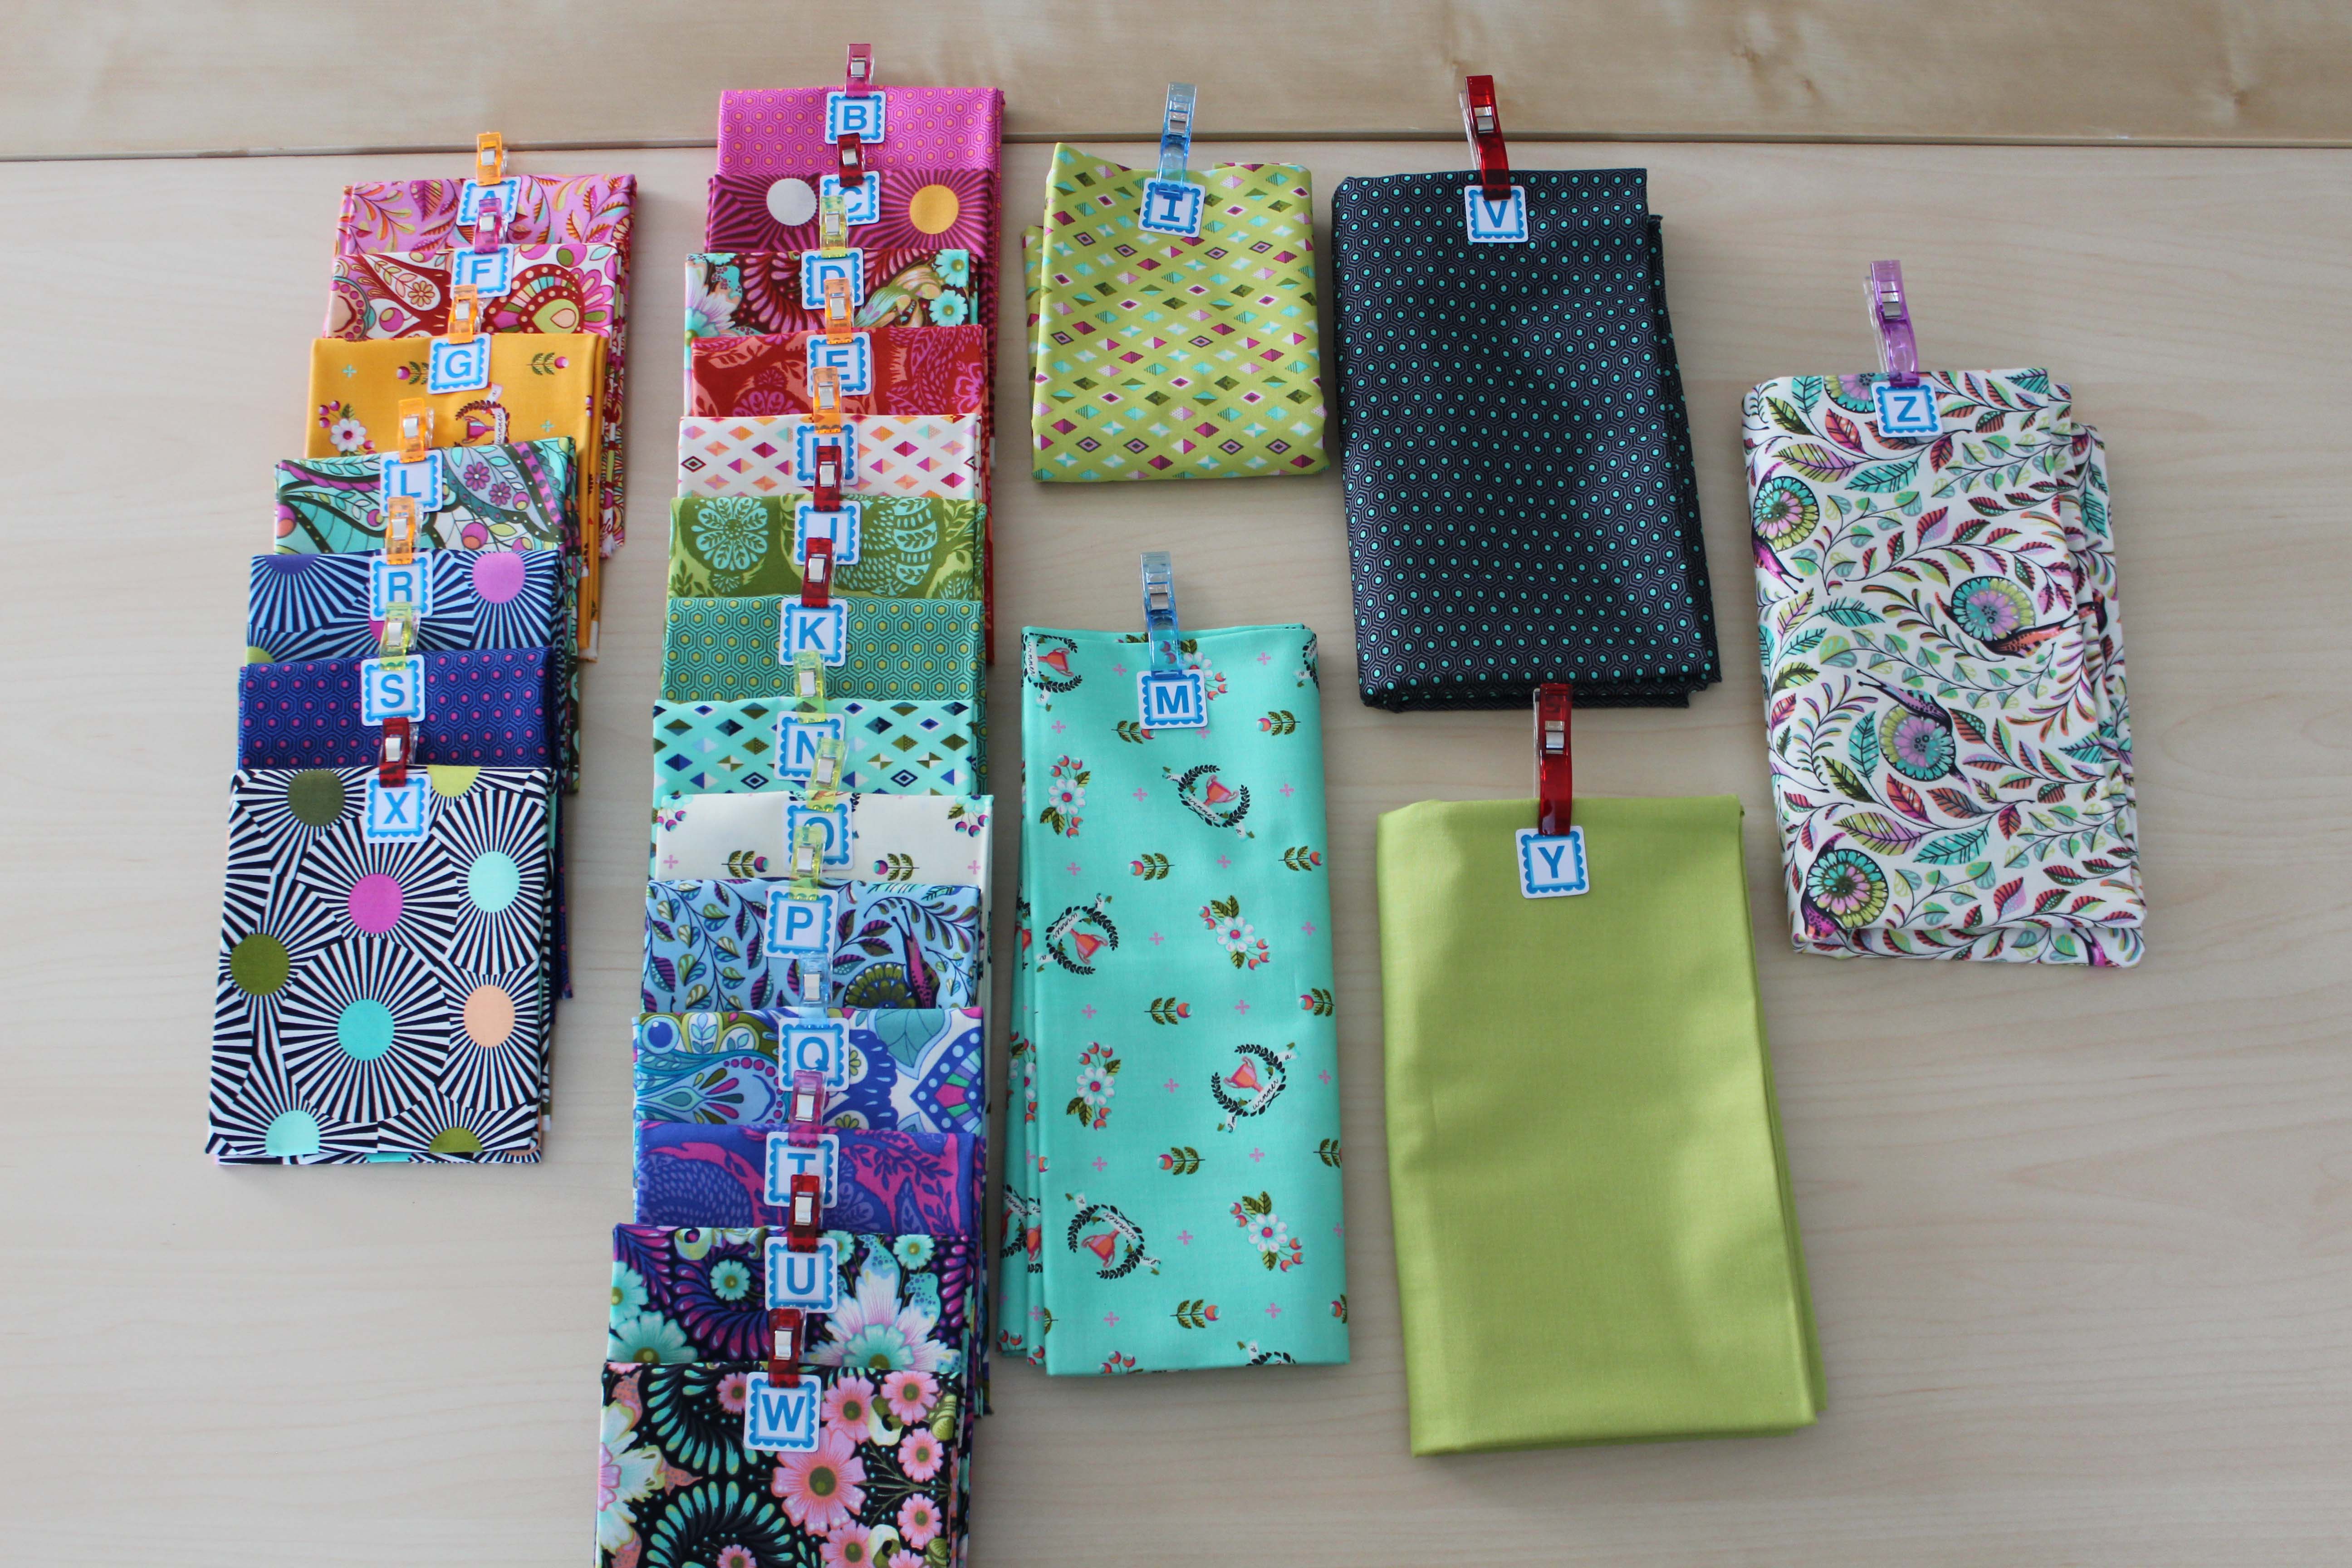
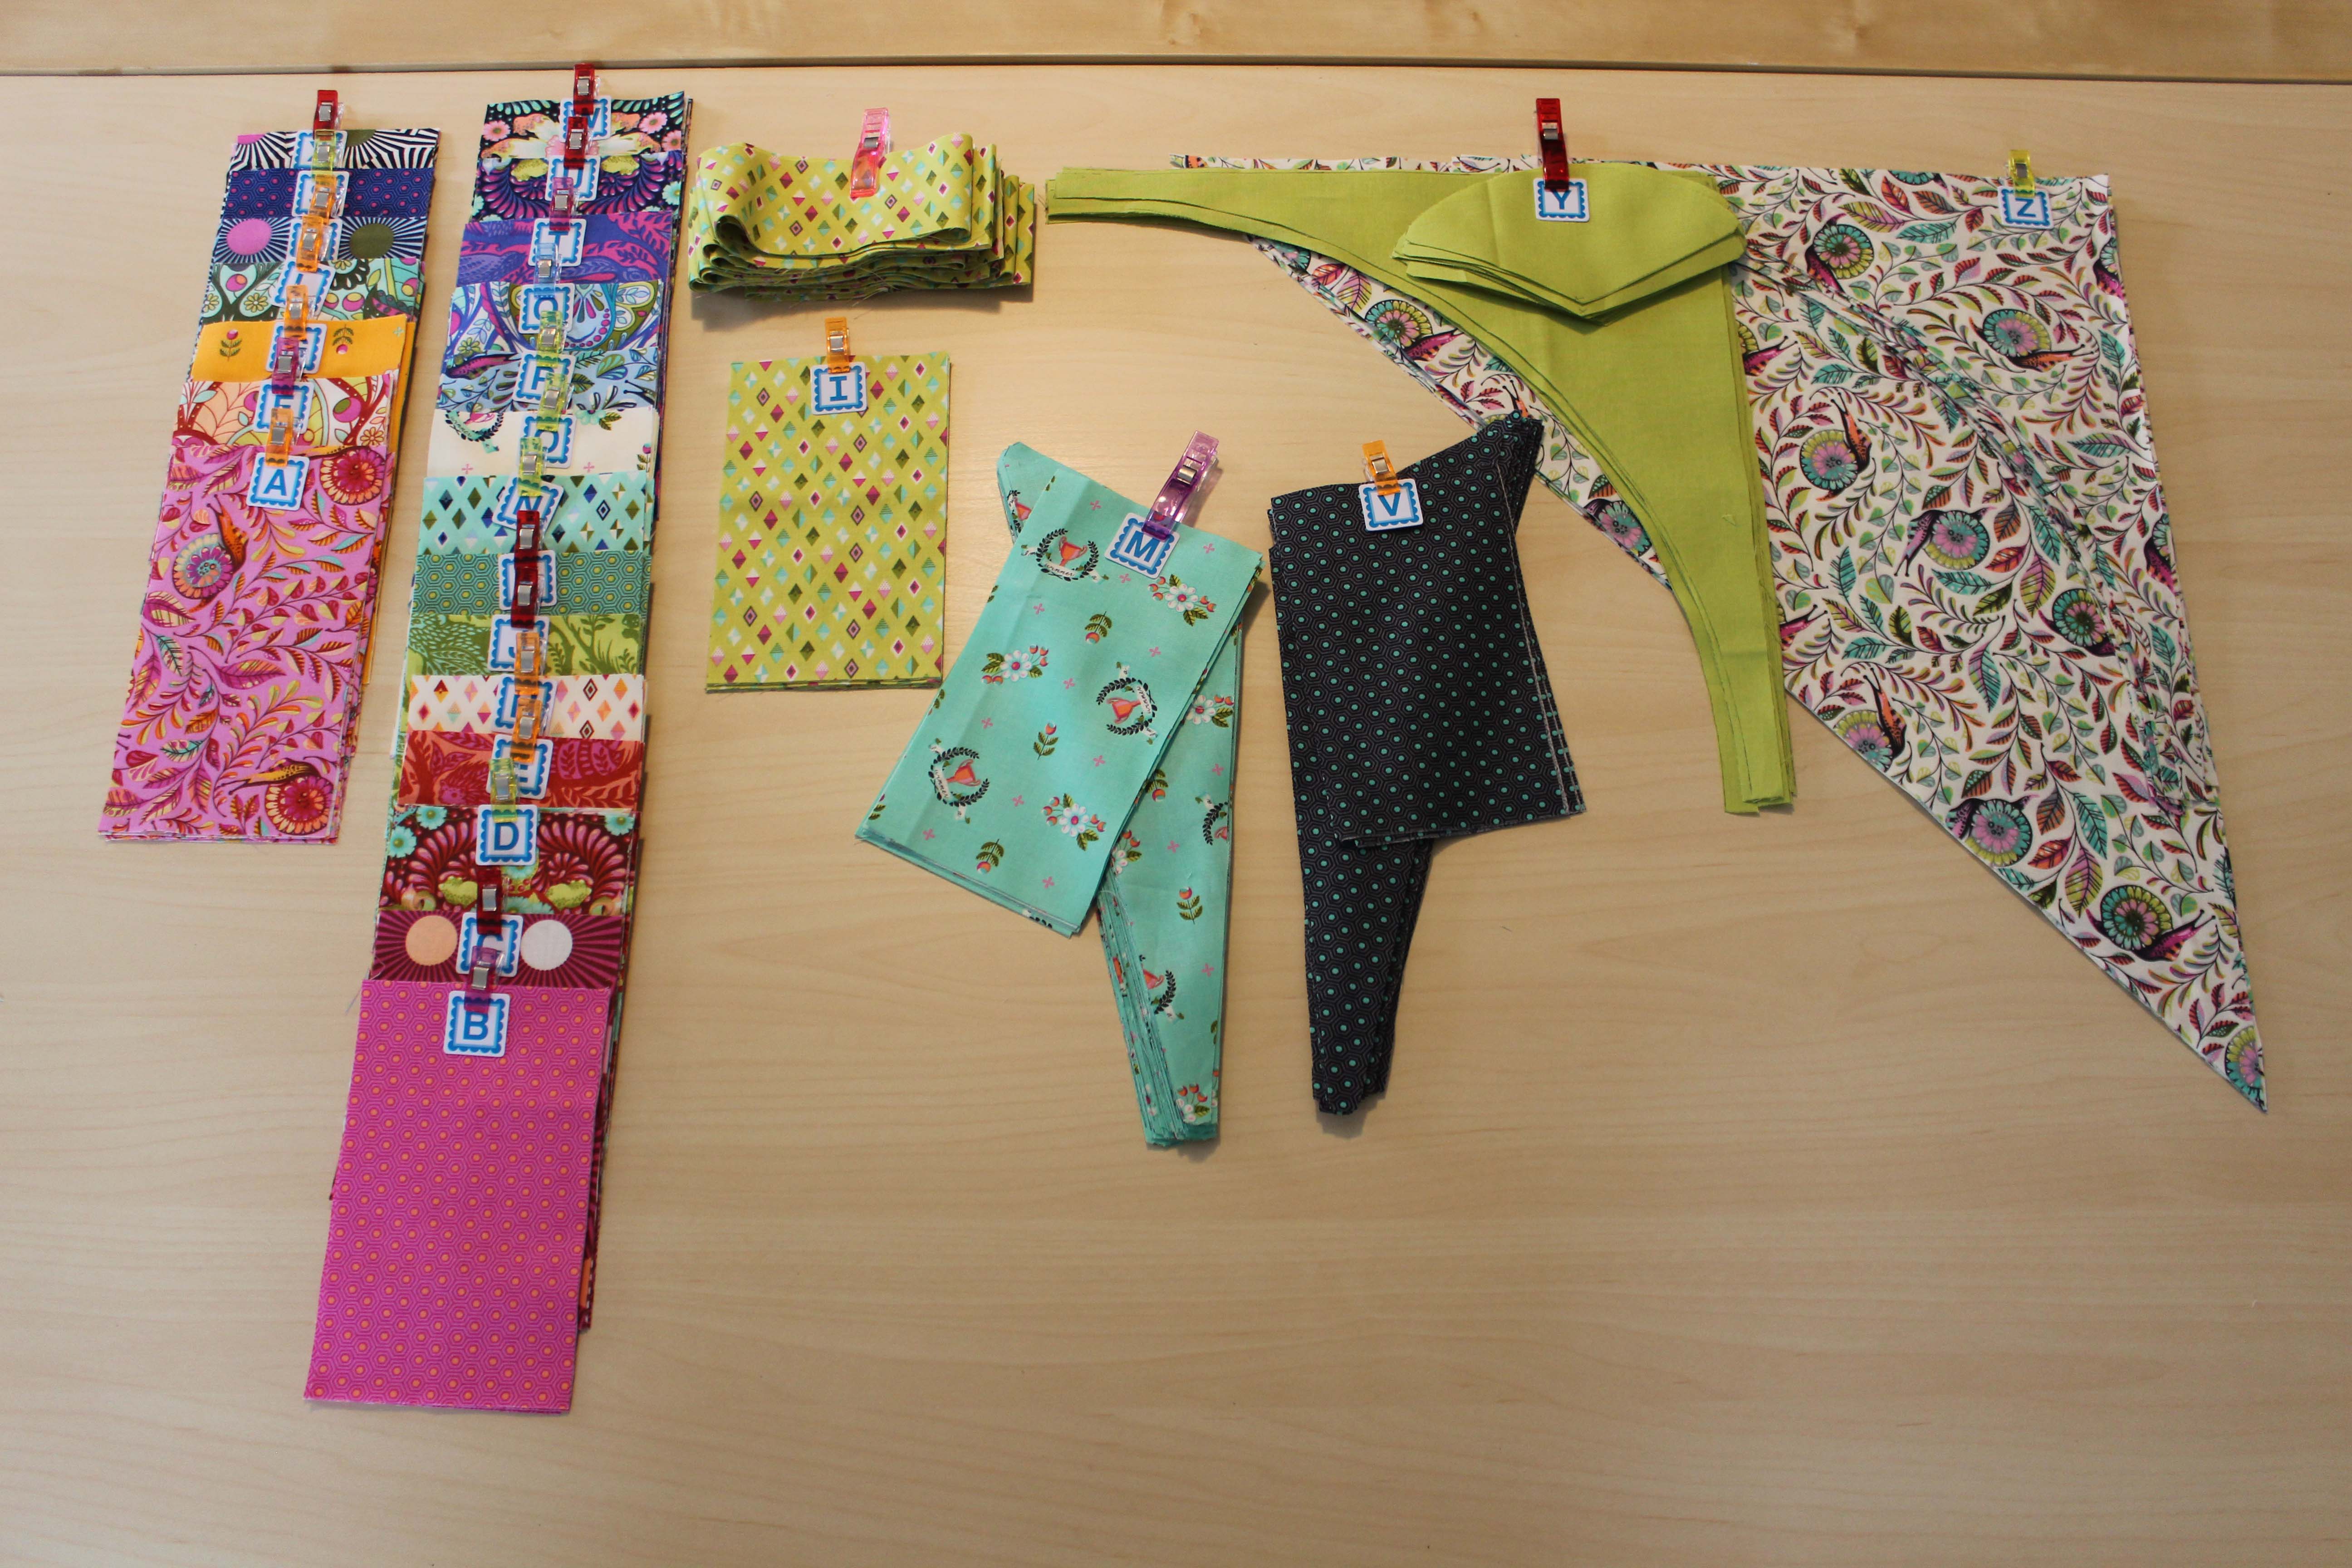
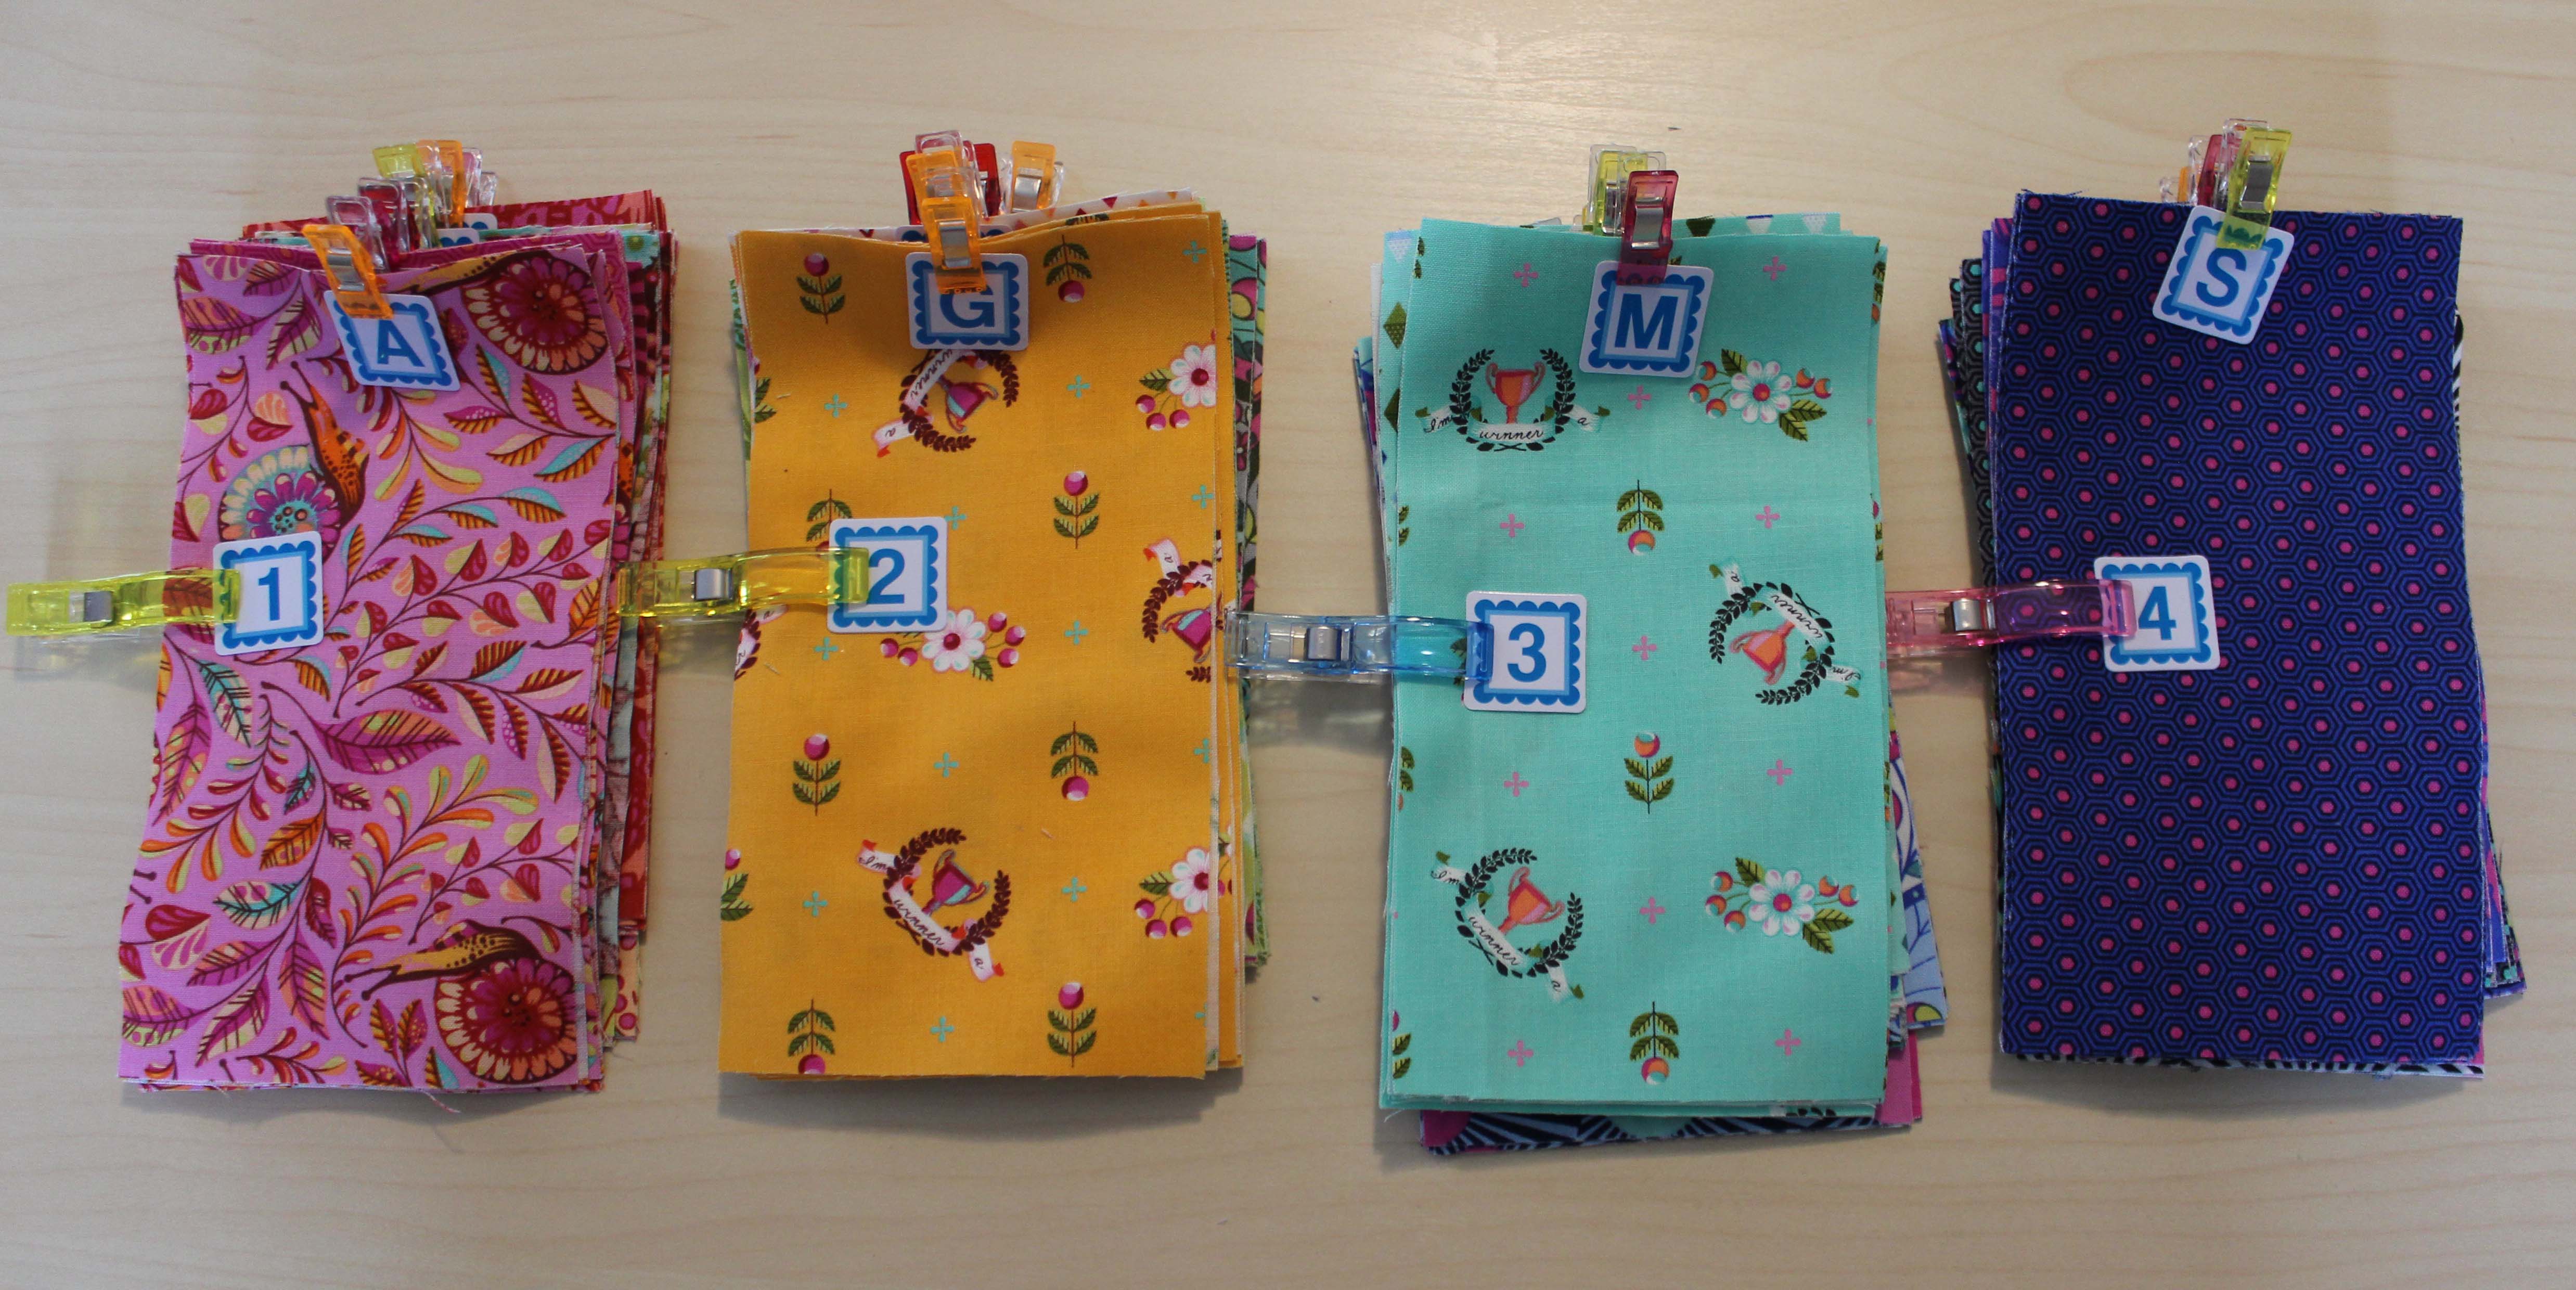
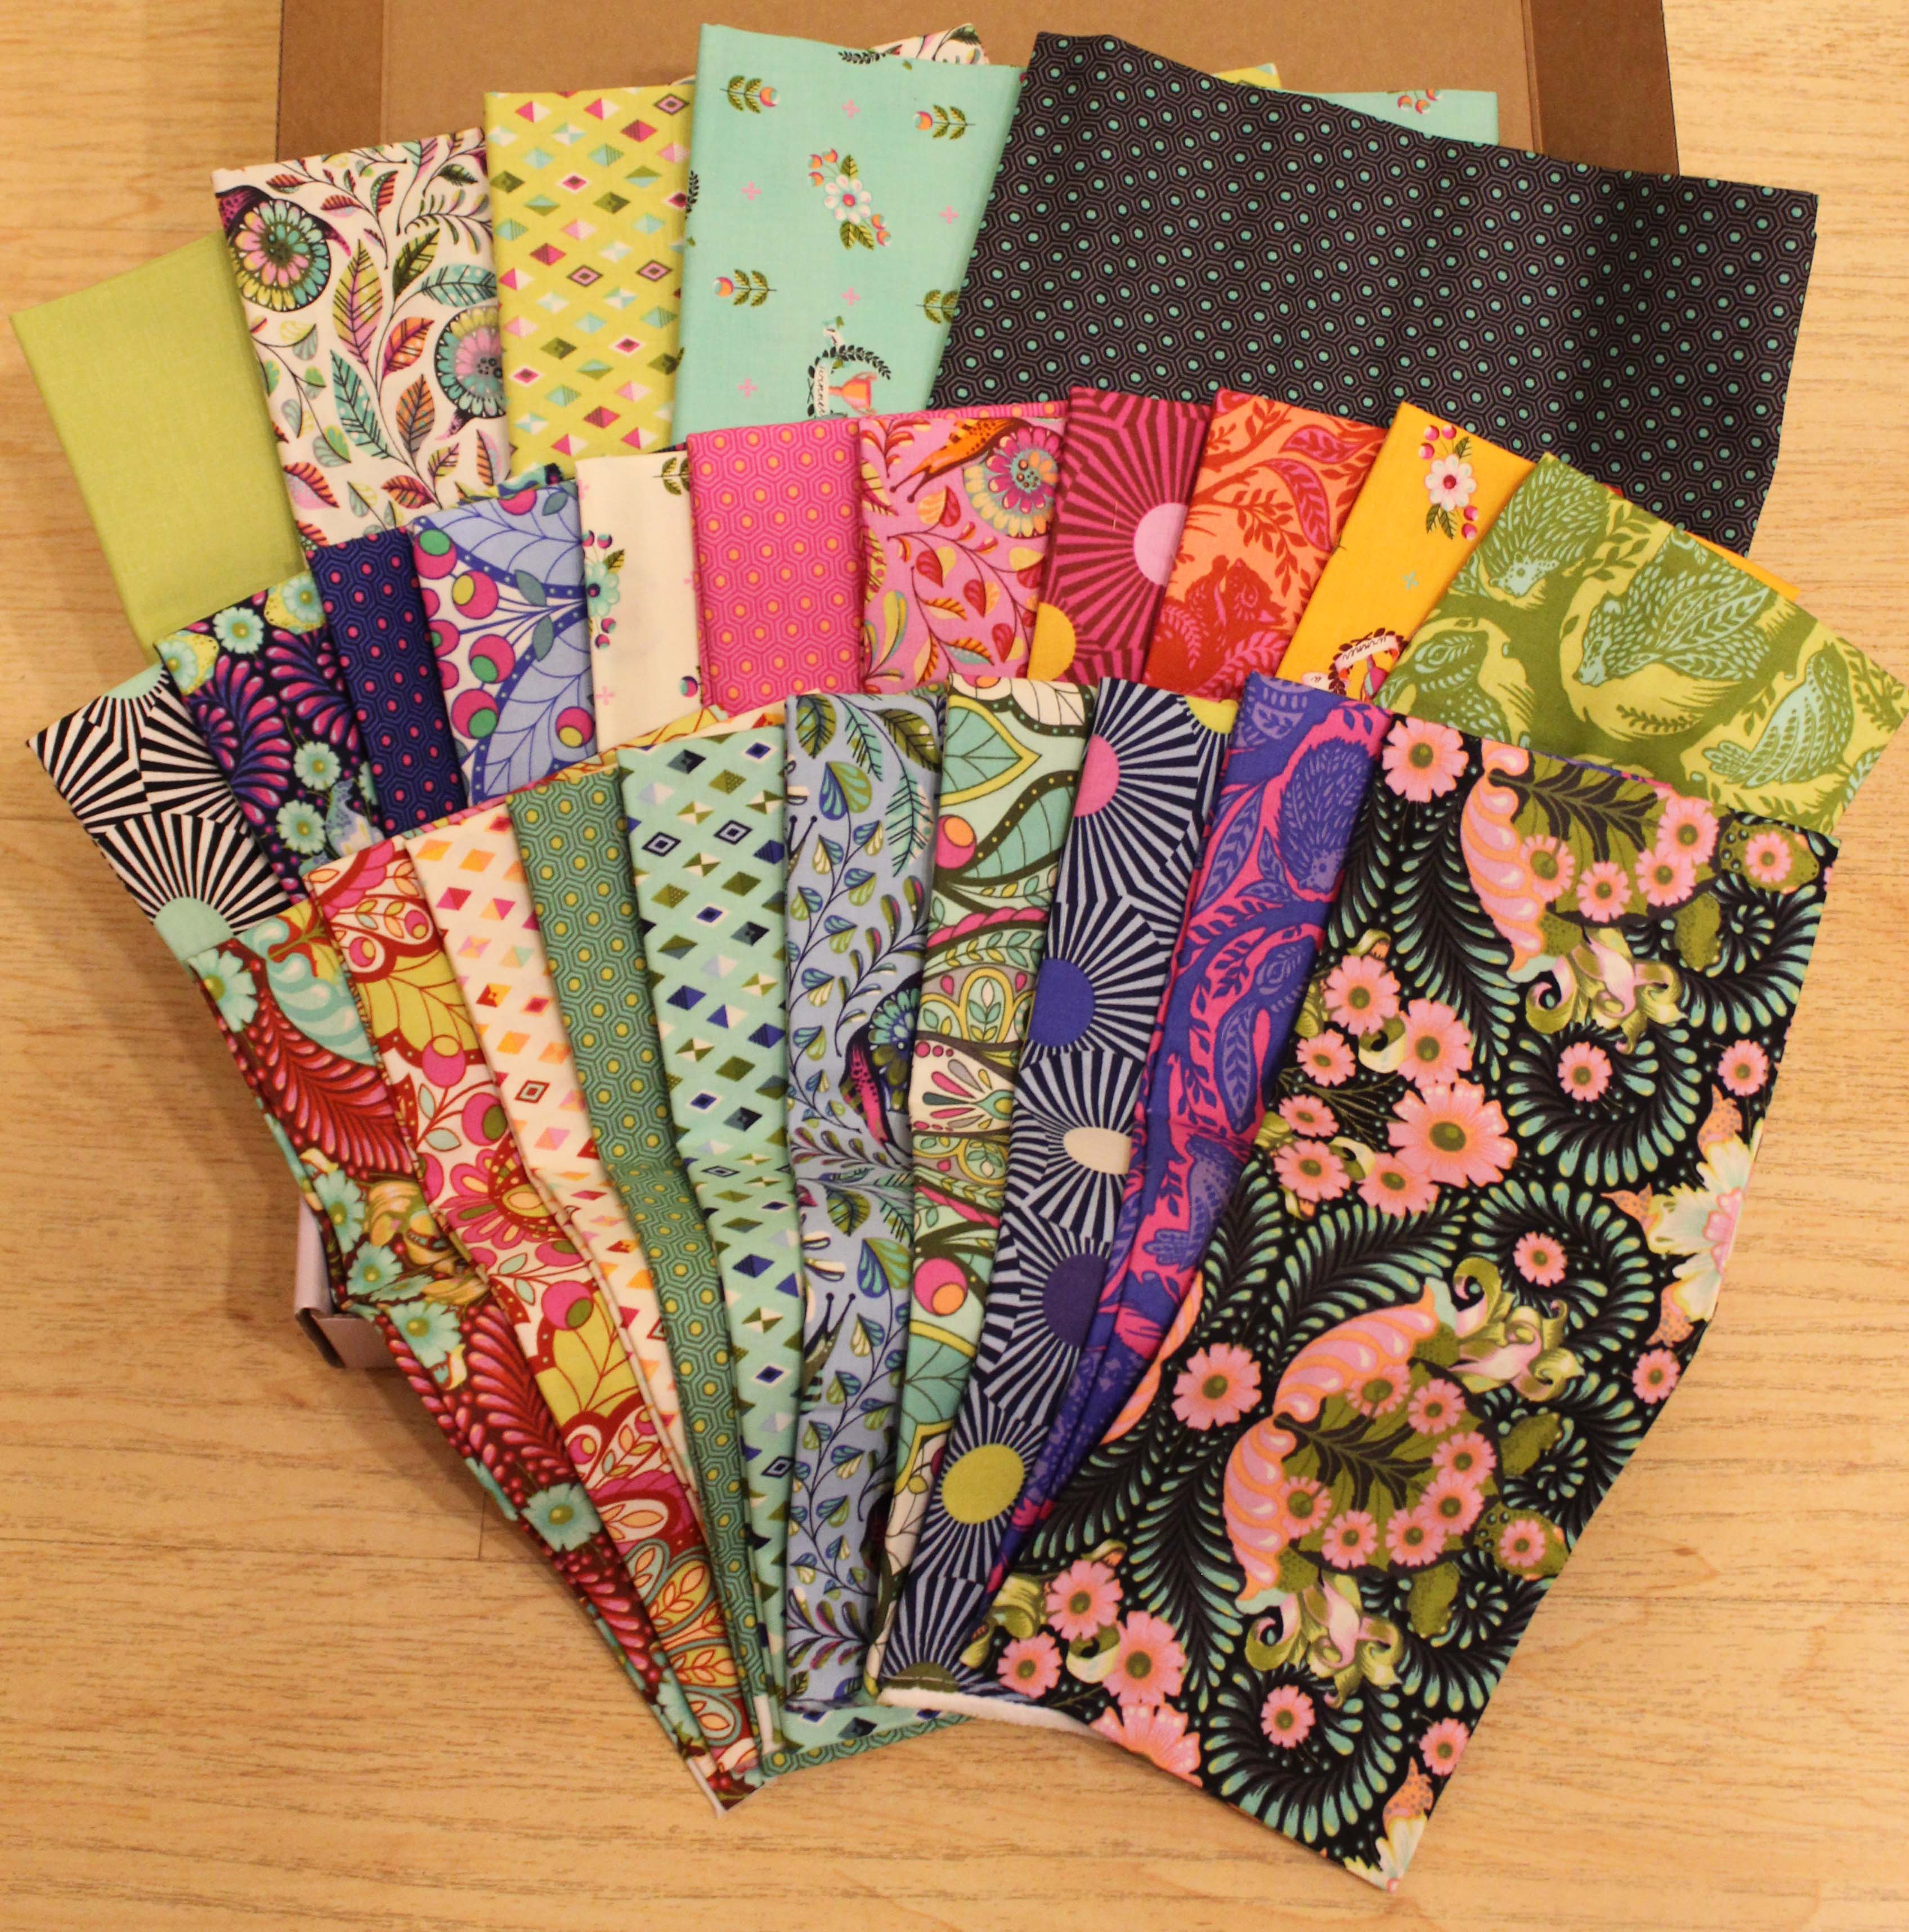
Here we go!!! It’s time to cut into all that delicious fabric! But first, let’s organize it because there are 26 different prints to work with.
I received Alpha Bitties in my Sew Sampler box a while back so I brought those out along with clips to attach them with. I labelled each fabric piece and then grouped them according to cutting directions.
I love how organized this looks.
Ready to go? I am. I used my trusty 6×24 cutting ruler. I also have a 6 1/2 inch square that gets used quite a bit and some larger squares that get used from time to time. For this project I did use my 20 inch square as well.
I began with all the rotary cuttings. As each fabric was completed, I clipped the alpha bittie label back on the cut pieces and then put all leftovers in my new Tula Pink scrap bag. Something wonderful will happen with all those leftovers I am sure.
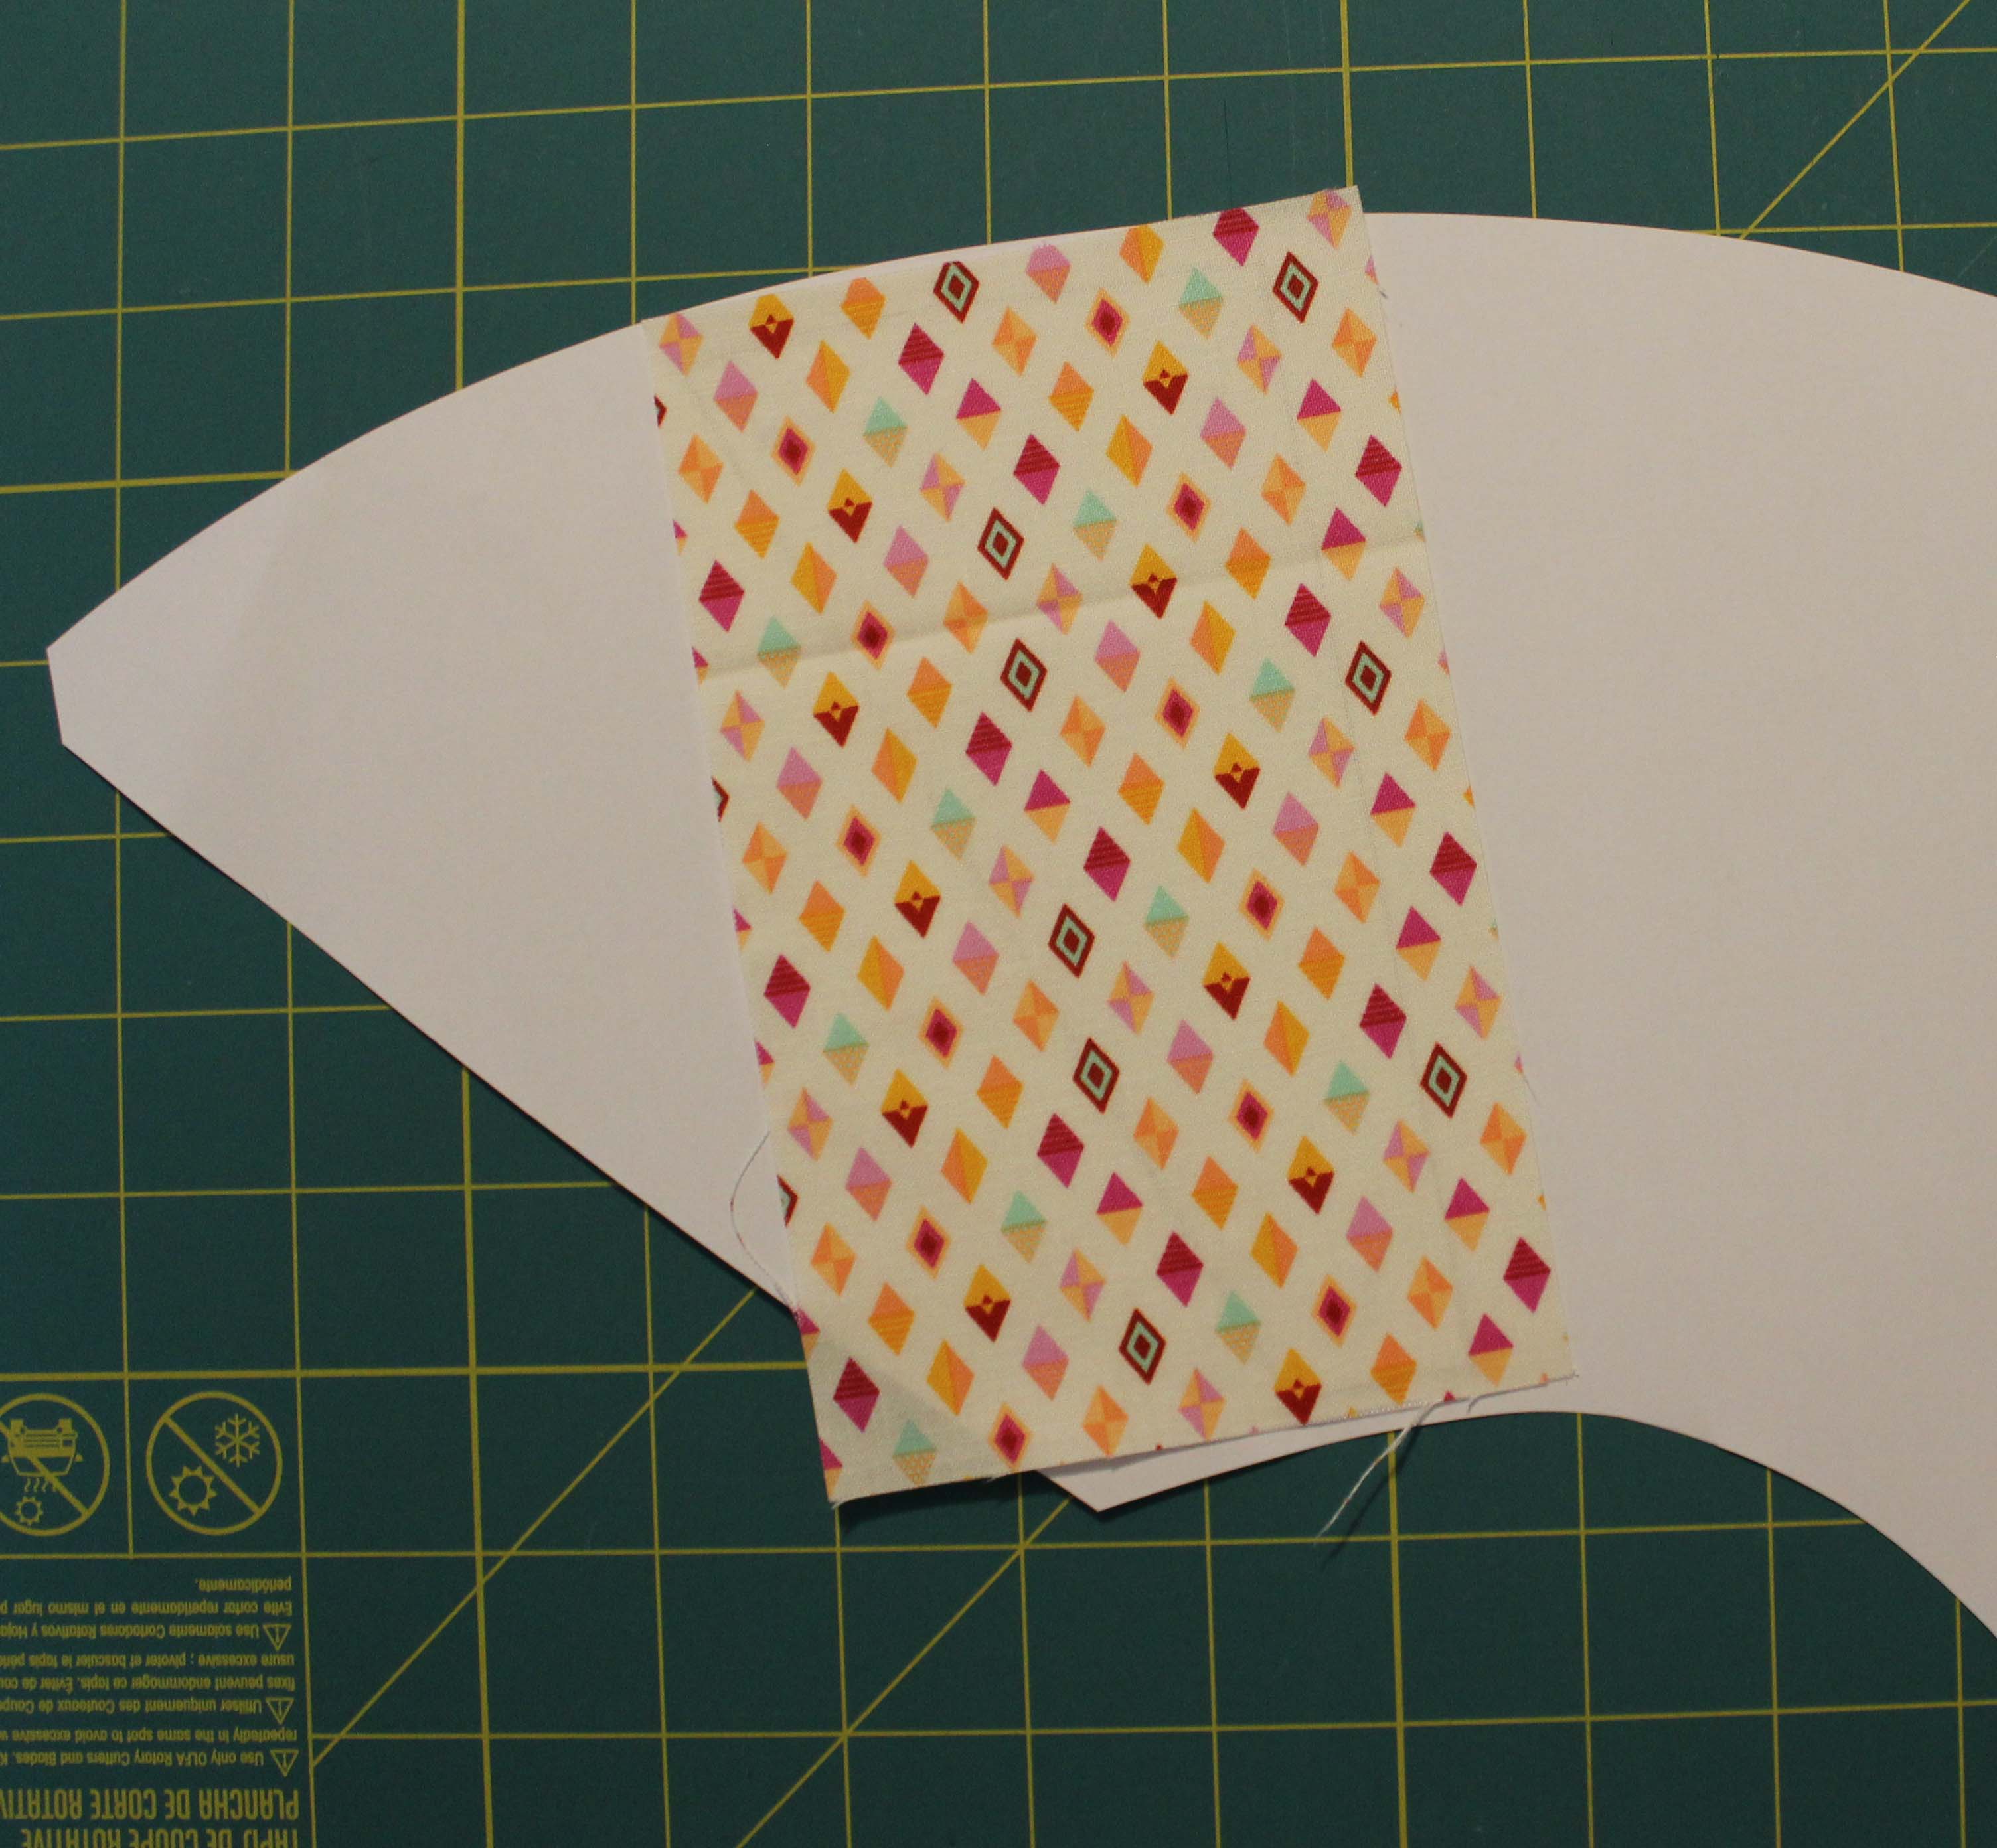
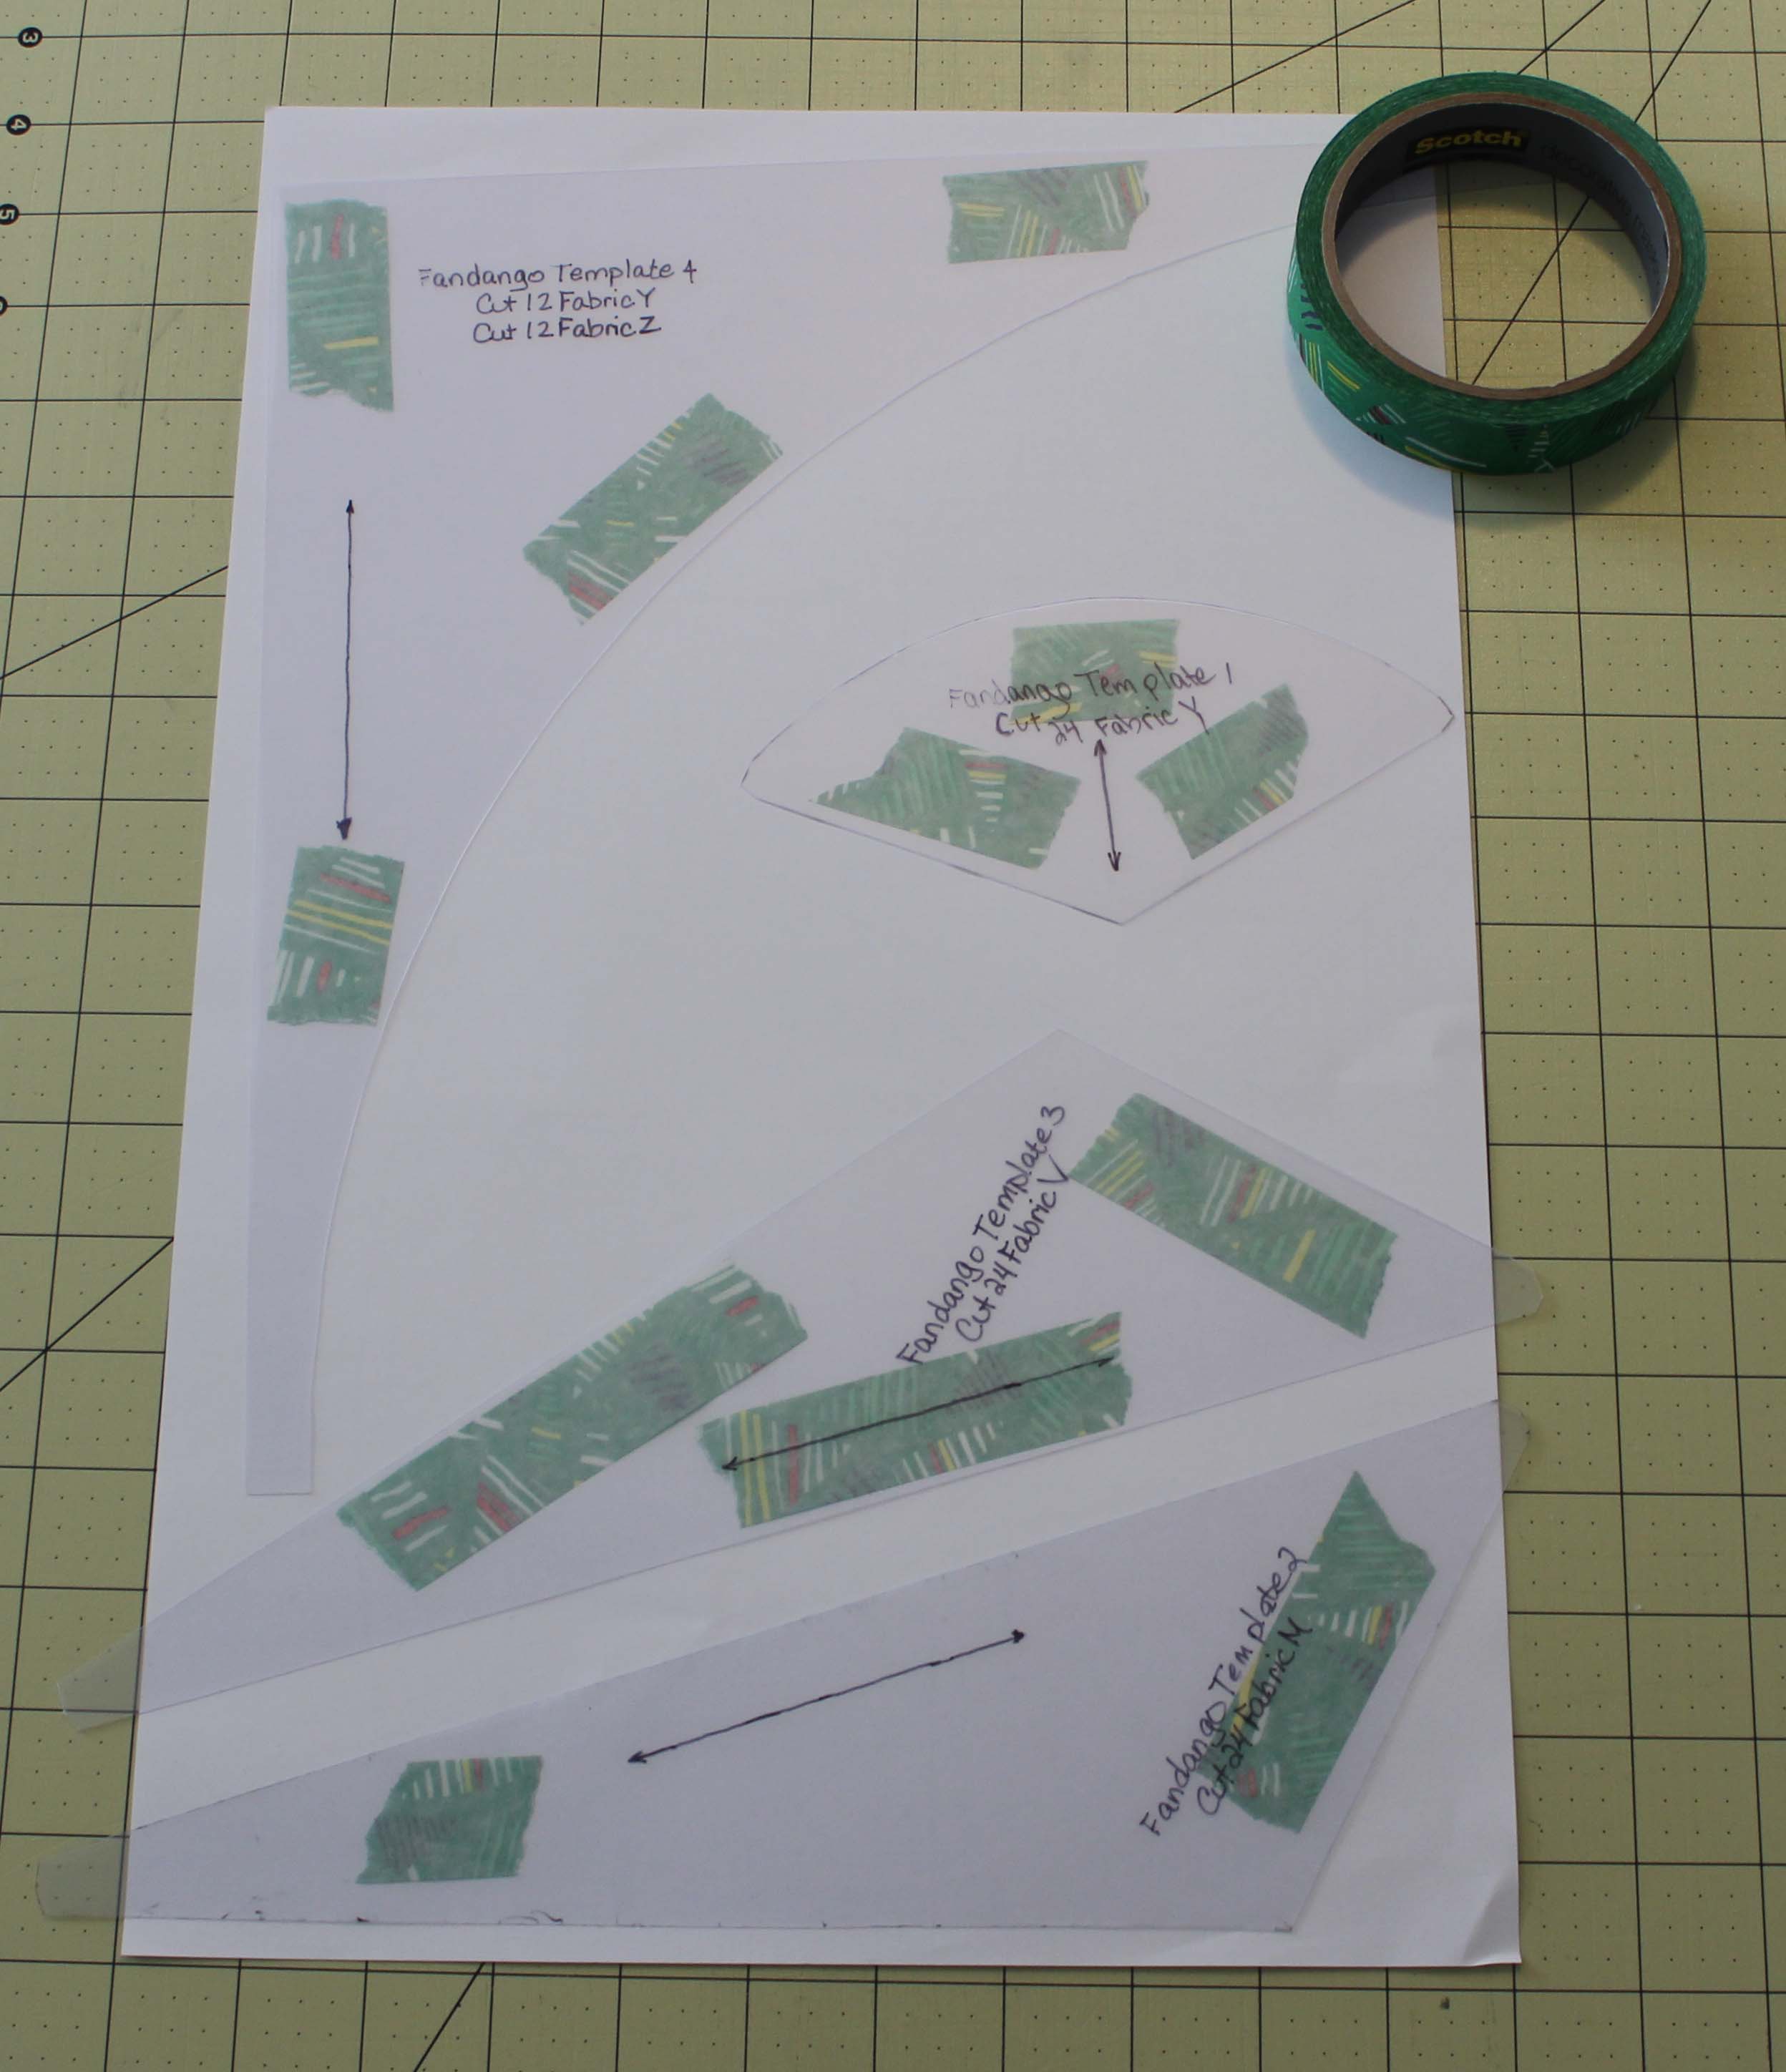
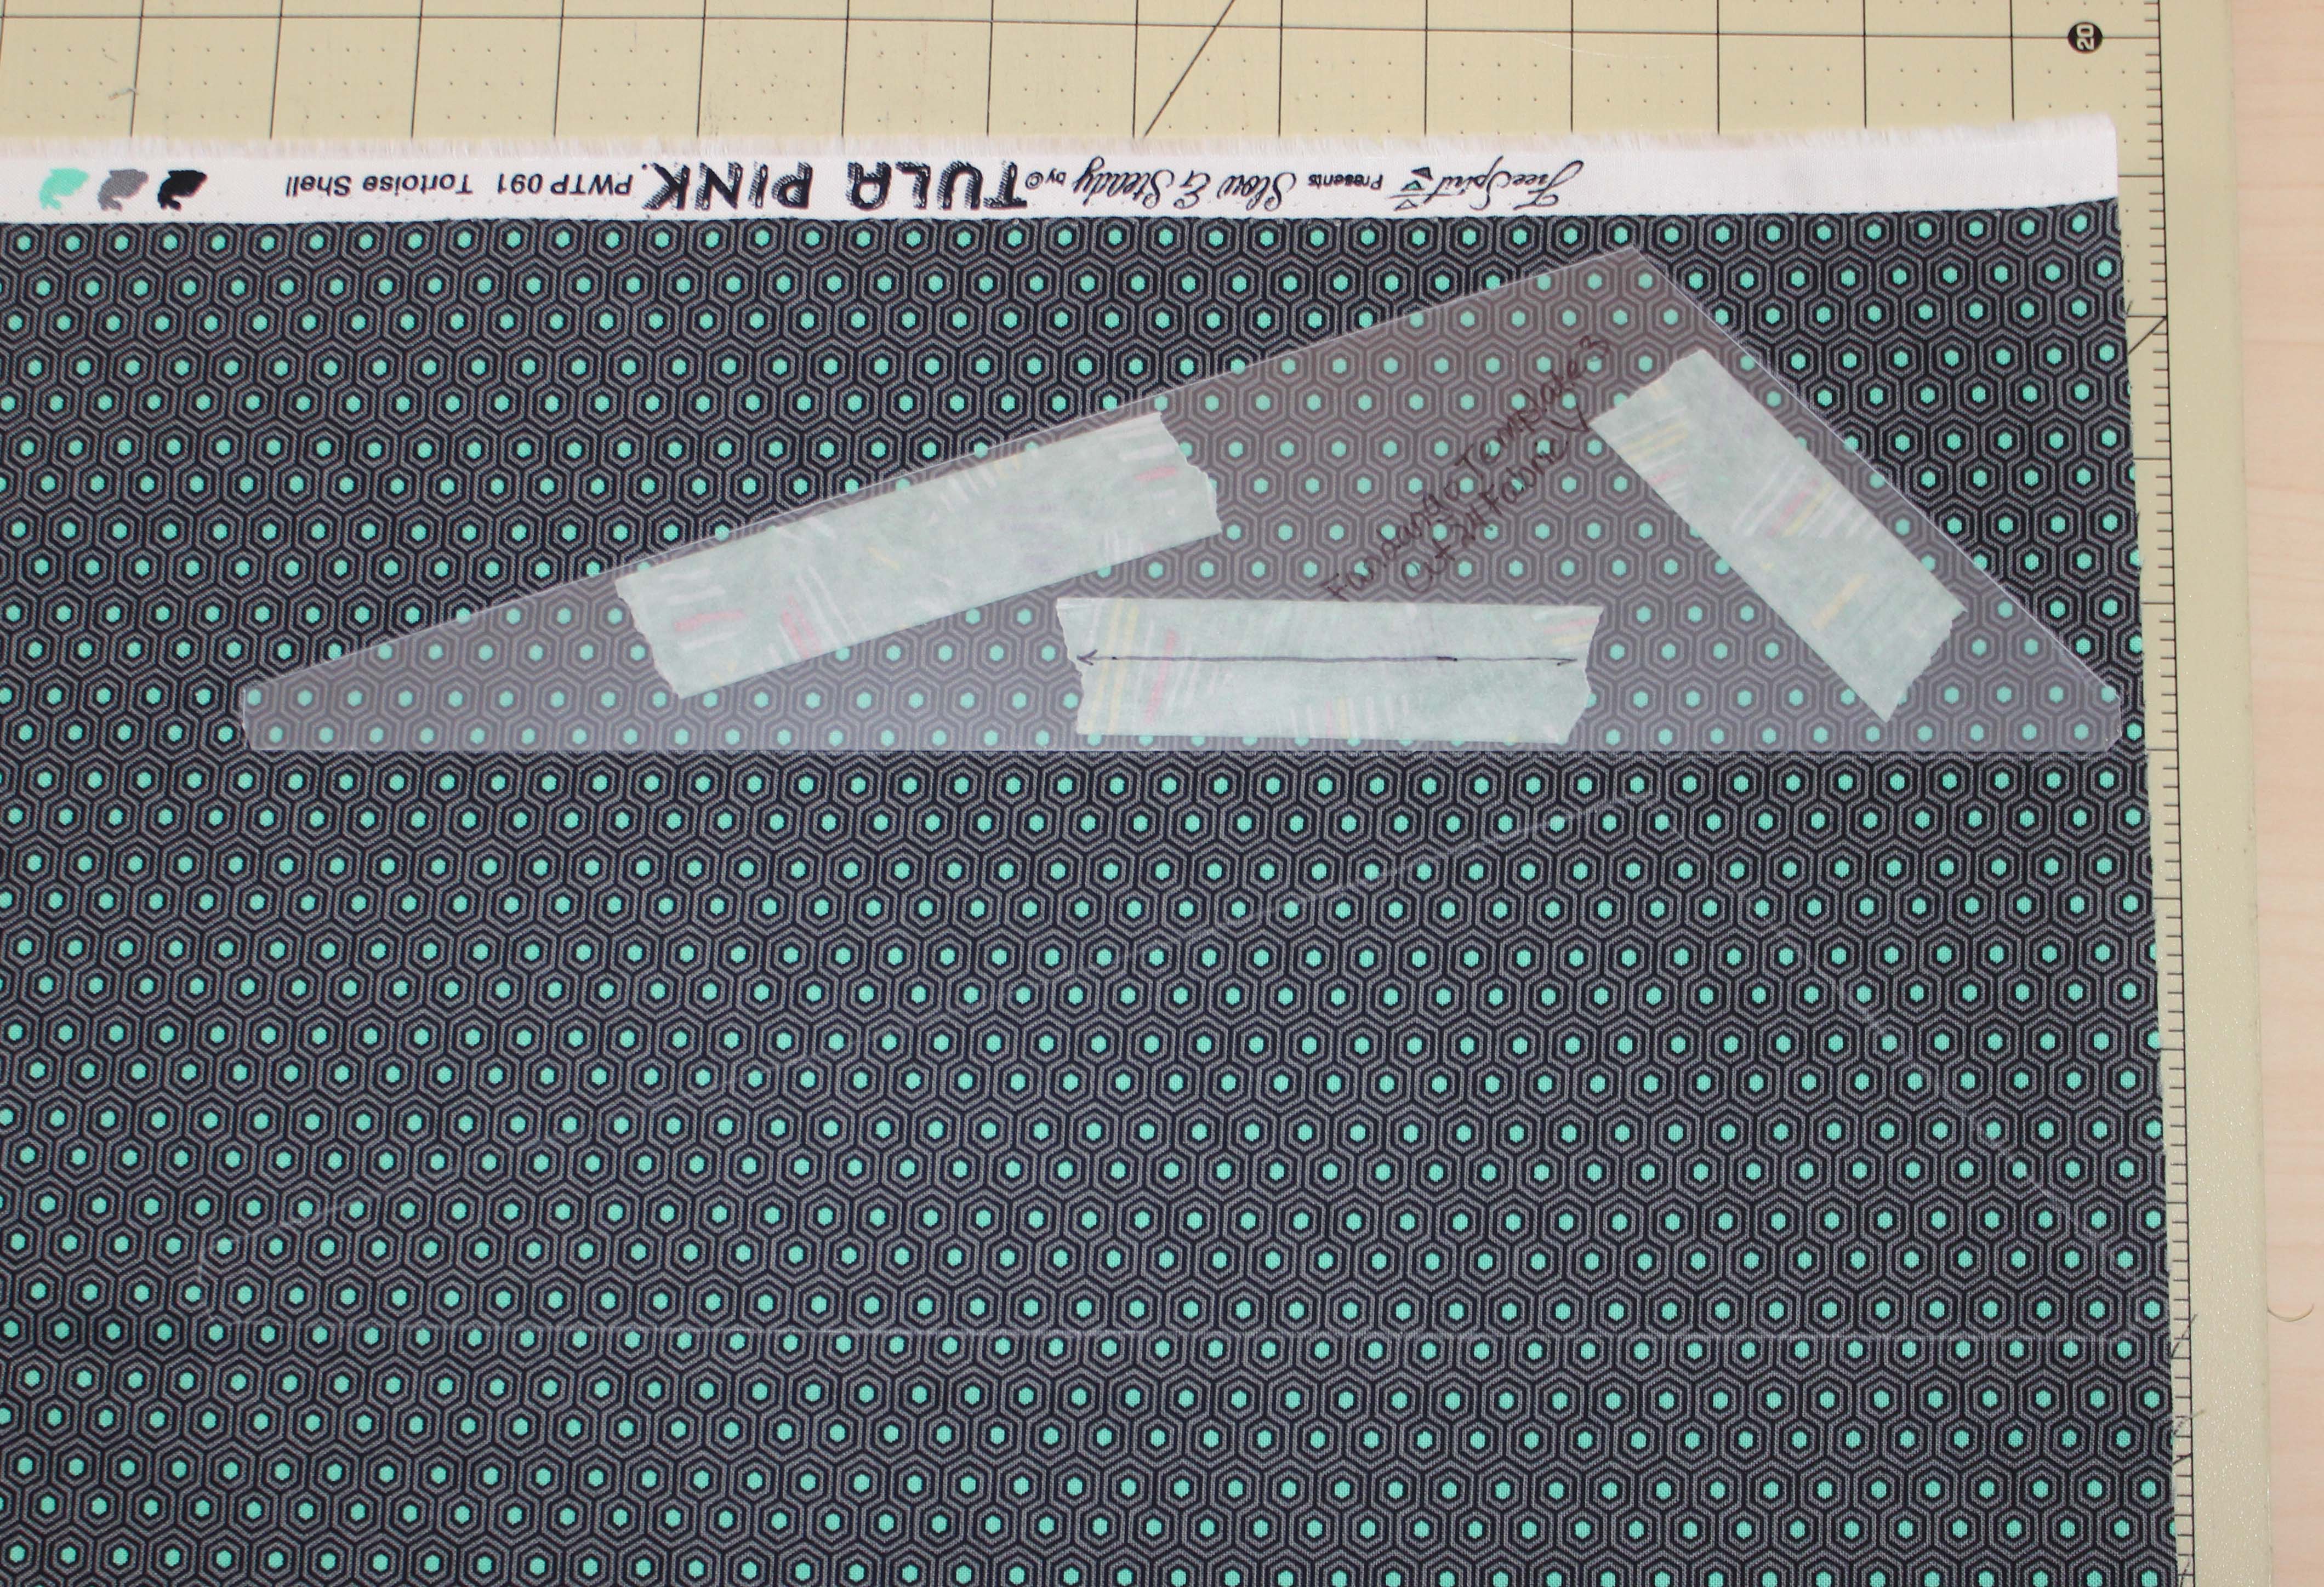
When that was all done, I pulled out my templates I made last week to trace and cut. The first thing I discovered was how slippery those templates are. I grabbed some masking tape and placed it on the wrong side of the template. Not as great as some no-slip tape, but a world better than what I had going on before.
Remember the arrows we traced on the templates? Those are to show you the direction to place the template in. It says to go with the grain. The grain of the fabric runs parallel to the selvage end.
When I was tracing templates 1 and 4 to fabric Y, which is the solid charteuse, I made sure to make a small x in a corner to mark the wrong side BEFORE I cut it.
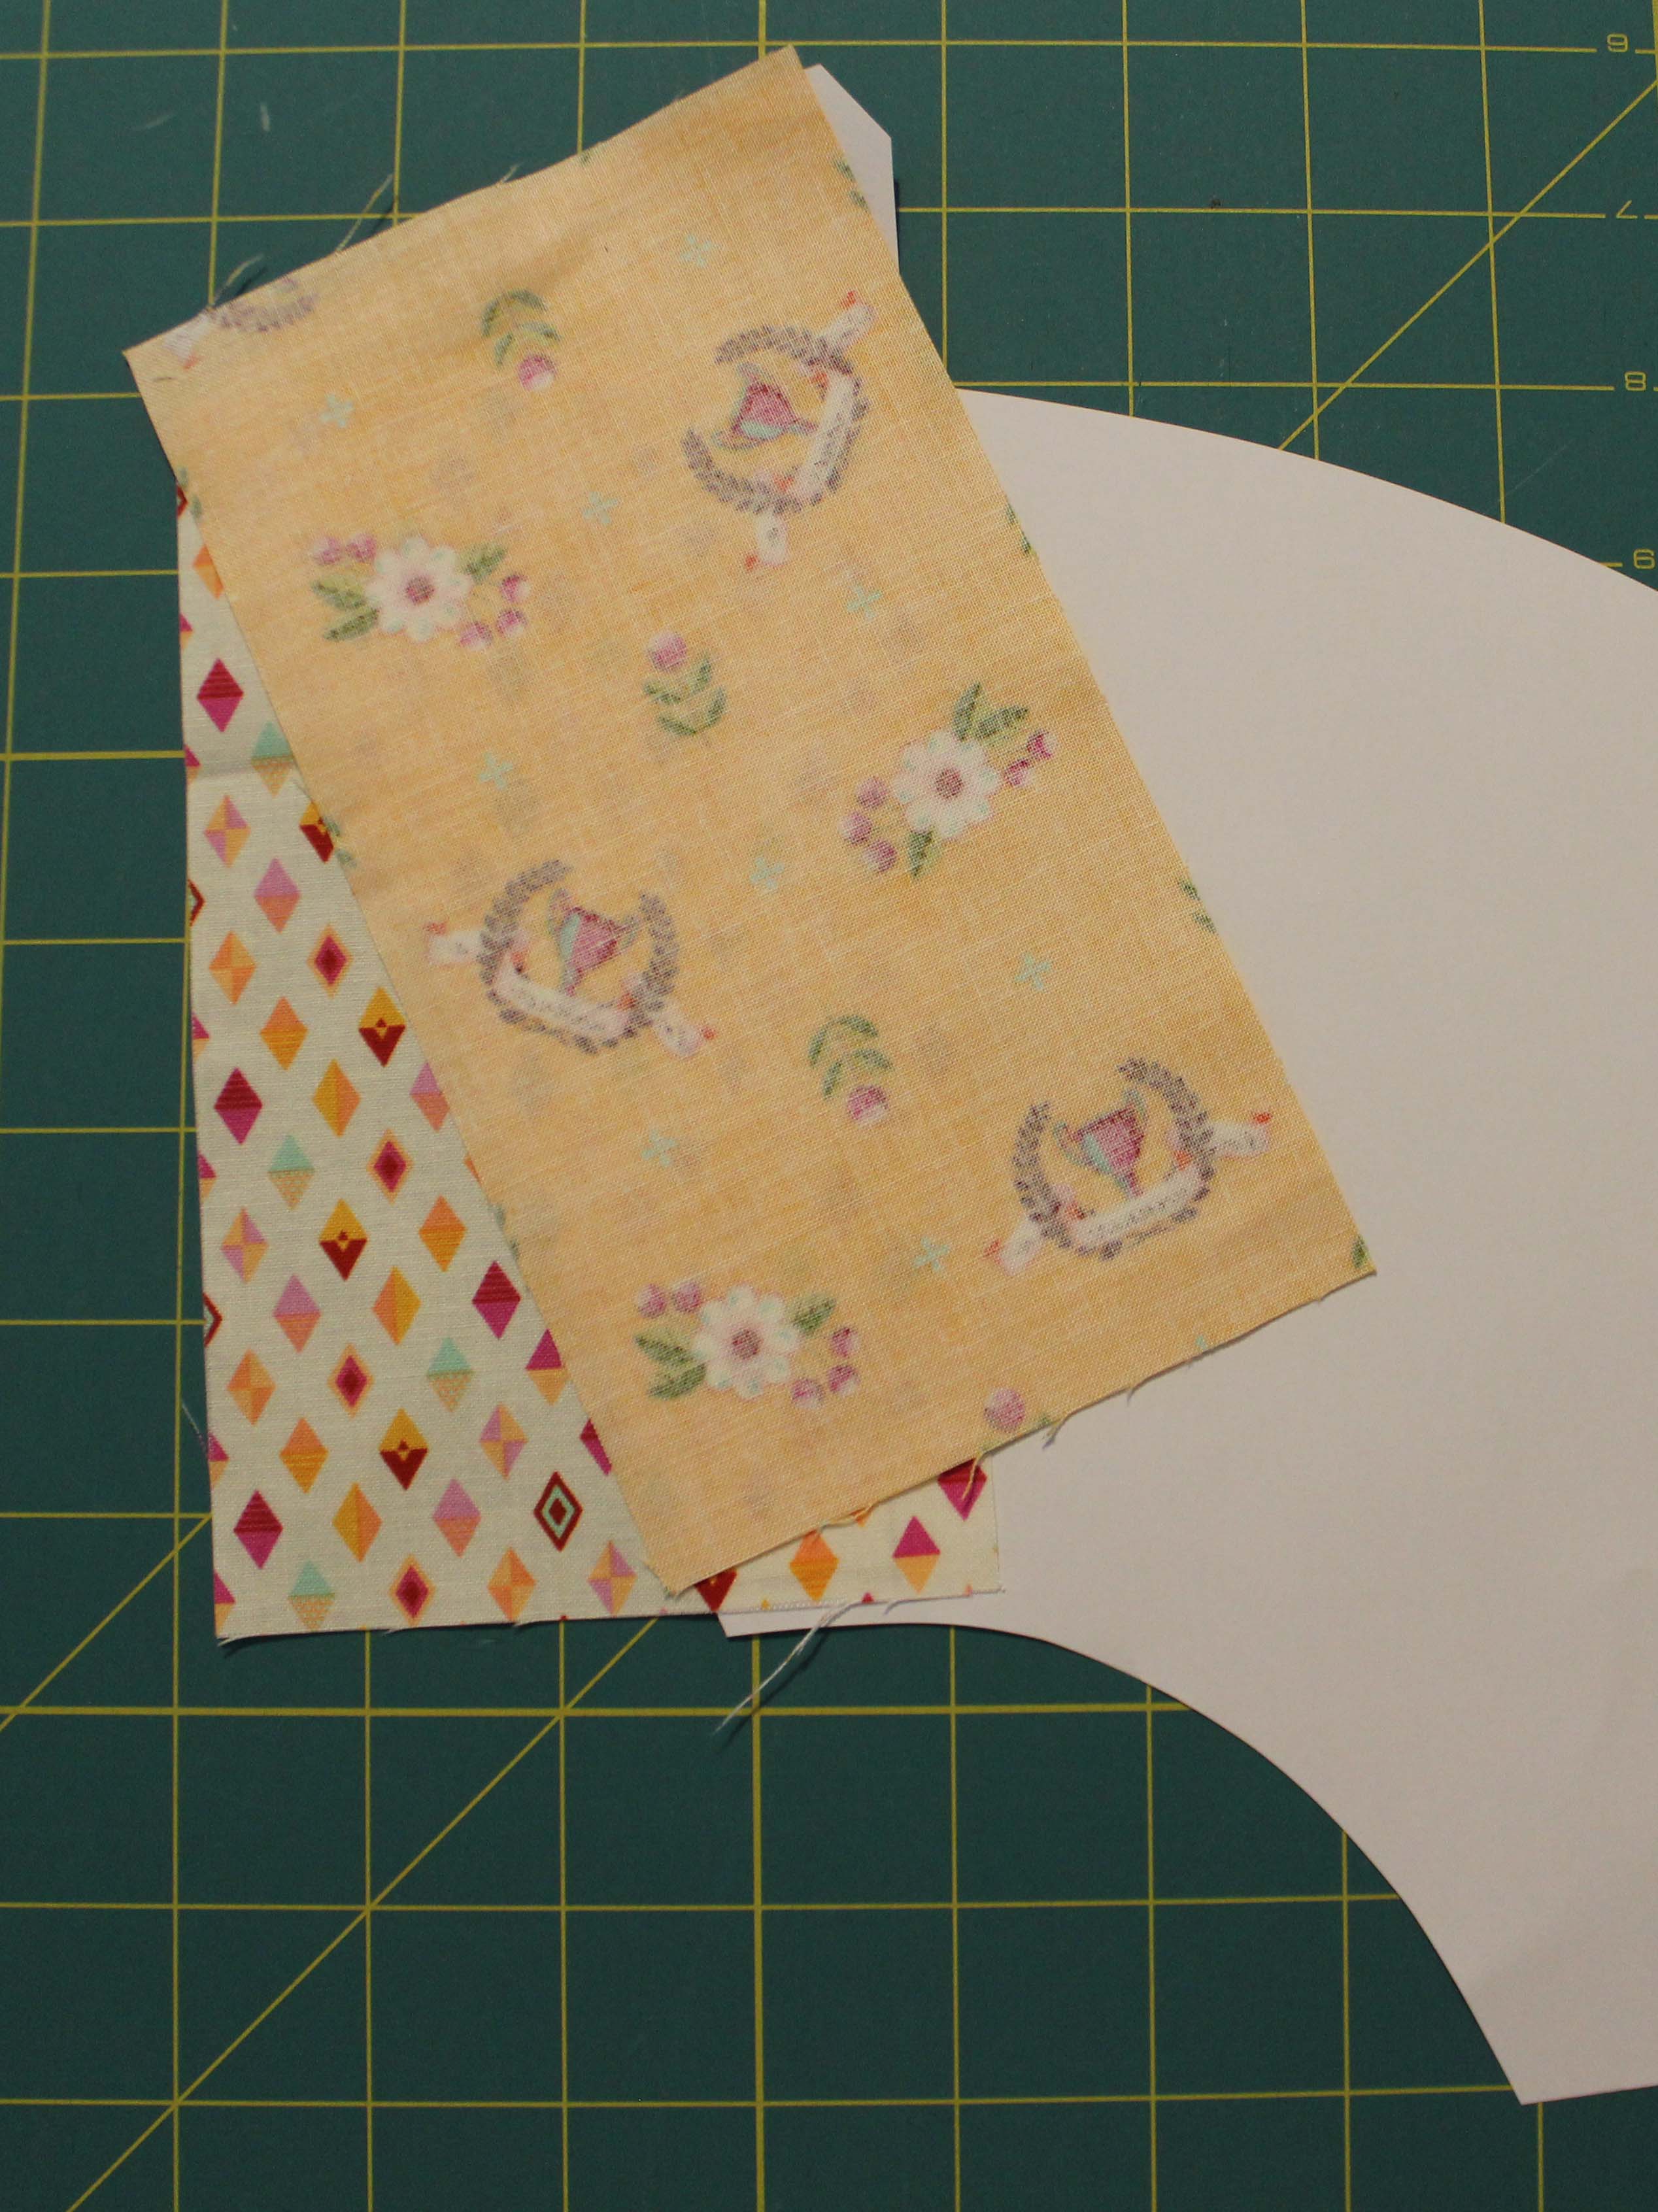
I’ve also already marked the seam allowances on all fabric I cut from templates 2 and 3.
I do suggest placing the templates over each piece after you have cut them to make sure you don’t have any fabric over the cutting line. Remember those 1/16 inch overages soon add up to 1/4 inch and then can really start throwing everything off.
Here’s everything all cut up and ready to be sewn.
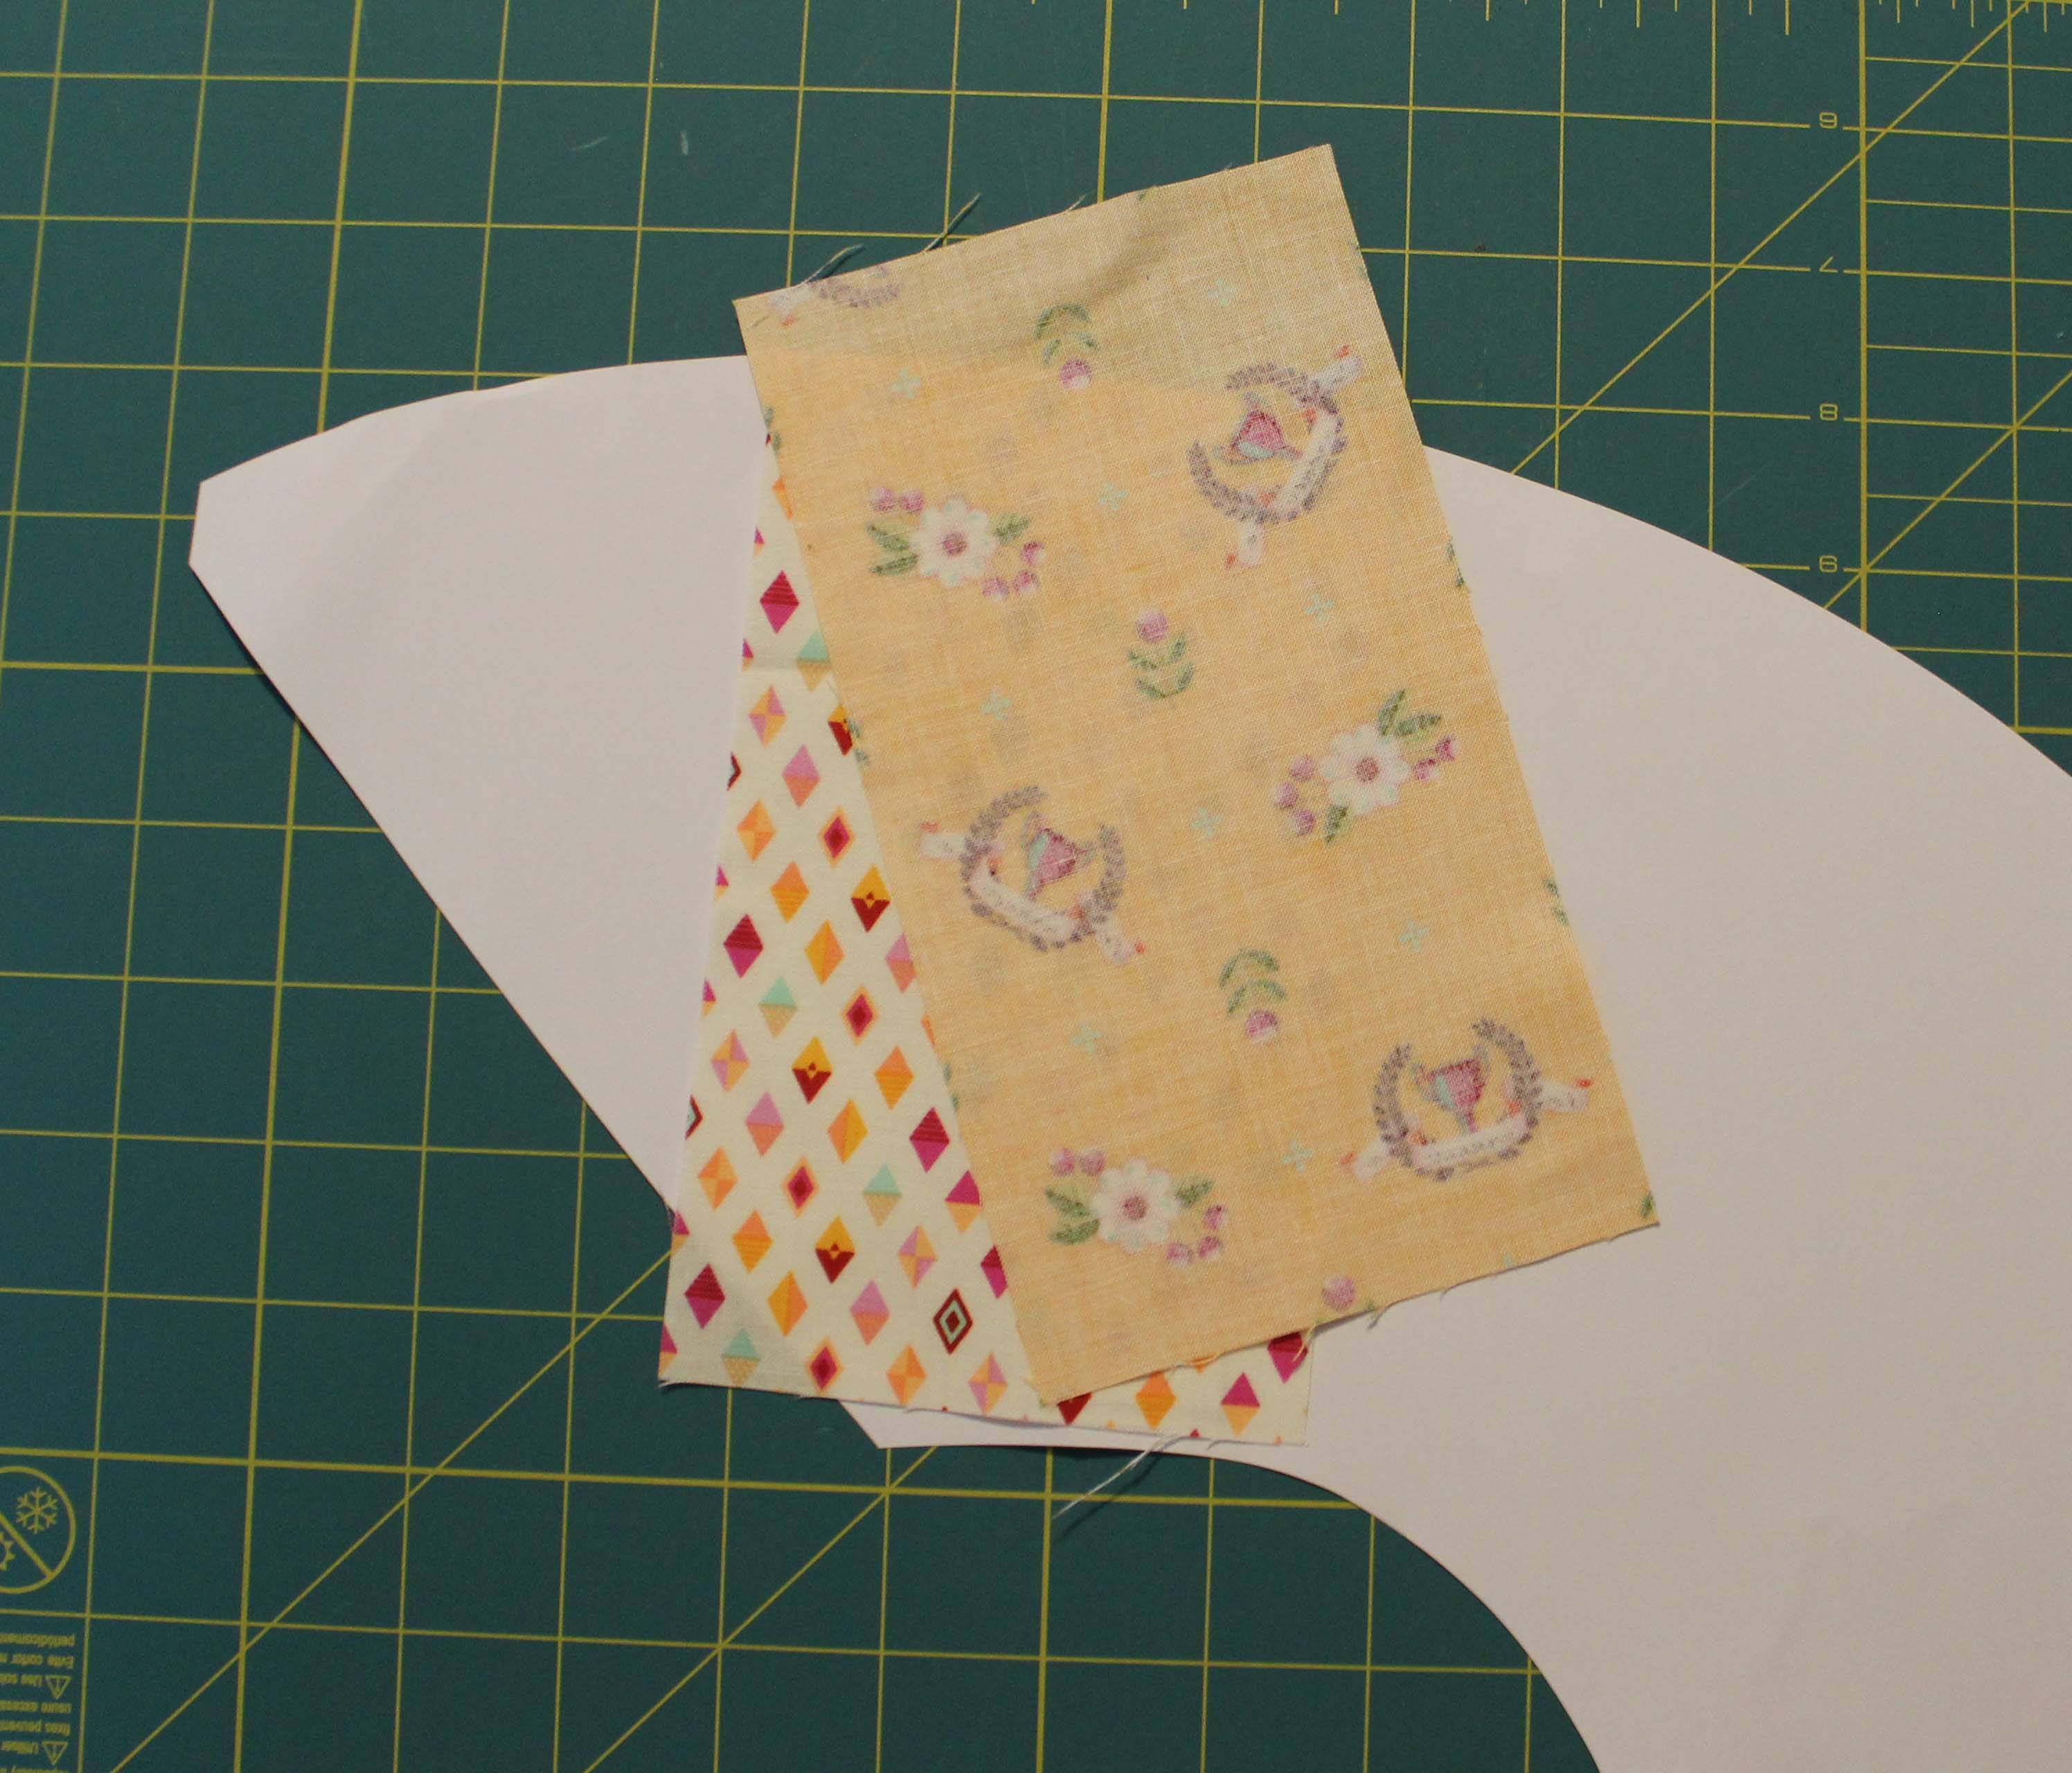
Another suggestion I have is regarding fabrics Y and Z which have a large edge of bias on them. If you have somewhere to store them flat, do so. You don’t want to have to iron them before you stitch them to the other pieces. Ironing bias edges can make the piece distorted if you are not extremely careful. In fact, if you haven’t cut template 4 or the setting triangles yet, don’t. Just wait until you need them and then cut them out. The other templates have bias edges to them too, but not as long as the other ones.
The last thing I did was group the fabrics together for sewing. I am now all ready to start sewing!
I will be working on group 1, steps 2-6 for next week. See you then!
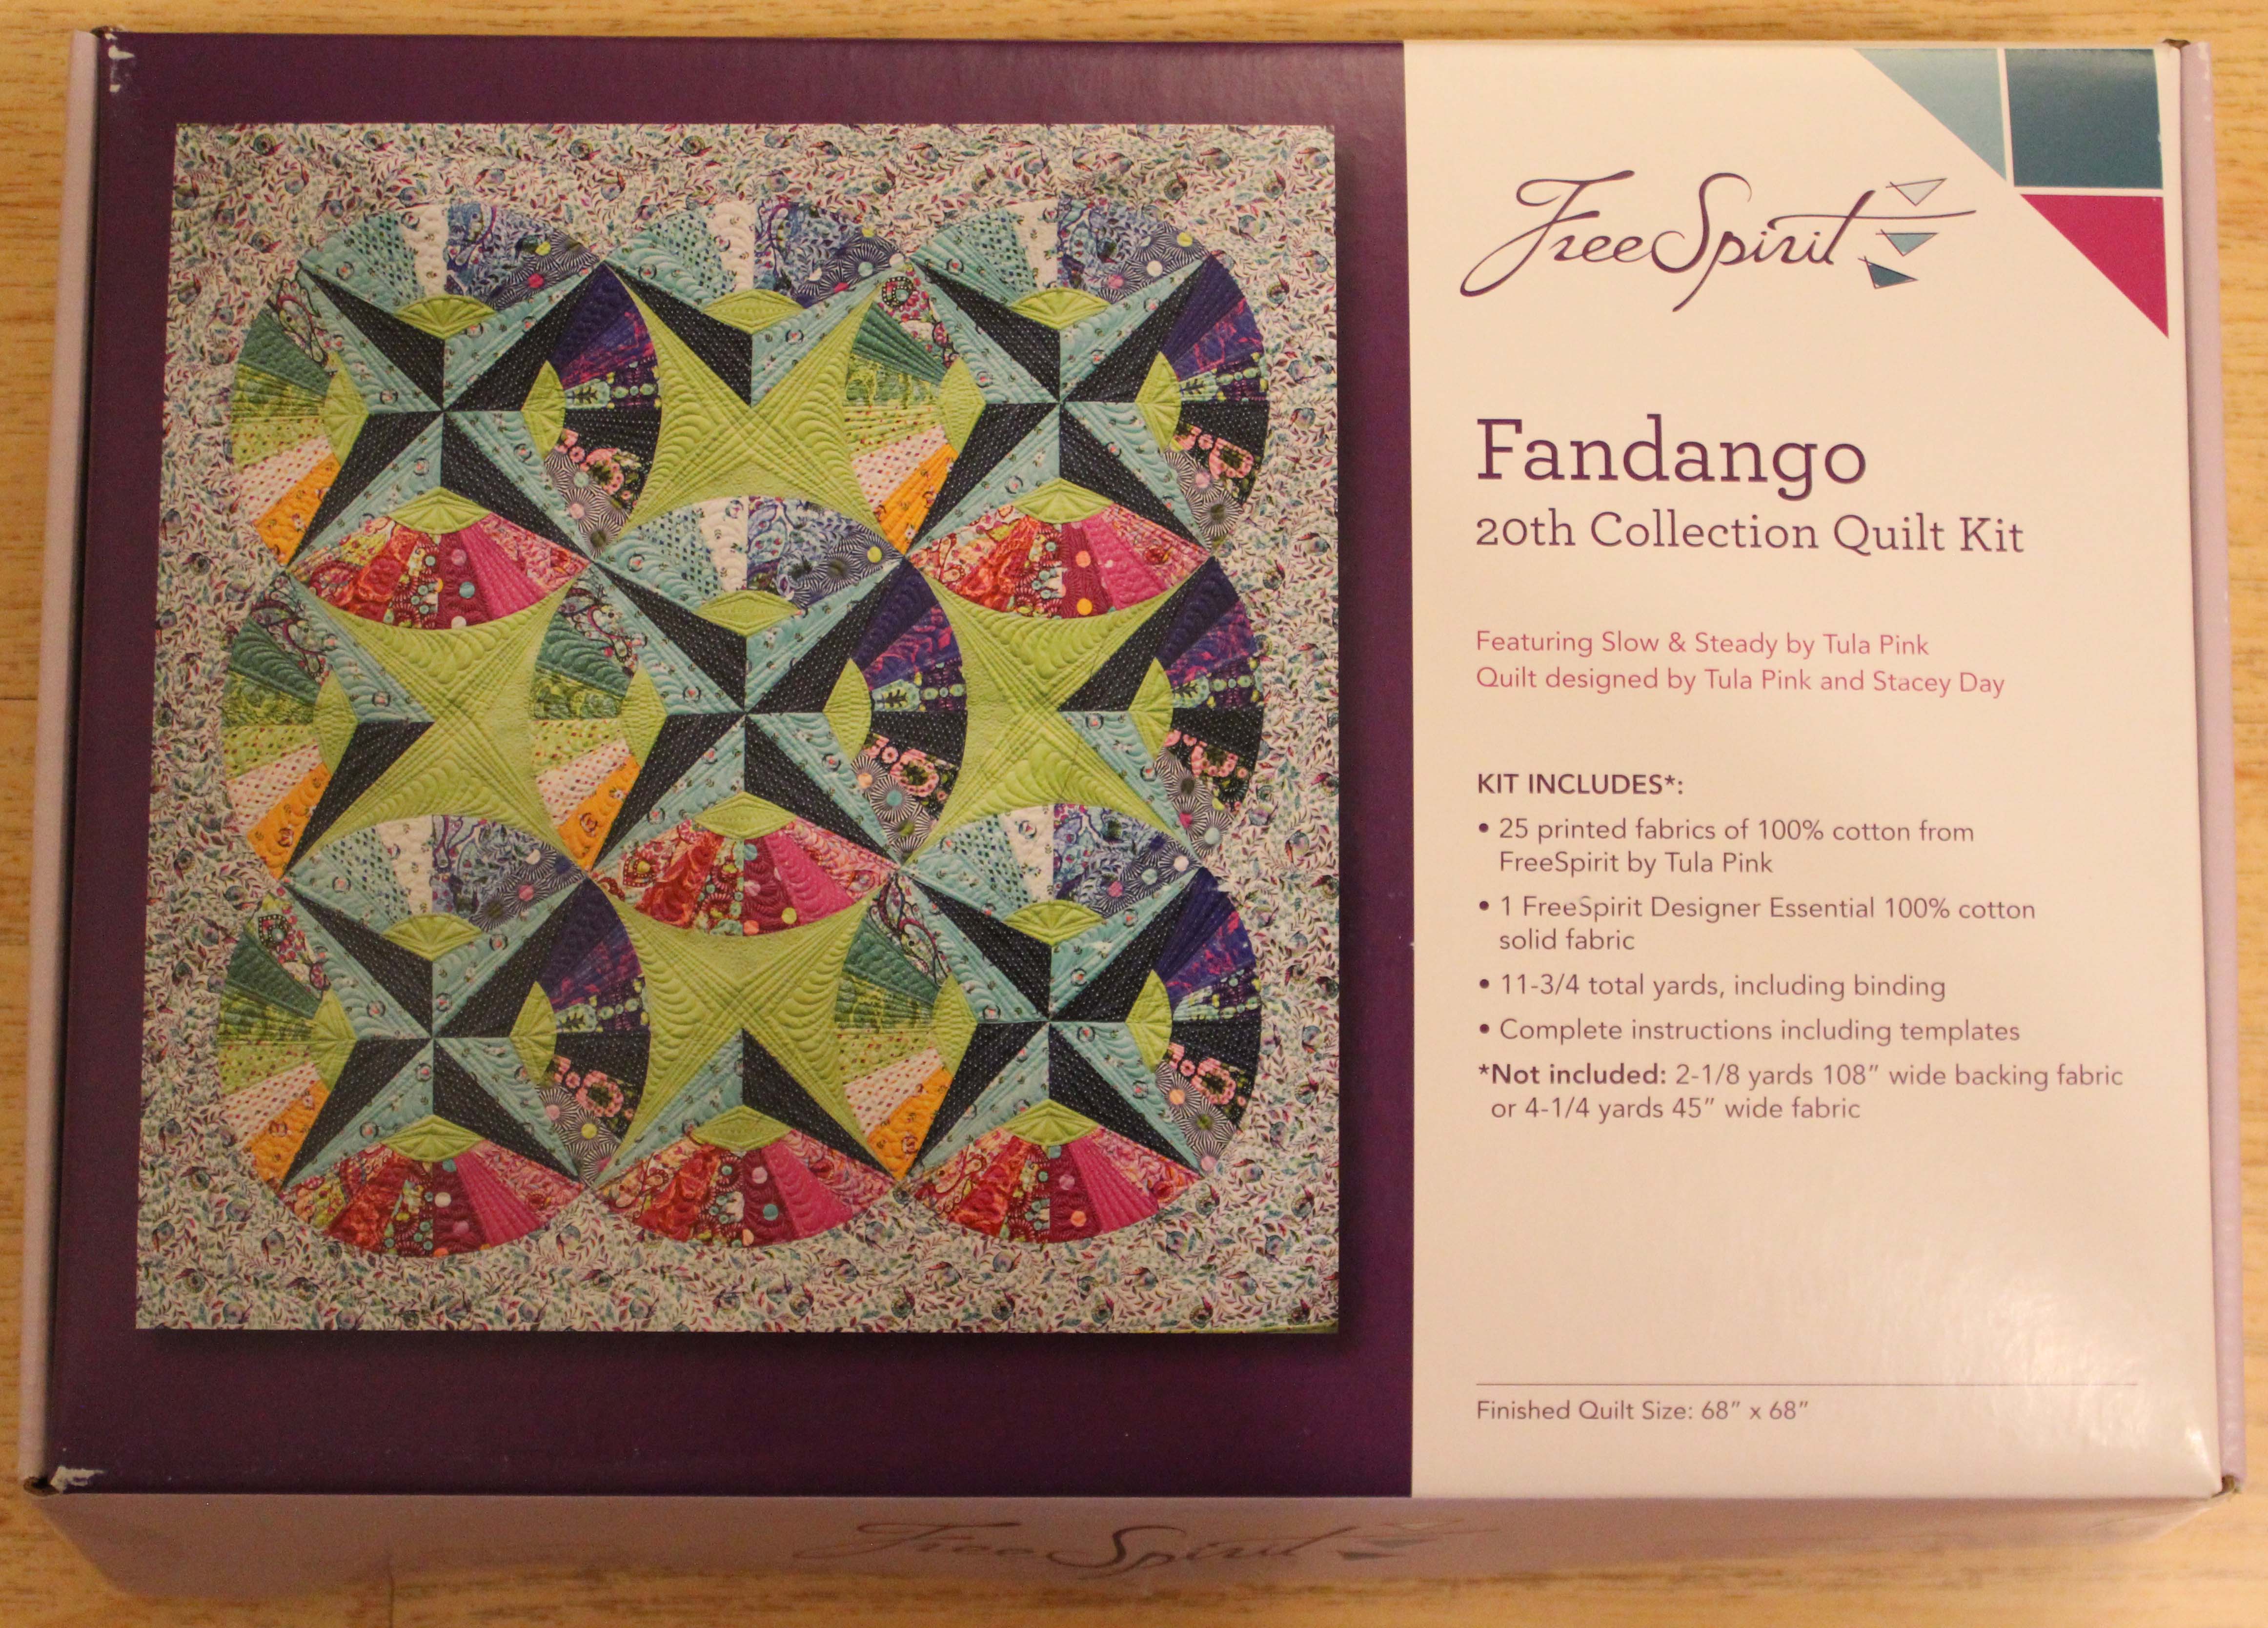
Here we go! Getting all ready to make the beautiful Fandango quilt by Stacey in Stitches featuring the Slow and Steady fabric line by Tula Pink
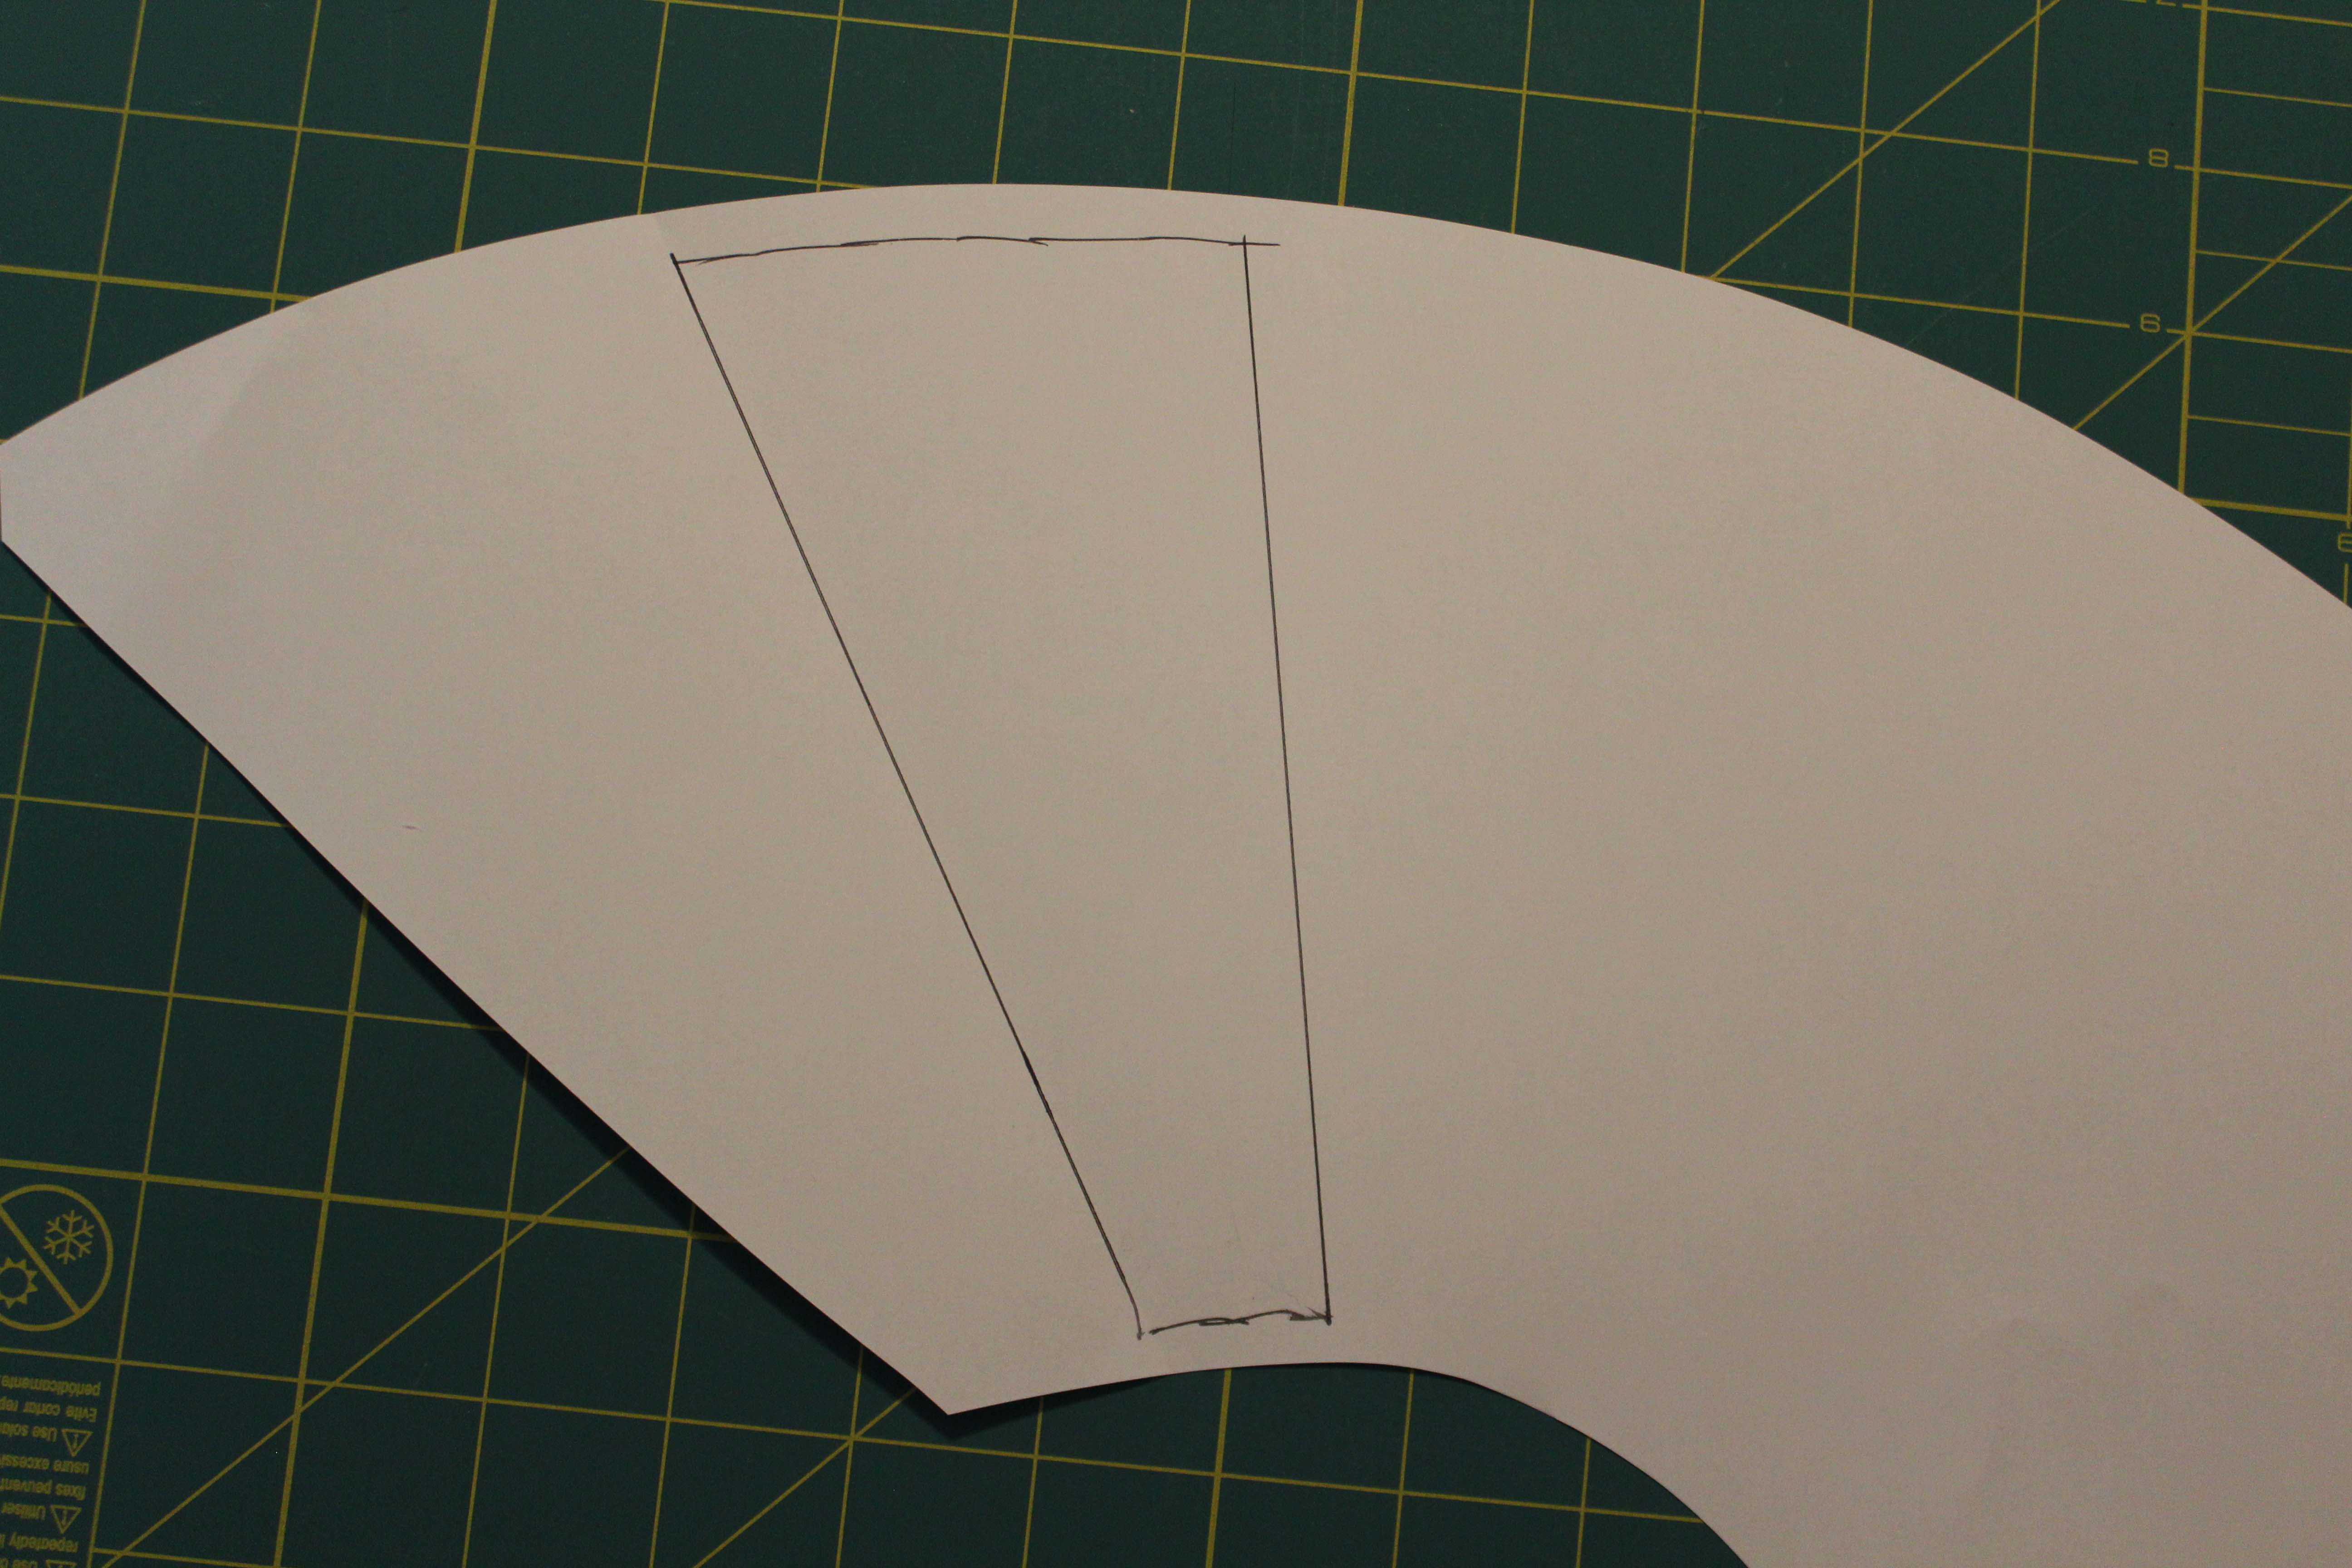
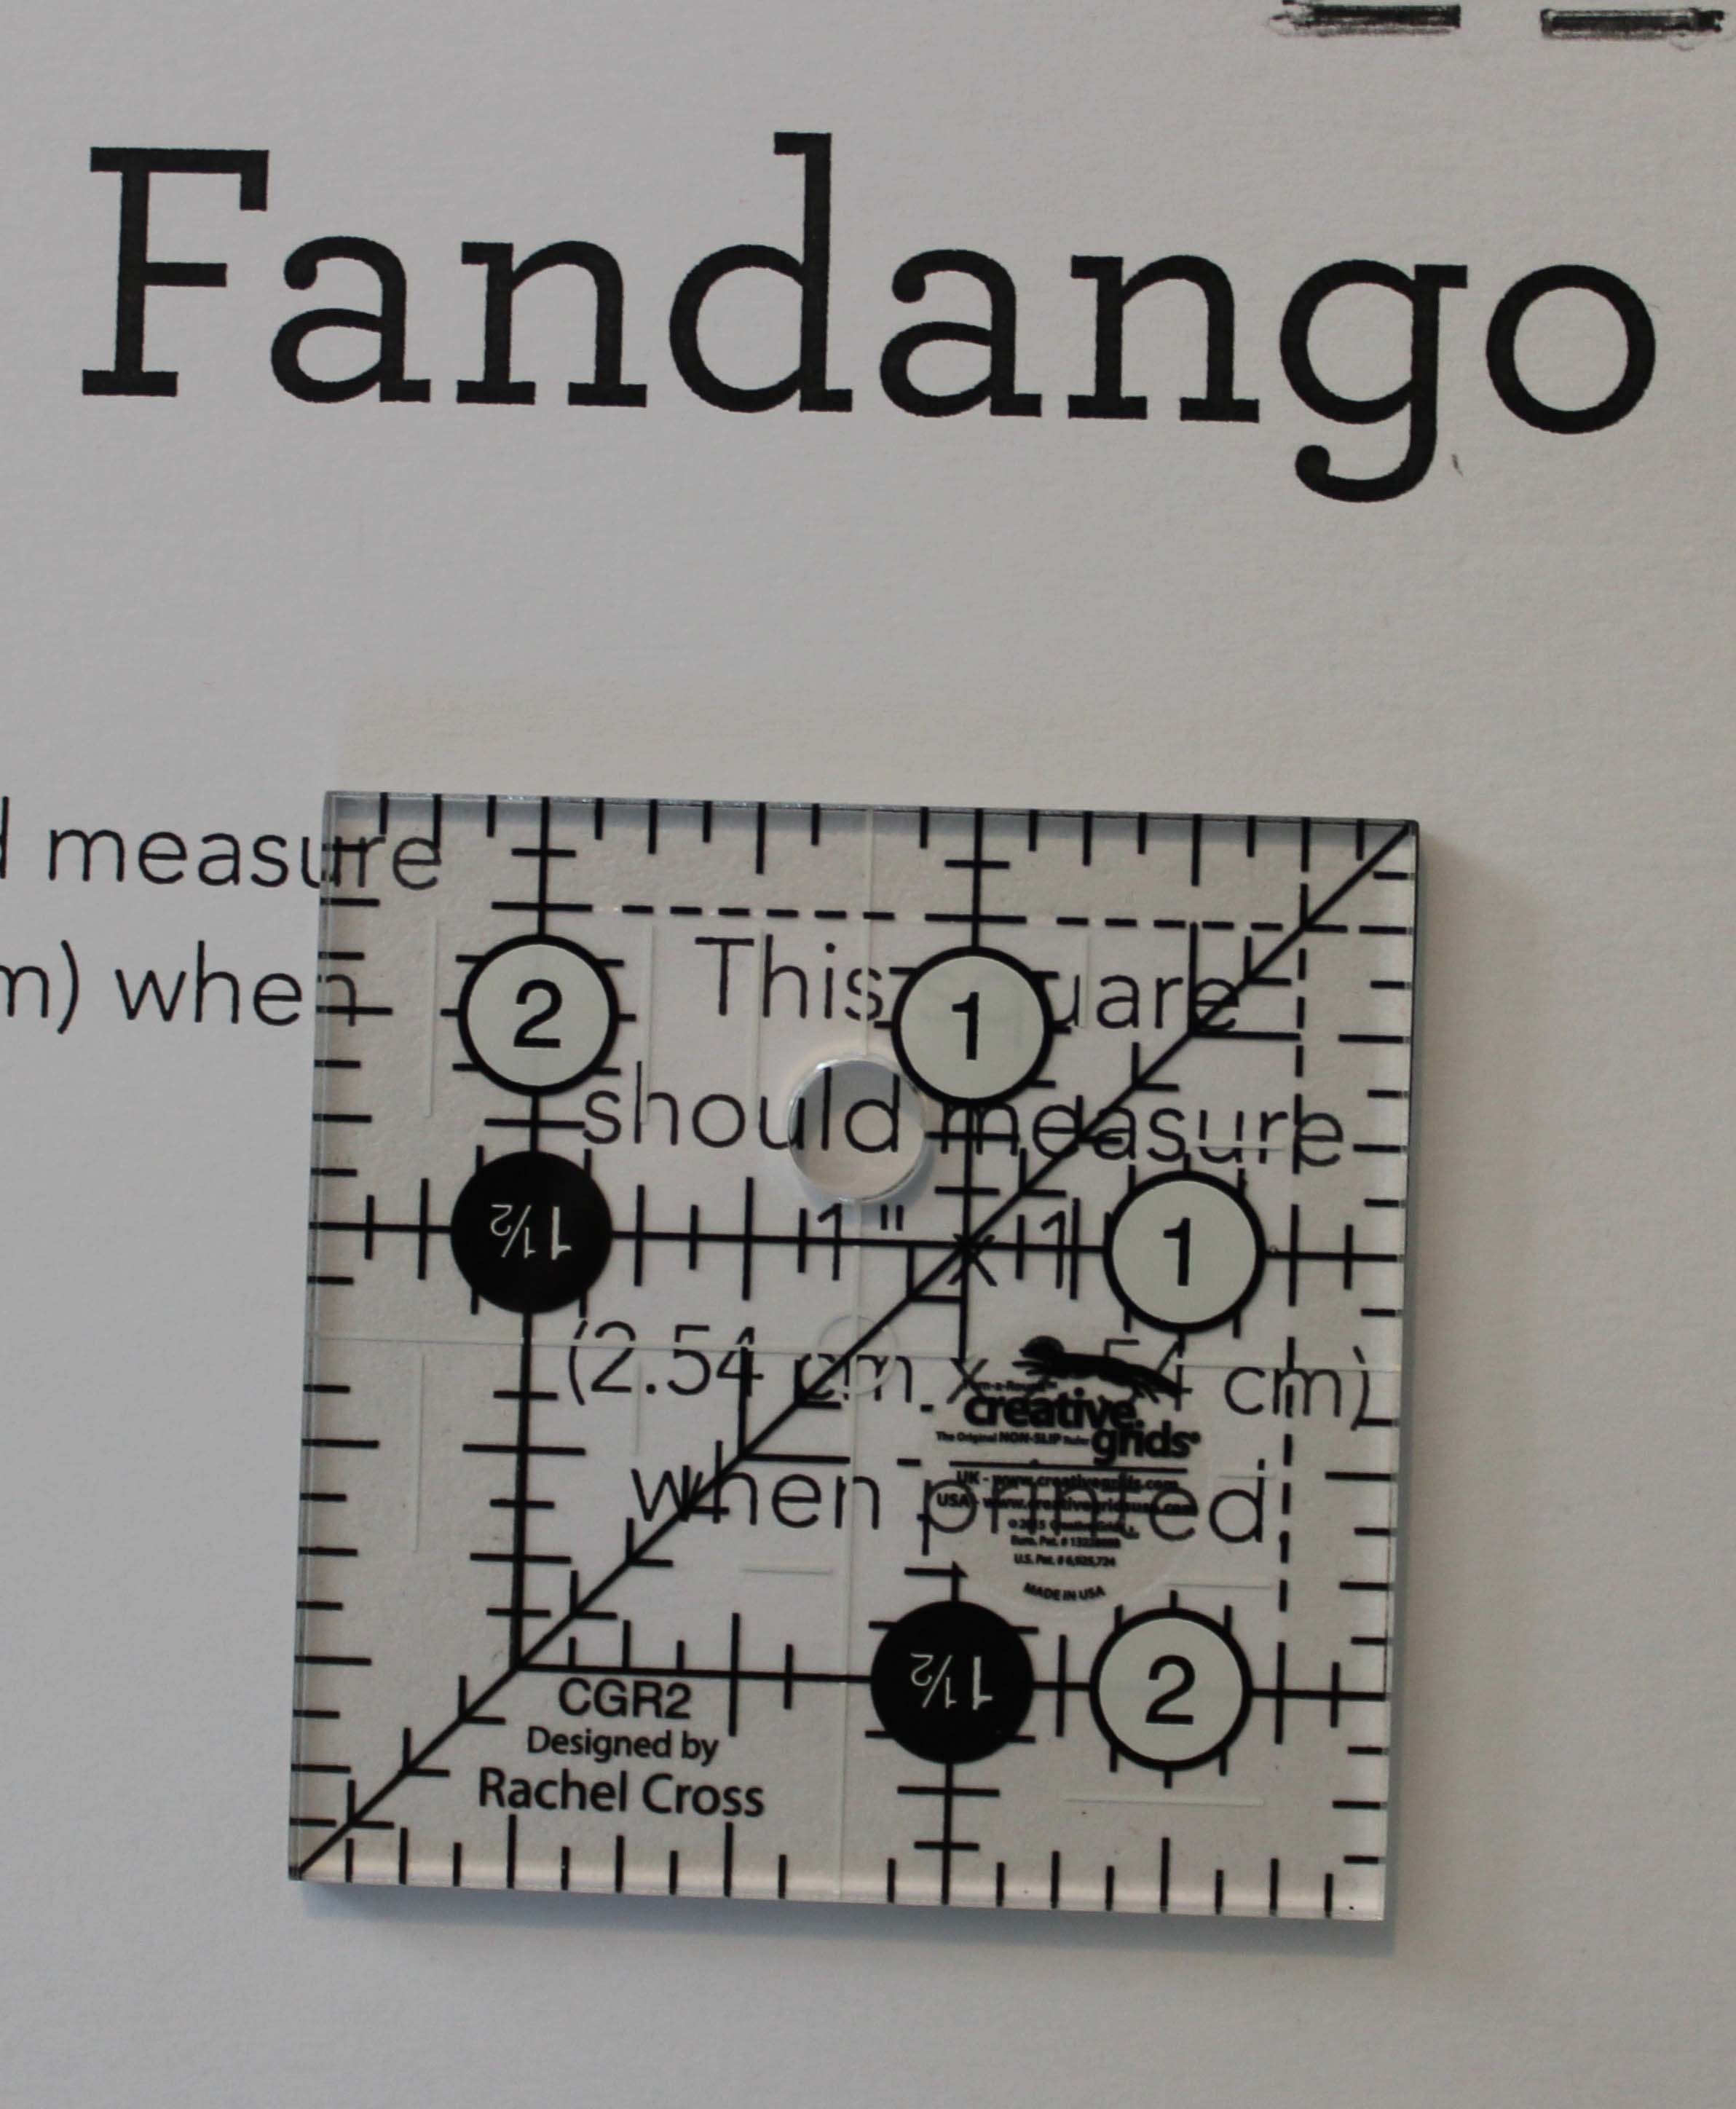
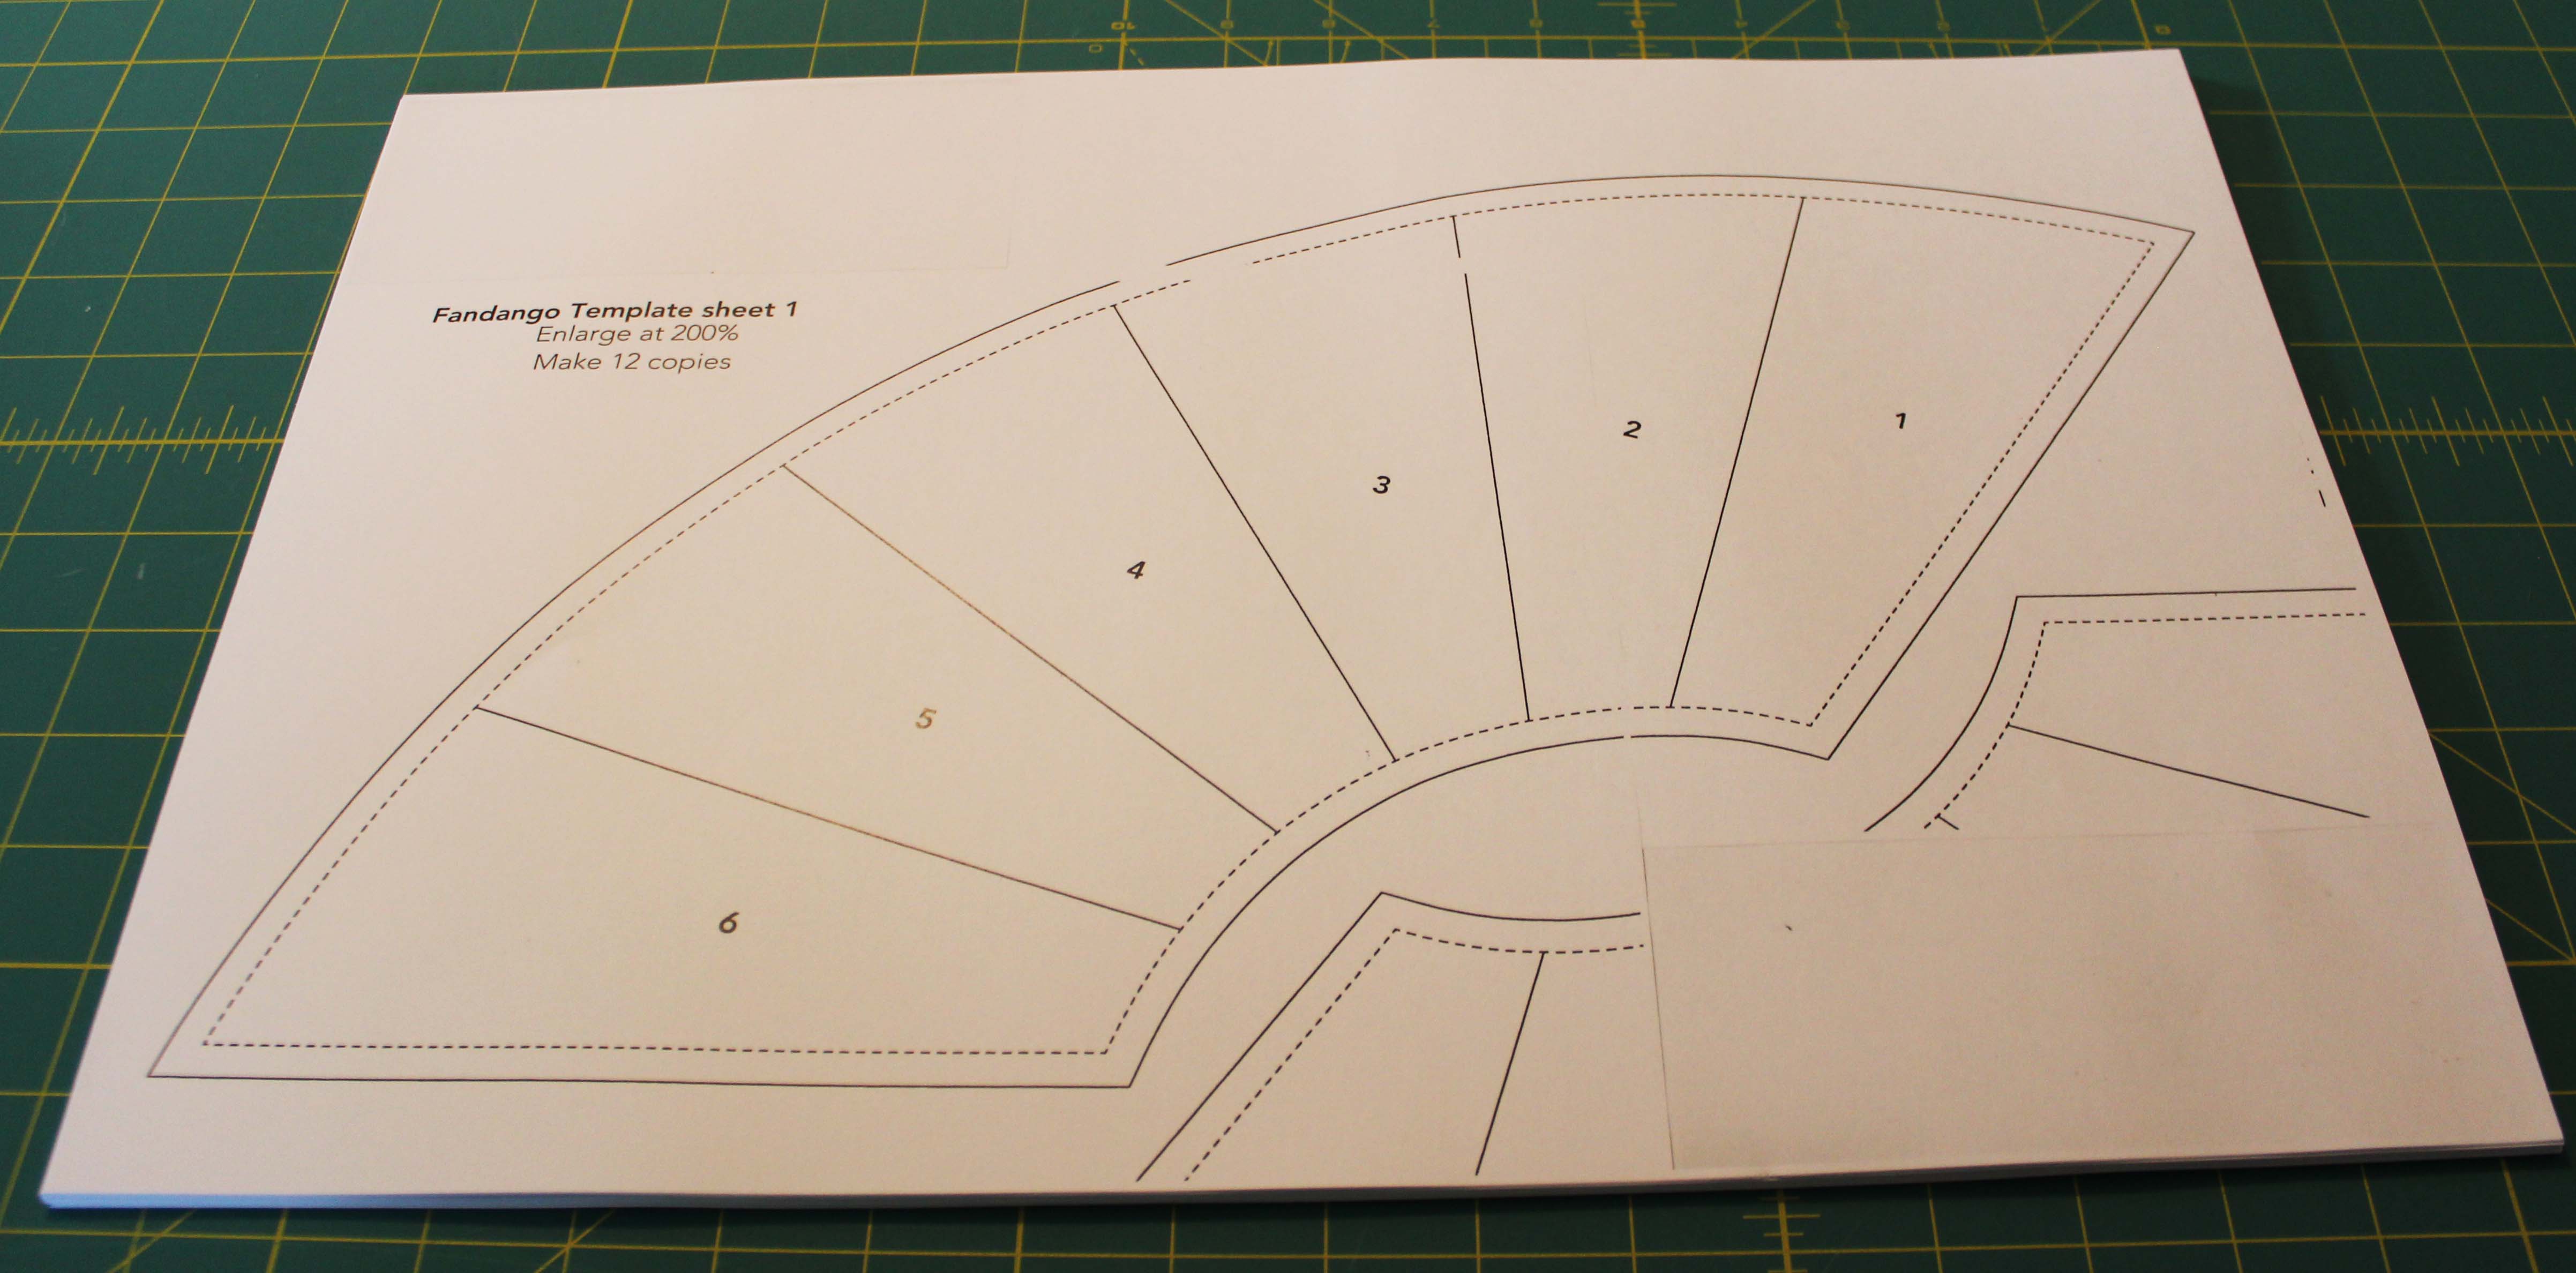
First we have to get the templates together. I took the pattern to a copy place and enlarged the pieces 200%
In the upper right corner of each template page you are copying is a small square. This square should measure 2 inches by 2 inches after you enlarge the pattern. It is REALLY, REALLY important to check and double check this before you continue copying.
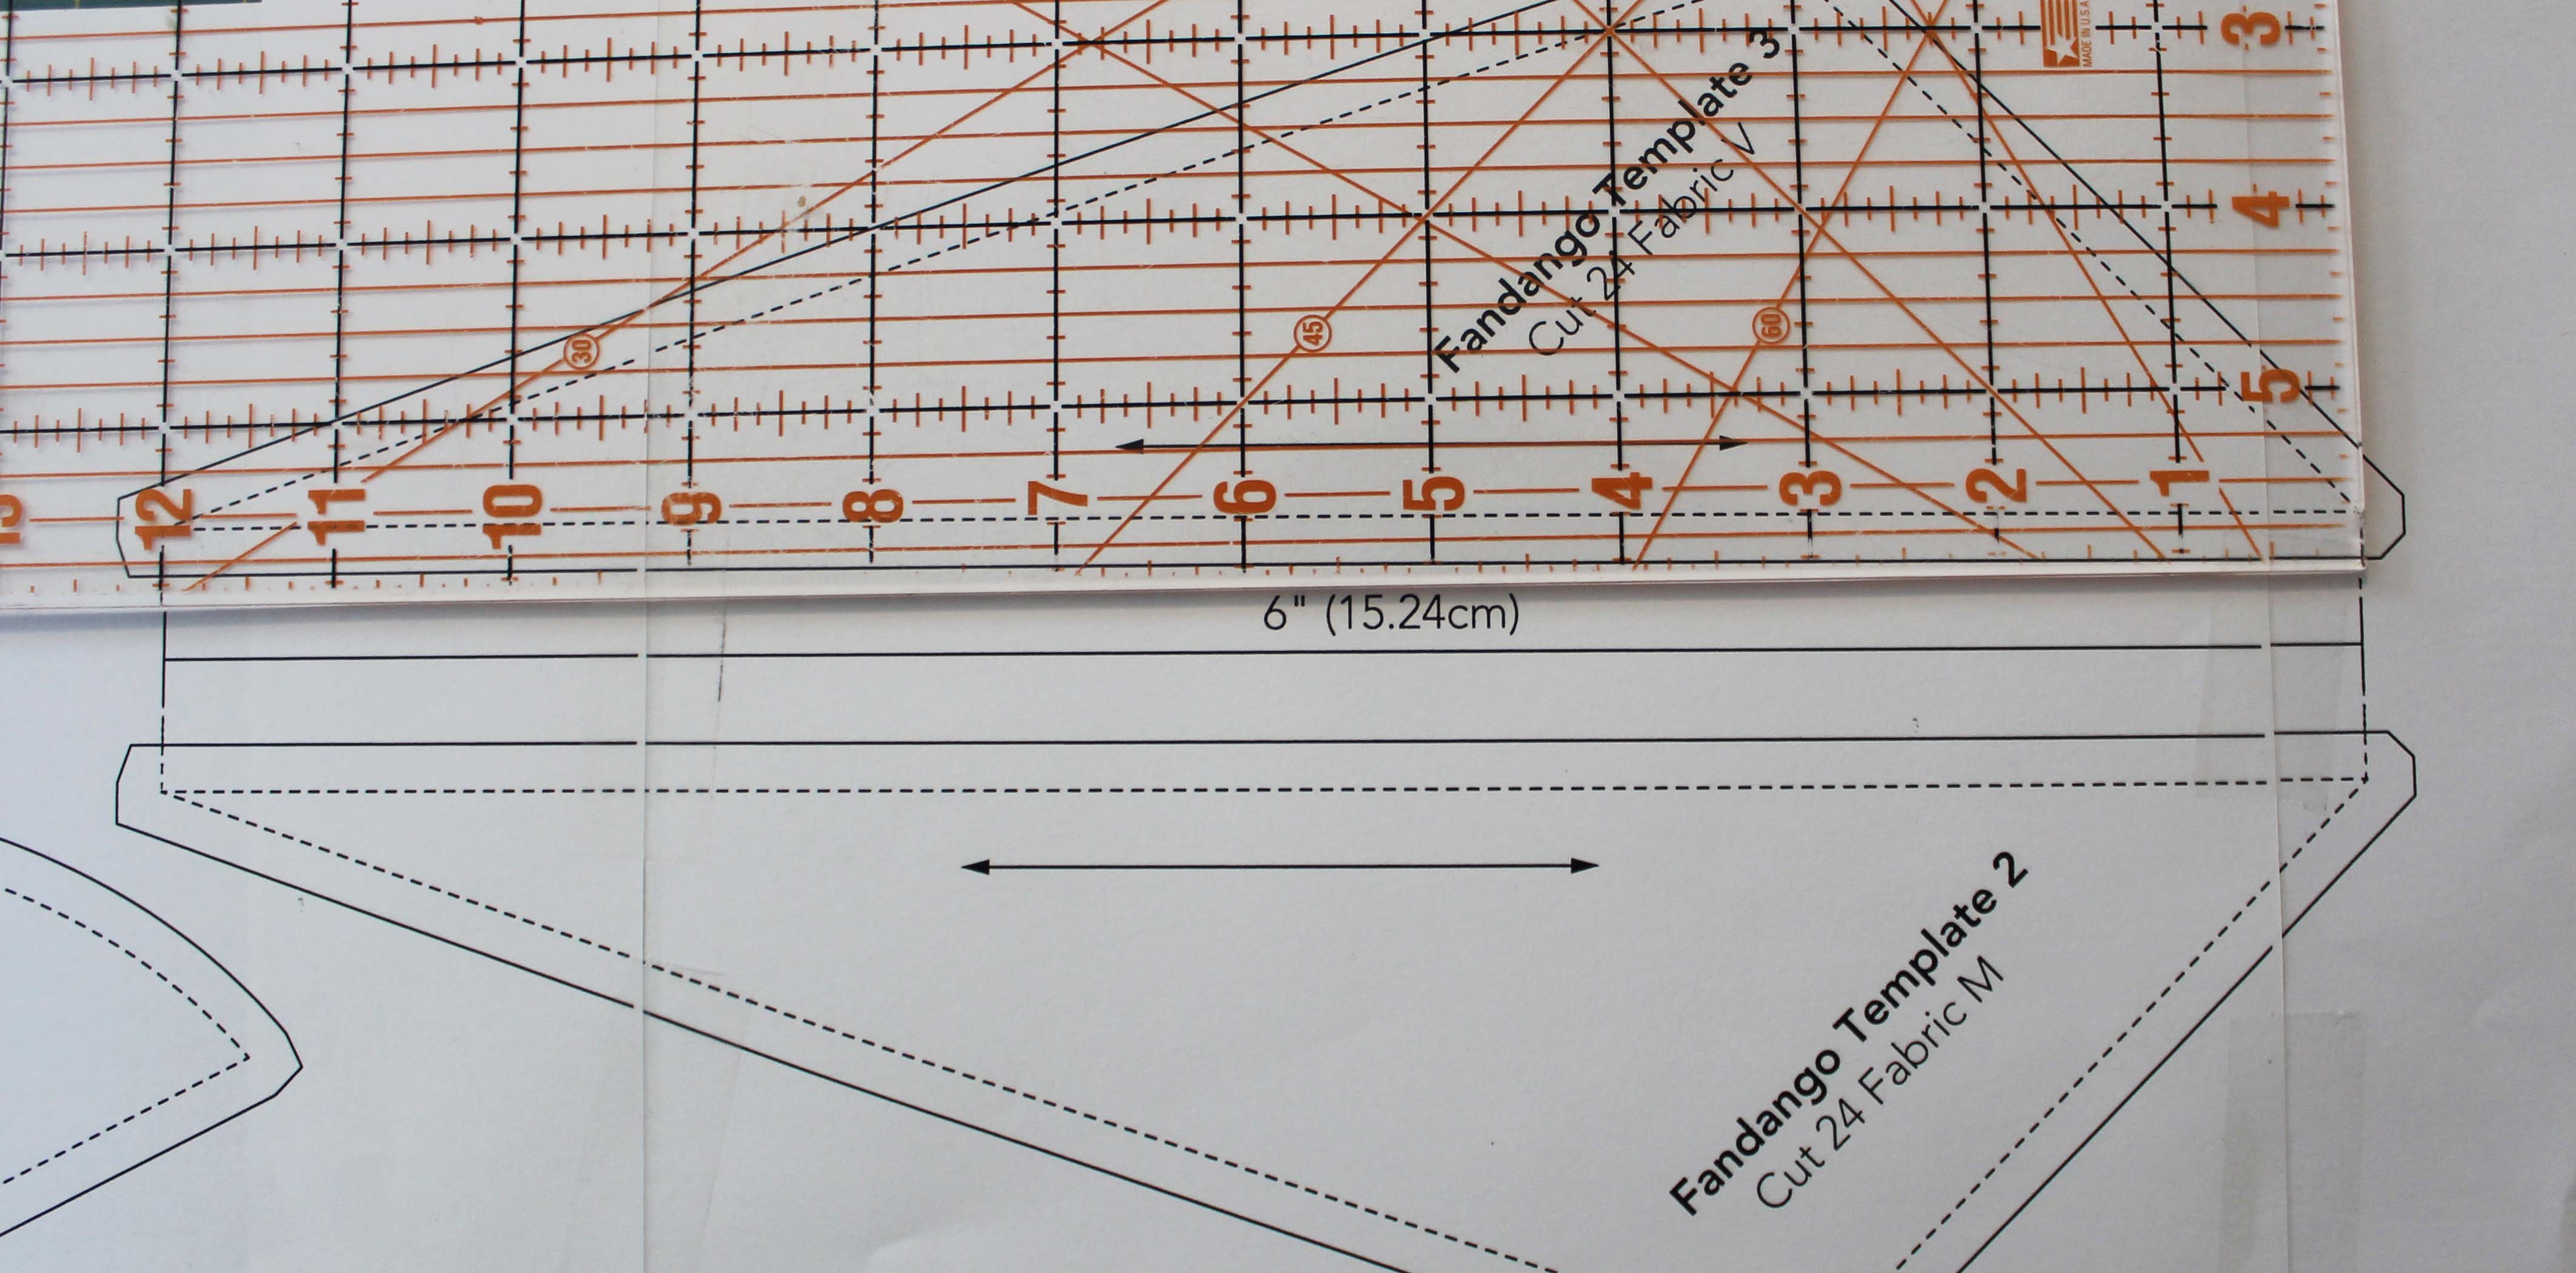
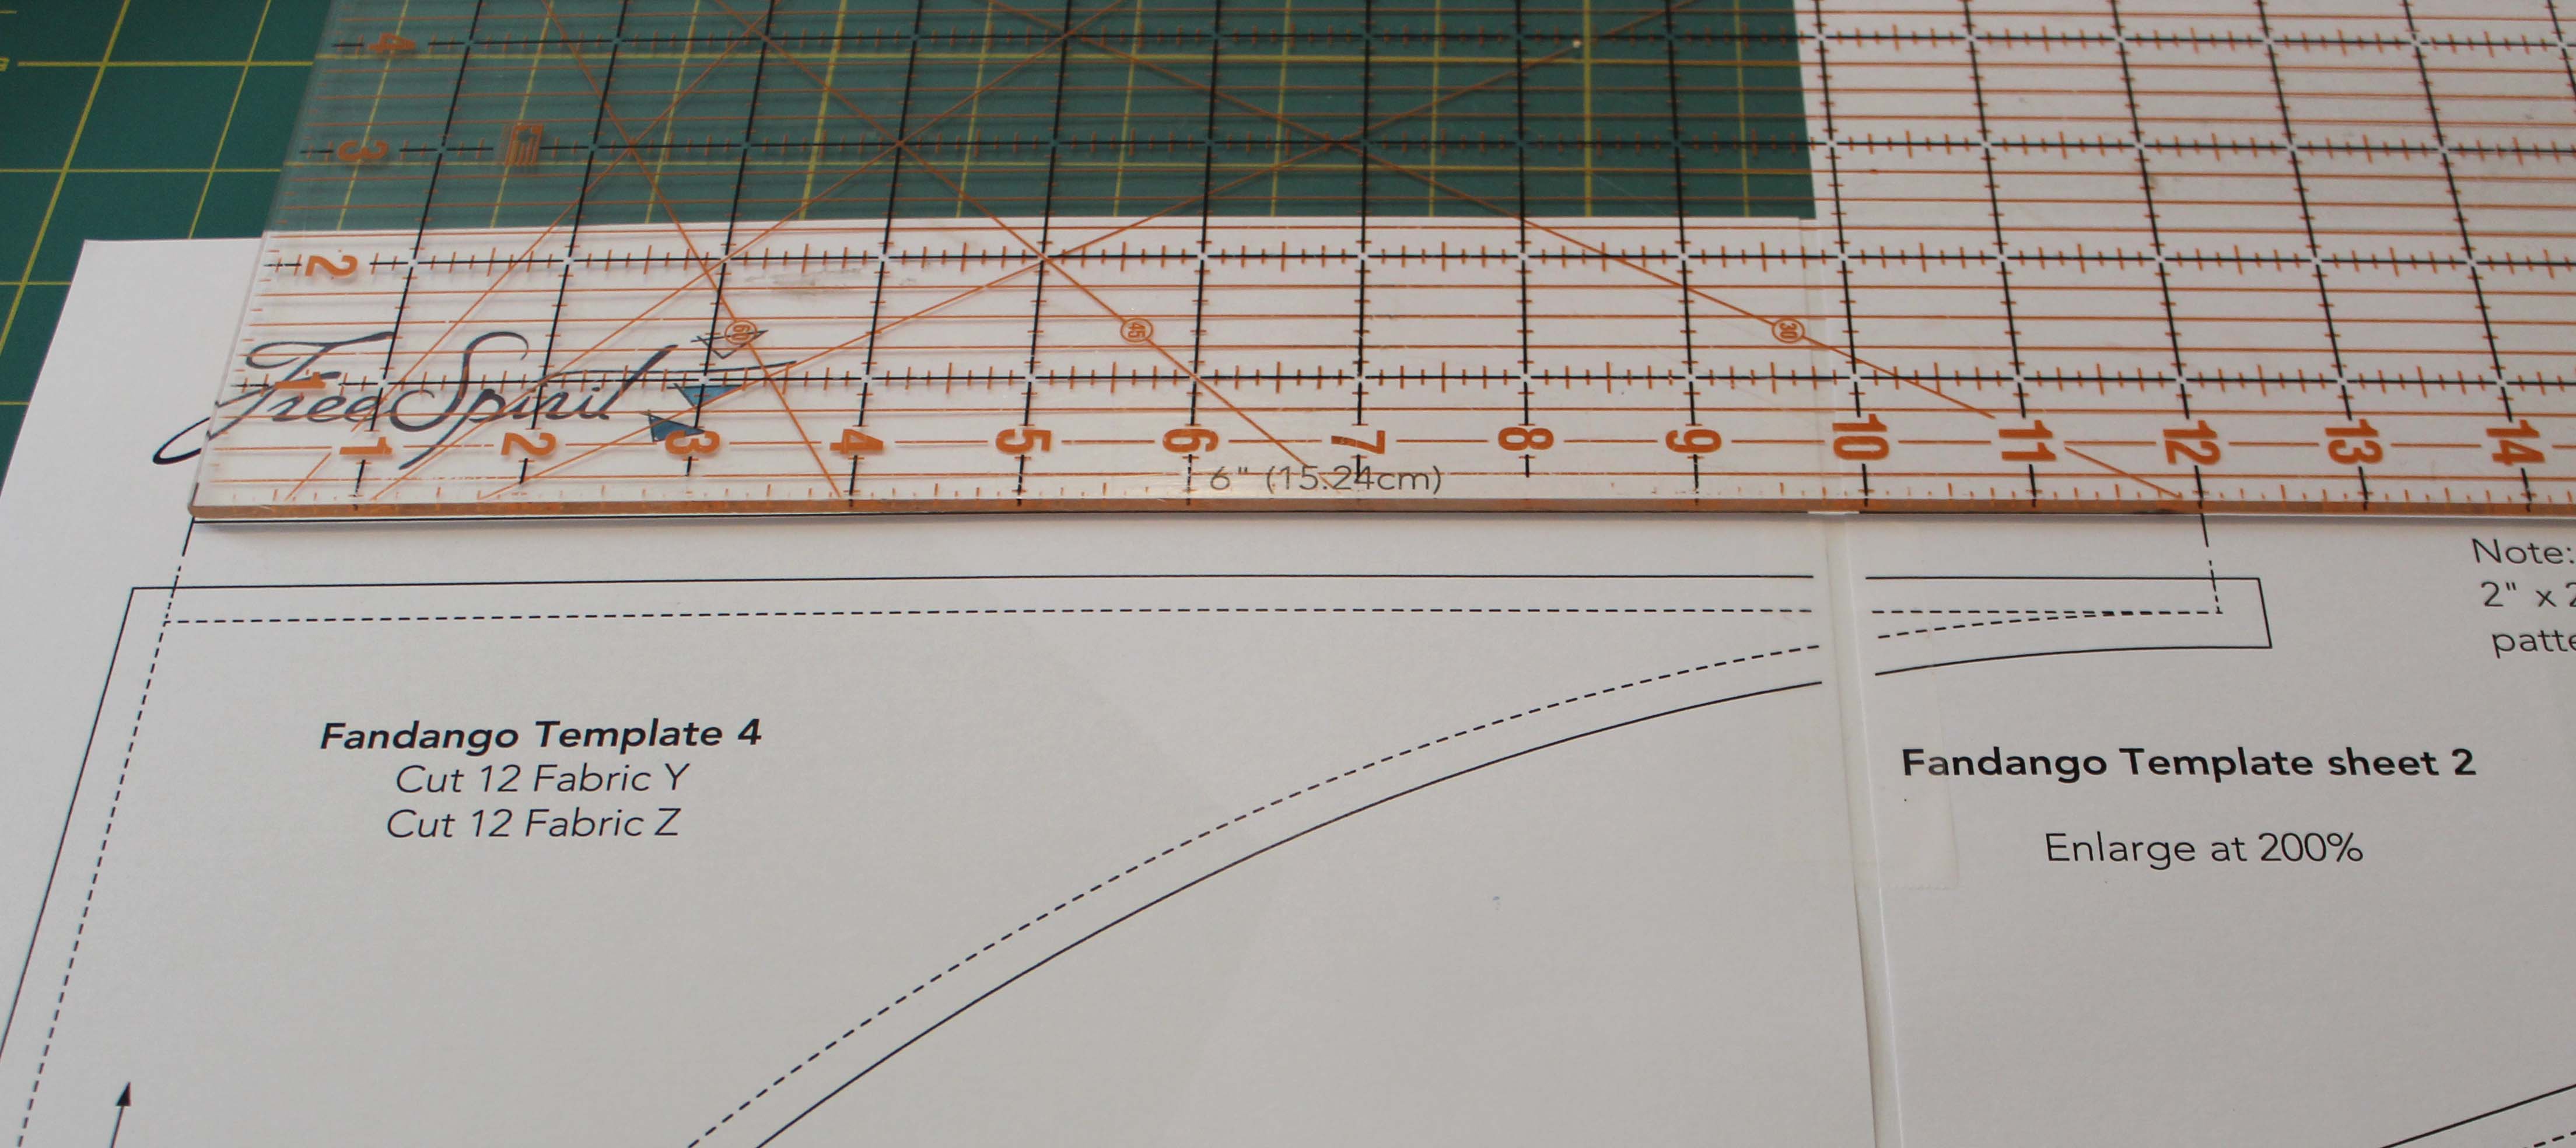
Also, Templates 2, 3 and 4 have a 6 inch measurement guide that should measure 12 inches after copying.
This measurement guide came in very helpful for me, since one of my templates didn’t overlap after I copied them. I was able to line it up with the ruler and add a piece of paper in the gap. You can see it above on the right.
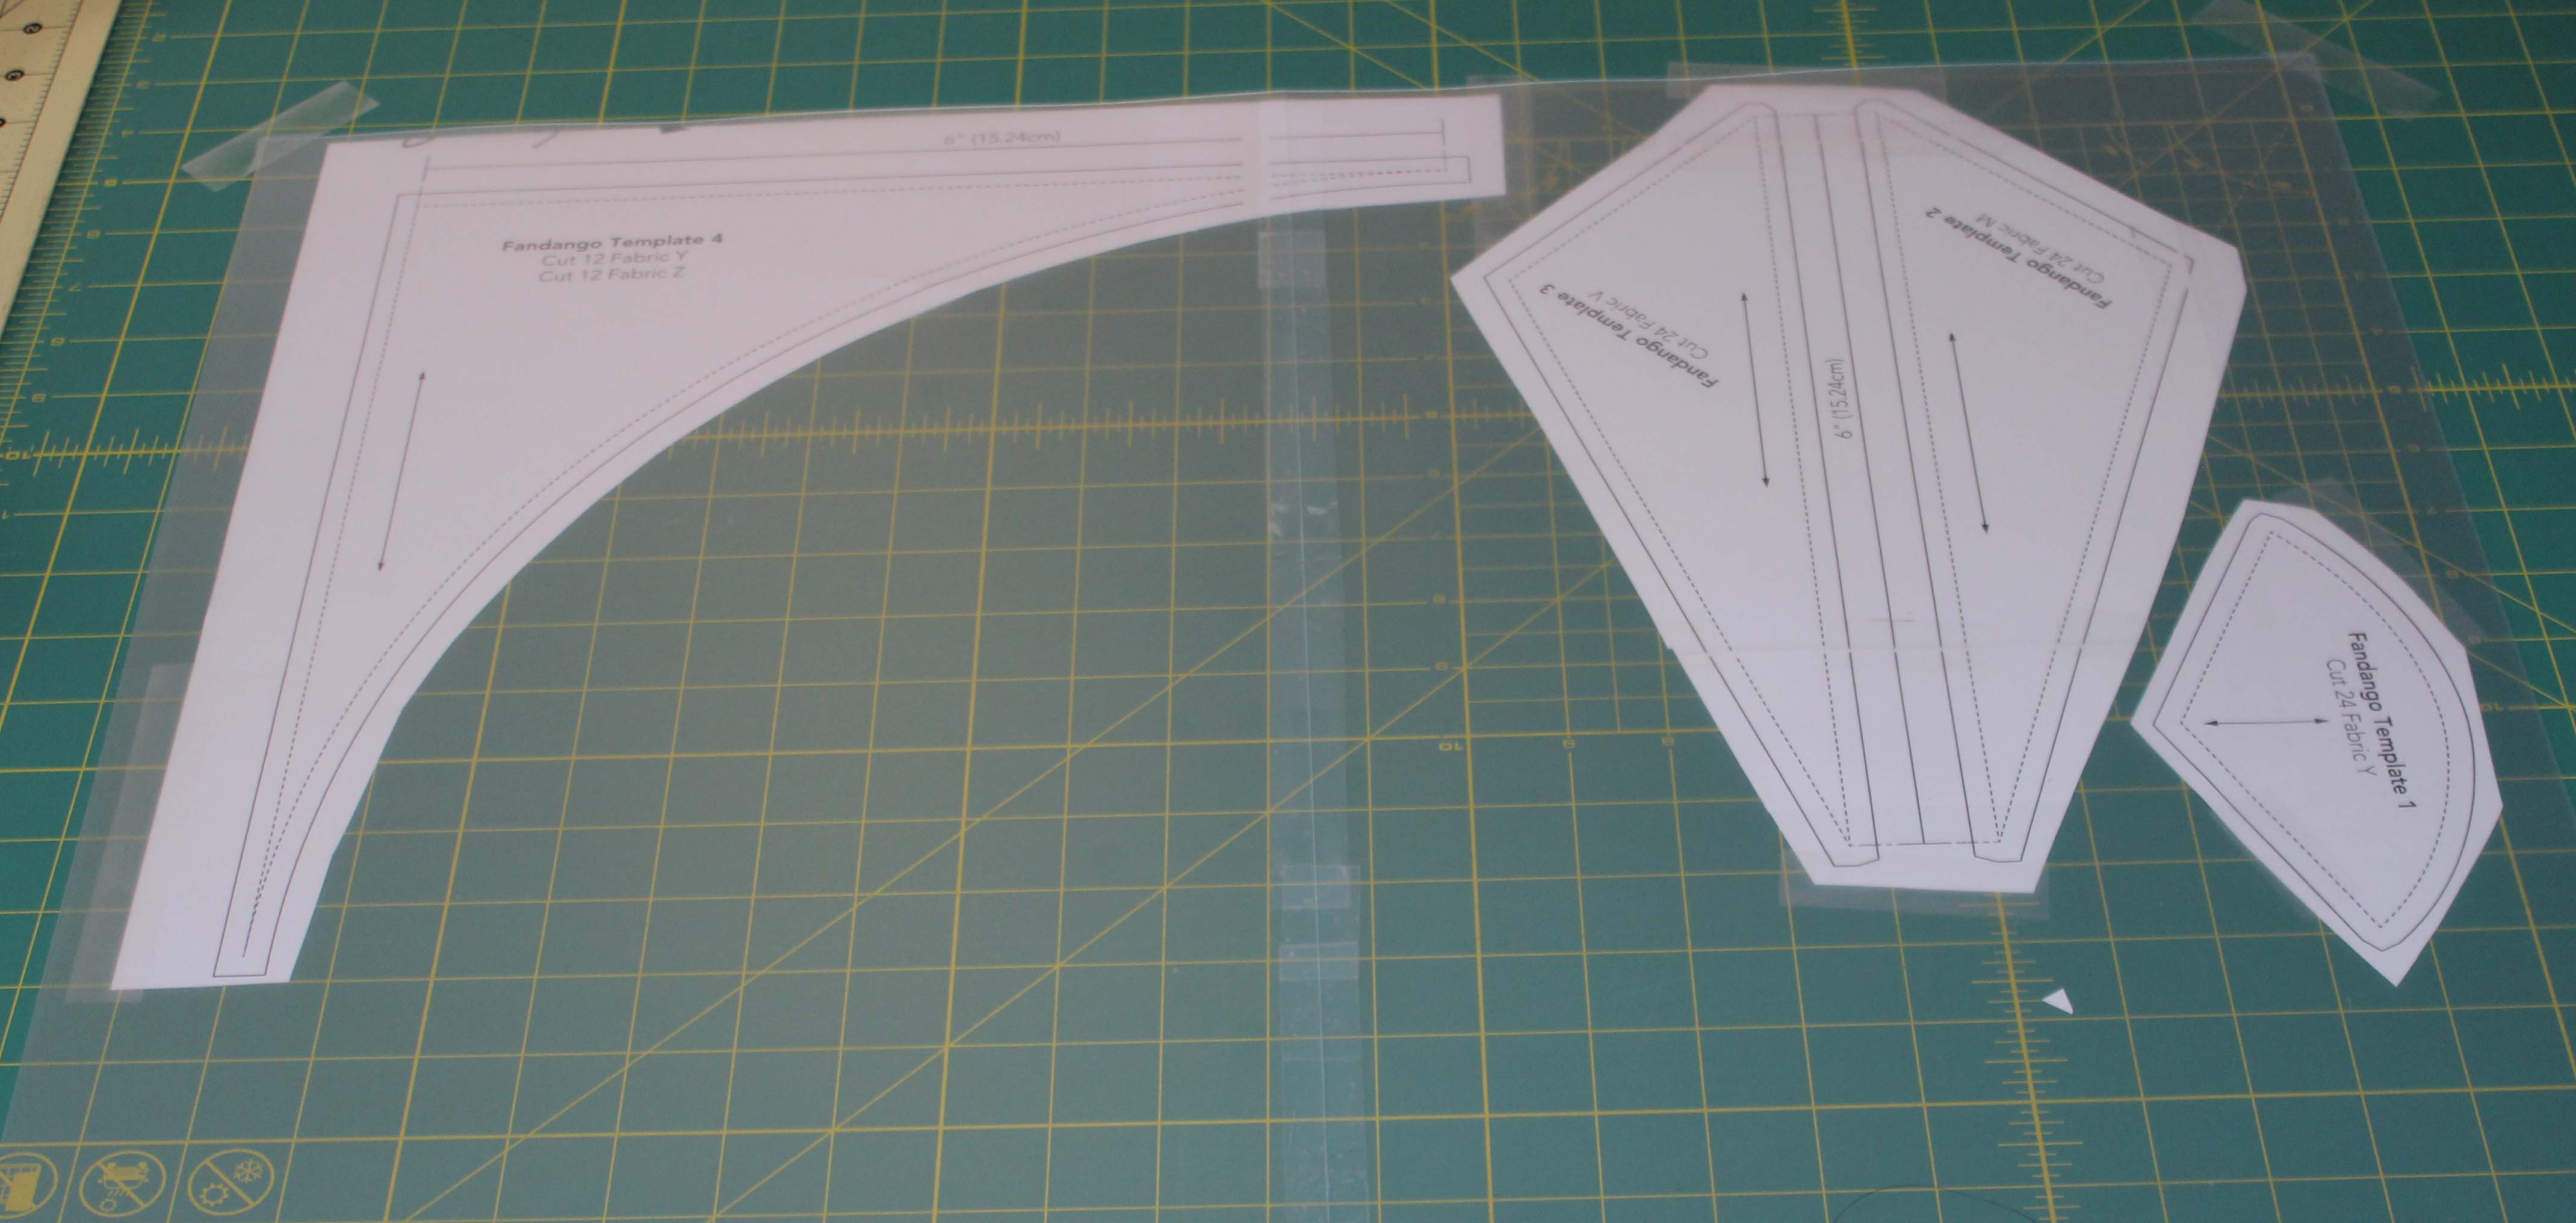
I purchased template material at my local store, but sadly it didn’t measure big enough for template 4 so I had to tape two pieces together.
I laid the paper templates on my cutting mat and taped them down, then I laid the template acrylic on top and taped it down. Seriously, I did a lot of taping. In fact, the hardest part of all of this was tracking which child had taken my tape dispenser from my room!
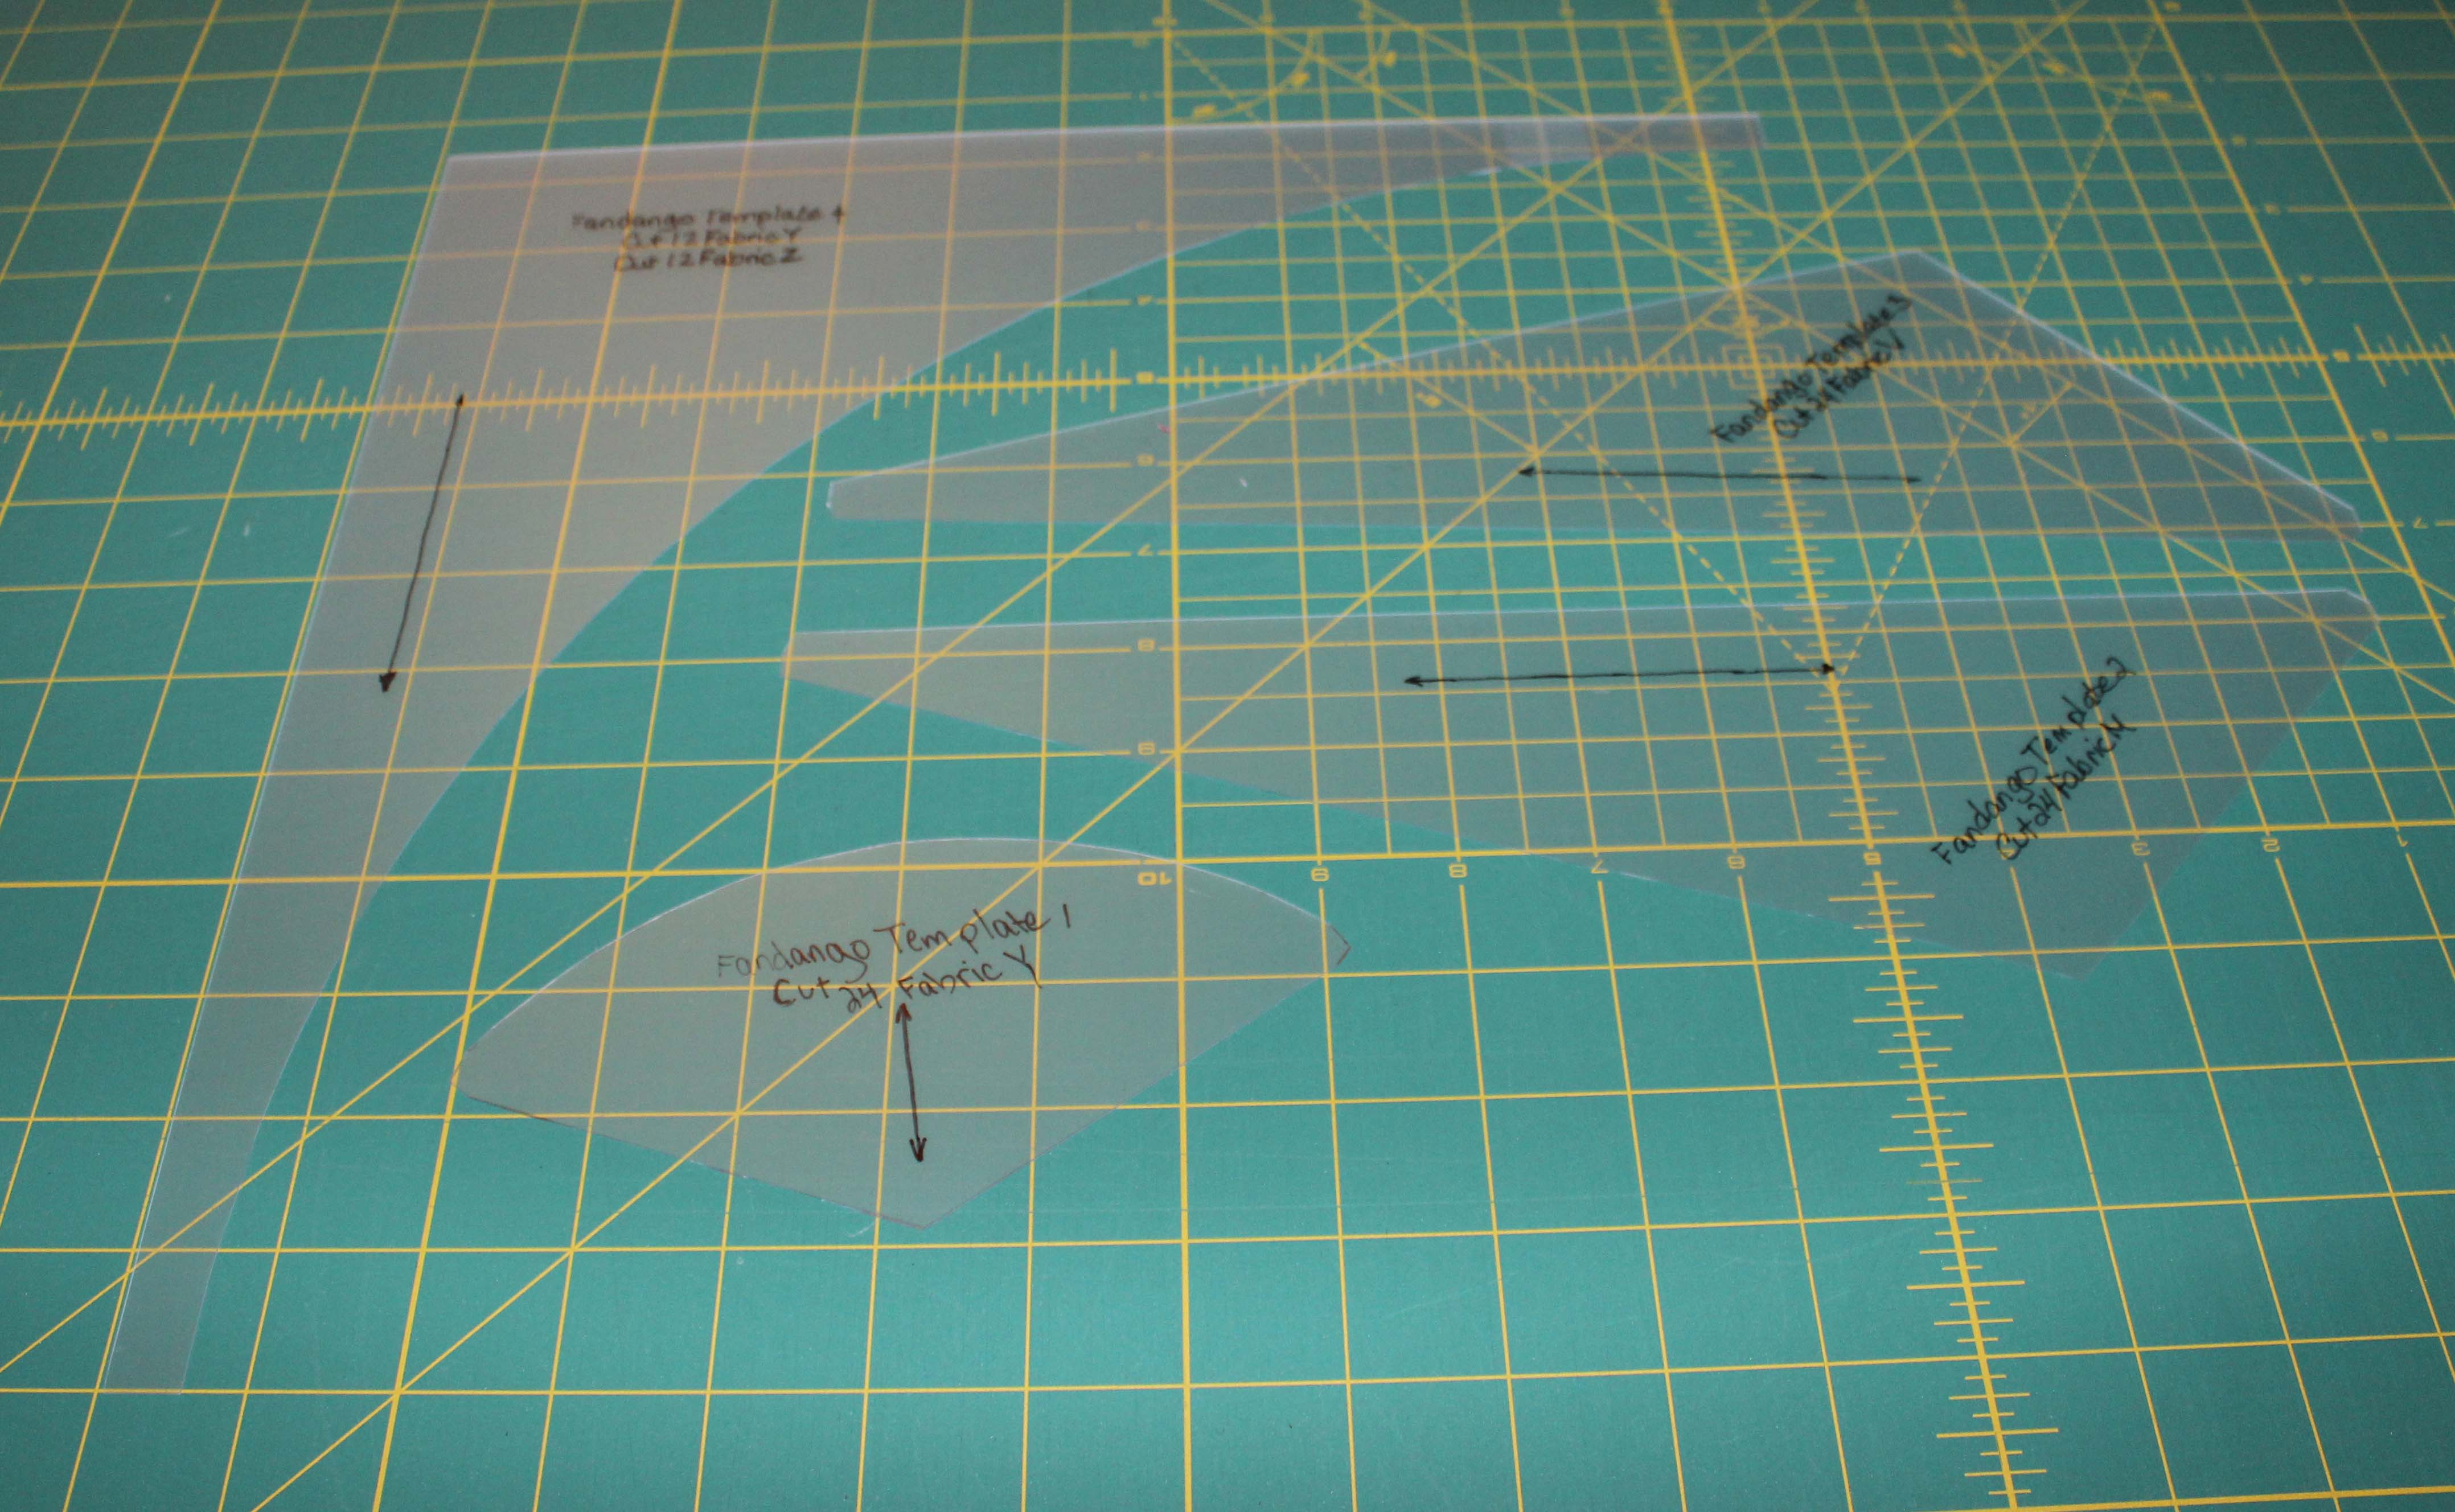
I used an extra fine tip sharpie to mark the templates and then a razor blade and ruler to cut along the outer lines
The curves were done free hand, very slowly.
All cut out and I still have 10 fingers!
The paper piecing templates were just enlarged onto 11×17 paper. I’ve always used regular paper when I paper piece with very tiny stitches and its always just been fine. There are two curved pieces on the original pattern and you are supposed to make 12 copies. I couldn’t see any difference between the two, so I enlarged the top one and made 30 copies (24 plus extras for mistakes)
I am looking forward to playing with the fabrics this week! We are cutting the fabric next, but will be sewing soon!
Are there any tips in prepping that you used? Feel free to share them here and on my instagram, @lovinglylissa.
I’ve come up with a bit of a time line for this Quilt Along. I plan on completing the steps on the following dates. These can be subject to change as we go along.
October 4 – templates copied and prepared
October 11 – fabrics cut
October 18 – Group 1 blocks complete (steps 2-6)
October 25 – Group 2 blocks complete (steps 2-6)
November 1 – Group 3 blocks complete (steps 2-6)
November 8 – Group 4 blocks complete (steps 2-6)
November 15 – Quilt top assembly.
December 1 for quilt finishing.
Now, this may be an ambitious timeline. If it is, we can change it. No worries.
I’ll be posting pictures on my Instagram, @lovinglylissa, so follow along there as well. There will be more details and tips on the blog.
The pattern must be purchased with the kit, I will not be posting the pattern.