Quilting tips and techniques · Uncategorized

Row by Row

Every summer quilt shops across the U.S. and Canada participate in the Row by Row experience.  You visit a participating shop and pick up a pattern for a quilt row.  Each shop has their own unique pattern, but they all follow a theme.

I don’t really shop hop and gather rows each summer, instead I visit a local quilt shop from wherever I am vacationing with my family.  Some time in the future I will have a wonderful blanket filled with memories of everywhere we went.

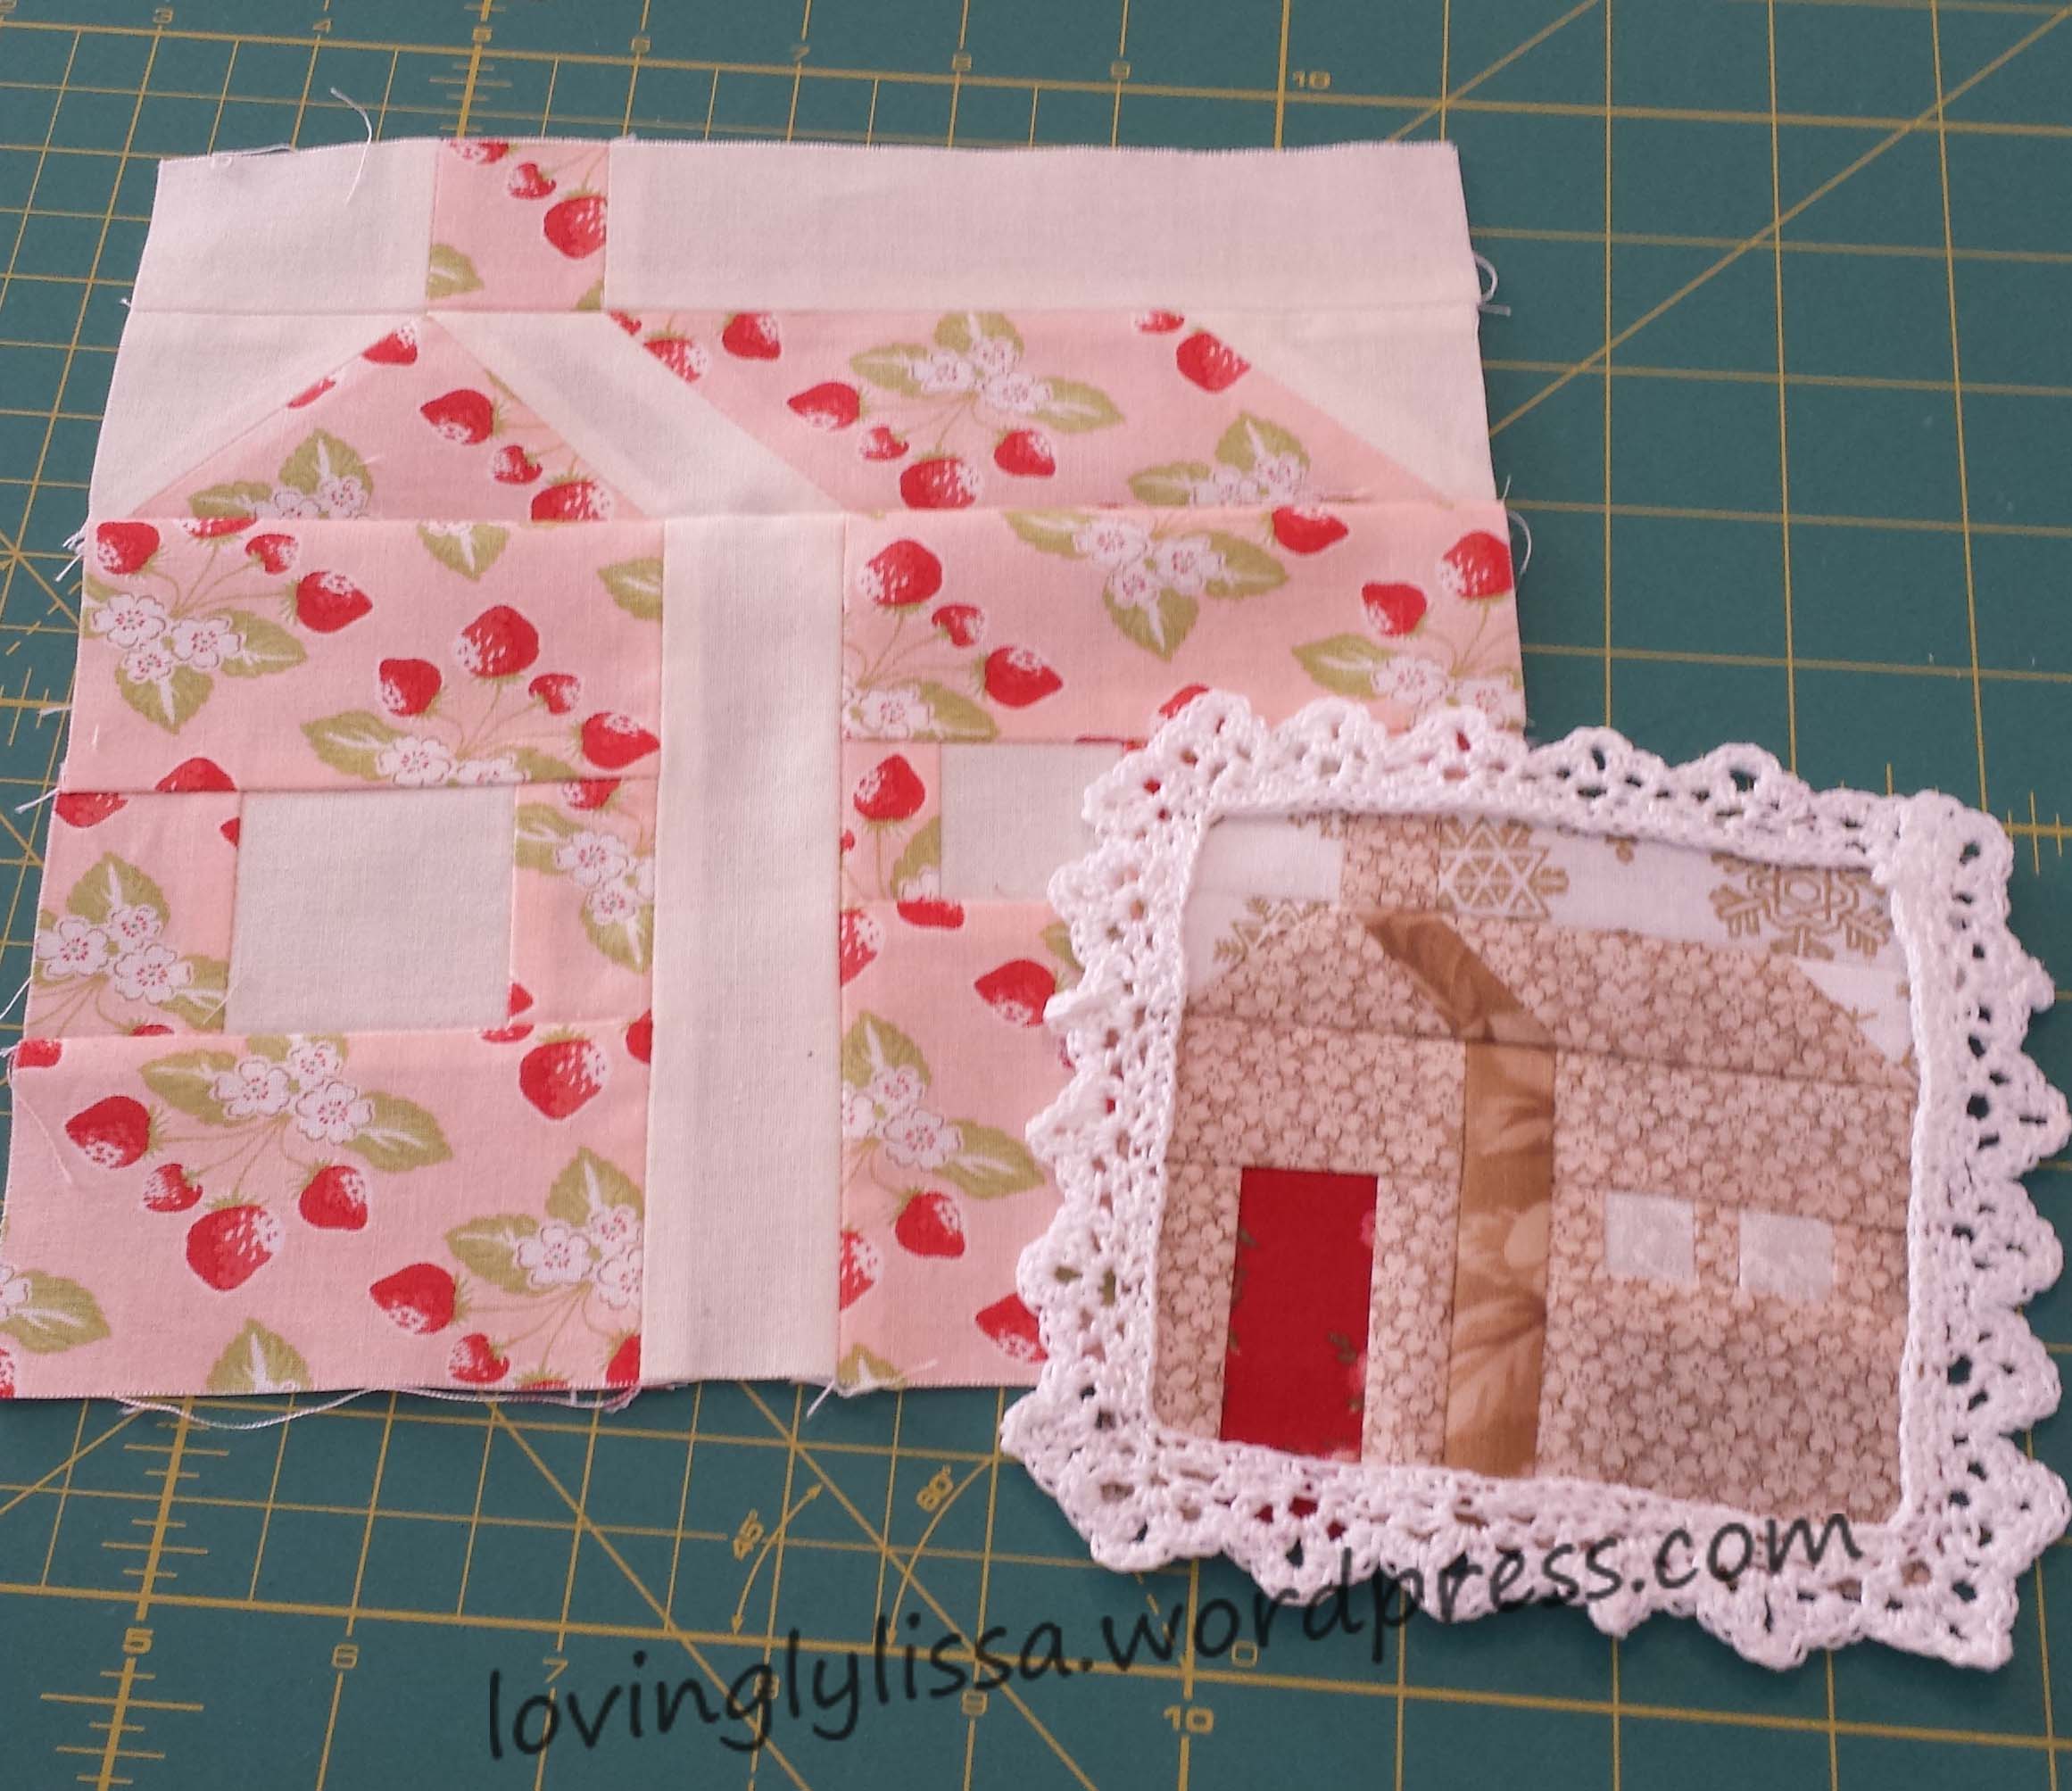
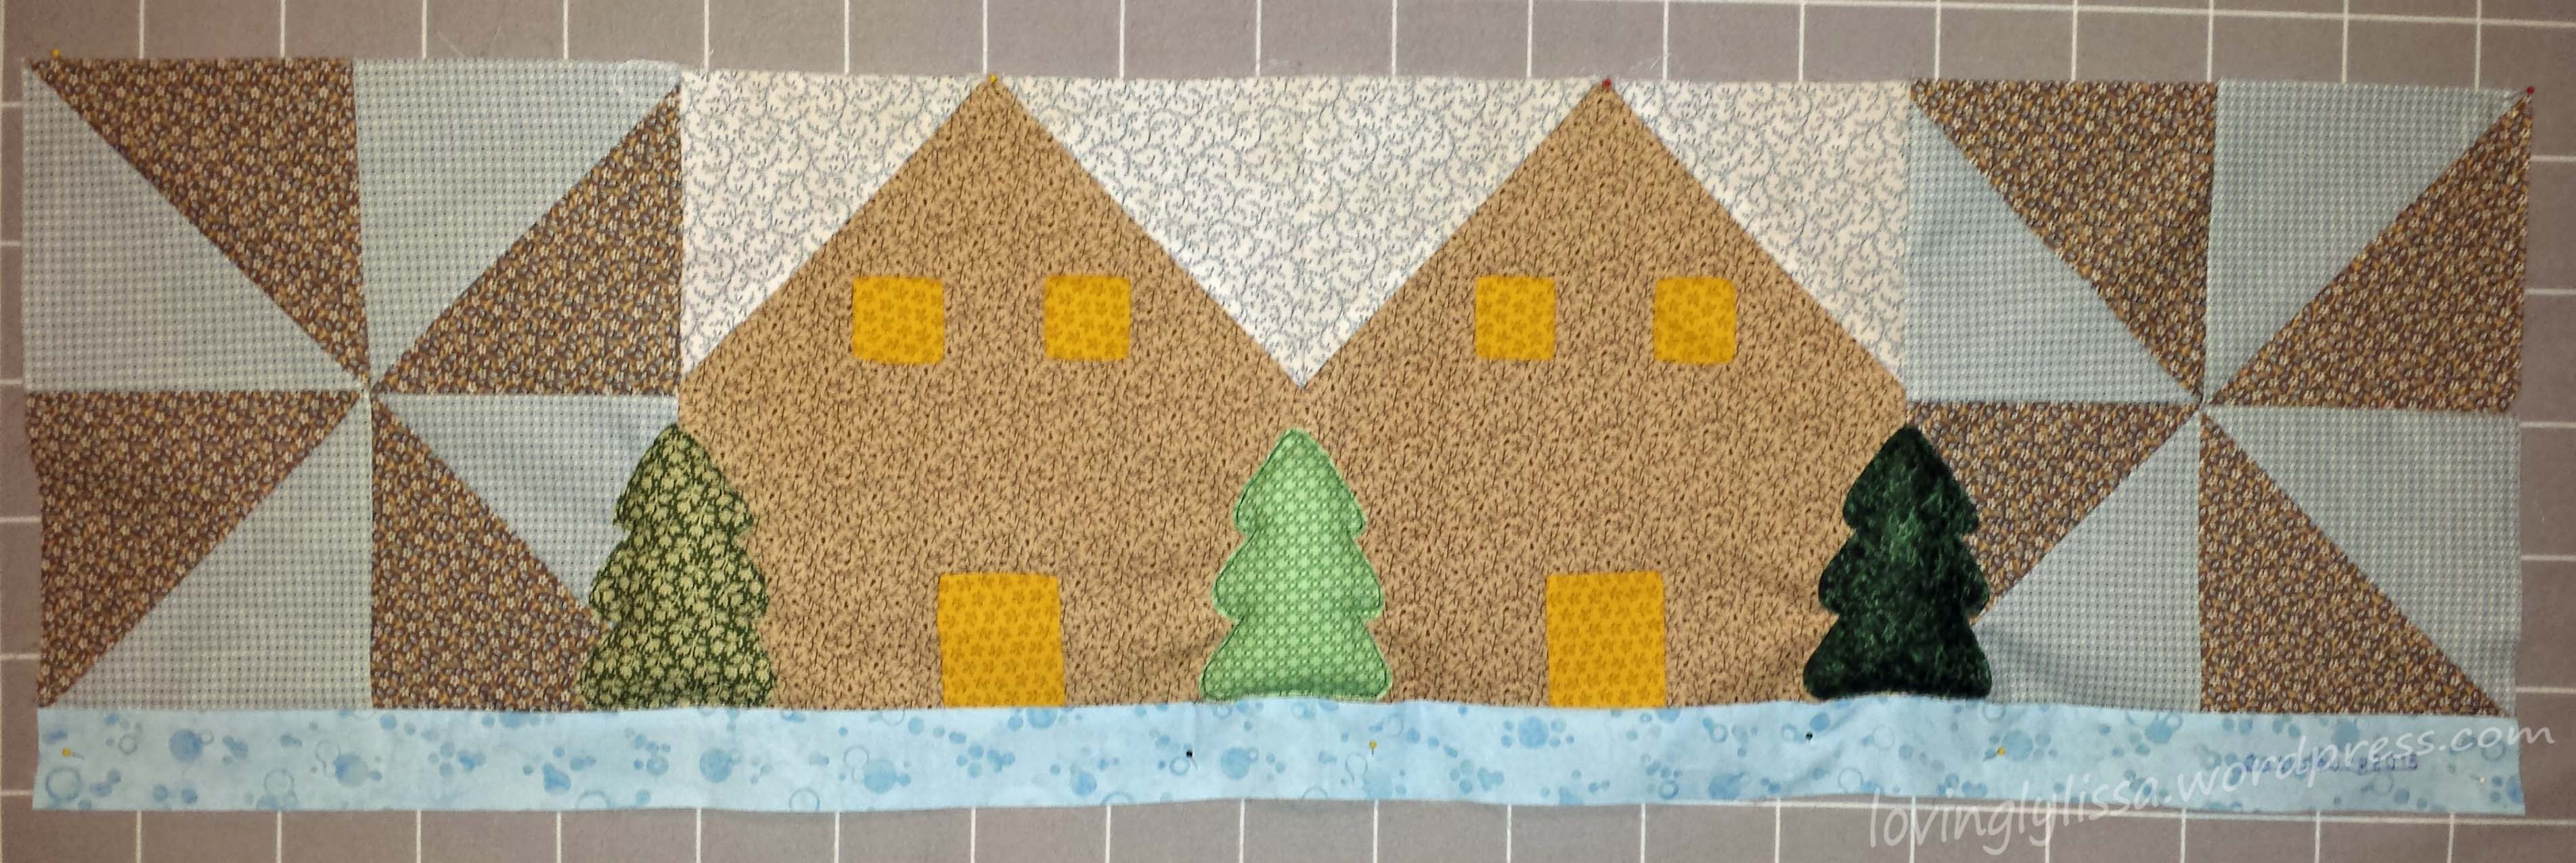
Last summer we went to Gatlinburg, TN and visited the Great Smokey Mountains.  I made a stop at Mountain Stitches by Susan  and purchased a kit to make her row of the grist mills and water wheels.

There was applique involved with this piece and I thought I would try it a few different ways.  Just to see how it would turn out.

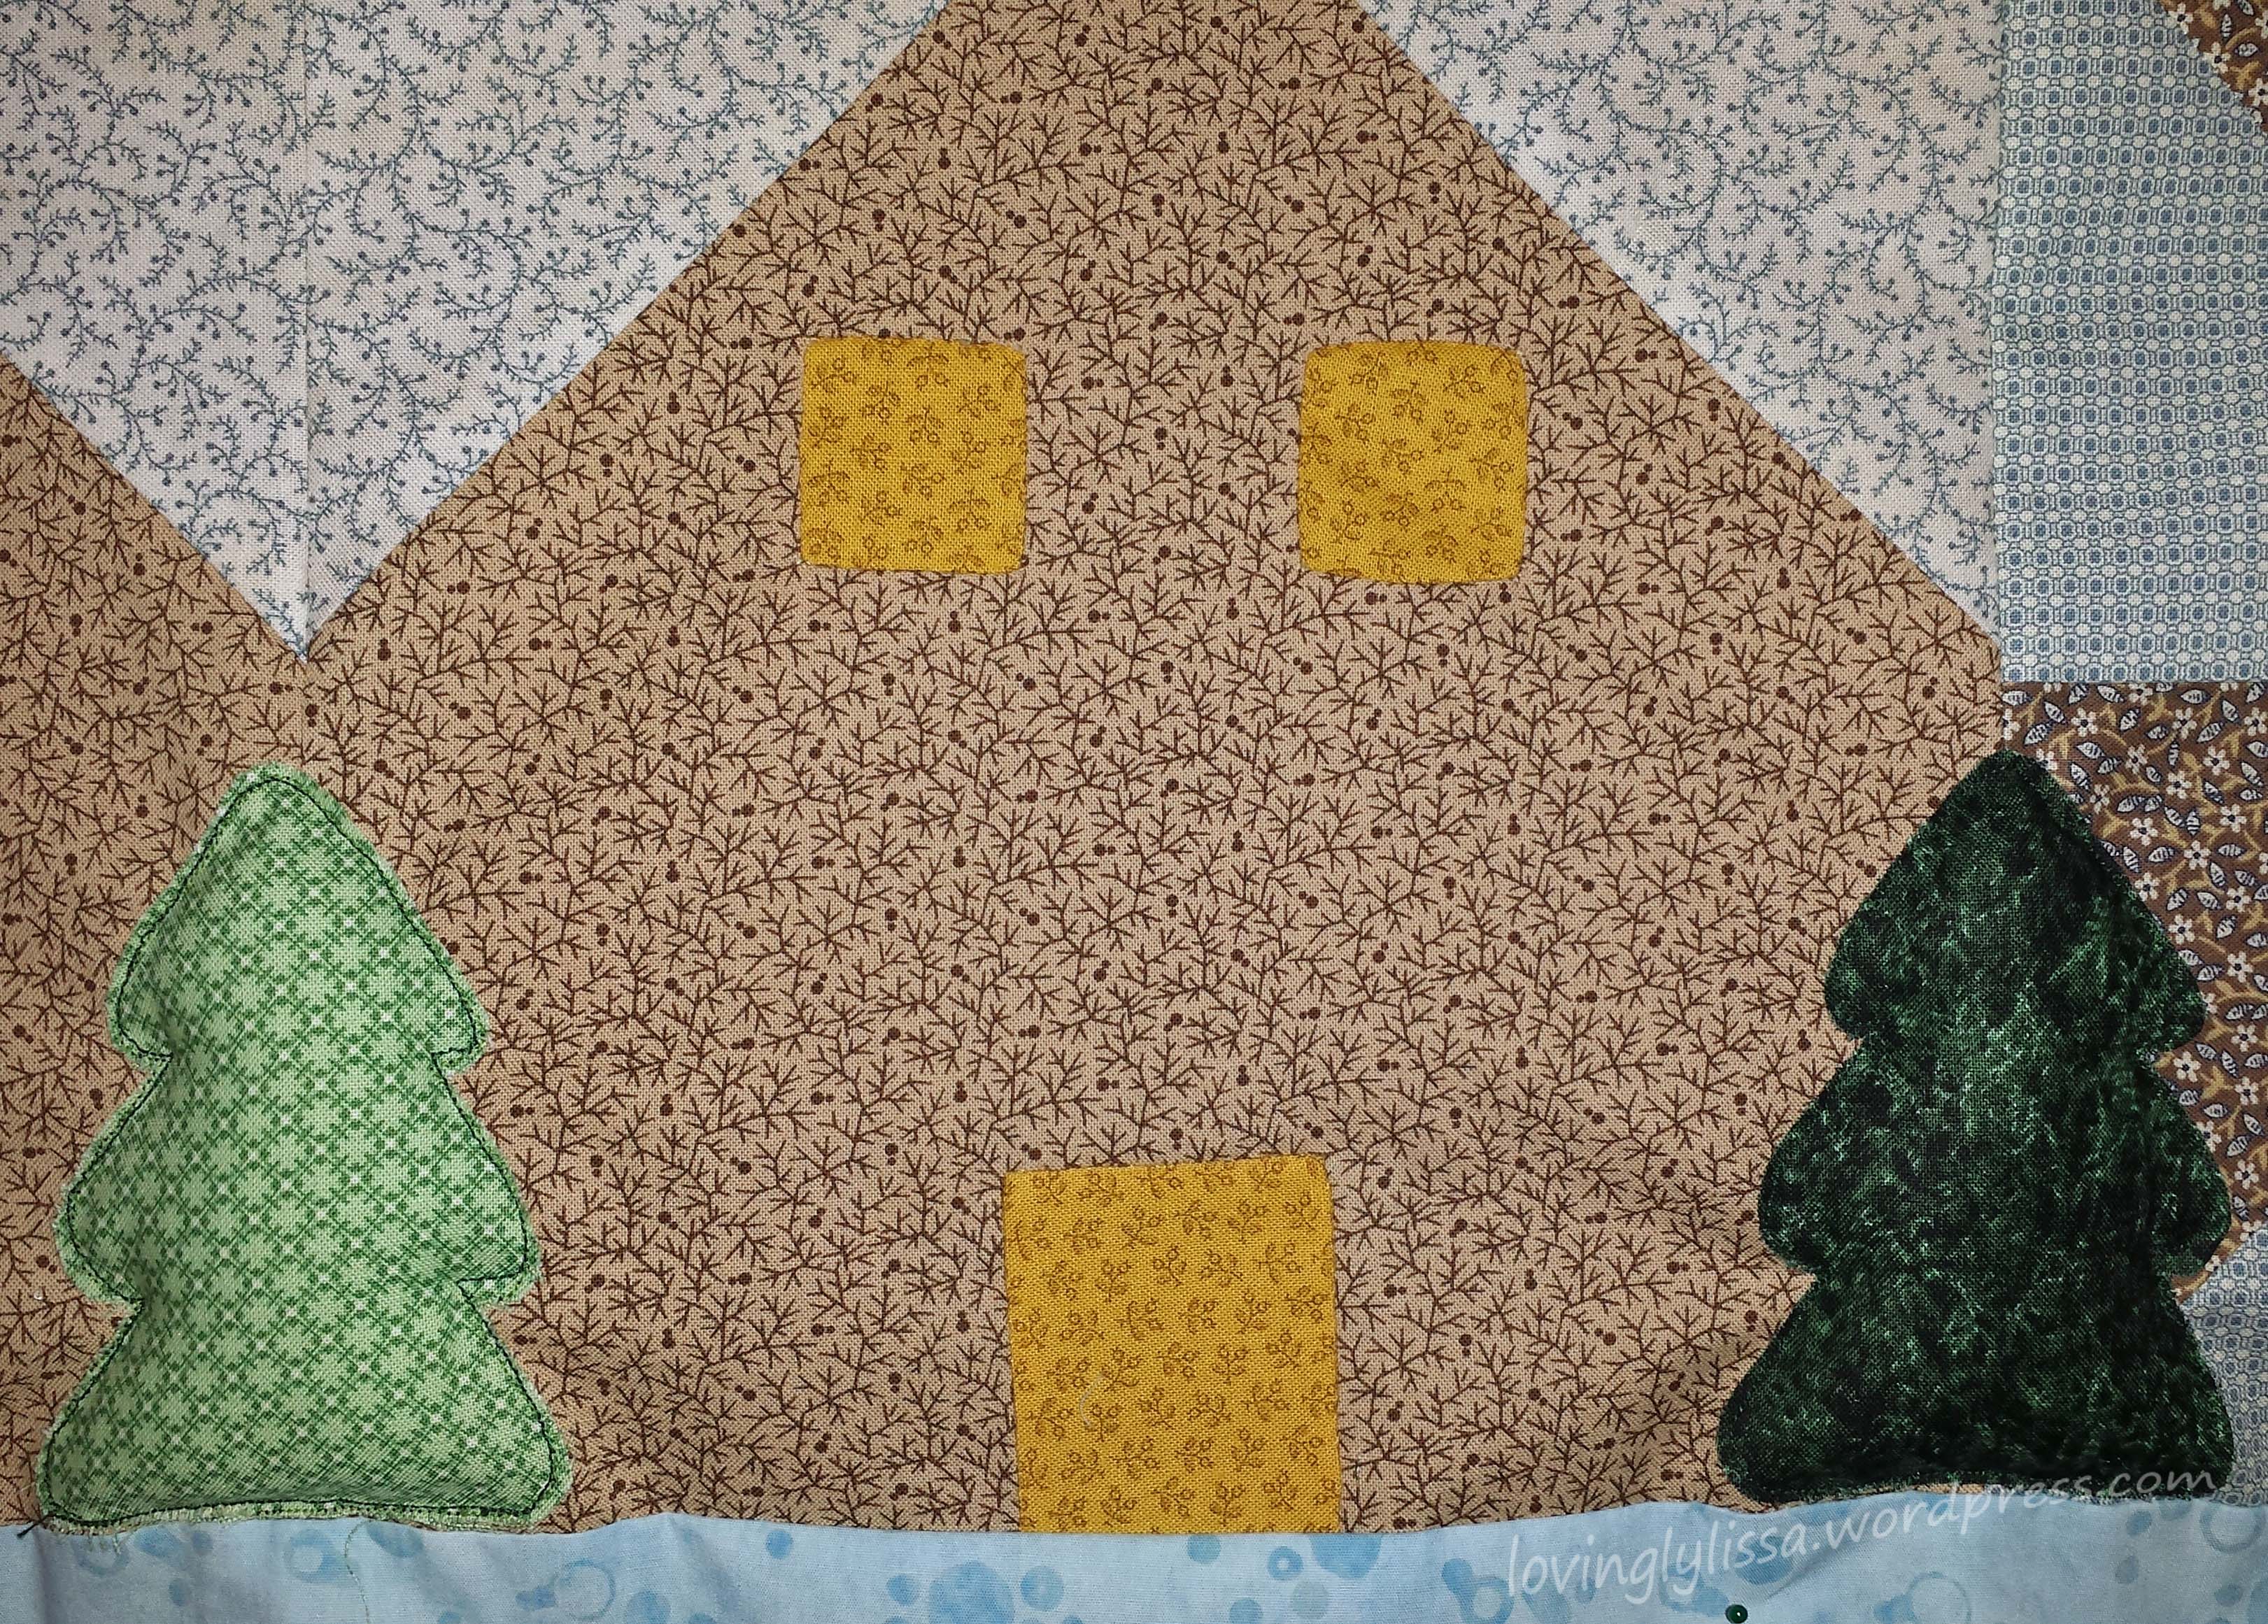
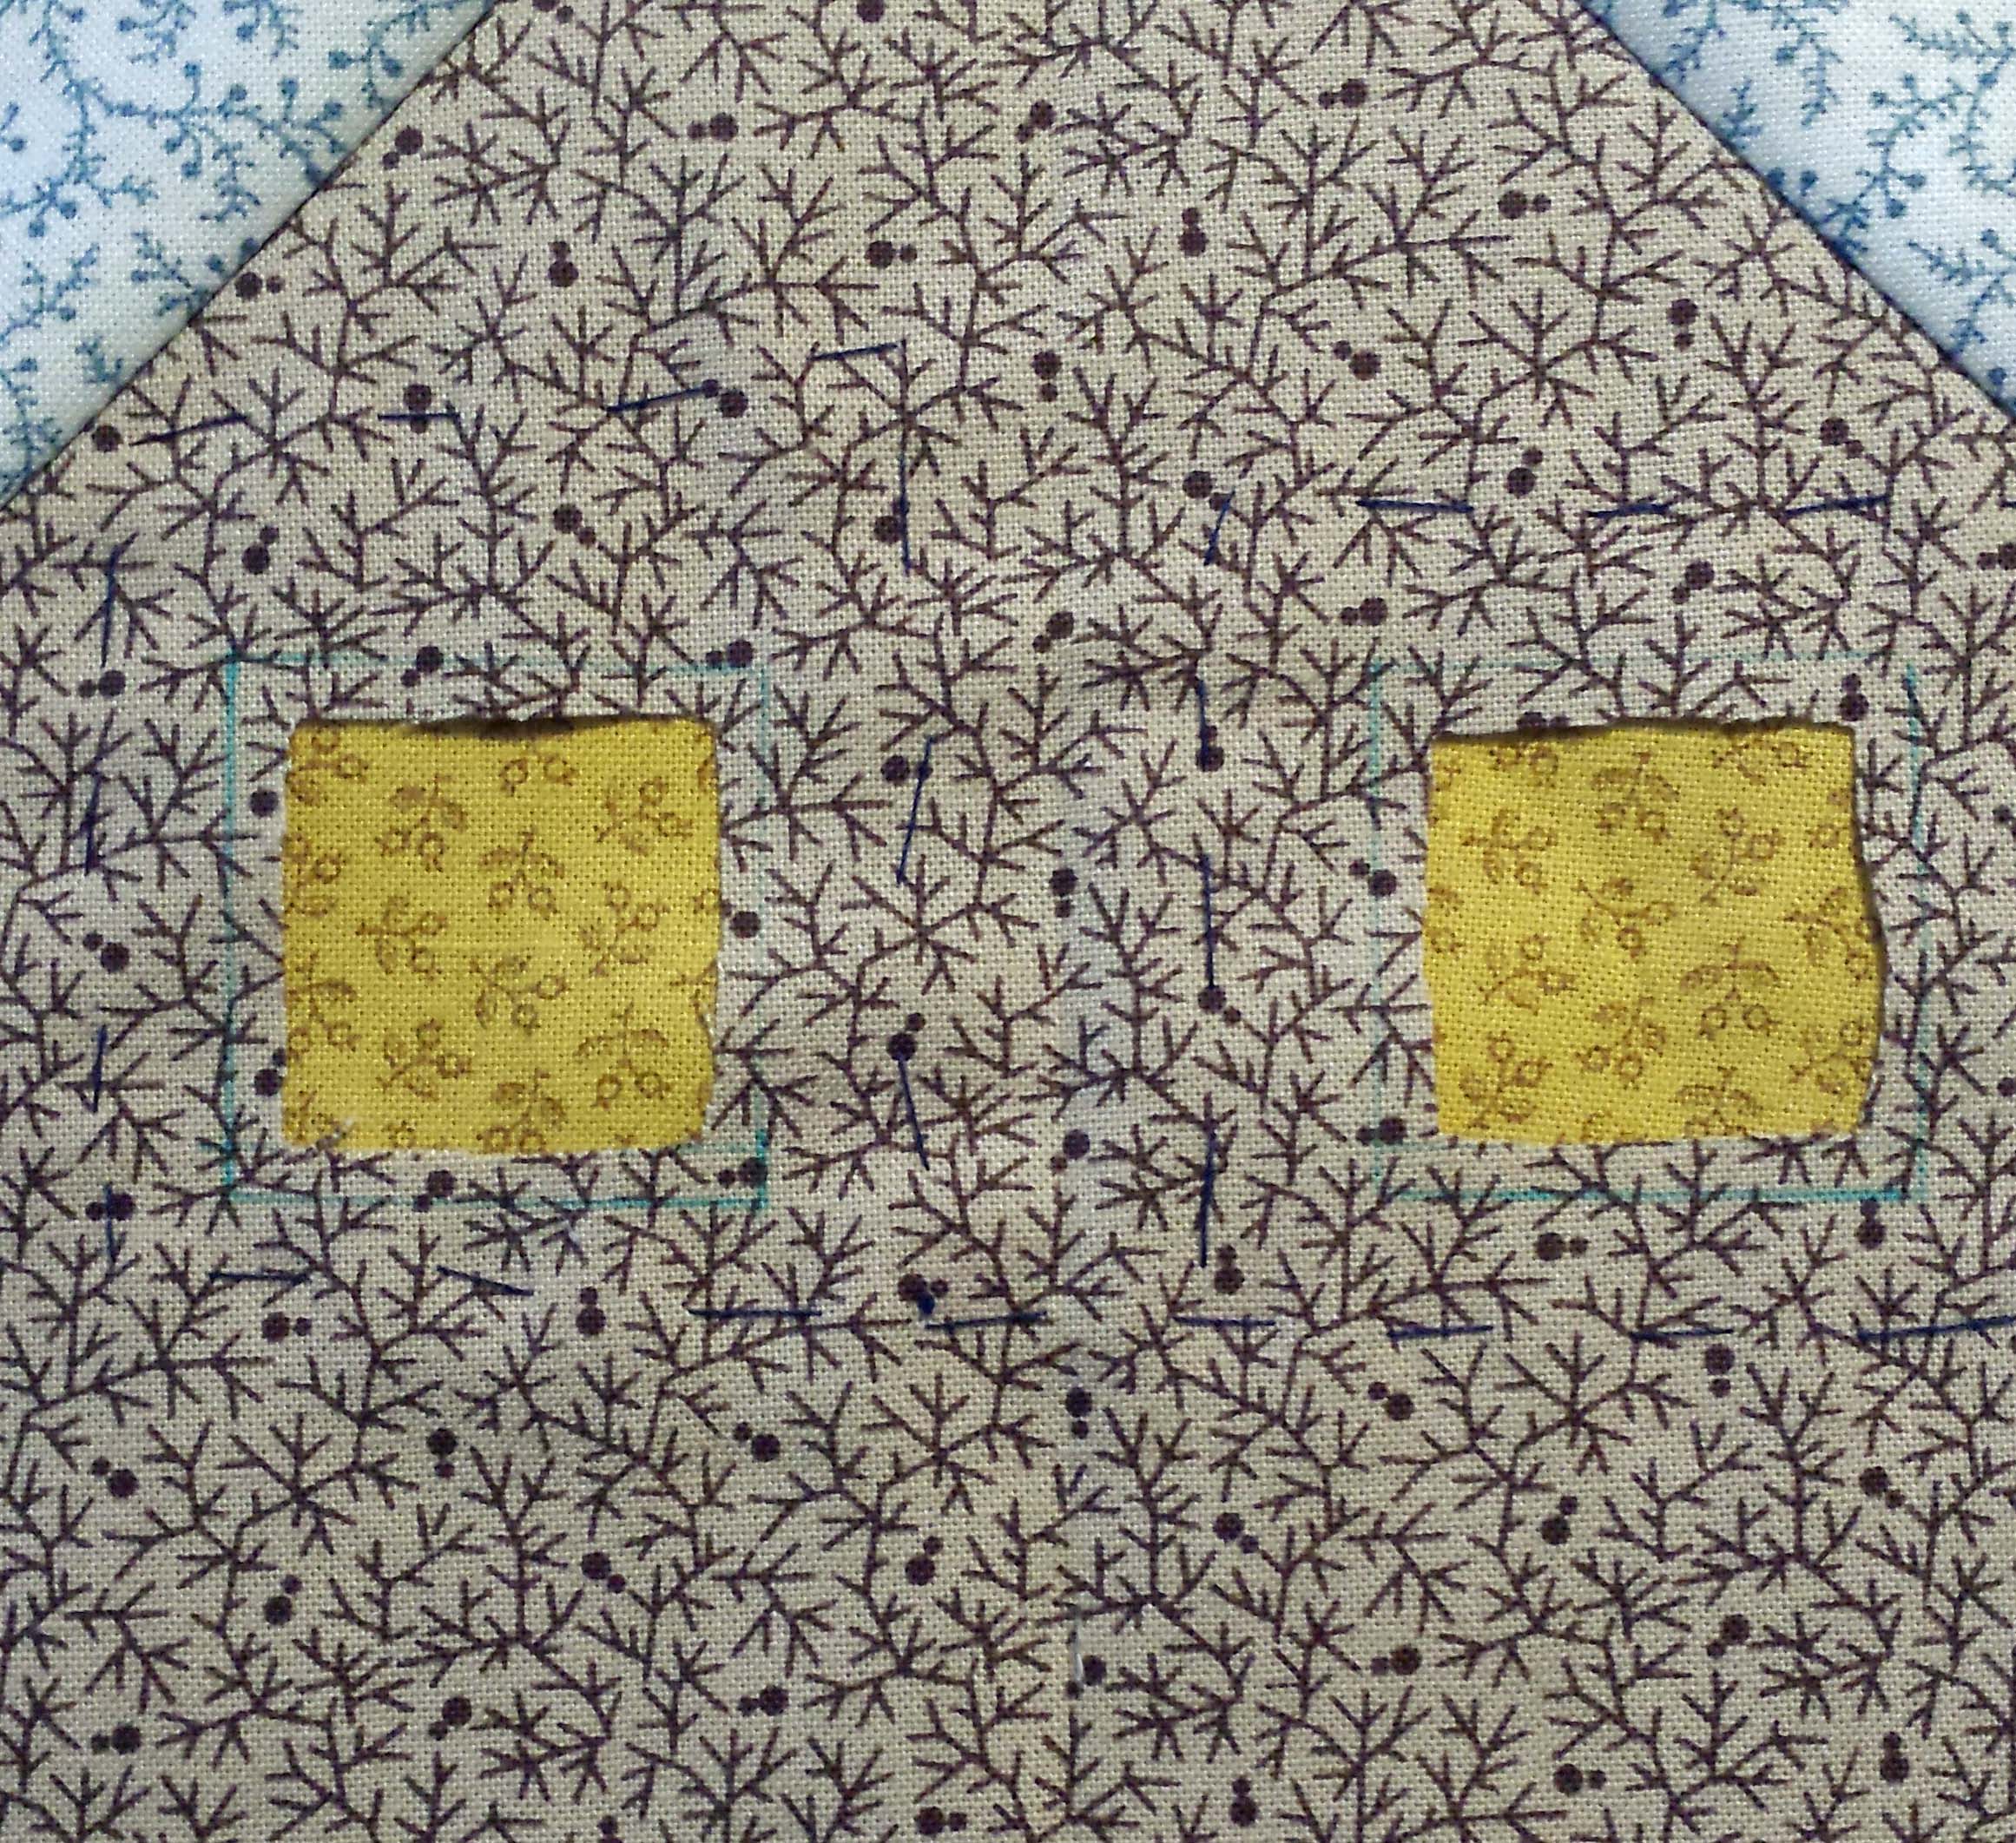
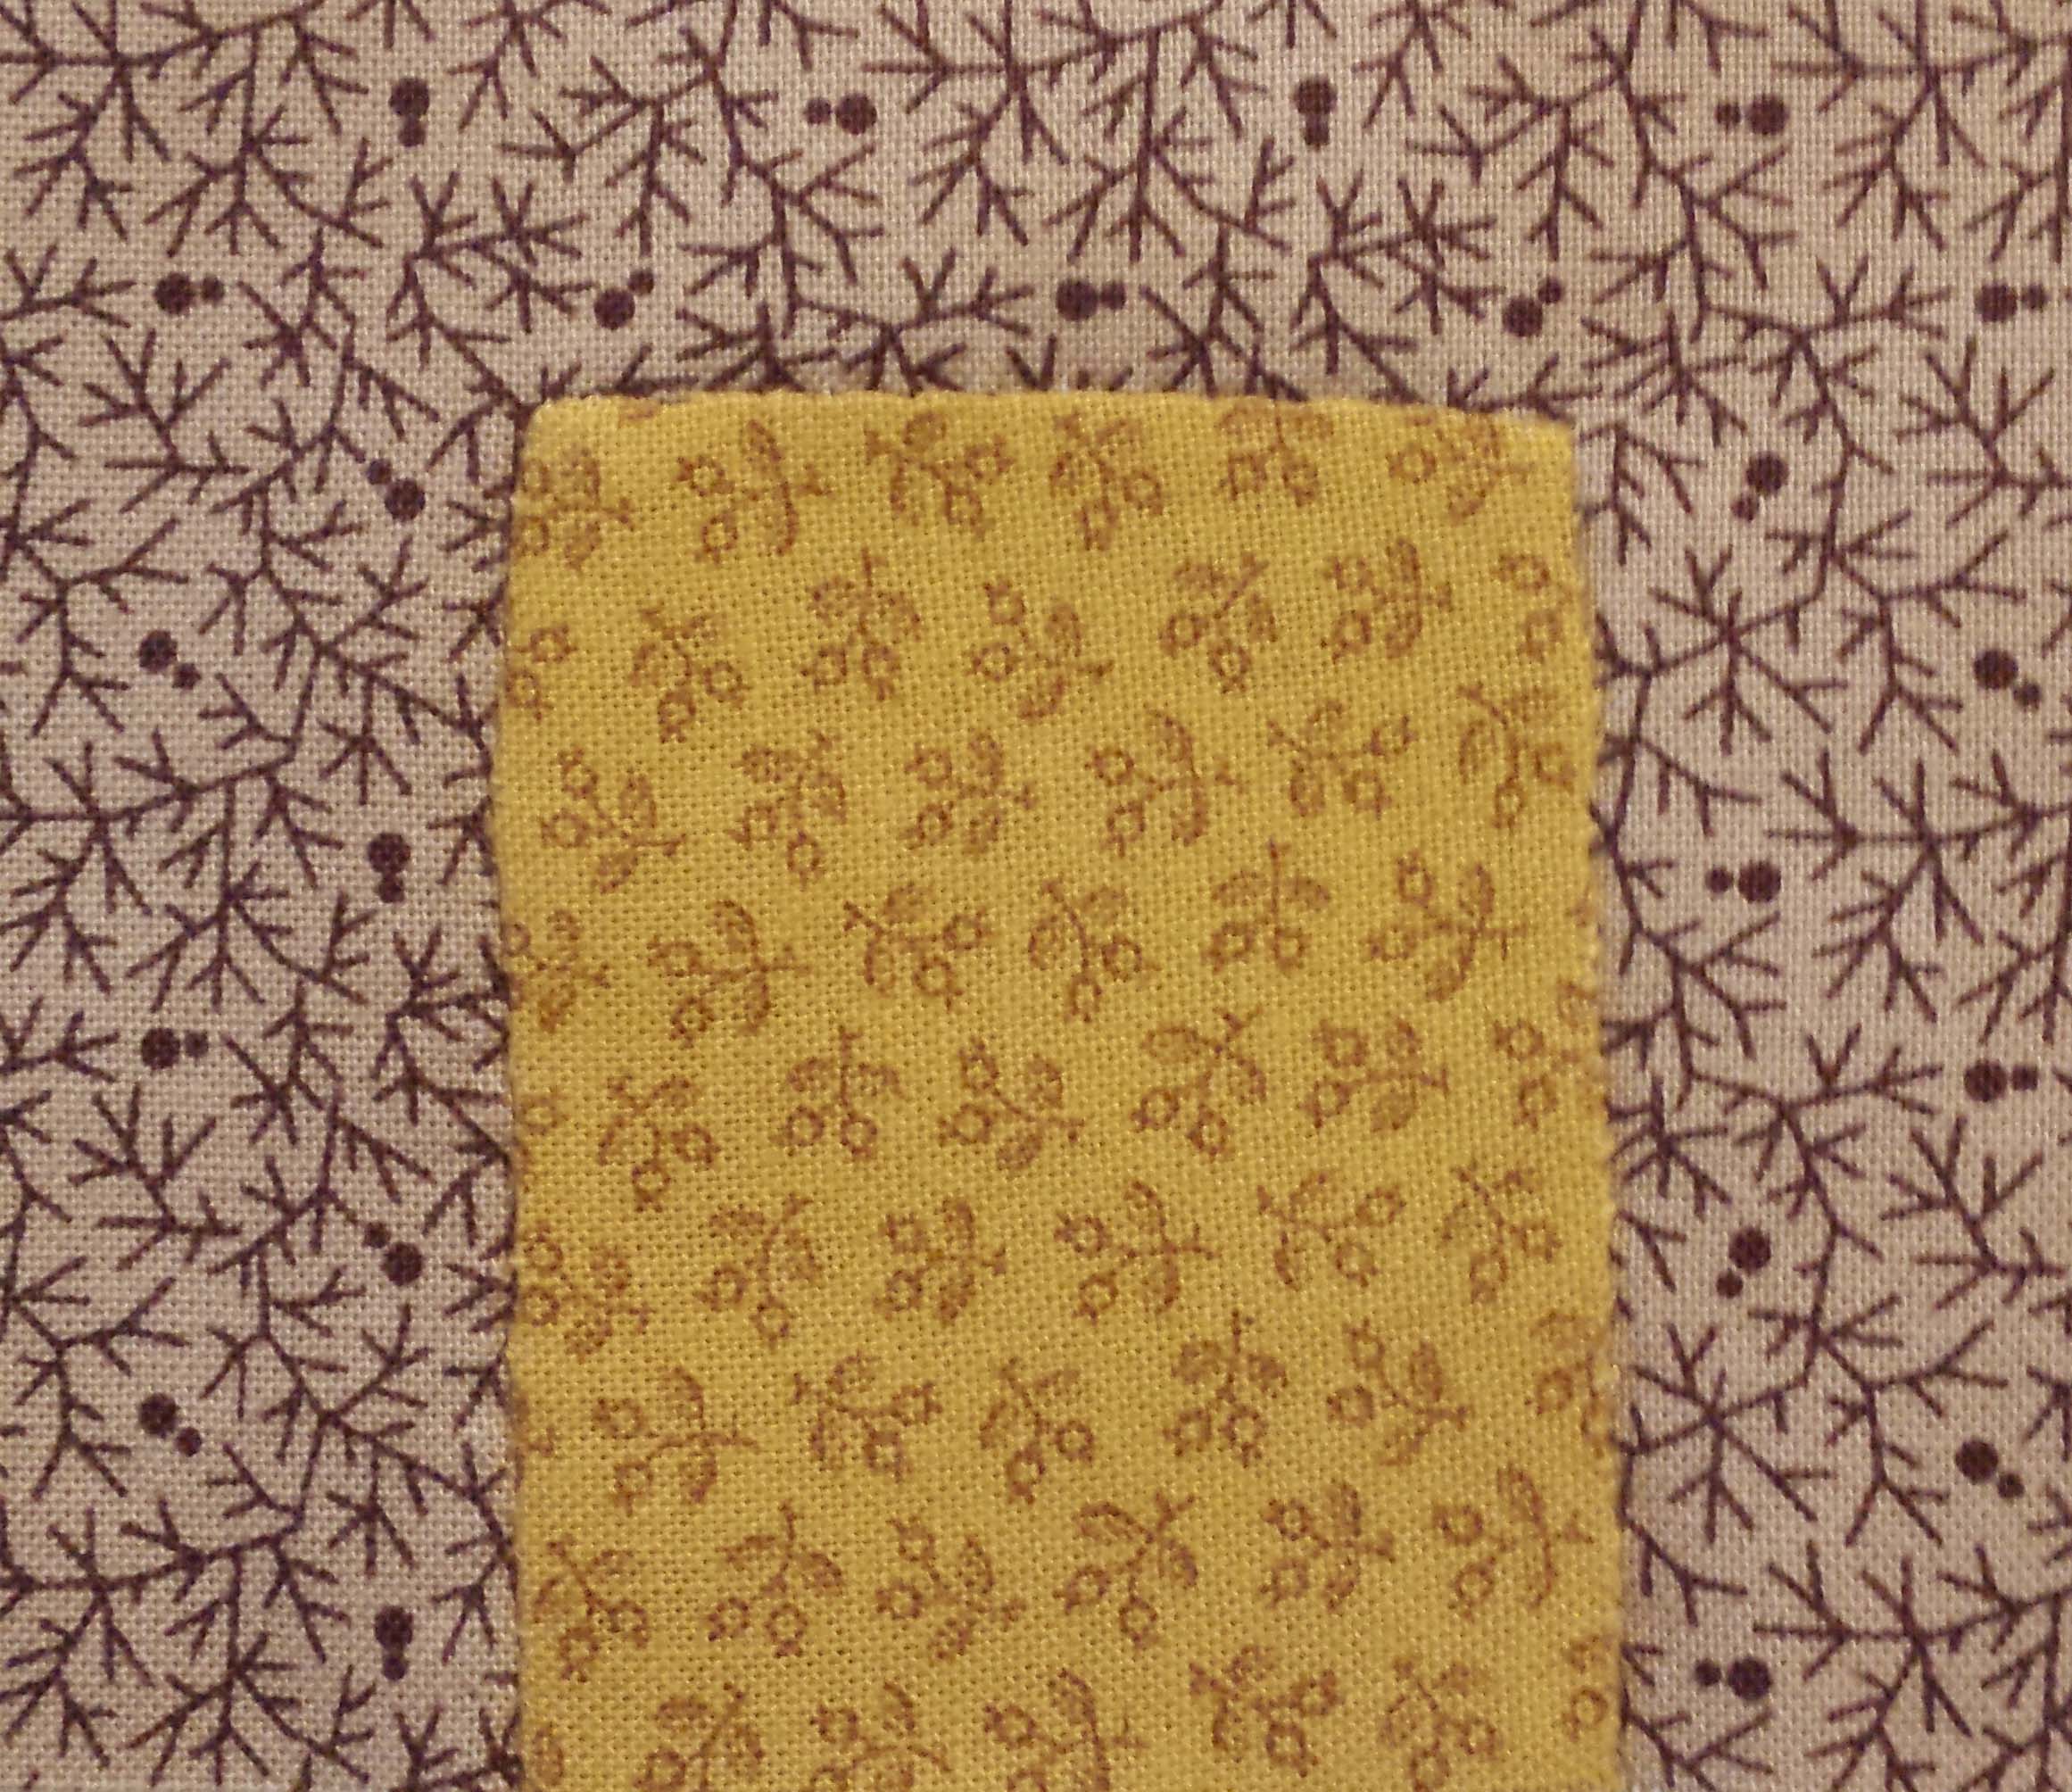
First, the upper windows of the grist mills were reversed appliqued.  This meant I put the window fabric behind the grist mill, and cut the grist mill fabric to show the windows.  I needled turned the grist mill fabric.


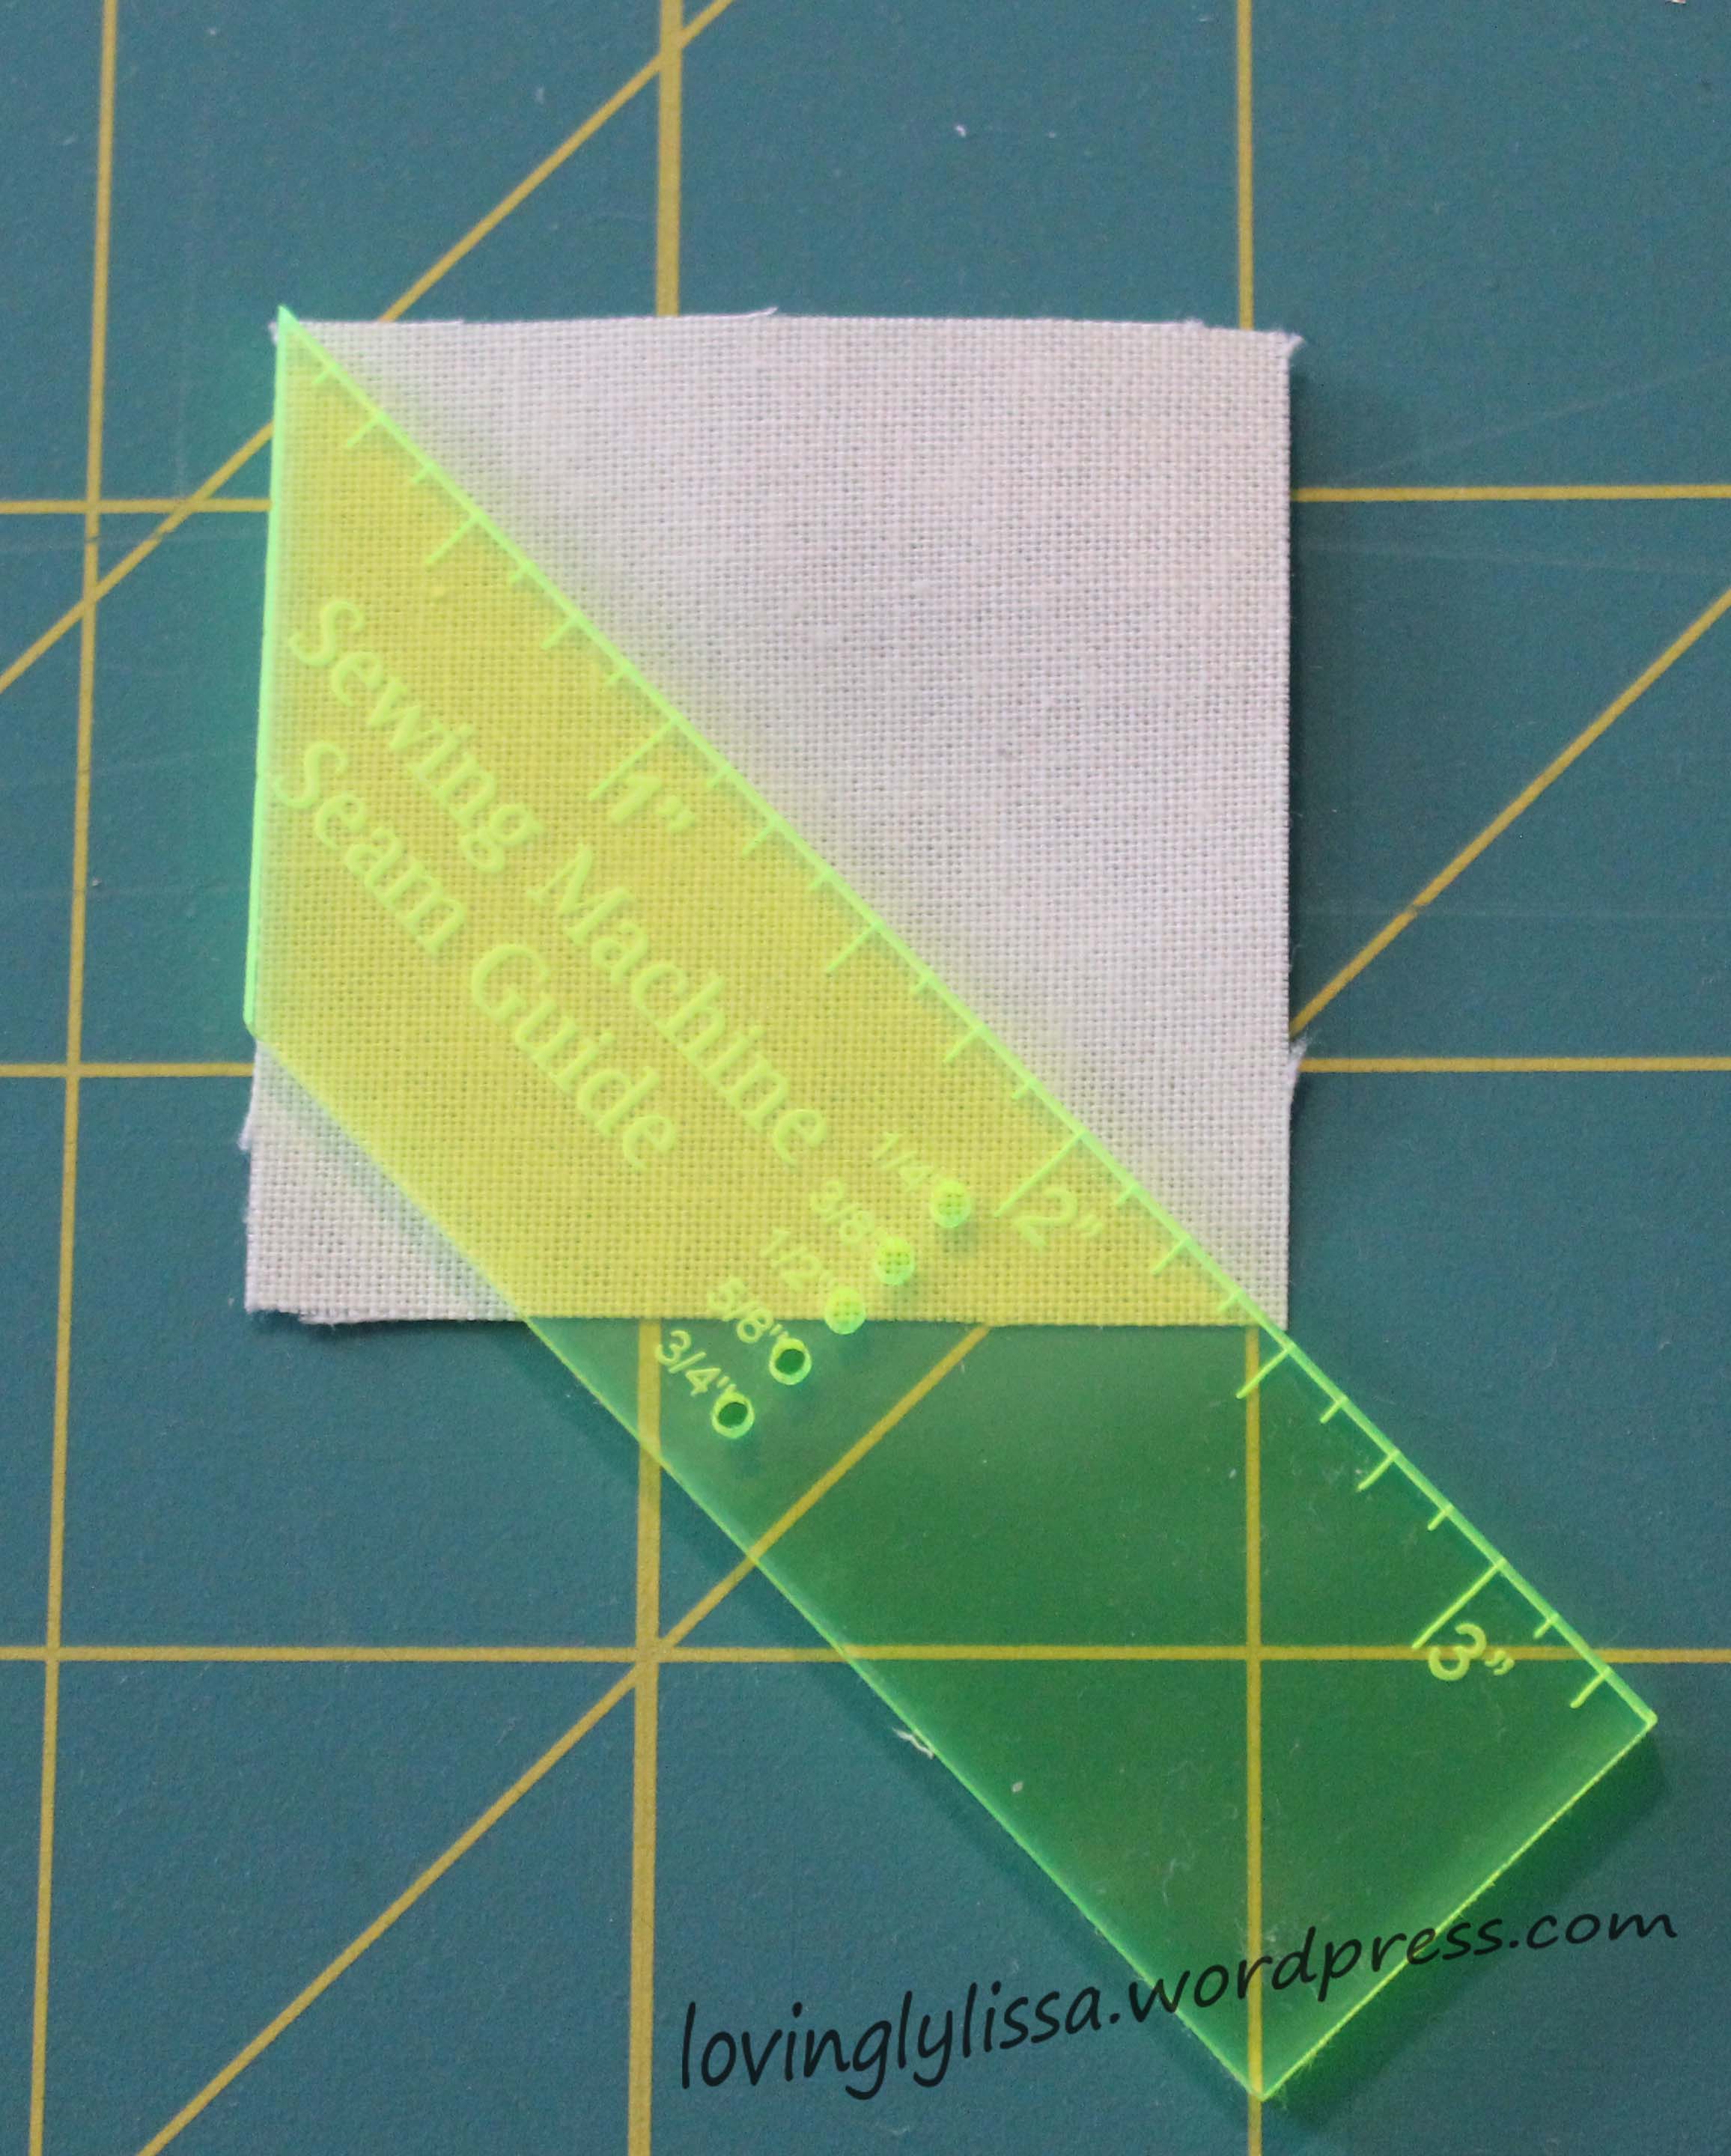
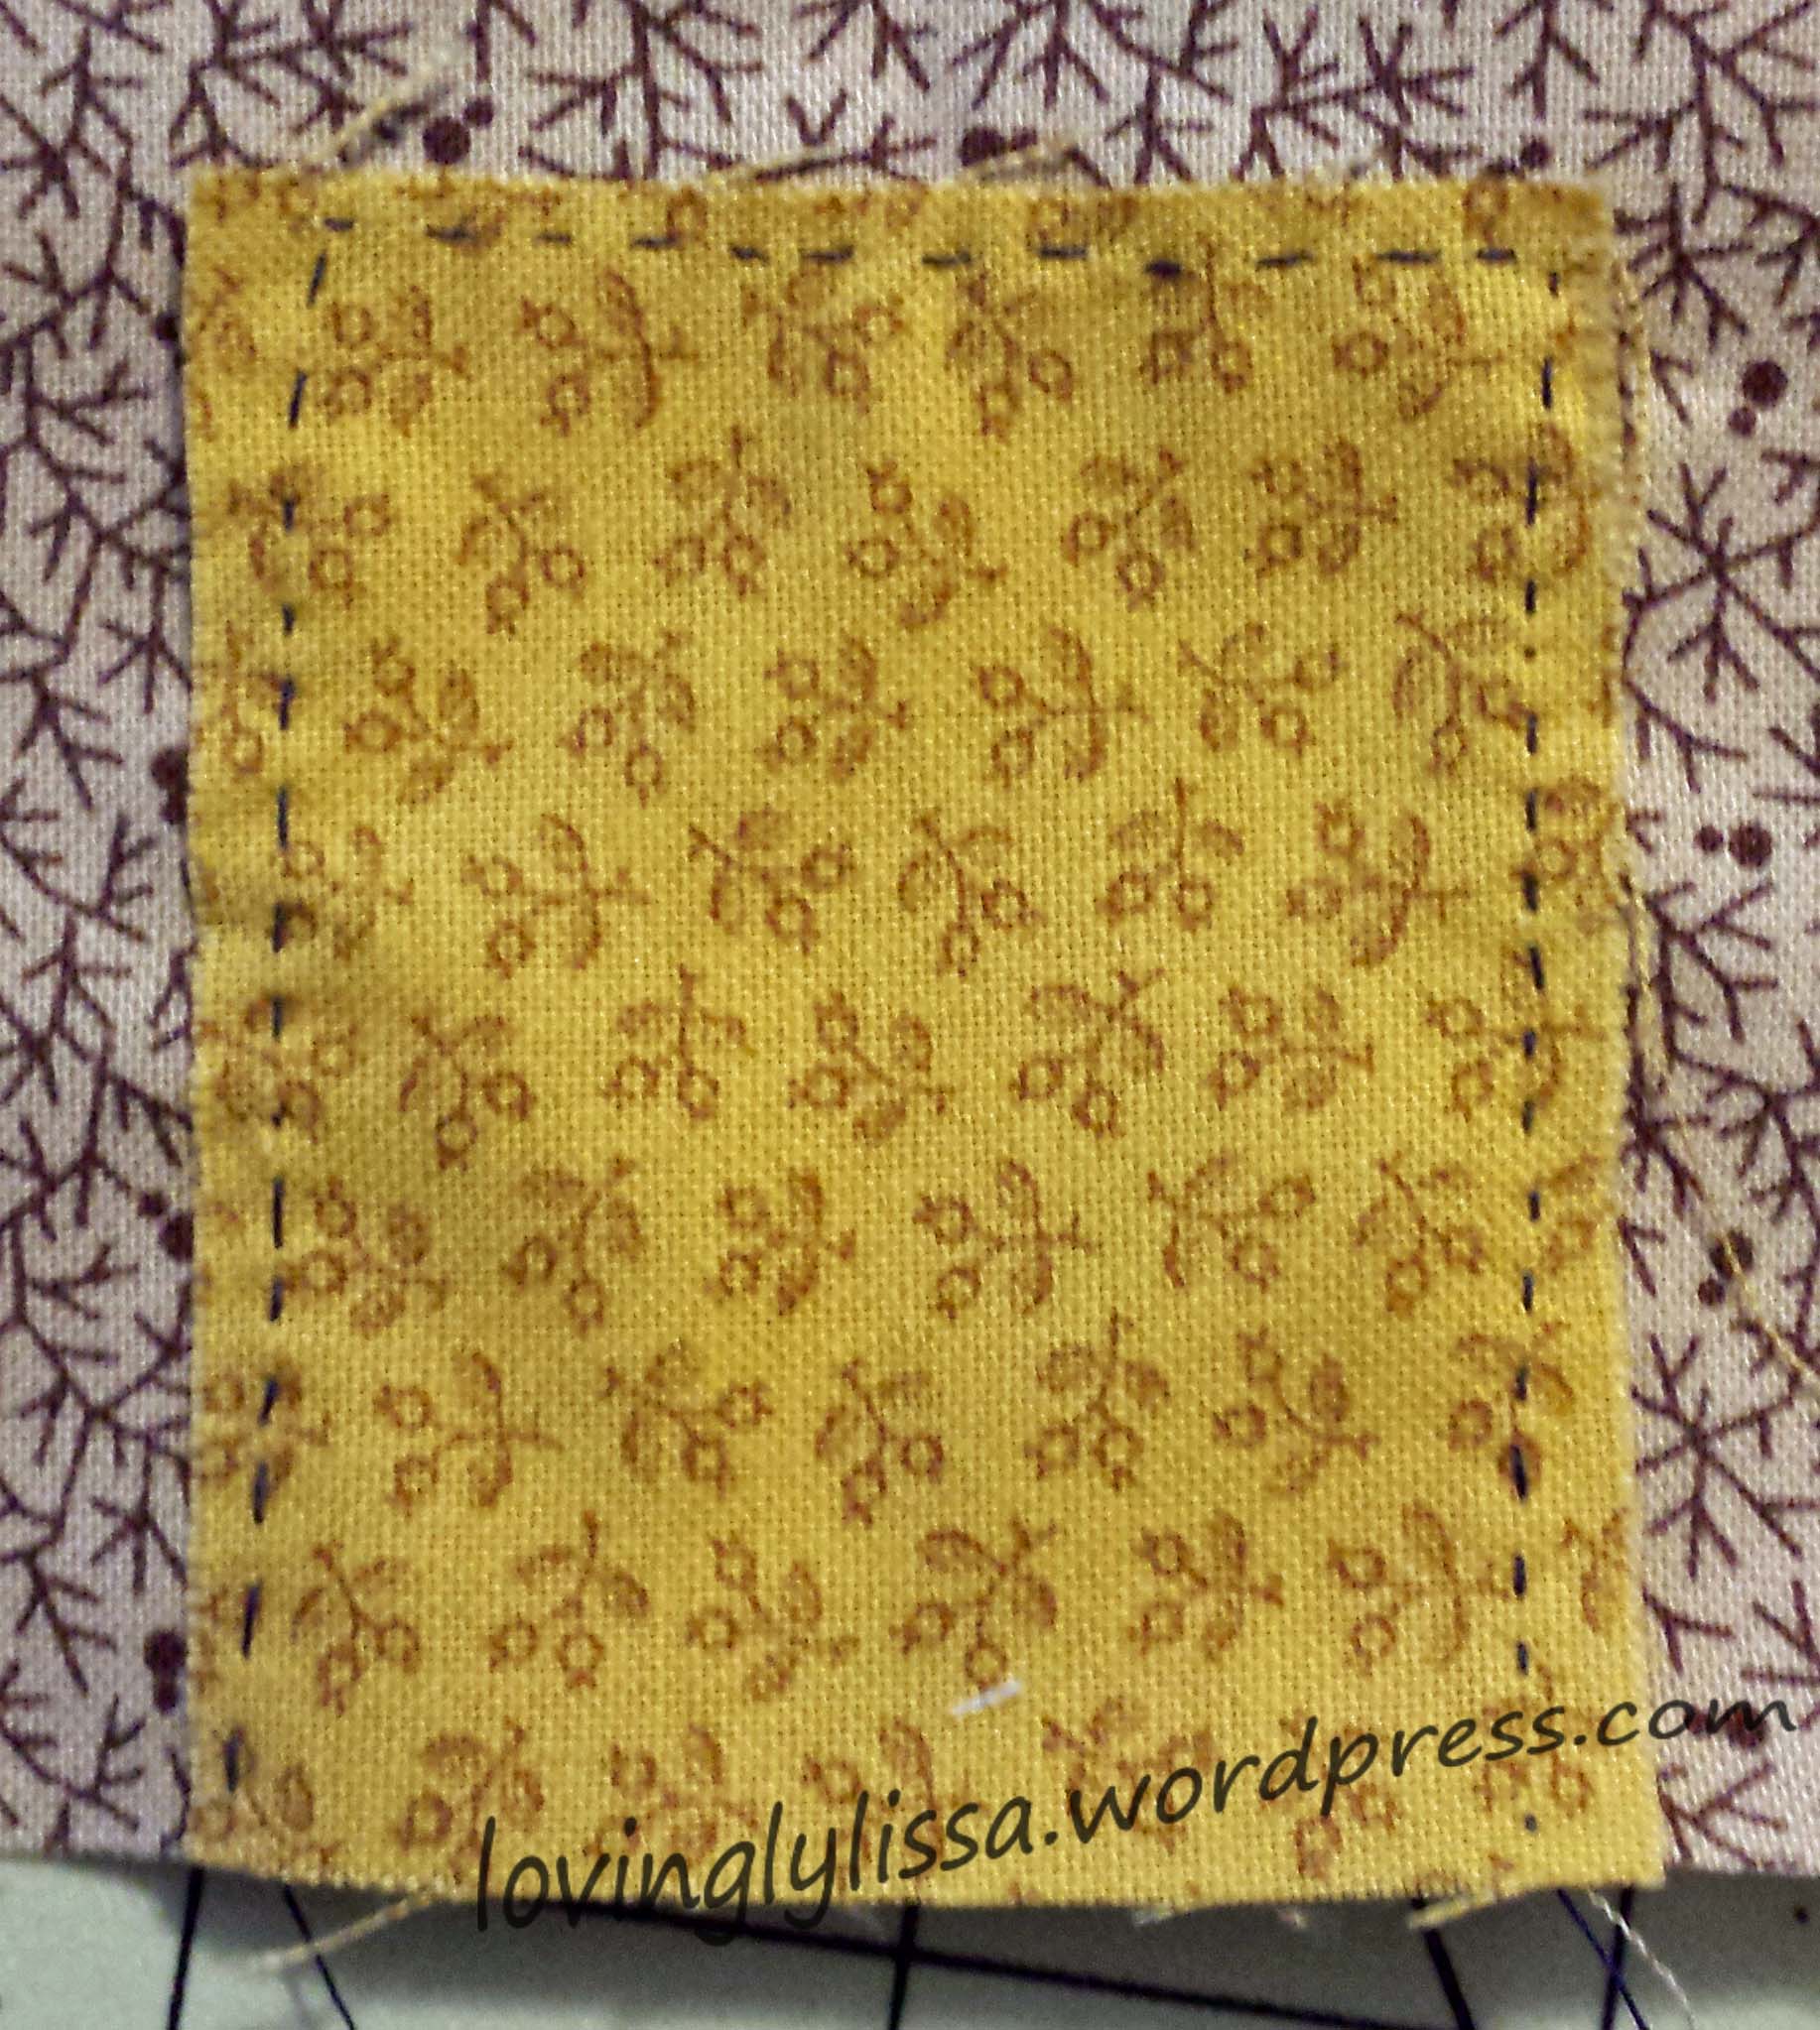
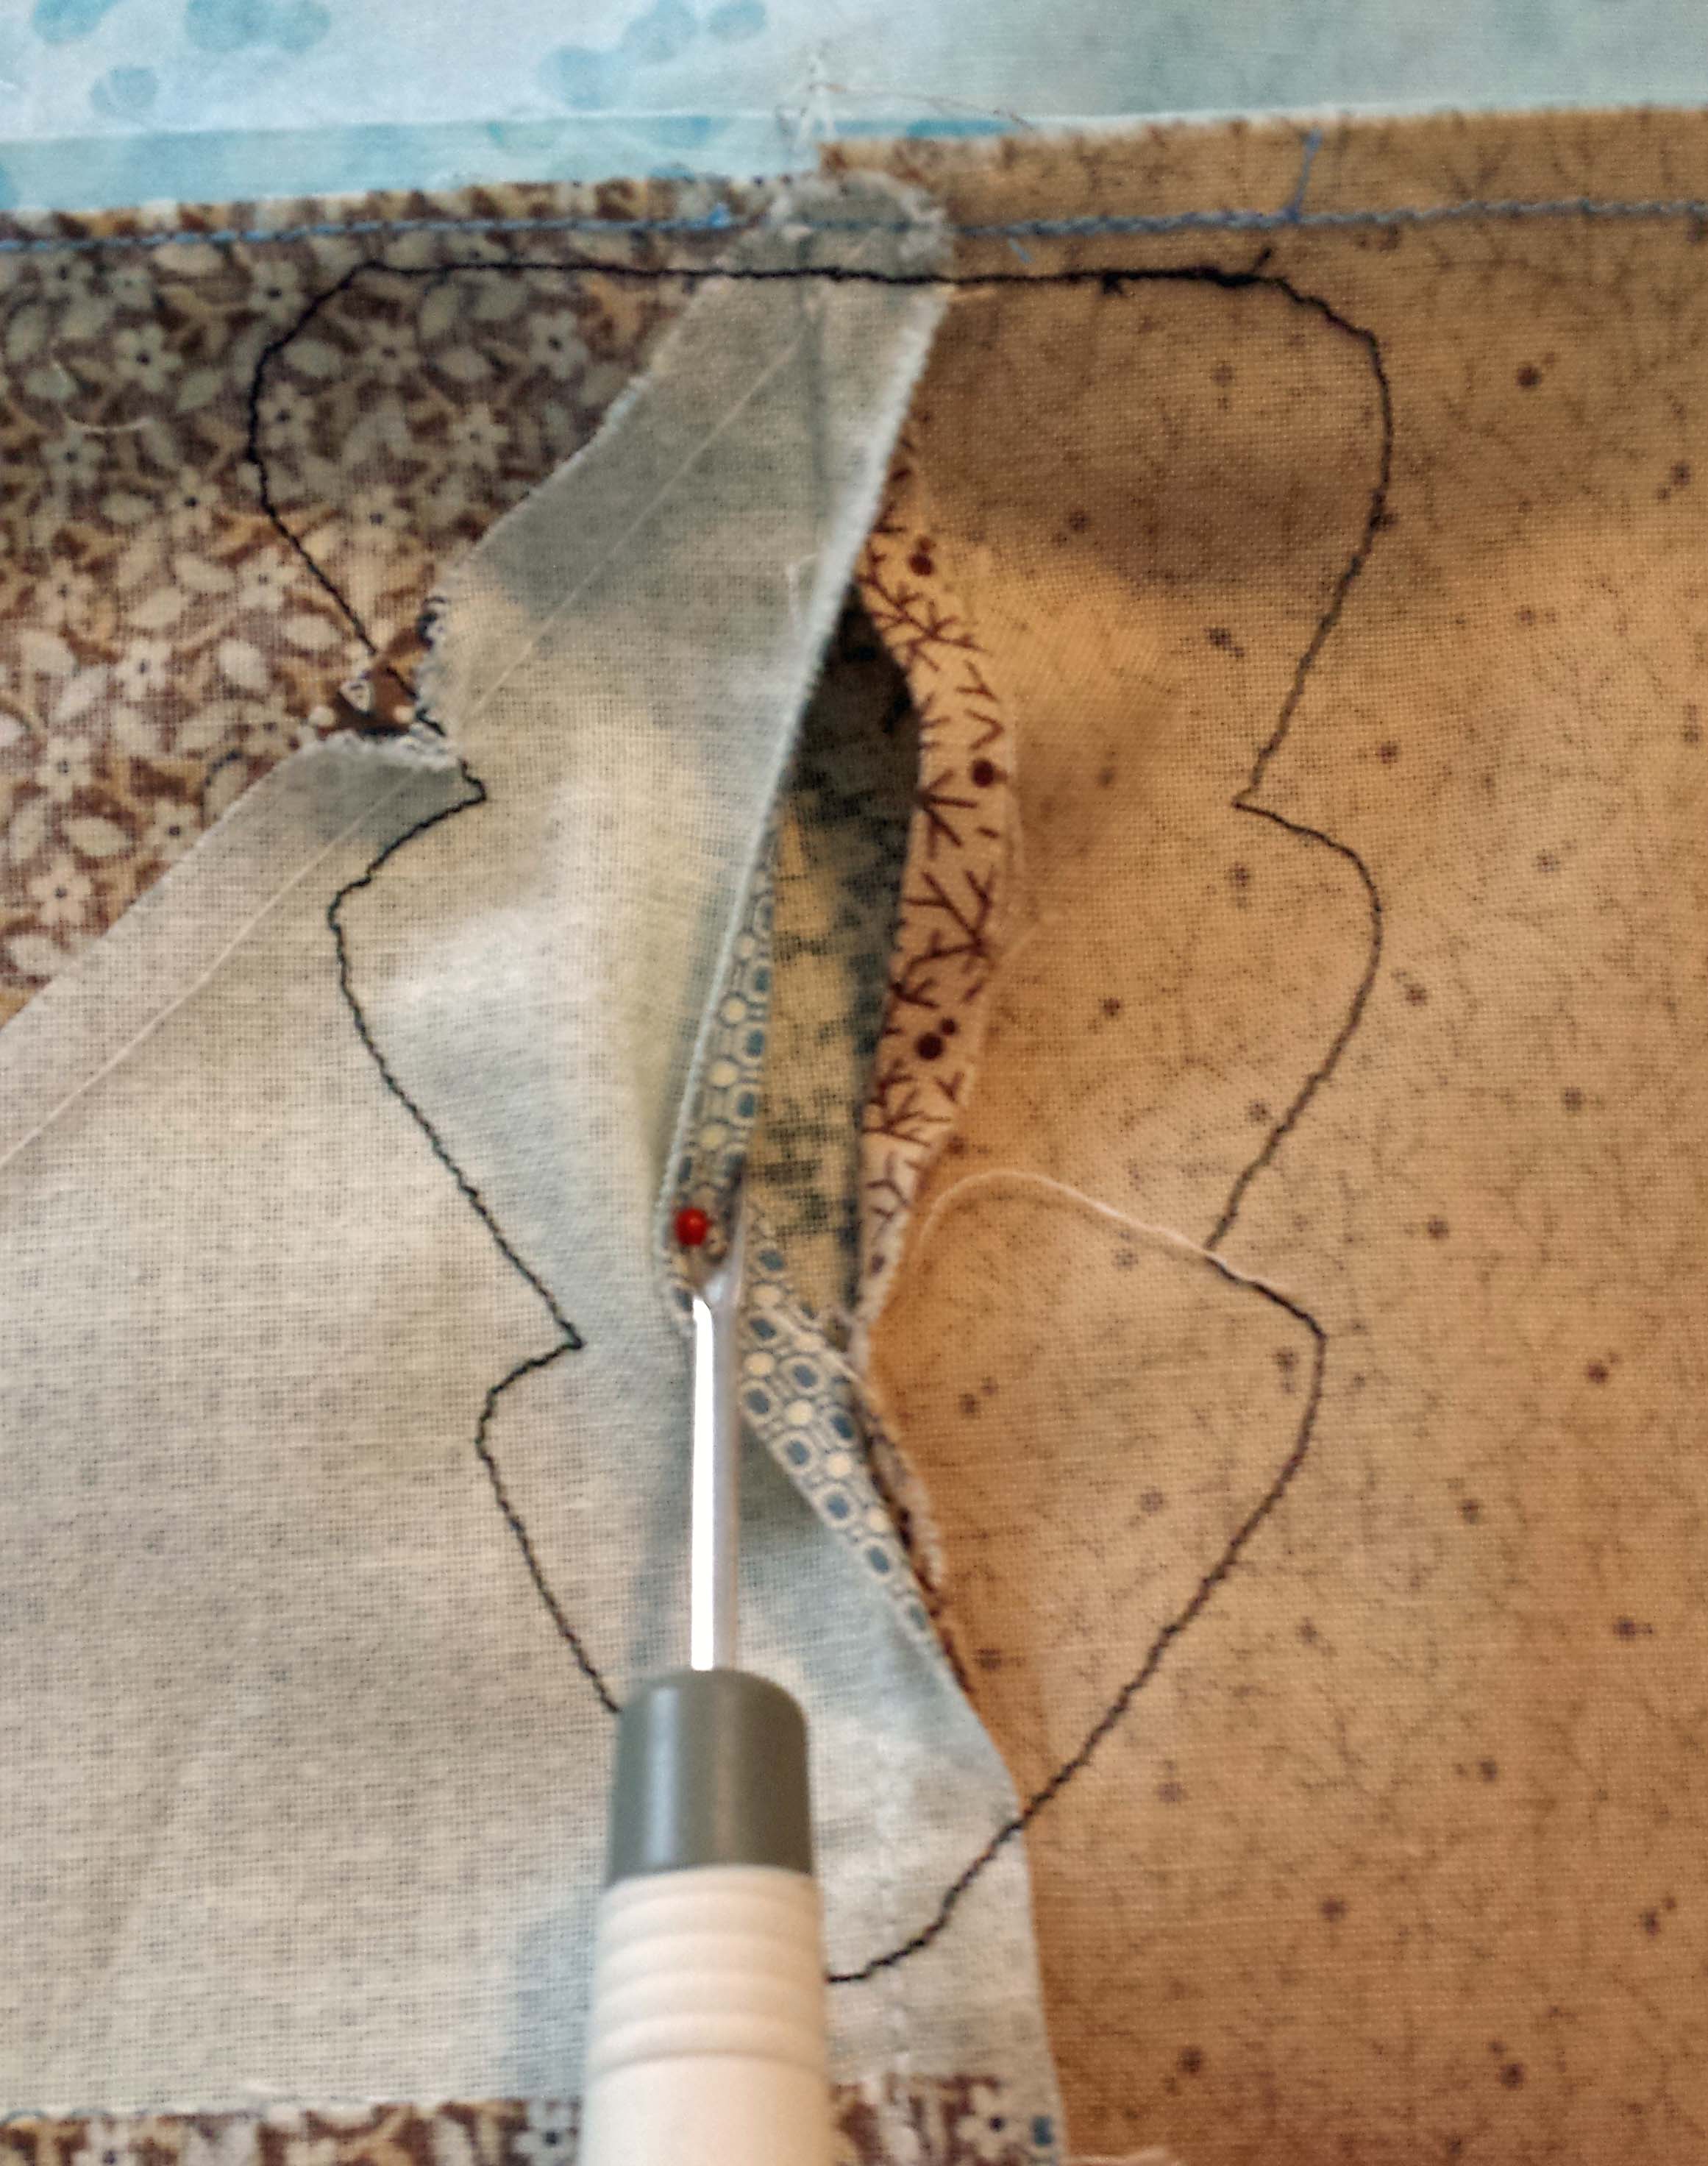
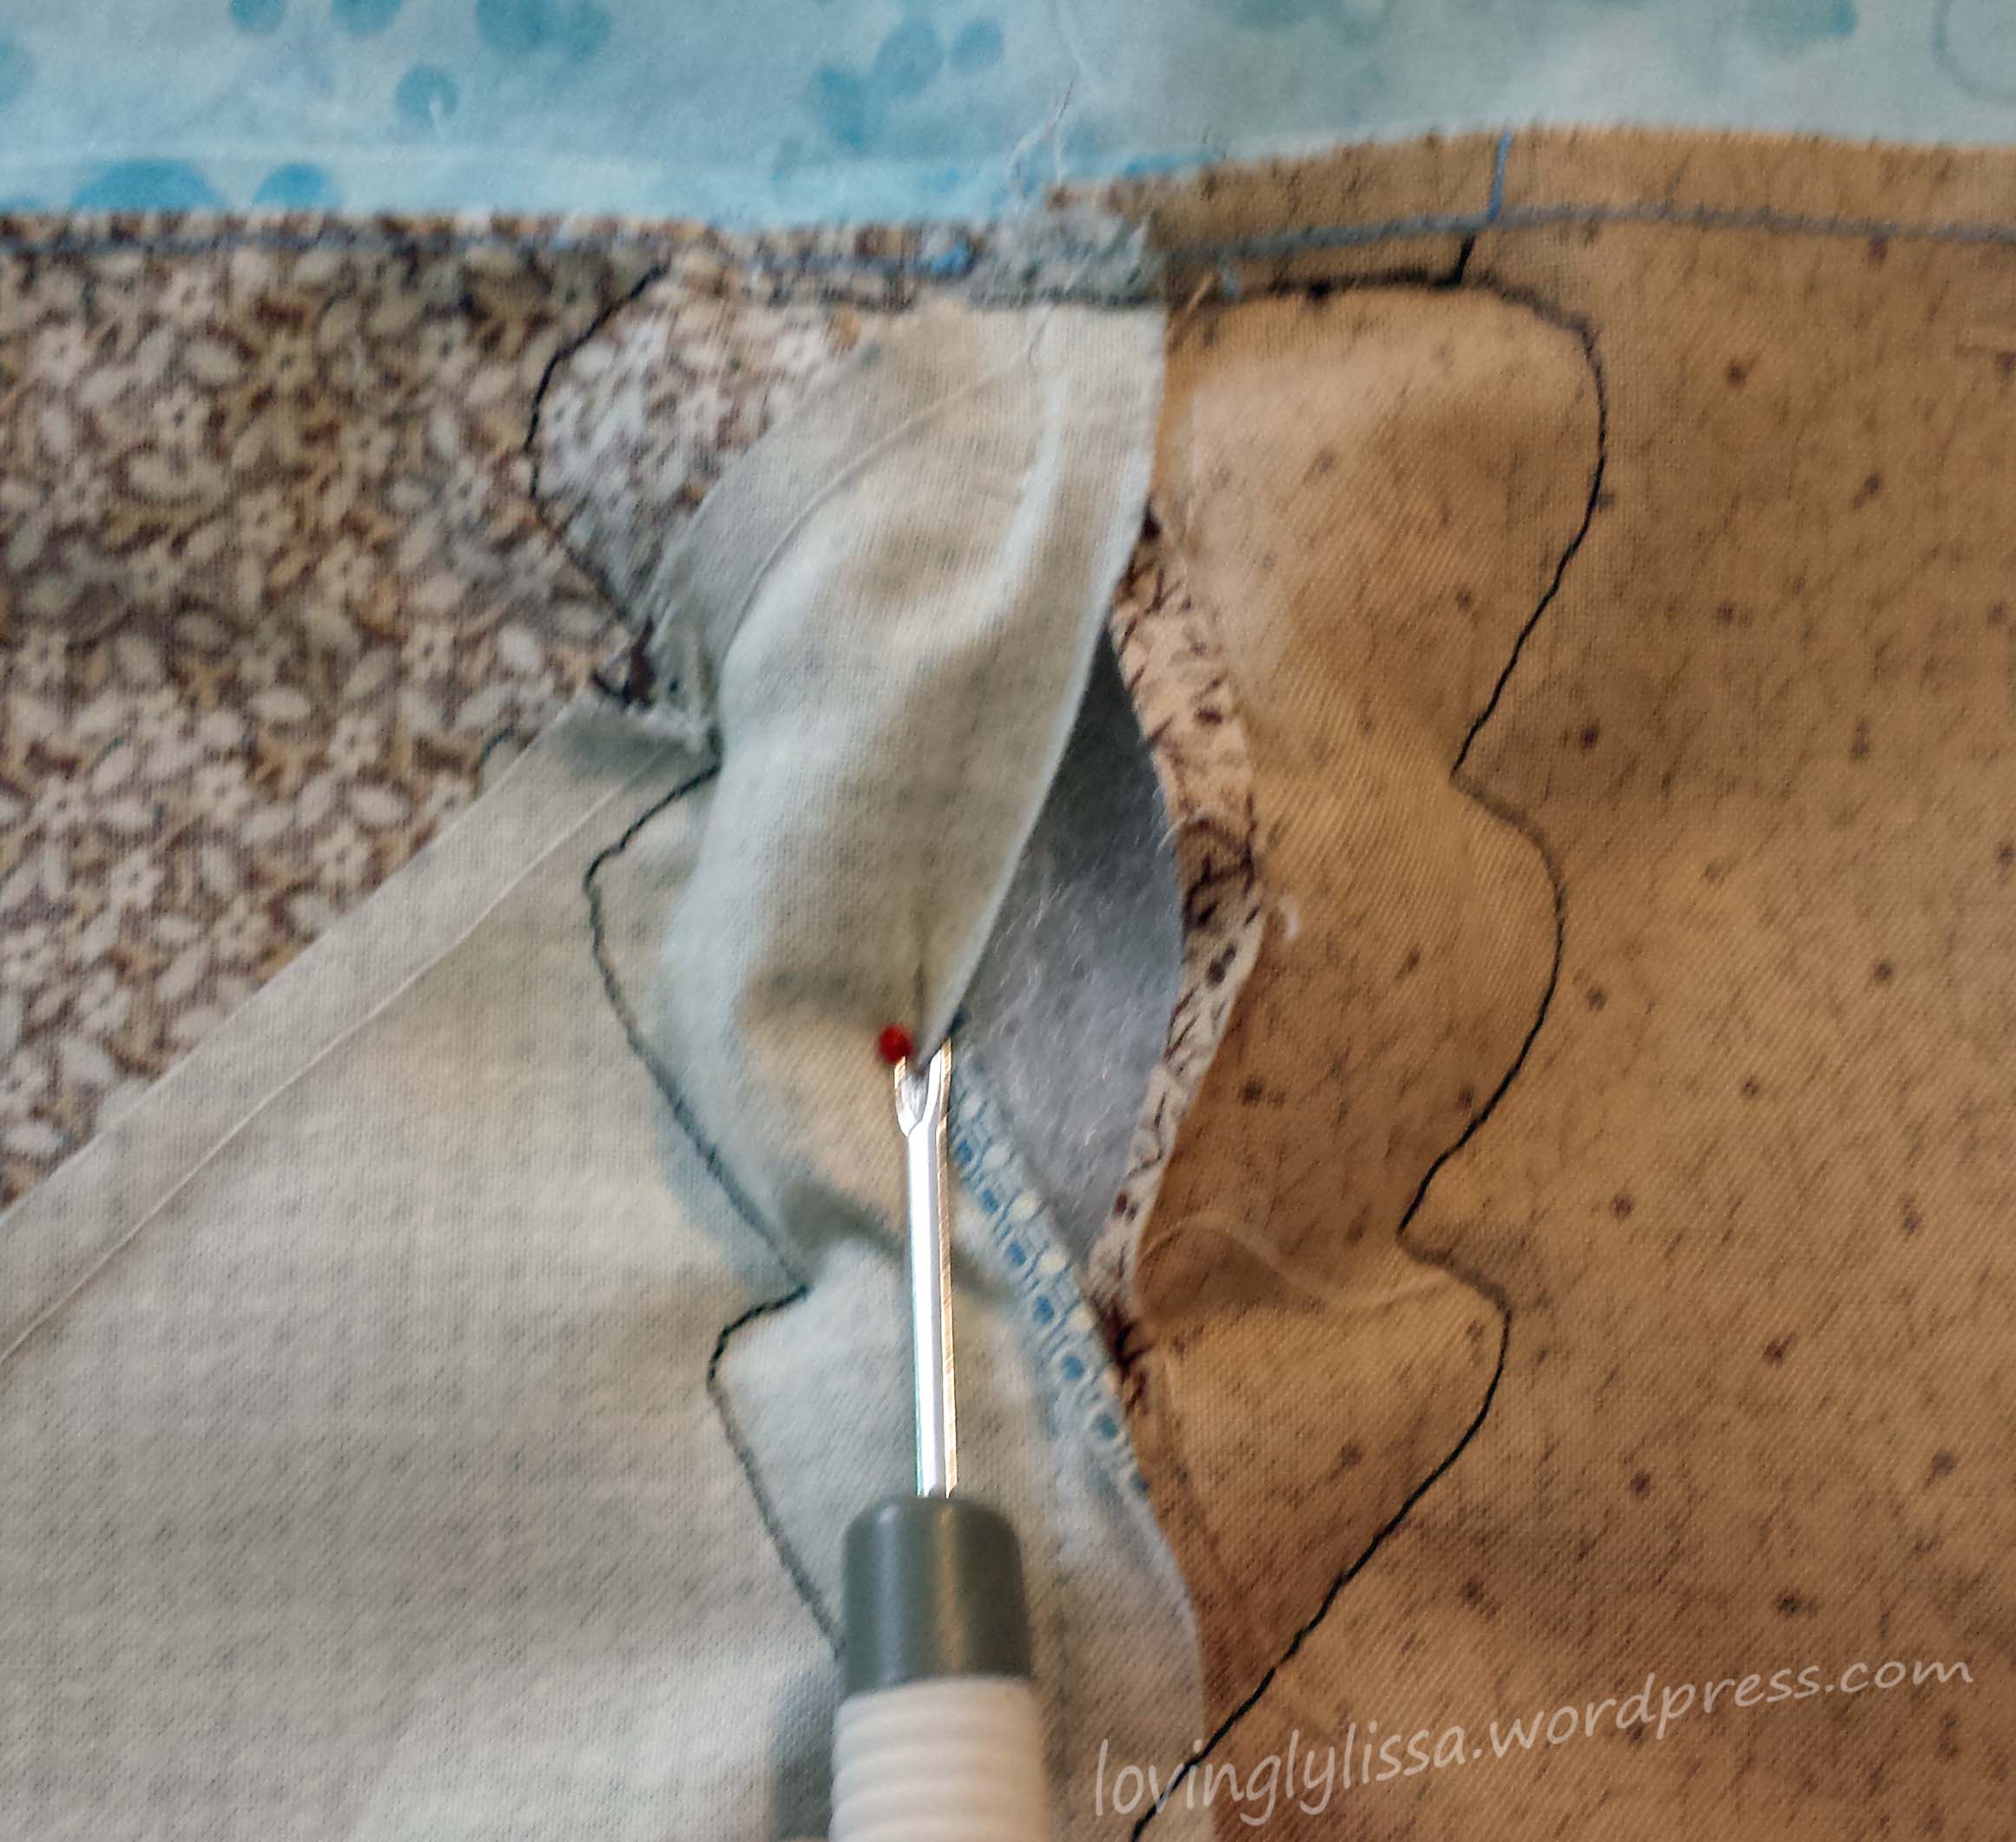
The door was next.  For this applique I did the backbasted method.  You draw the outline of your applique on the back of the piece you are sewing it onto.  Then you lay the piece to be appliqued on top.  Following the drawing you baste the piece on using tiny stitches.  If you let it sit like this for a while, it makes a perforation of the fabric to make turning under easier.  I just pull out a few basting stitches and needle turn the fabric.


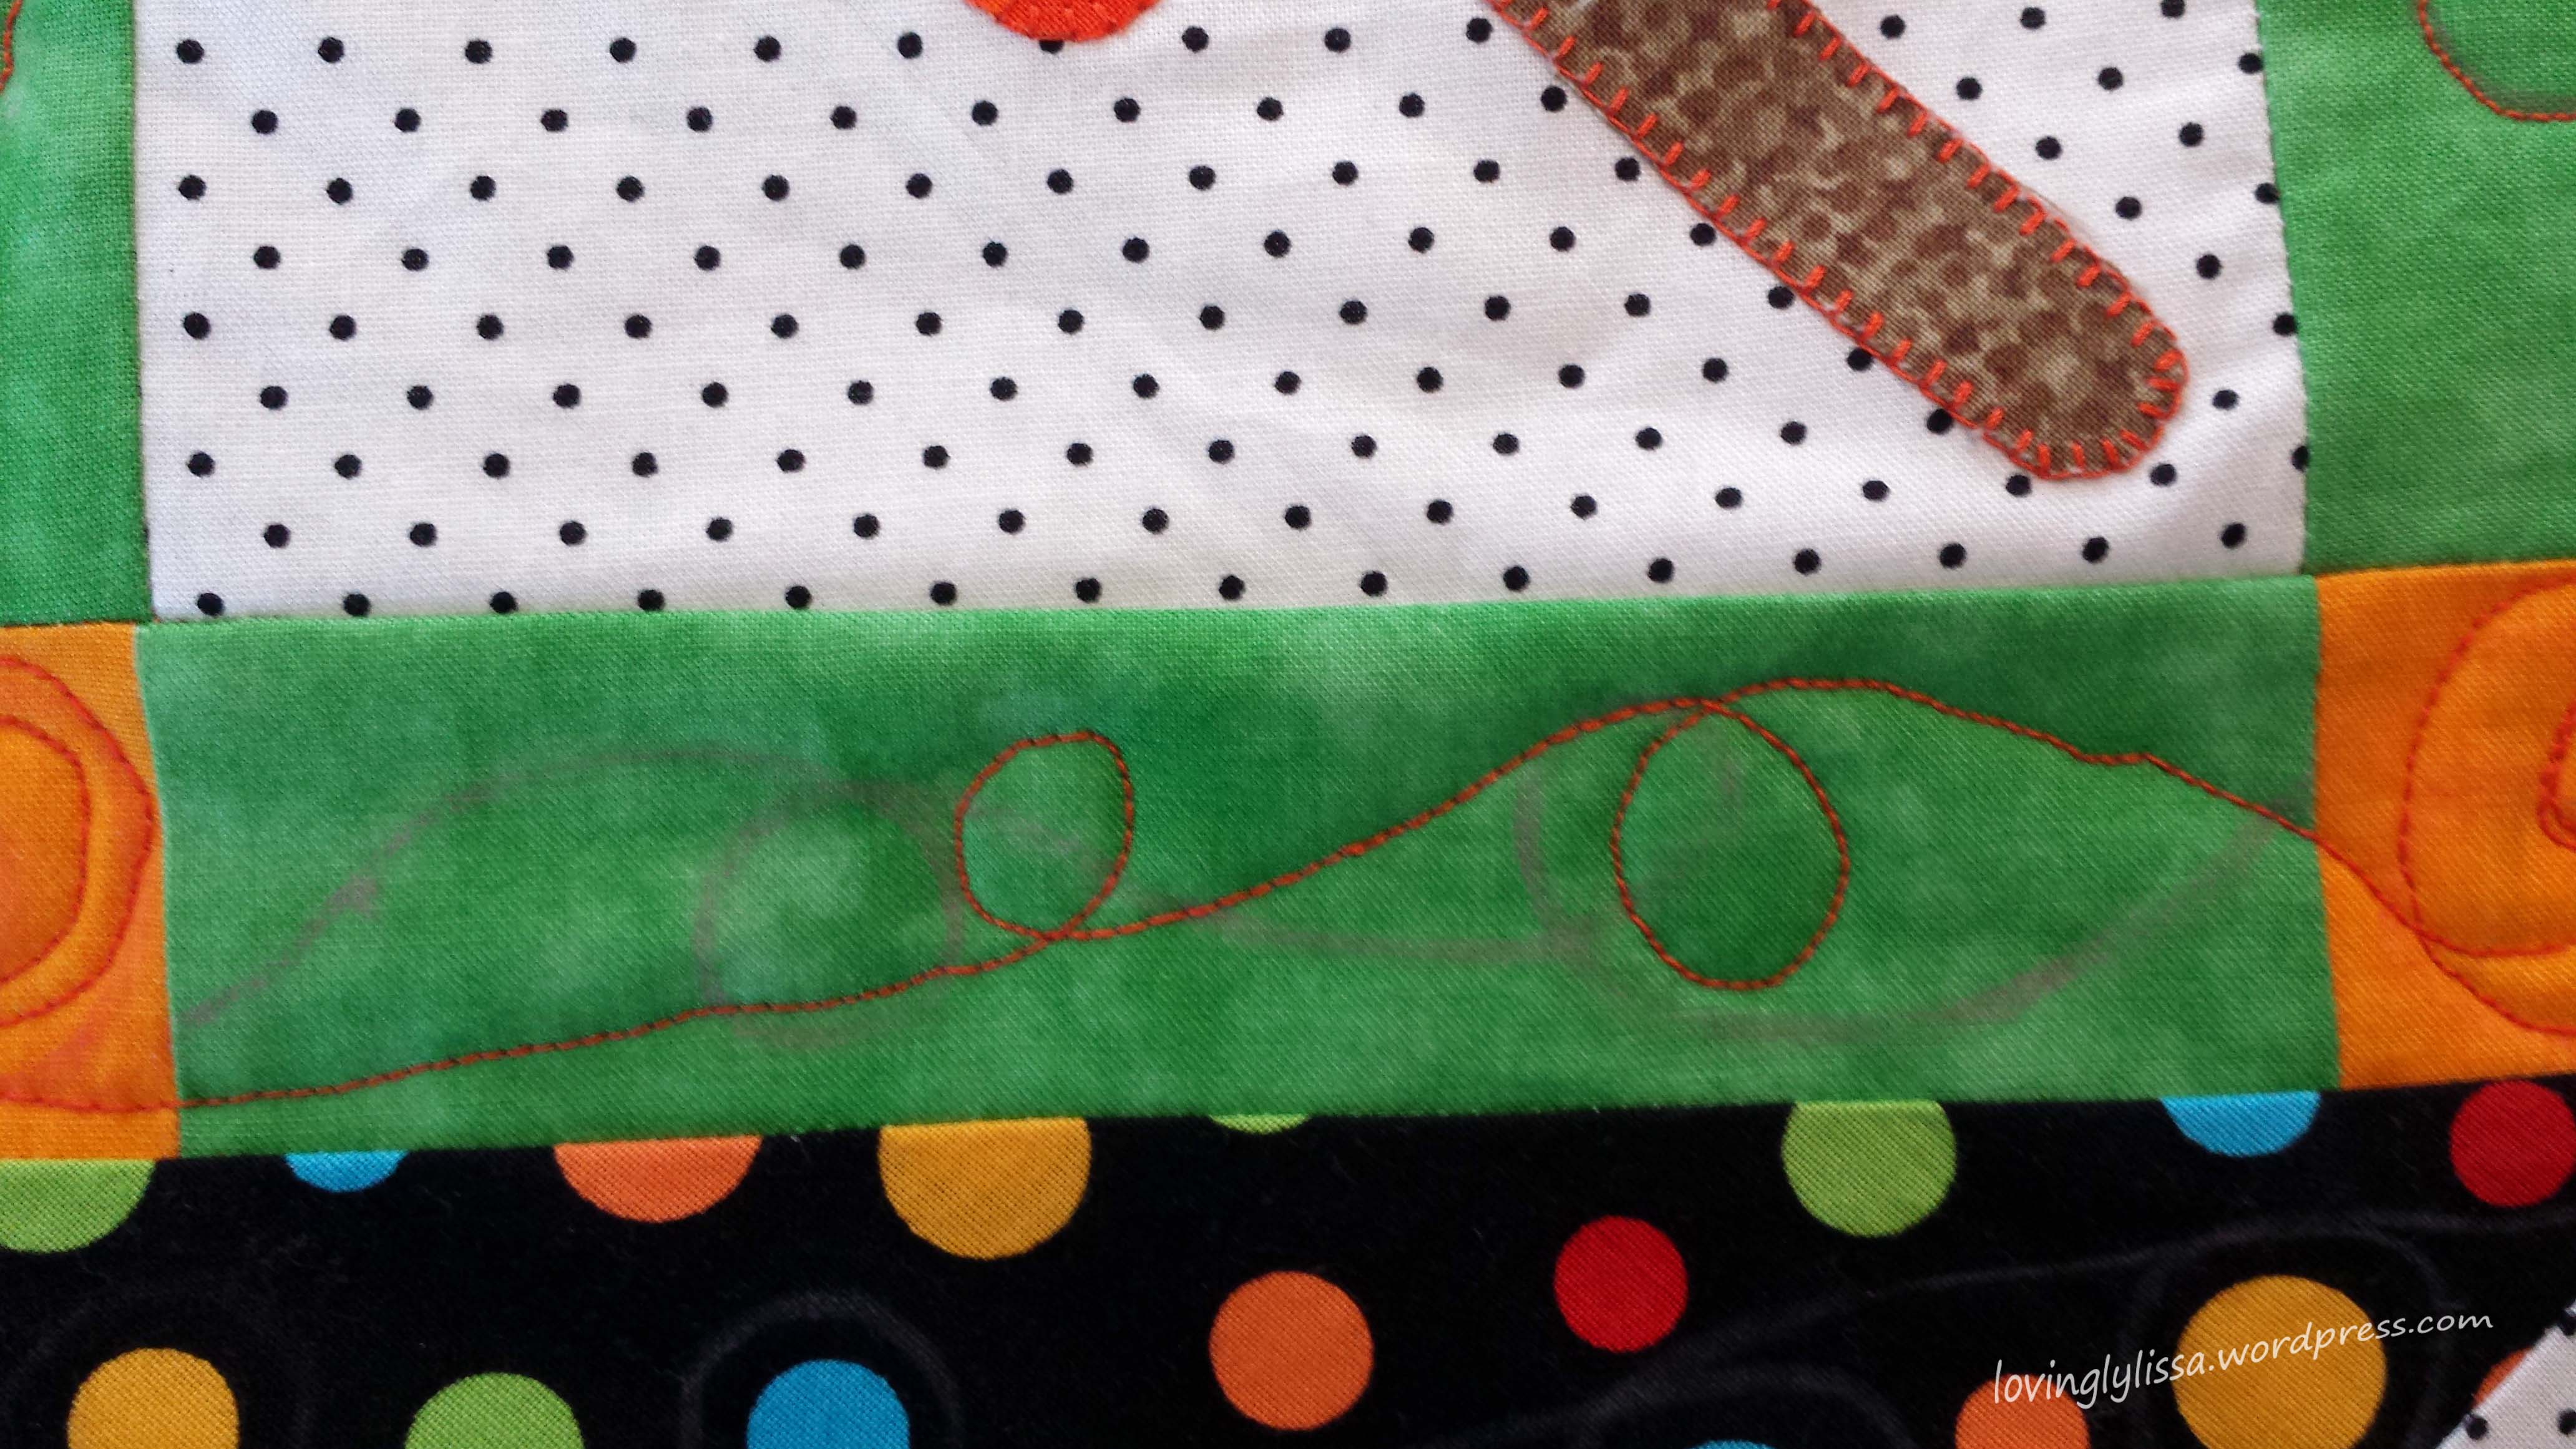
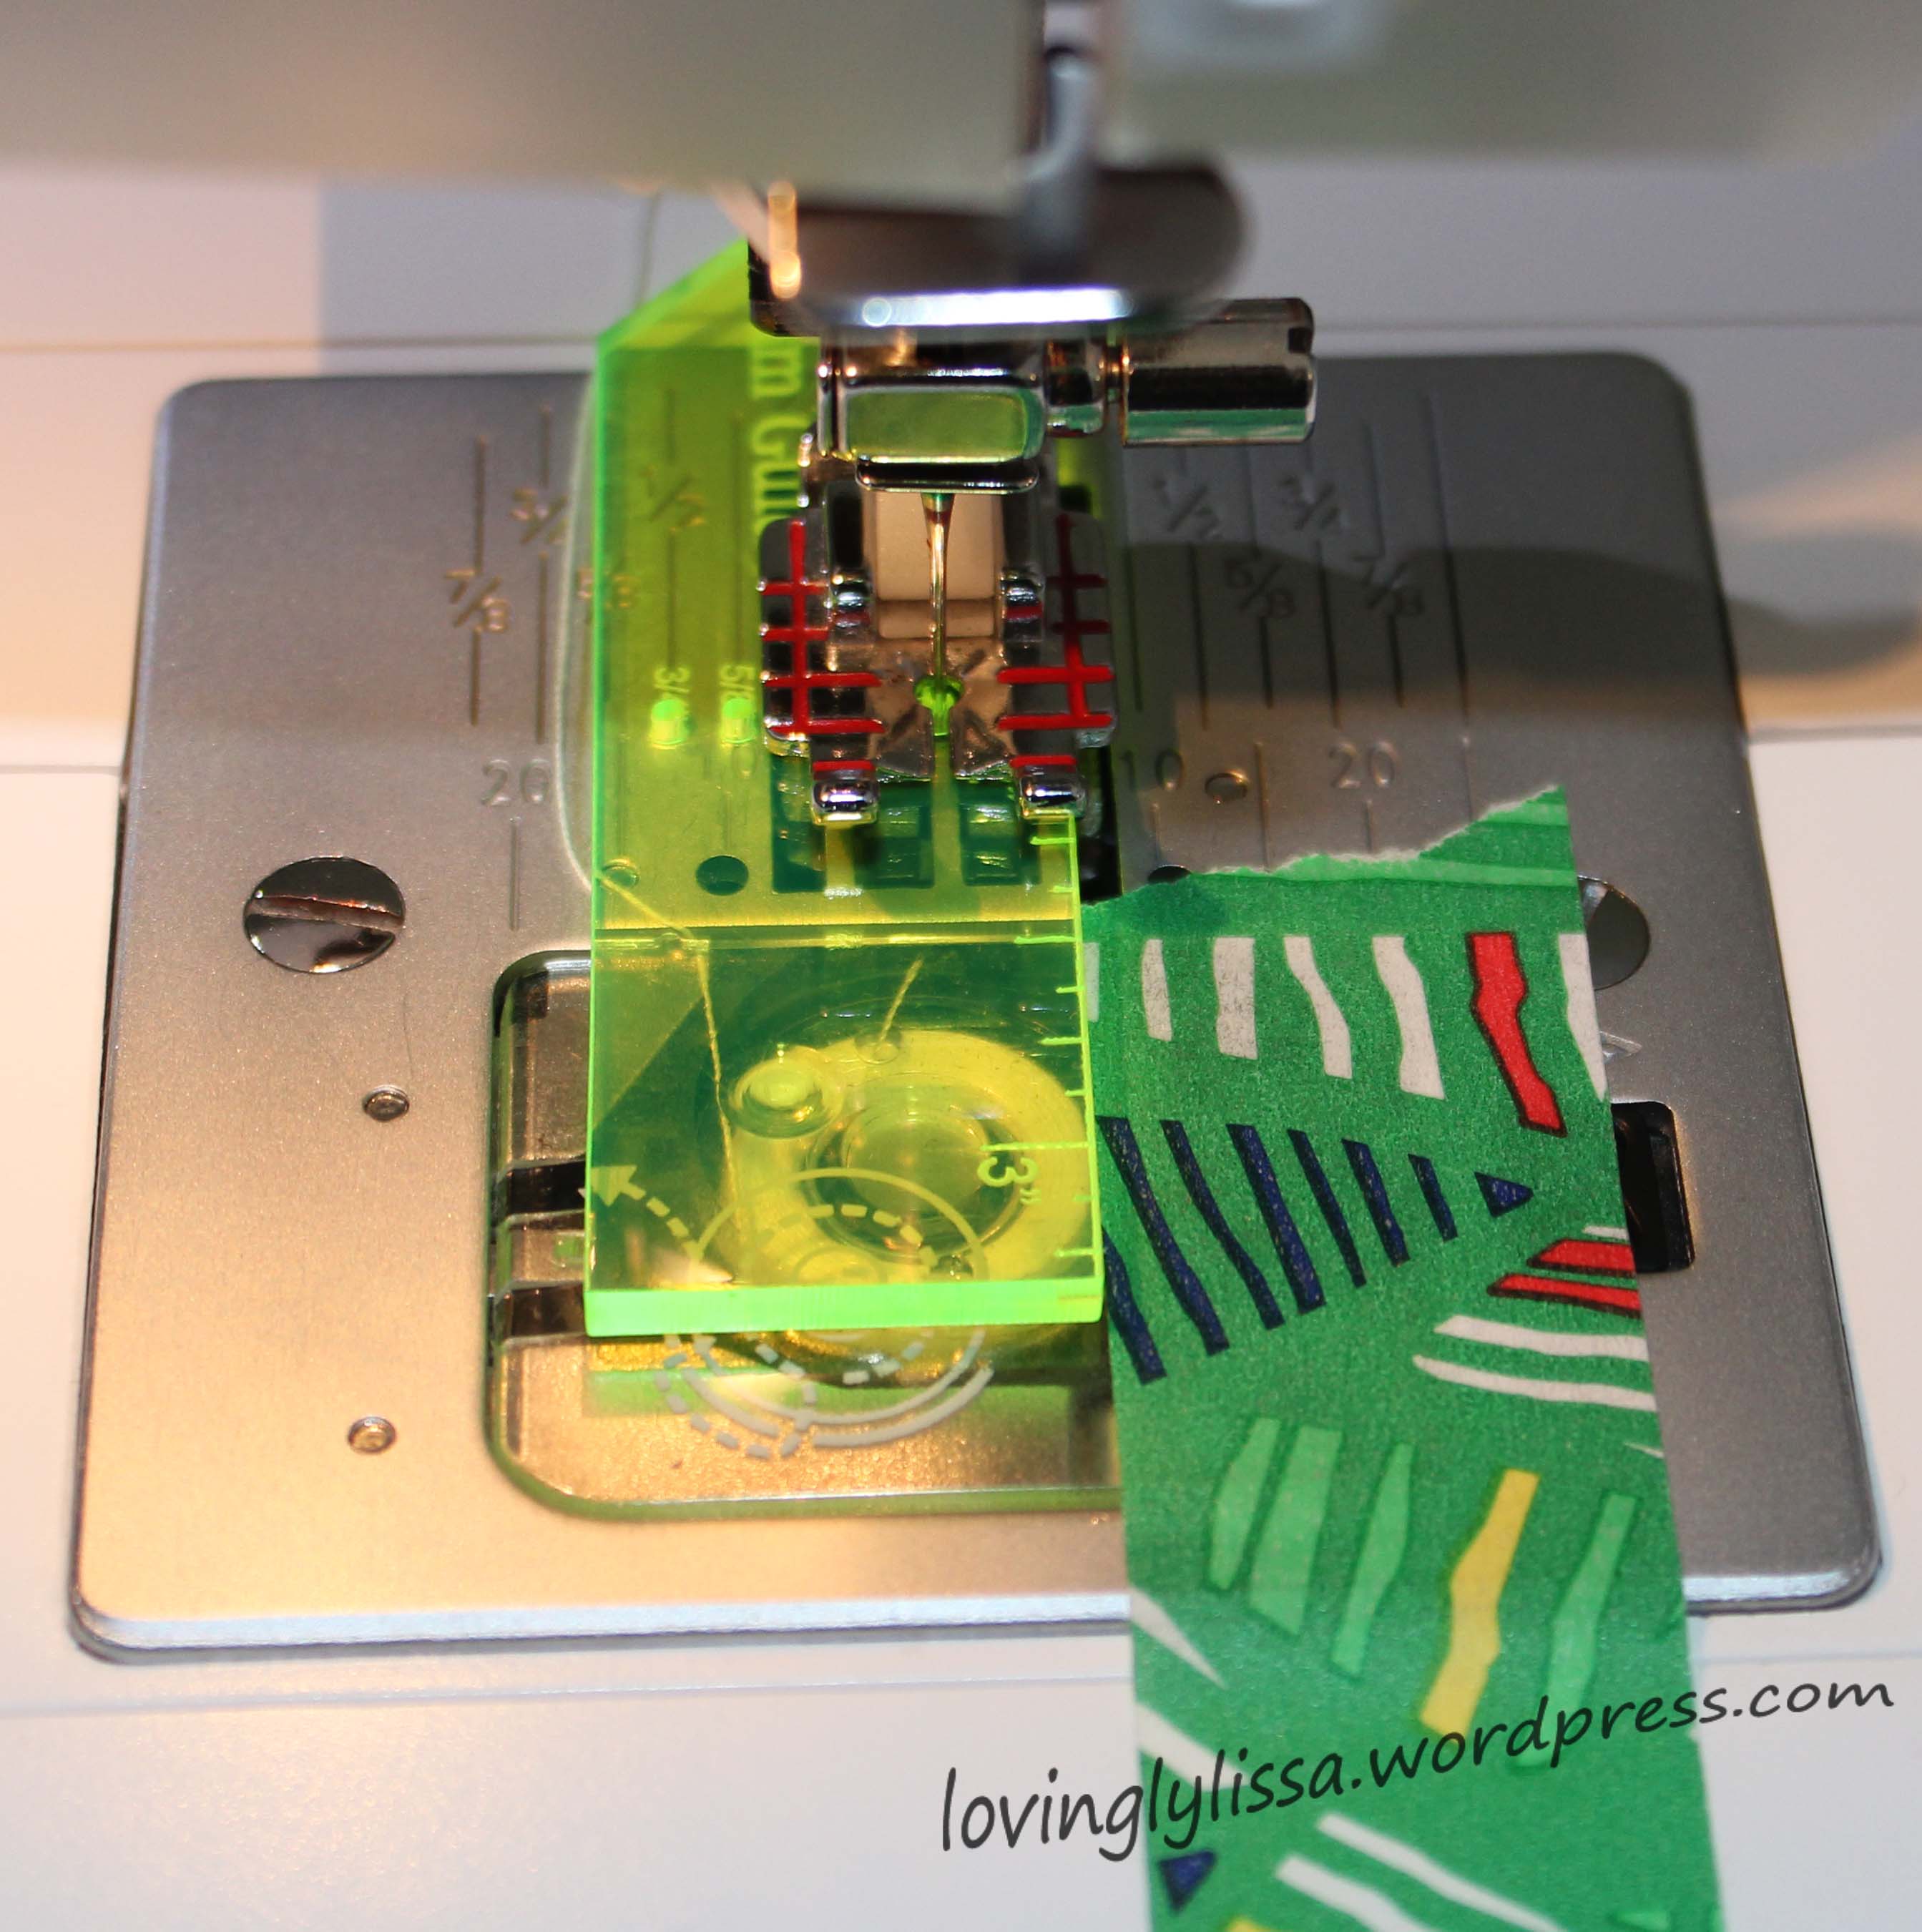
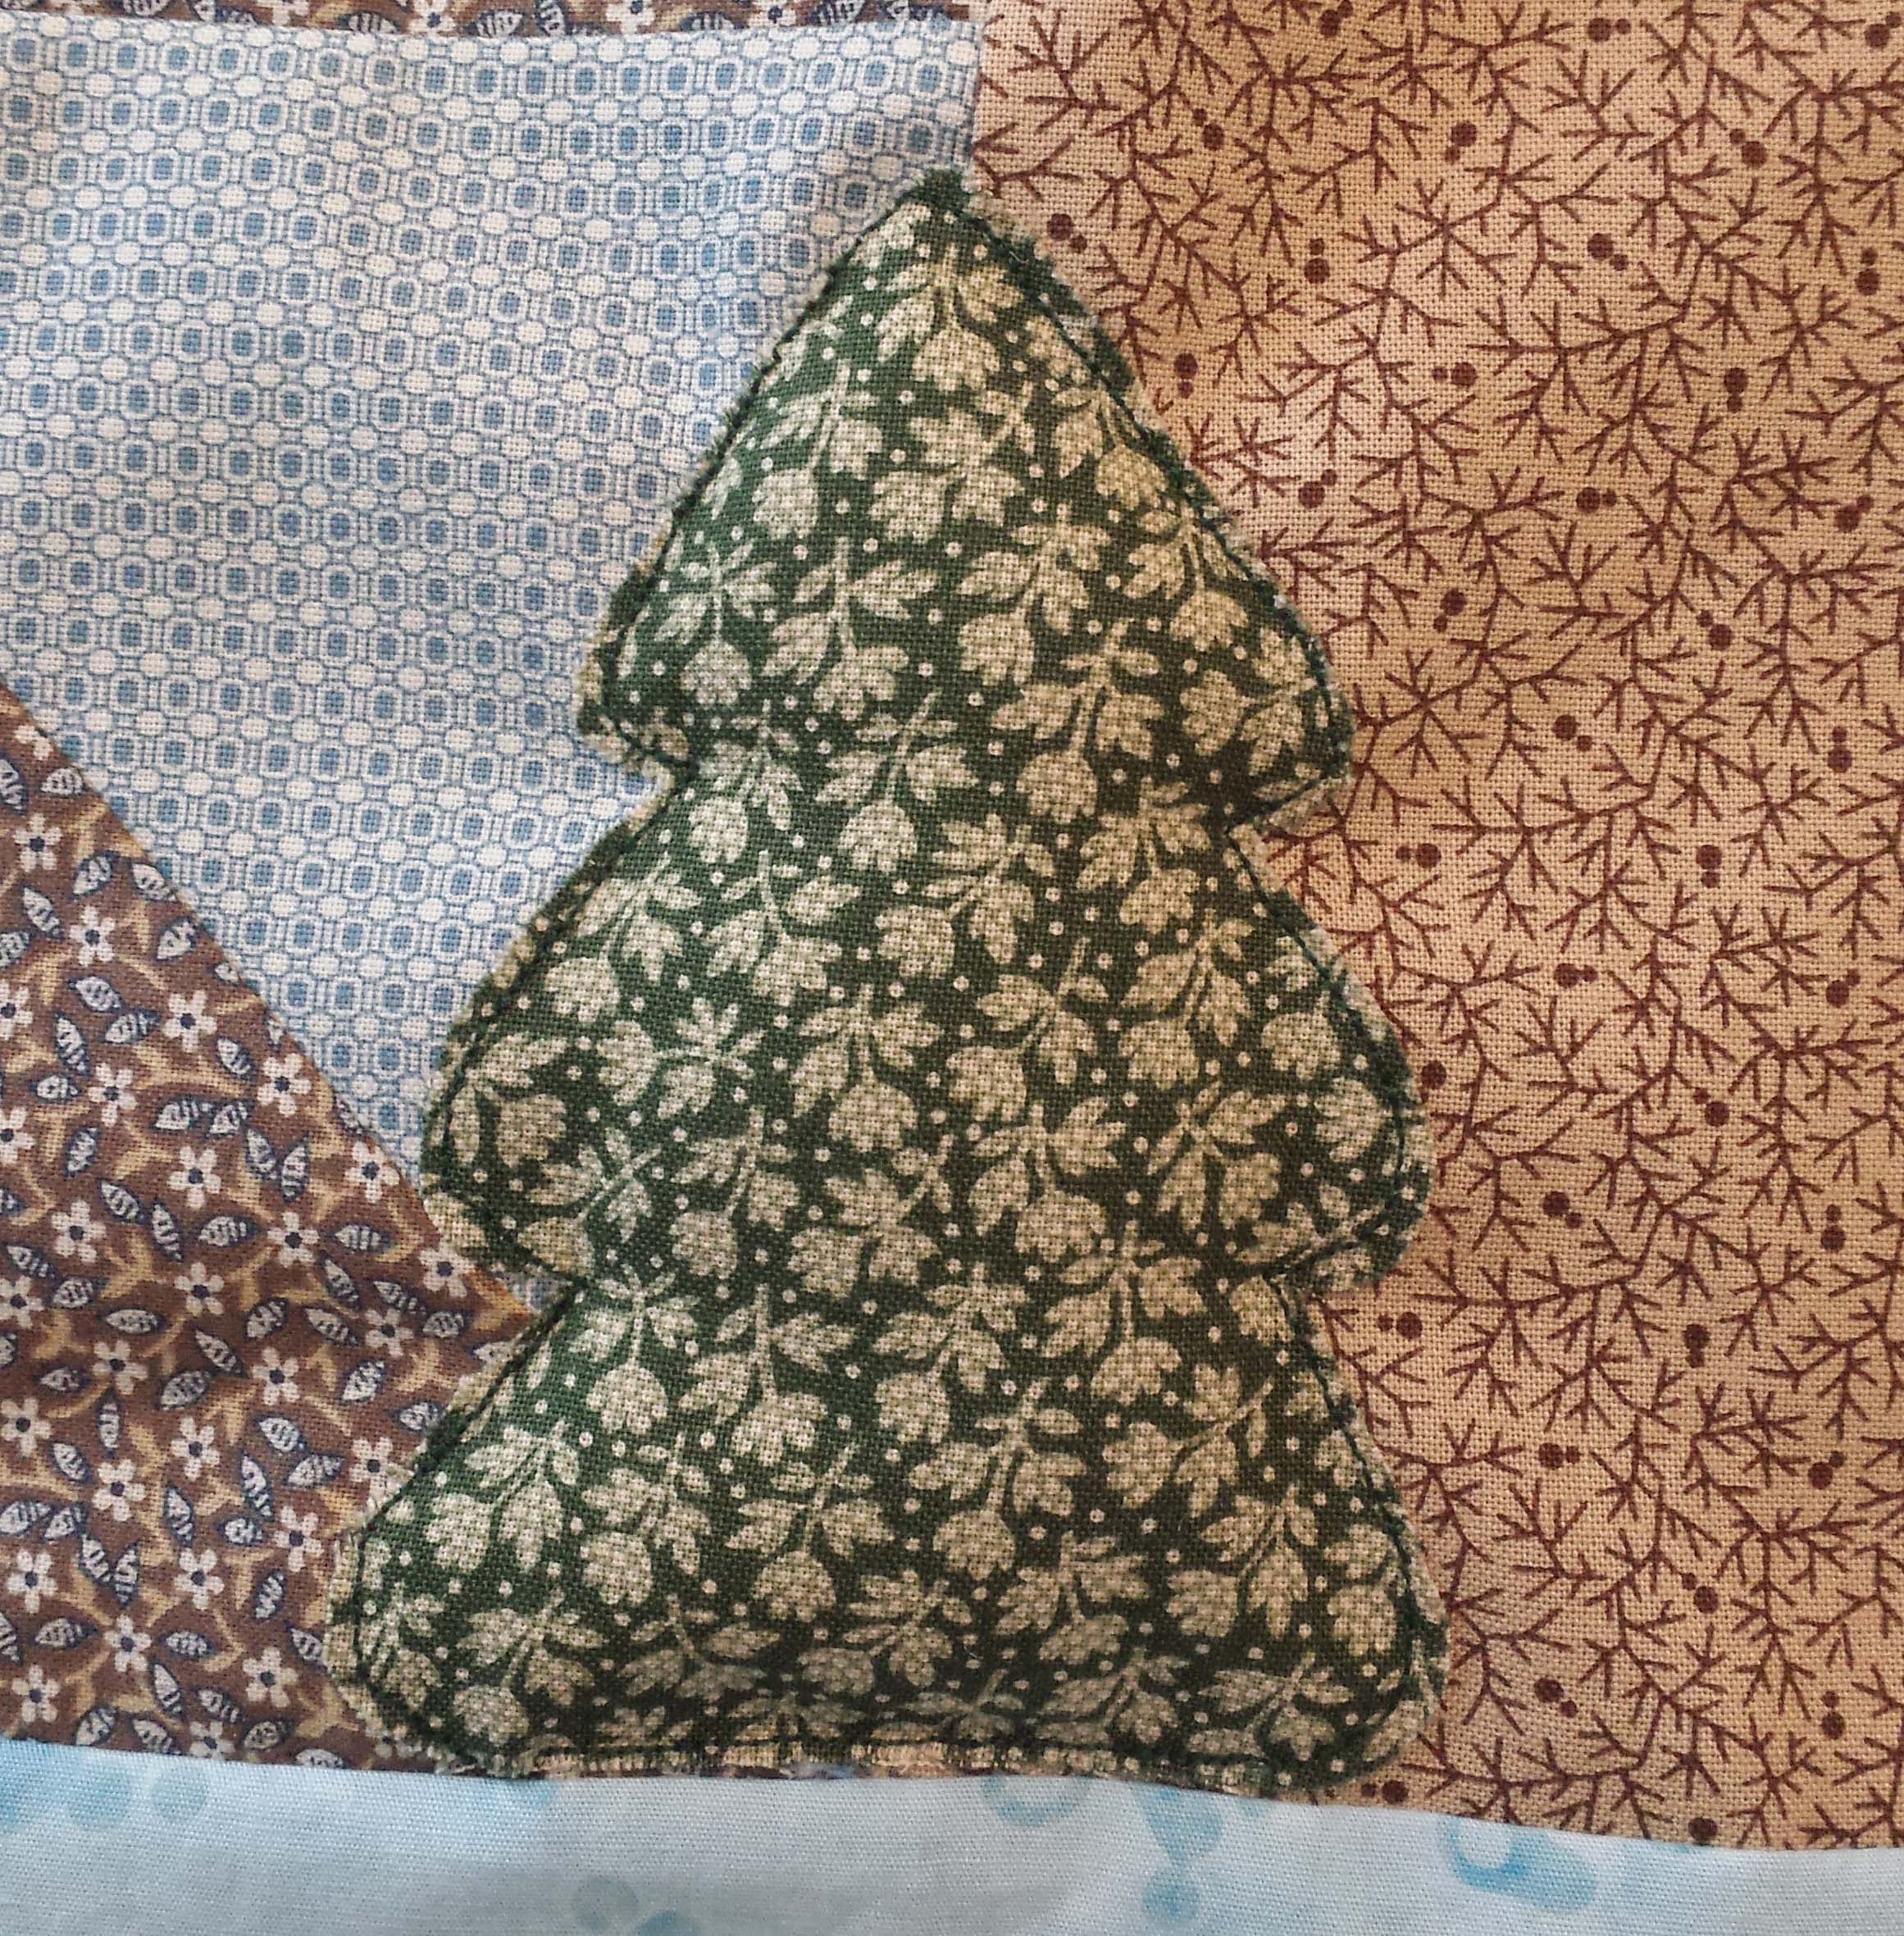
Finally the trees were machine appliqued.  I cut the design directly on the green fabric and used a straight stitch along the edges. The fabric may fray as time goes on, but I think that would be in keeping with the trees.

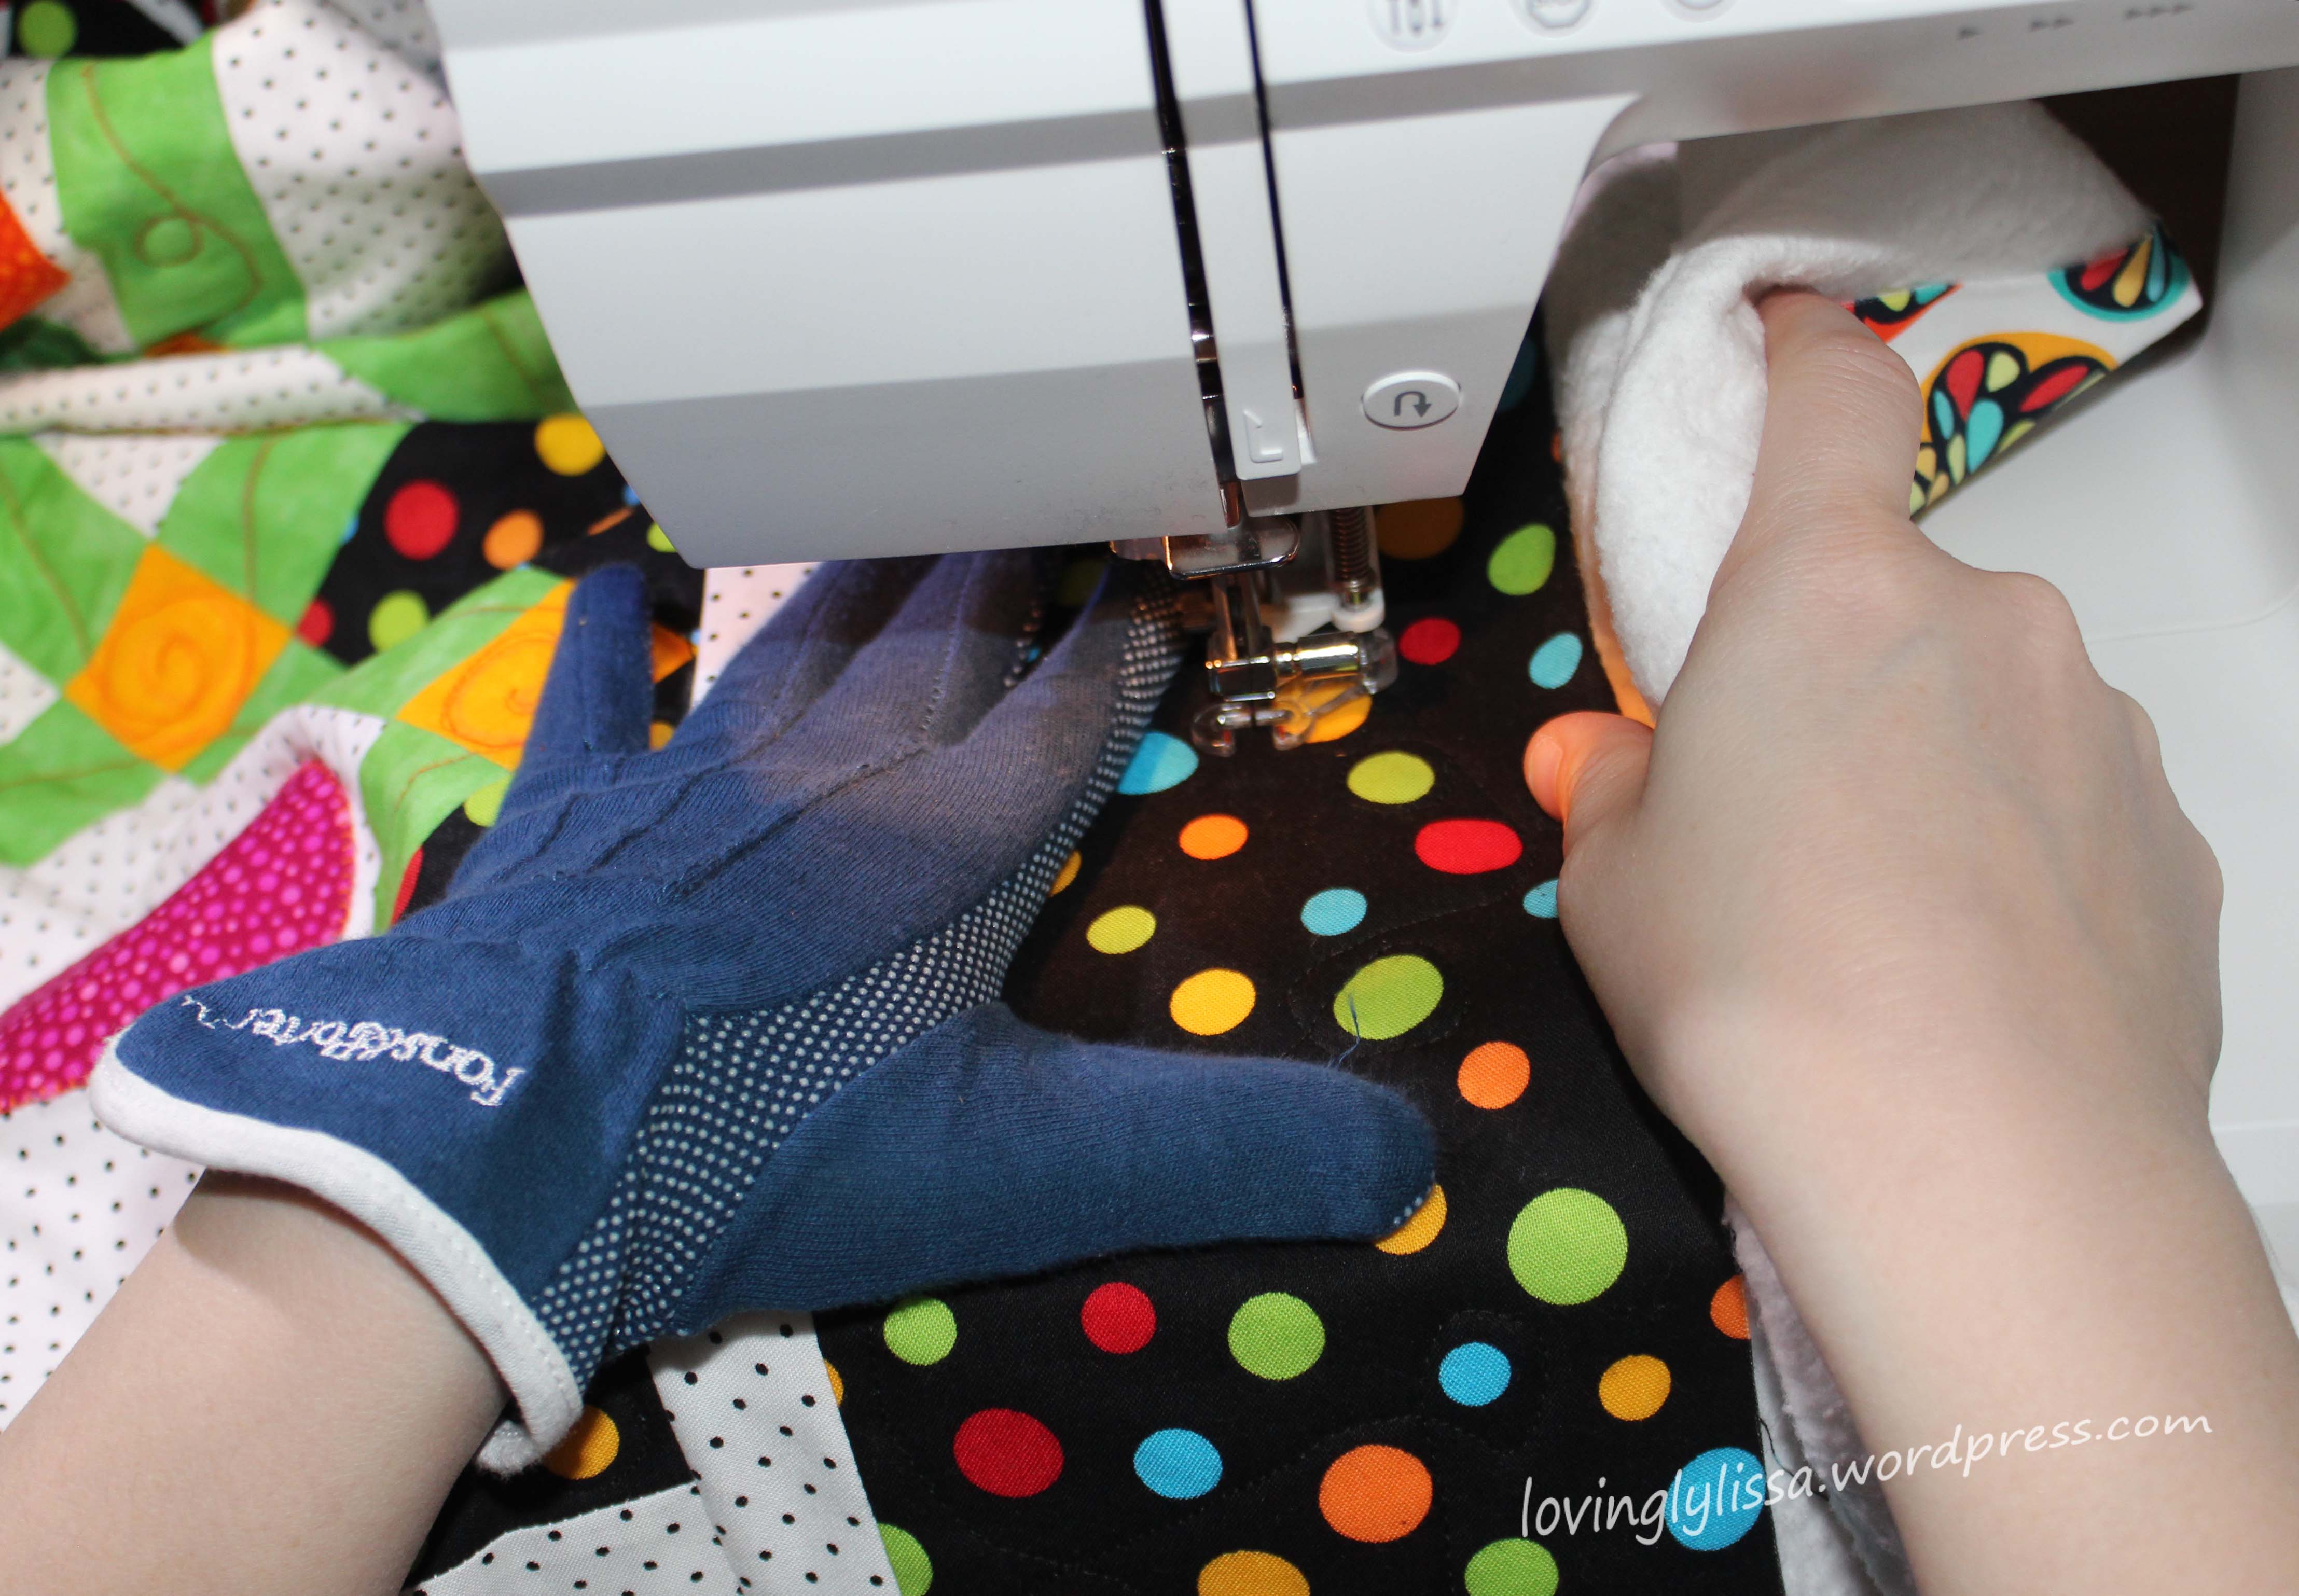
To make the trees pop and add dimension, I opened the seams behind them and stuffed the insides.

open seam
Open the seam.
stuffed seam
Add stuffing.
stuff tree
Finished tree.

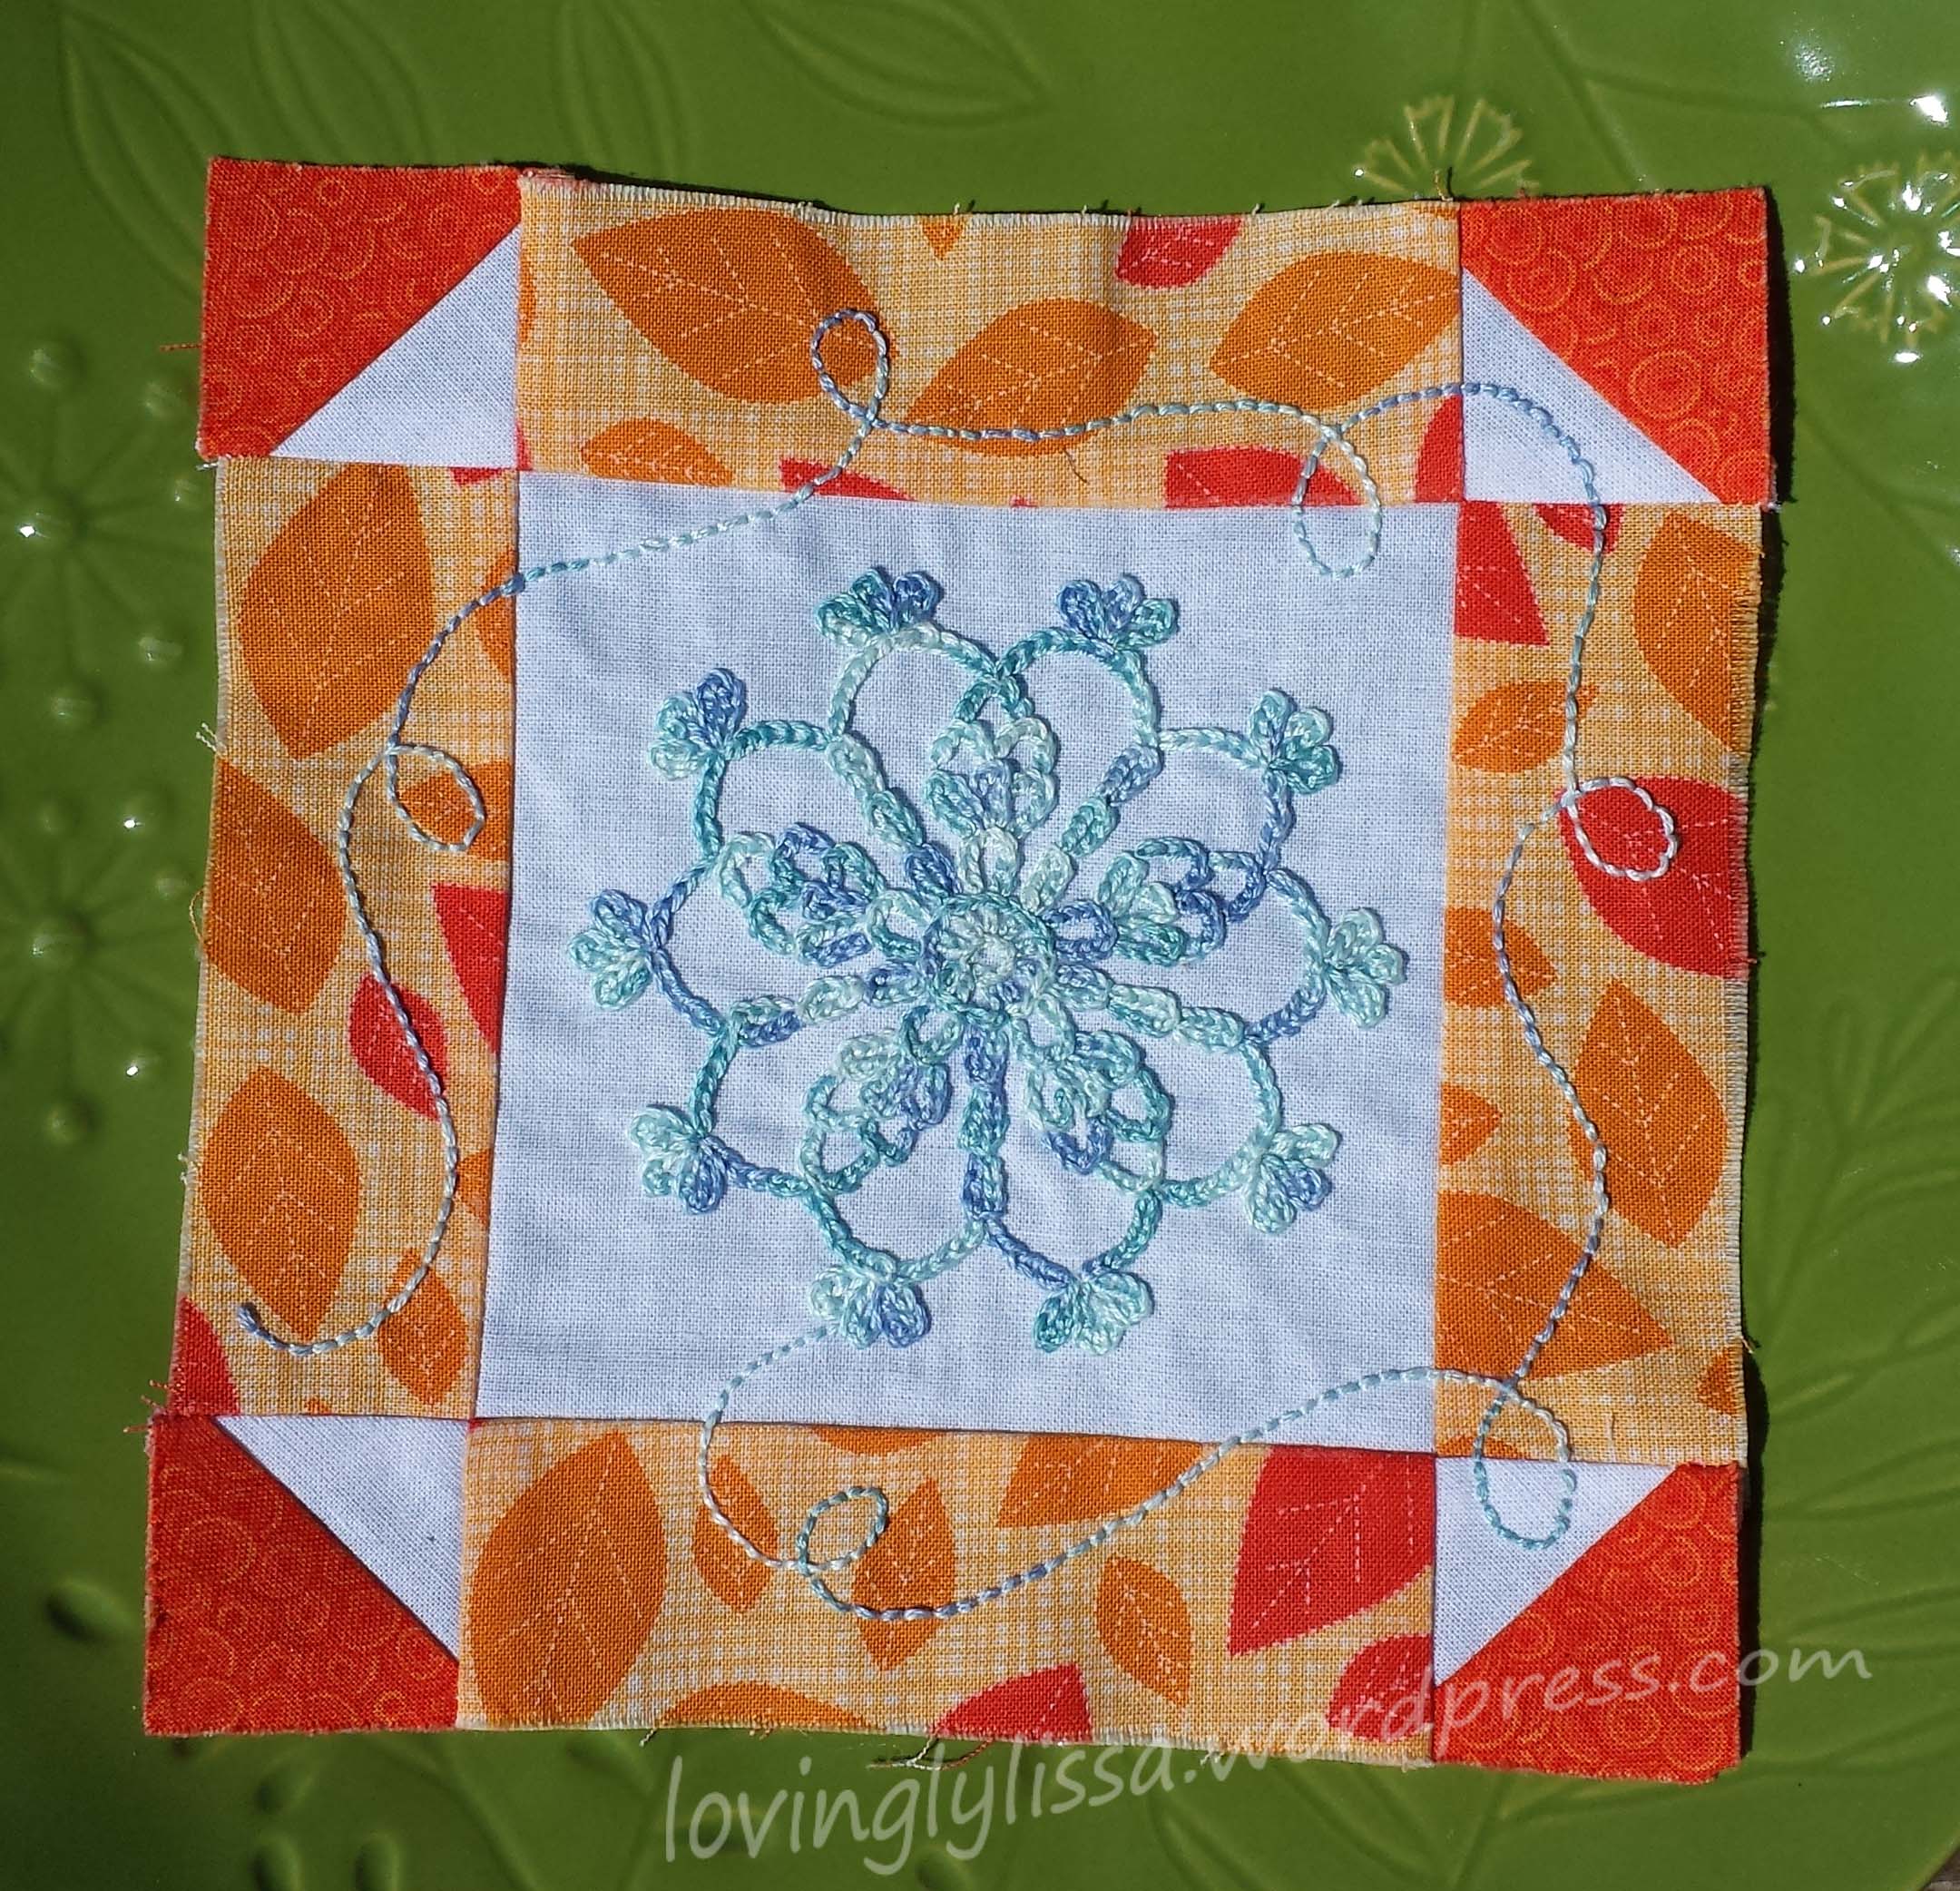
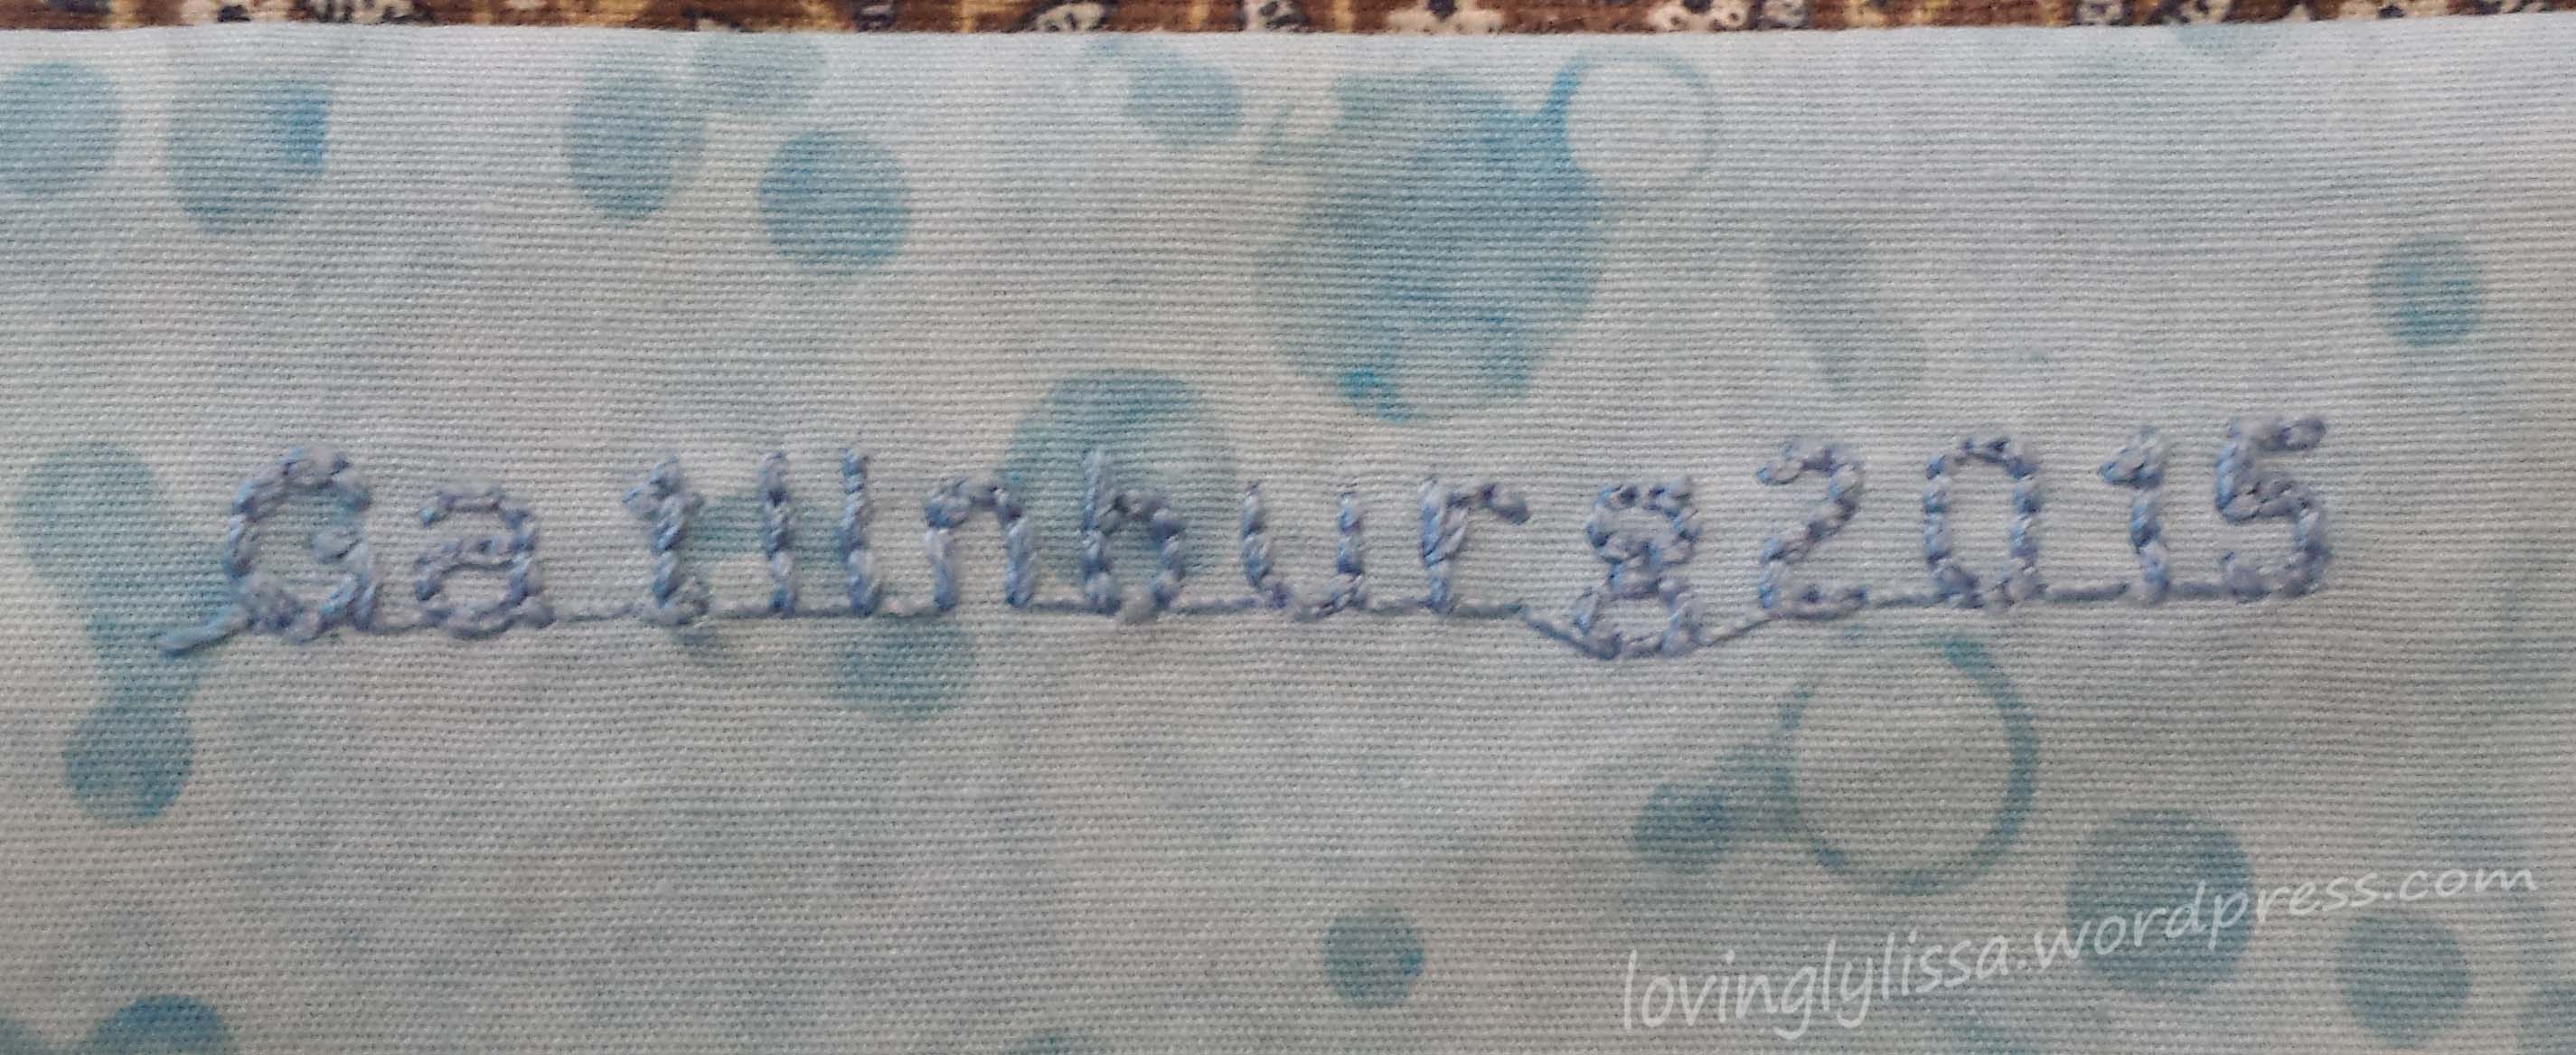
Finally, I added some embroidery to the bottom.  Just to remember where and when.

gatlinburg

Here is the finished row;

rowbyrow

I am excited to see what rows 2016 brings.


Quilting tips and techniques · Uncategorized

Free Motion

I took a class with Alex Anderson, oh, about two years ago.  We learned how to machine applique using a blanket stitch.  The class was fun and the quilt pattern sweet.  I loved the bright colors.  It took me almost a year to finally finish the quilt top and it has been sitting in my UFO box ever since.

You see, I have a fear of finishing quilts.  I’ve taken a few free motion classes.  It’s not something I do perfectly the first time, so I shy away from it.  After all the hard work I put into a quilt top, I don’t want to ruin it with the quilting part.

But time to face my fears!

The classes I’ve taken on free motion quilting all had different advice.  I’ve mixed it all up and have found what works best for me.

First, I mark my quilts.  I like this chalk set I found at a local quilt shop, I think I’ve also seen it at Joann’s.

markingchalk

I like the interchangeable colors, the case, and the sharpener.  Also the chalk rubs off rather easily, which can be a good or bad thing.

I made a general design on the quilt.  Just to give me a general idea of where to go.  Trying to figure out my next move while sewing just doesn’t work for me.  I get all kinds of confused and frustrated.  I usually find that I’ve quilted very close together in some areas and very spread out in others, and I’ll get stuck somewhere and not know where to turn next.

markedquilt

I keep a stash of 12 x 12 inch batting and muslins in a box.  Before I start free motion on a quilt I make a sandwich out of these a do a practice run.  This gives me a chance to check the tension on the threads and see how my quilt design is going to go.

I do NOT press the pedal to the metal when free motion quilting.  When the needle moves fast I feel like I need to move fast and I just can’t control the stitching that way.  The size of the stitch is as big as you make it when you move the quilt.  So if the needle is slow, I move slow.  I’ve found I’ve had more even stitching this way.

A little tip from me – I take my shoe off and use a bare foot to apply pressure to the pedal.  I feel like it gives me more control.

I use a quilt glove on my left hand and use my right hand to actually grip the quilt.

quilthands


It’s really about control.  I feel like I have more control this way.  I do admit, my right hand was hurting after a bit.  I’ll keep working on it to find a more comfortable position.

I also start and stop a lot right now in order to move my hands.  By the end of this quilt I was getting much better at it.

As I said earlier, the markings are just general directions, sometimes I didn’t follow the way they were drawn.  Having them there still helped to know where to go.

quiltedmarks

The quilting is not in any means perfect, but I have to tell you it is MUCH better than I have quilted in the past.  Its just something I will have to keep working on.

You know what?  I don’t think I mind that at all.

Quilting tips and techniques · Sew Sampler · Uncategorized

Surprises!!

I have a special post tonight, all about surprises.

Today I received my first Sew Sampler box from Fat Quarter Shop.  It’s a box I will receive monthly filled with quilting goodies.  You don’t know what you will get until you open up the box.

SURPRISE!!

sewsamplerclosed

As I ran up the stairs with the box I thought the blue reminded me of a box from Tiffany’s.  But what is inside here was going to be better than anything from Tiffany’s.

It was very hard to not rip into the box right away, but I really wanted to photograph everything first.

Let’s open it up!

sewsamplerclose2


Hehe!  Still more unwrapping to do.

Here it all is.

sewsampleropen

I feel like I must be on the same wavelength as Kimberly Jolly.  The Strawberry Picking pattern just caught my eye the other day, and last week I was just saying I needed embroidery scissors with a case to travel with me.   That ruler looks fantastic for all the little pieces I’ve been working on lately.  I love the grips on the bottom.

The Grow! Charm Pack from Moda has all the colors of the rainbow.  My mind started racing a mile a minute with all the things I could do with it.  It was hard to put it back down and not start on a new project right away.

Also in the box were Screw B Do, which are magnetic screwdrivers (they’re in the little fabric sack) for sewing machines, a sticker, magnet, and the first block pattern in a series.  One new one comes with each box.

In the end, I’m quite pleased.  The hard part will be waiting for next month’s box!


Crossroads Quilt Along · Quilting tips and techniques · Uncategorized

Friendship

What a perfect name for the block I am working on for the Crossroads Quilt Along this month, especially after my last post about Community.

But first, I want to show you this nifty gadget I picked up on clearance from Craftsy.

seamguide

It’s a handy little seam guide!  Do you see the fraction markings?  Right next to them is a hole you can put your needle into on the sewing machine.

Like so;

seamguideneedledown

I was able to make sure my quarter inch foot marking was really marking a quarter inch.  I’ve noticed my needle can be slightly off center sometimes.  But it looks good here.

I used the ruler to mark the machine with masking tape.

seamguidemaskingtape

I was curious to see if having a longer mark for the 1/4 inch guide would help on my blocks.  It didn’t hurt.

Also I used it to mark the diagonals on the small squares for the Friendship blocks.  It has the perfect mitered edge for just a task.

seamguidemarking

Time to sew!

My blocks this month lost some points.  I pulled apart and redid pieces many times.  In the end I am quite pleased with how they turned out.  I even went outside for a fancy photoshoot with them.

crossroadsapril3

crossroadsapril2

crossroadsapril1

Remember, the Crossroads Quilt Along is raising money towards the March of Dimes.  Please donate if you are able!

Now that the Crossroads blocks are done, I am (im)patiently waiting for the mini size from Sondra Davison of Out of the Blue Quilts.  I am picking out and starching fabrics tonight!

Also, it is almost time for a special arrival!!!!!

I’ve signed up for the monthly Sew Sampler from Fat Quarter Quilts.  The very first one ships this week and I can’t wait to share with you the surprises I find inside.  I’m looking forward to trying out new notions and tools and giving you all an honest review of it all.

There are so many other projects I am working on too.  I can’t wait to share them all with you.


hockey quilt · Quilting tips and techniques · Uncategorized

Take Me Out to the Ballgame 2

I’m finishing off the Hockey quilt top for my nephew.  I want to applique his name on the top of the quilt.  I used my Cameo Silhouette to cut the letters out using the same font as the team uses.

I put Wonder Under under a large piece of fabric and sent it through the machine.

cameo cutting

They came out really nice.

letters

After that it was just a matter of ironing them onto the top border and machine appliqueing them on.  I used black thread to give them a little pop.

jonathon

I added the top and bottom borders and the top is finished!

hockeyfinish

So here it is, the finished top.  I don’t have a back fabric for it yet.  This team is one of the few NHL teams that doesn’t have a licensed fabric. I may just go with the navy blue, but I’m opened to suggestions.

If you know of a fabric you think would go great with this top, leave a comment and let me know!

Quilting tips and techniques · Uncategorized

Take Me Out to the Ballgame

Well…not really, because this quilt is a hockey quilt and I don’t think they use balls in hockey.

As you can probably tell, I’m not much of a hockey fan.  I do like baseball and football, but just can’t get into hockey.  However, I have family members who are fans and a nephew who never got his baby blanket from me.

My sister and I did some searching and found this pattern by Kristie at OCD: Obsessive Crafting Disorder and I got to work.

I wanted to personalize the borders and decided on some applique.  I will be putting my nephew’s name at the top and on the sides I decided the logo for their favorite team would be perfect.

I have this great circle cutter that I’m in love with. I used it to cut the black and white circles I needed for the logo.

circle cutter

cut circle

Perfect!

The circles were cut larger than I needed and I used this method by Anna Maria Horner and machine appliqued them.

For the main part of the logo I used Wonder Under and cut out the main part.

red logo

Once the circles were machined appliqued on, I ironed the main part of the logo onto them and machine appliqued that on as well.

border logo

I attached the borders to the sides and they are looking great on the quilt!

hockeyborder1

Stay tuned for my next post to see the finished top!


Quilting tips and techniques · The Splendid Sampler · Uncategorized

Colors

I have been following along with The Splendid Sampler quilt along.  I’m not making every block as I have too many projects going on.  However, every now and then a pattern has struck me and I’ve just HAD to make it.  This happened recently and it was great timing as it was an embroidered block and I was looking for something to do while waiting for my car to be serviced.  I love projects that are portable.

This block is called Crocheted Thoughts and is by Alyssa Thomas.

I found some blue variegated thread in my container and was thrilled.  Not only do I love blue, but I have SOOOOO much blue fabric.  I started pulling out of the bins and laying them out.  I take pictures with my phone so I can step back and get a better read.

At first I tried to use some fabrics that came together in a pack and moved them about a bit.

colors7 colors9

But I wasn’t happy, so I tried a new arrangement.

colors6

I got closer with that arrangement.  I really like the center fabric, it is a very pale blue, but I didn’t like all the other blues around it.

So, I figured I would use some color theory and asked myself what the complementary color of blue is.  Answer is orange!

No way, orange with blue?!  There was no way I was going to like it, but I went to my orange fabrics and pulled some out.

colors5

Oh my goodness, I think I was falling in love.  But to be sure, I cut all the pieces out and laid out the block.

colors3

Yes, this is definitely a winner!

crochet block

The finished block is 6 inches.  Not sure what my plans for it is yet, right now I just enjoy looking at it.

Crossroads Quilt Along · Quilting tips and techniques

Stabilize it!

While we wait for the next pattern for Crossroads, Sondra Davison from Outofthebluequilts is giving measurements to make mini versions of the Crossroads Blocks.

I decided to give it a try, with a few changes to the original block.  Instead of the line down the side of the house matching the background fabric, I made it a darker color of the house, and I took out the main window and added a door.

Here are my fabrics. They are just from my stash, I don’t know the lines or designers.

fabric choices mini

I knew the pieces were going to be tiny so I decided to try a fabric stabilizer I had on hand and see if that would make sewing easier.

sew stable

I mixed it up with some water according to the directions, laid the fabrics on a towel, and sprayed away.

wet fabric

It was fun to play with the pieces in the morning.  They felt like thin pieces of paper.  See?  No flopping!

stiff fabric

I did find it much easier to cut and sew these tiny, tiny pieces with the stabilizer applied.  There was less movement when cutting and sewing and no fraying.

Here’s Momma house and Baby house. Baby house was so cute, I made it a little crocheted frame.

mini house w full

And so you can see how tiny the finished block is, here it is next to a tic tac box.  Finished size of the mini block is 3.75 inches by 3.75 inches.

mini house w tic tac

I can’t wait for the mini diamond block to come out!

lovingly, lissa

Crossroads Quilt Along · Quilting tips and techniques

Crossroads Quilt Along – March

My dearest friend has entered the world of quilting recently.  I was wistfully thinking one day how much fun it would be to do a quilt along with her, despite the miles separating us.  The VERY NEXT DAY, I received a text from her asking if I would like to join her in the Fat Quarters Shop’s Crossroads Quilt Along.  Friends for life, no doubt about it.

There are kits to purchase if you like, I have found the Strawberry Fields Revisted from Moda quite pretty and not something I would have chosen for myself.  Kimberly Jolly is quite generous with the fabric in the kits, and I found there is plenty left over for mistakes.  The patterns are released monthly on the blog with a link to donate $5 per pattern to the March of Dimes.  Fat Quarters and Moda have teamed up to match $10,000  in donations.  Please consider to this wonderful cause even if you do not join the quilt along.

In January my kit arrived with cutting instructions and the instructions to make the first block, the House block.
image

Pretty, aren’t they?  The unfinished block is 8″, so I cut a frame with an inside dimension of 7.5″ to get a good look at the finished block.  It was easily cut out of an old manila folder.

image


All my pieces have been cut and organized in baggies.

image

And another bag to catch all the ‘crumb’ pieces.  I have plans for these.
image

March’s block is the Diamond pattern.  We started with half square triangles that I daisy chained.

image

Here they are all hanging out together.

image

I just flipped them over and sewed on the other side of the line.

image

I then cut on the line and got them together to iron them open.


image

At this point I realized that I sewed them WRONG SIDES TOGETHER!!!  I let out a sigh, turned my machine off, and left the craft room for a bit.

When I returned I spent quite a while ripping seams out and re-stitching.  Only two blocks had to be remade totally, the rest were salvageable.

The best piece of advice I can give for this quilt along is to measure after each step.  The directions are great and give you the expected measurements.

image

There were plenty of crumbs left over for my stash.

image

Okay…I need help here… This drives me insane when it happens.  Anyone have any tips or tricks to prevent this?  Please leave the advice in the comment section.

image

Here are all my diamonds ready to be put together.

image

I hate losing corners, so I was very careful when sewing these rows together.

image

There they are, all nice and pointy.

image

And one finished square.

20160315_194619.jpg


For some reason my other two blocks did not measure up to 8″.  My husband heard me complaining to myself and came into my room to tell me that 1 out of 3 is a great night for a baseball player.  Then he finished reloading his nerf guns and ran off to put the kids to bed.

I’ll post pictures of the other two once I fix them.

Quilting tips and techniques

Trying something new

I have so many projects going on right now and have told myself, “No More.”  I’m sure you’ve all said that to yourself at some point or another.  However I am following Pat Sloan and Jane Davidson’s Splendid Sampler.  They release two new blocks a week and have bonus projects as well.  I simply do not have the time to join in, but every now and then something strikes me and I just HAVE to do it.

First was this wonderful pincushion, a bonus project. http://www.thesplendidsampler.com/2016/02/11/meet-the-splendid-sampler-designers-4/

Now, I have never made a cathedral window block before.  They honestly made me a little nervous.  But I just had to give this a try.  I pulled down a basket of fat quarters that my wonderful Mother in Law gave me that I new would just be perfect.

The fabrics are “Sew…A Needle Pulling Thread” and “Quilting Companions” by Cat Williams and “Stitching in the Woods” by Robin Betterley.

image

Fabulous, aren’t they?

Here is what I learned while making the block;

  • Iron very carefully.  You want your edges to line up as exact as possible to the guidelines you ironed into the fabric.

image


  • Make sure your center points line up and meet as close as you can.

image


  • When you begin folding back the fabric do not force it as far as it can go.  You may want to show off as much as the peeking fabric as you can, but this warps the block a bit.

image


* Instead, just turn them gently and pin them down.  You will still get plenty of your peek-a-boo fabric


image


  • When you fold back the ‘petal’ fabric the raw edges of the triangle fabrics may show.  Use a small scissor or seam ripper to tuck it back under the petal when you put the block on your machine.


image


image


  • Holding the petal down with my finger, I just sew right along the edge of the petal.

image


  • Here they are, all sewn.  So pretty!


image


  • When sewing the back, press the seams open.  I find this helps with the hand stitching later.

image


  • What to fill the pin cushion with?  There were many suggestions on the Splendid Sampler Facebook page and I did some googling.  Crushed walnut shells seemed to be popular and easy to find at a pet store.  Some suggested going to a local hardware store and asking for sawdust.  There were also suggestions of fabric and batting scraps, but I like weight to my pin cushions so I went with the suggestion of play sand.  Also, I had it on hand, so I can keep going with the project!  Remember to use play sand, not beach sand.  Mine is unused and has been stored in bucket, so I knew it was safe to use.

image


  • Give it some shakes to make sure the sand gets into the corners.

image


  • I cut a 4 inch square piece of batting to put on top of the sand.  I couldn’t imagine trying to sew this shut with the sand spilling everywhere.

image


  • Remember when I pressed the seams open?  I used the press marks as a guideline for sewing it shut.

image


  • Voila!!!

image


I am thrilled to tell you that I am no longer scared of cathedral windows!!  In fact I have fallen in love with them!  I had to  make more, it was addictive.  These are for my two high school friends who I am doing a quilt a long with.  We live in three different states and I’m so thankful for the internet and this quilt a long to bring us together.  (I’ll be posting about this quilt a long soon)

image


Of course I made one for myself too!


image

I took mine a step further by adding a thread catcher to it.  I used the pattern found at http://mypolkadotapron.blogspot.com/2011/05/thread-catcher-tutorial.html?spref=bl

I love it!  I carry it with me all over the house when I do hand stitching.  I guess I just need to make more so this one can live on my sewing table, because now….

image


I FINALLY HAVE A BERNINA!!!!!!!!!!!

image